
Allied Warships
HMS Southampton (83)
Light cruiser of the Southampton class
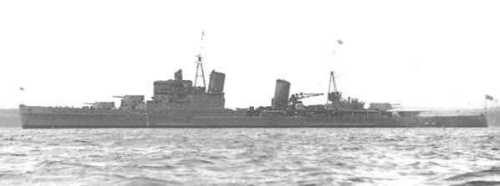
HMS Southampton at an unknown date
| Navy | The Royal Navy |
| Type | Light cruiser |
| Class | Southampton |
| Pennant | 83 |
| Built by | John Brown Shipbuilding & Engineering Company Ltd. (Clydebank, Scotland) |
| Ordered | 1 May 1934 |
| Laid down | 21 Nov 1934 |
| Launched | 10 Mar 1936 |
| Commissioned | 6 Mar 1937 |
| Lost | 11 Jan 1941 |
| Loss position | 34° 54'N, 18° 24'E |
| History | HMS Southampton (Capt. Basil Charles Barrington Brooke, RN) was heavily damaged in the Central Mediterranean about 195 nautical miles east-south-east of Malta in position 34°54'N, 18°24'E by German Ju-87 divebombers (from II/St.G.2. The planes were led by the Group Commander, the famous Oberst (Major) Werner Ennecerus). 81 men were killed. The ship was finally sunk by torpedoes from HMS Orion and HMS Gloucester. |
Commands listed for HMS Southampton (83)
Please note that we're still working on this section
and that we only list Commanding Officers for the duration of the Second World War.
| Commander | From | To | |
| 1 | Capt. Francis William Hugh Jeans, RN | 2 Jan 1939 | 18 Jun 1940 |
| 2 | Capt. Basil Charles Barrington Brooke, RN | 18 Jun 1940 | 11 Jan 1941 |
You can help improve our commands section
Click here to Submit events/comments/updates for this vessel.
Please use this if you spot mistakes or want to improve this ships page.
Notable events involving Southampton include:
The page for this light cruiser was last updated in June 2022.
1 Sep 1939
Around 2015A/1, the light cruisers HMS Southampton (Capt. F.W.H. Jeans, CVO, RN, flying the flag of Vice-Admiral G.F.B. Edward-Collins, CB, KCVO, RN), HMS Glasgow (Capt. F.H. Pegram, RN) and the destroyers HMS Jervis (Capt. P.J. Mack, RN), HMS Jackal (Cdr. T.M. Napier, RN), HMS Javelin (Cdr. A.F. Pugsley, RN), HMS Jersey (Lt.Cdr. A.M. McKillop, RN) and HMS Jupiter (Lt.Cdr. D.B. Wyburd, RN), departed Grimsby for a patrol off the coast of Norway. (1)
4 Sep 1939
Early in the afternoon, HMS Southampton (Capt. F.W.H. Jeans, CVO, RN, flying the flag of Vice-Admiral G.F.B. Edward-Collins, CB, KCVO, RN) intercepts the German merchant Johannes Molkenbuhr (5294 GRT, built 1936) off Stadlandet, Norway in position 61°40'N, 03°51'E. The Germans scuttled their ship, which was en-route from Montreal to Germany, before it could be captured. The crew was taken off by HMS Jervis (Capt. P.J. Mack, RN). The ship was then finished off by HMS Jersey (Lt.Cdr. A.M. McKillop, RN).
5 Sep 1939
Around 1430A/5, the destroyers HMS Jervis (Capt. P.J. Mack, RN) and HMS Javelin (Cdr. A.F. Pugsley, RN) were detached from HMS Southampton (Capt. F.W.H. Jeans, CVO, RN, flying the flag of Vice-Admiral G.F.B. Edward-Collins, CB, KCVO, RN), HMS Glasgow (Capt. F.H. Pegram, RN) and HMS Jupiter (Lt.Cdr. D.B. Wyburd, RN).
The destroyers that had been detached arrived at Invergordon 0715A/6.
6 Sep 1939
HMS Southampton (Capt. F.W.H. Jeans, CVO, RN, flying the flag of Vice-Admiral G.F.B. Edward-Collins, CB, KCVO, RN), HMS Glasgow (Capt. F.H. Pegram, RN) and HMS Jupiter (Lt.Cdr. D.B. Wyburd, RN) arrived at Rosyth around 0700A/6. (1)
8 Sep 1939
Operation GH.
Shortly after noon on the 8th, the light cruisers HMS Southampton (Capt. F.W.H. Jeans, CVO, RN, flying the flag of Vice-Admiral G.F.B. Edward-Collins, CB, KCVO, RN), HMS Glasgow (Capt. F.H. Pegram, RN) and the destroyers HMS Jervis (Capt. P.J. Mack, RN), HMS Javelin (Cdr. A.F. Pugsley, RN), HMS Jersey (Lt.Cdr. A.M. McKillop, RN) and HMS Jupiter (Lt.Cdr. D.B. Wyburd, RN) departed Rosyth for a patrol in the North Sea to intercept German shipping between Rotterdam and Hamburg.
Nothing of interest was sighted and the ships returned to Rosyth around 1800A/9. (1)
10 Sep 1939
Around 1800A/10, the light cruisers HMS Southampton (Capt. F.W.H. Jeans, CVO, RN, flying the flag of Vice-Admiral G.F.B. Edward-Collins, CB, KCVO, RN), HMS Glasgow (Capt. F.H. Pegram, RN) and the destroyers HMS Jervis (Capt. P.J. Mack, RN), HMS Javelin (Cdr. A.F. Pugsley, RN), HMS Jersey (Lt.Cdr. A.M. McKillop, RN) and HMS Jupiter (Lt.Cdr. D.B. Wyburd, RN) departed Rosyth for Sheerness. (1)
11 Sep 1939
Around 1200A/11, the light cruisers HMS Southampton (Capt. F.W.H. Jeans, CVO, RN, flying the flag of Vice-Admiral G.F.B. Edward-Collins, CB, KCVO, RN), HMS Glasgow (Capt. F.H. Pegram, RN) and the destroyers HMS Jervis (Capt. P.J. Mack, RN), HMS Javelin (Cdr. A.F. Pugsley, RN), HMS Jersey (Lt.Cdr. A.M. McKillop, RN) and HMS Jupiter (Lt.Cdr. D.B. Wyburd, RN) arrived at Sheerness from Rosyth. They had been sent to Sheerness to be in a position to provide cover for minelaying operations in the Dover Strait ('Operation GR'), if this was needed.
In the evening they all sailed for patrol returning to Sheerness the following morning. (1)
13 Sep 1939
HMS Southampton (Capt. F.W.H. Jeans, CVO, RN, flying the flag of Vice-Admiral G.F.B. Edward-Collins, CB, KCVO, RN), HMS Glasgow (Capt. F.H. Pegram, RN) and the destroyers HMS Jervis (Capt. P.J. Mack, RN), HMS Javelin (Cdr. A.F. Pugsley, RN), HMS Jersey (Lt.Cdr. A.M. McKillop, RN) and HMS Jupiter (Lt.Cdr. D.B. Wyburd, RN) departed Sheerness around 0345A/13 hours for a patrol off the Nore to provide cover for the minelaying operations in the Dover Strait ('Operation GR'). They returned to Sheerness around 1445A/13. (1)
14 Sep 1939
HMS Southampton (Capt. F.W.H. Jeans, CVO, RN, flying the flag of Vice-Admiral G.F.B. Edward-Collins, CB, KCVO, RN), HMS Glasgow (Capt. F.H. Pegram, RN) and the destroyers HMS Jervis (Capt. P.J. Mack, RN), HMS Javelin (Cdr. A.F. Pugsley, RN), HMS Jersey (Lt.Cdr. A.M. McKillop, RN) and HMS Jupiter (Lt.Cdr. D.B. Wyburd, RN) departed Sheerness around 0615A/14 for patrol to provide cover for minelaying operations in the Dover Strait ('Operation GR'). They arrived at Grimsby around 2330A/14. (2)
16 Sep 1939
HMS Southampton (Capt. F.W.H. Jeans, CVO, RN, flying the flag of Vice-Admiral G.F.B. Edward-Collins, CB, KCVO, RN), HMS Glasgow (Capt. F.H. Pegram, RN) and the destroyers HMS Jervis (Capt. P.J. Mack, RN) and HMS Jupiter (Lt.Cdr. D.B. Wyburd, RN) departed Grimsby around 1200A/16 for Rosyth. They arrived at Rosyth around 0600A/17. (1)
20 Sep 1939
HMS Southampton (Capt. F.W.H. Jeans, CVO, RN, flying the flag of Vice-Admiral G.F.B. Edward-Collins, CB, KCVO, RN) conducted gunnery exercises in the Firth of Forth. (1)
20 Sep 1939
HMS Southampton (Capt. F.W.H. Jeans, CVO, RN, flying the flag of Vice-Admiral G.F.B. Edward-Collins, CB, KCVO, RN) conducted exercises off the Firth of Forth during which she was escorted by the destroyers HMS Javelin (Cdr. A.F. Pugsley, RN) and HMS Jupiter (Lt.Cdr. D.B. Wyburd, RN). (3)
22 Sep 1939
Operation SK.
To conduct an operation against German shipping off the Norwegian coast the light cruiser HMS Aurora (Capt. G.B. Middleton, RN, flying the flag of Rear-Admiral R.H.C. Hallifax, RN) and the destroyers HMS Tartar (Capt. G.H. Warner, DSC, RN), HMS Punjabi (Cdr. J.T. Lean, RN), HMS Eskimo (Cdr. St. J.A. Micklethwait, RN) and HMS Bedouin (Cdr. J.A. McCoy, RN) departed Scapa Flow around 0700A/22 as well as the light cruisers HMS Southampton (Capt. F.W.H. Jeans, CVO, RN, flying the flag of Vice-Admiral G.F.B. Edward-Collins, CB, KCVO, RN), HMS Sheffield (Capt. E. de F. Renouf, CVO, RN), HMS Glasgow (Capt. F.H. Pegram, RN) and the destroyers HMS Jervis (Capt. P.J. Mack, RN), HMS Javelin (Cdr. A.F. Pugsley, RN) and HMS Jupiter (Lt.Cdr. D.B. Wyburd, RN) which had departed Rosyth around 0415A/22. HMS Jersey (Lt.Cdr. A.M. McKillop, RN), coming from the Chatham Dockyard, joined at sea.
To provide cover for this operation two forces were deployed from Scapa Flow. One force was made up of the battlecruisers HMS Hood (Capt. I.G. Glennie, RN, flying the flag of Rear-Admiral W.J. Whitworth, CB, DSO, RN), HMS Repulse (Capt. E.J. Spooner, DSO, RN) and the destroyers HMS Fame (Cdr. P.N. Walter, RN), HMS Firedrake (Lt.Cdr. S.H. Norris, RN), HMS Foresight (Lt.Cdr. G.T. Lambert, RN) and HMS Fortune (Cdr. E.A. Gibbs, RN). They had departed Scapa Flow around 1000A/22.
The other force was made up of the battleships HMS Nelson (Capt. G.J.A. Miles, RN, flying the flag of Admiral J.M. Forbes, KCB, DSO, RN), HMS Rodney (Capt. E.N. Syfret, RN), aircraft carrier HMS Ark Royal (Capt. A.J. Power, RN, flying the flag of Vice-Admiral L.V. Wells, CB, DSO, RN) and the destroyers HMS Faulknor (Capt. C.S. Daniel, RN), HMS Fearless (Cdr. K.L. Harkness, RN), HMS Foxhound (Lt.Cdr. P.H. Hadow, RN), HMS Somali (Capt. R.S.G. Nicholson, DSC, RN), HMS Mashona (Cdr. P.V. McLaughlin, RN) and HMS Matabele (Cdr. G.K. Whitmy-Smith, RN). Later the destroyers HMS Forester (Lt.Cdr. E.B. Tancock, RN), HMS Fury (Cdr. G.F. Burghard, RN), HMS Esk (Lt.Cdr. R.J.H. Couch, RN) and HMS Express (Cdr. J.G. Bickford, RN) joined at sea. They had departed Scapa Flow around 1030A/22.
The raid was abandoned when HMS Javelin and HMS Jersey collided in position 57°09'N, 03°08'W at 2038A/22.
All forces returned to their port of departure on 23 September but not before HMS Hood reported an explosion at 1330A/23. The destroyers HMS Firedrake and HMS Fortune were detached to investigate but no contact was obtained. In fact this was indeed an attack by a German submarine; U-24 which reported to have made a failed torpedo attack at 1328A/23 on HMS Hood and two escorting destroyers.
25 Sep 1939
At 0510A/25 a radio message was received from the submarine HMS Spearfish (Lt. J.H. Eaden, RN) that she had been badly damaged by enemy warships and that she was unable to dive and was proceeding along the Danish coast try to make it back to the U.K.
Around 0730A/25 the light cruisers HMS Southampton (Capt. F.W.H. Jeans, CVO, RN, flying the flag of Vice-Admiral G.F.B. Edward-Collins, CB, KCVO, RN) and HMS Glasgow (Capt. F.H. Pegram, RN) departed Rosyth and joined destroyers HMS Jervis (Capt. P.J. Mack, RN) and HMS Jupiter (Lt.Cdr. D.B. Wyburd, RN) near May Island shortly after 0900 hours. They were to operate off the Norwegian coast at 60°N to closely cover the retreat of the damaged submarine. with the destroyers HMS Somali (Capt. R.S.G. Nicholson, DSC, RN), HMS Eskimo (Cdr. St. J.A. Micklethwait, RN), HMS Mashona (Cdr. P.V. McLaughlin, RN) and HMS Matabele (Cdr. G.K. Whitmy-Smith, RN) which were already on patrol in that area.
The light cruisers HMS Aurora (Capt. G.B. Middleton, RN, flying the flag of Rear-Admiral R.H.C. Hallifax, RN) and HMS Sheffield (Capt. E. de F. Renouf, CVO, RN) departed Scapa Flow and were ordered to proceed well into the approaches of the Skagerrak with the destroyers HMS Fame (Cdr. P.N. Walter, RN), and HMS Foresight (Lt.Cdr. G.T. Lambert, RN) which had been on the Fare Island patrol. These ships were to try to make contact with HMS Spearfish.
To provide more distant cover for the whole operation the battlecruisers HMS Hood (Capt. I.G. Glennie, RN, flying the flag of Rear-Admiral W.J. Whitworth, CB, DSO, RN), HMS Repulse (Capt. E.J. Spooner, DSO, RN), heavy cruiser HMS Norfolk (Capt. A.G.B. Wilson, DSO, RN) and the destroyers (Capt. A.G.B. Wilson, DSO, RN) and the destroyers HMS Faulknor (Capt. C.S. Daniel, RN), HMS Fearless (Cdr. K.L. Harkness, RN), HMS Firedrake (Lt.Cdr. S.H. Norris, RN), HMS Foresight (Lt.Cdr. G.T. Lambert, RN), HMS Forester (Lt.Cdr. E.B. Tancock, RN), HMS Fortune (Cdr. E.A. Gibbs, RN) and HMS Foxhound (Lt.Cdr. P.H. Hadow, RN) departed Scapa Flow.
[It is often stated that the light cruisers HMS Newcastle (Capt. J. Figgins, RN), HMS Edinburgh (Capt. F.C. Bradley, RN) also sailed with the 'Hood-Force' but this was not the case.]
Also from Scapa Flow sailed yet another cover force made up of the battleships HMS Nelson (Capt. G.J.A. Miles, RN, flying the flag of Admiral J.M. Forbes, KCB, DSO, RN), HMS Rodney (Capt. E.N. Syfret, RN), aircraft carrier HMS Ark Royal (Capt. A.J. Power, RN, flying the flag of Vice-Admiral L.V. Wells, CB, DSO, RN) and the destroyers HMS Tartar (Capt. G.H. Warner, DSC, RN), HMS Punjabi (Cdr. J.T. Lean, RN), HMS Bedouin (Cdr. J.A. McCoy, RN) and HMS Fury (Cdr. G.F. Burghard, RN).
Around 0100A/26 the destroyers HMS Somali and HMS Eskimo made contact with HMS Spearfish which was then safely escorted to Rosyth despite German air attacks during which HMS Ark Royal was near missed and HMS Hood struck by a bomb which did not explode.
All ships returned to port late on the 26th or on the 27th September minus HMS Norfolk which was detached earlier to join the Northern Patrol being ordered to patrol in the Iceland-Faeroer gap.
28 Sep 1939
HMS Southampton (Capt. F.W.H. Jeans, CVO, RN, flying the flag of Vice-Admiral G.F.B. Edward-Collins, CB, KCVO, RN) conducted gunnery exercises in the Firth of Forth. (1)
28 Sep 1939
The light cruisers HMS Southampton (Capt. F.W.H. Jeans, CVO, RN, flying the flag of Vice-Admiral G.F.B. Edward-Collins, CB, KCVO, RN) and HMS Glasgow (Capt. F.H. Pegram, RN) conducted exercises off the Firth of Forth during which they were escorted by the destroyers HMS Jervis (Capt. P.J. Mack, RN) and HMS Jupiter (Lt.Cdr. D.B. Wyburd, RN).
The cruisers returned to port after a local patrol vessel obtained an A/S contact. The destroyers briefly joined the hunt for the supposed submarine but later also returned to port. (3)
29 Sep 1939
HMS Southampton (Capt. F.W.H. Jeans, CVO, RN, flying the flag of Vice-Admiral G.F.B. Edward-Collins, CB, KCVO, RN) conducted exercises in the Firth of Forth. (1)
29 Sep 1939
The light cruisers HMS Southampton (Capt. F.W.H. Jeans, CVO, RN, flying the flag of Vice-Admiral G.F.B. Edward-Collins, CB, KCVO, RN) and HMS Glasgow (Capt. F.H. Pegram, RN) conducted exercises off the Firth of Forth during which they were escorted by the destroyers HMS Jervis (Capt. P.J. Mack, RN), HMS Jaguar (Lt.Cdr. J.F.W. Hine, RN) and HMS Jupiter (Lt.Cdr. D.B. Wyburd, RN).
Again the cruisers returned to port after the A/S trawler HMS Amethyst (Ch.Skr. A. Liston, RNR) obtained an A/S contact. The destroyers joined the hunt for the supposed submarine but in the evening they returned to port. (3)
1 Oct 1939
HMS Southampton (Capt. F.W.H. Jeans, CVO, RN, flying the flag of Vice-Admiral G.F.B. Edward-Collins, CB, KCVO, RN) conducted gunnery exercises in the Firth of Forth. (4)
1 Oct 1939
The light cruisers HMS Southampton (Capt. F.W.H. Jeans, CVO, RN, flying the flag of Vice-Admiral G.F.B. Edward-Collins, CB, KCVO, RN) and HMS Glasgow (Capt. F.H. Pegram, RN) conducted exercises off the Firth of Forth during which they were escorted by the destroyers HMS Jaguar (Lt.Cdr. J.F.W. Hine, RN) and HMS Jupiter (Lt.Cdr. D.B. Wyburd, RN). (5)
2 Oct 1939
The light cruisers HMS Southampton (Capt. F.W.H. Jeans, CVO, RN, flying the flag of Vice-Admiral G.F.B. Edward-Collins, CB, KCVO, RN) and HMS Glasgow (Capt. F.H. Pegram, RN) conducted exercises off the Firth of Forth during which they were escorted by the destroyers HMS Jaguar (Lt.Cdr. J.F.W. Hine, RN) and HMS Jupiter (Lt.Cdr. D.B. Wyburd, RN). (6)
6 Oct 1939
The light cruisers HMS Southampton (Capt. F.W.H. Jeans, CVO, RN, flying the flag of Vice-Admiral G.F.B. Edward-Collins, CB, KCVO, RN), HMS Glasgow (Capt. F.H. Pegram, RN) and HMS Edinburgh (Capt. F.C. Bradley, RN) and the destroyers HMS Jervis (Capt. P.J. Mack, RN), HMS Jaguar (Lt.Cdr. J.F.W. Hine, RN) and HMS Jupiter (Lt.Cdr. D.B. Wyburd, RN) conducted exercises off the Firth of Forth. (6)
8 Oct 1939
A force of German warships departed Kiel to operate off the south coast of Norway. They were to sink Allied shipping and lure the British Home Fleet into the range of Luftwaffe aircraft. This force was made up of the battlecruiser Gneisenau, light cruiser Köln and the destroyers Z 3 / Max Schultz, Z 5 / Paul Jacobi, Z 11 / Bernd von Arnim, Z/14 Friedrich Ihn, Z 15 / Erich Steinbrinck, Z 16 / Friedrich Eckholdt, Z 17 / Diether von Roeder, Z 20 / Karl Galster, Z 21 / Wilhelm Heidkamp. In addition, four submarines were deployed in a patrol line to attack the Home Fleet, these were U-10, U-18, U-20 and U-23.
The Admiralty took the bait and around 1600A/8 the battlecruisers HMS Hood (Capt. I.G. Glennie, RN, flying the flag of Rear-Admiral W.J. Whitworth, CB, DSO, RN), HMS Repulse (Capt. E.J. Spooner, DSO, RN), light cruisers HMS Aurora (Capt. G.B. Middleton, RN, flying the flag of Rear-Admiral R.H.C. Hallifax, RN) and HMS Sheffield (Capt. E. de F. Renouf, CVO, RN) and the destroyers HMS Somali (Capt. R.S.G. Nicholson, DSC, RN), HMS Mashona (Cdr. P.V. McLaughlin, RN), HMS Eskimo (Cdr. St. J.A. Micklethwait, RN) and HMS Ashanti (Cdr. W.G. Davis, RN) departed Scapa Flow for a position about 50 miles to the north-west of Stadlandet, Norway.
Around 1900A/8, the battleships HMS Nelson (Capt. G.J.A. Miles, RN, flying the flag of Admiral J.M. Forbes, KCB, DSO, RN), HMS Rodney (Capt. E.N. Syfret, RN), aircraft carrier HMS Furious (Capt. M.L. Clarke, DSC, RN), light cruiser HMS Newcastle (Capt. J. Figgins, RN) and the destroyers HMS Faulknor (Capt. C.S. Daniel, RN), HMS Fame (Cdr. P.N. Walter, RN), HMS Firedrake (Lt.Cdr. S.H. Norris, RN), HMS Foresight (Lt.Cdr. G.T. Lambert, RN), HMS Forester (Lt.Cdr. E.B. Tancock, RN), HMS Fury (Cdr. G.F. Burghard, RN), HMS Punjabi (Cdr. J.T. Lean, RN) and HMS Bedouin (Cdr. J.A. McCoy, RN) departed Scapa Flow for a position north of Muckle Flugga. Both forces were to reach their positions by dawn the following day and then steam towards each other in a pincer movement to cut off the German ships from their home ports.
The light cruisers HMS Southampton (Capt. F.W.H. Jeans, CVO, RN, flying the flag of Vice-Admiral G.F.B. Edward-Collins, CB, KCVO, RN), HMS Glasgow (Capt. F.H. Pegram, RN), HMS Edinburgh (Capt. F.C. Bradley, RN) and the destroyers HMS Jervis (Capt. P.J. Mack, RN), HMS Jaguar (Lt.Cdr. J.F.W. Hine, RN) and HMS Jupiter (Lt.Cdr. D.B. Wyburd, RN) departed Rosyth around 0945A/8. They were joined at sea by the destroyers HMS Jackal (Cdr. T.M. Napier, RN) and HMS Janus (Lt.Cdr. J.A.W. Tothill, RN) which came from Grimsby. This force was ordered to operate off the western end of the Skagerrak and then sweep northwards.
At 0600A/9 HMS Jaguar was ordered to return to Rosyth to refuel. En-route there she was attacked by German aircraft but she was not hit.
HMS Jervis and HMS Jupiter were ordered to search for the small Danish merchant vessel Teddy (503 GRT, built 1907) which had reported that she had picked up the crew of a German flying boat whih was shot down on the 8th. They were attacked by German aircraft at 1518A/9, but neither destroyer was damaged. However, about 1.5 hours laters HMS Jupiter broke down and had to be taken in tow by her sister ship.
HMS Jaguar meanwhile had completed refuelling at Rosyth. She left that port together with HMS Jersey (Lt.Cdr. A.M. McKillop, RN) which just finished repairs to the damage sustained in her collision of 22 September.
The were ordered to screen the withdrawal of HMS Jervis and HMS Jupiter. But it was not to be as shorty after departing Rosyth, Jaguar struck a small islet above the Forth bridge and damaged her starboard propeller shaft and HMS Jersey struck the Rosyth boom defence. Both destroyers proceeded to Leith for repairs.
Between 1120A/9 and 1645A/9 the Luftwaffe heavily bombed the 'Humber force' made up at that time of HMS Southampton, HMS Glasgow, HMS Edinburgh, HMS Jackal and HMS Janus which had arrived off the western entrance to the Skagerrak by that time. HMS Southampton and HMS Glasgow were near missed but were not damaged.
The German force returned to Kiel shortlyafter midnight during the night of 9/10 October. This news reached the C-in-C, Home Fleet in the afternoon of the 10th after which all ships were ordered to return to port.
HMS Nelson, HMS Rodney, HMS Hood, HMS Faulknor, HMS Firedrake, HMS Forester, HMS Fury, HMS Bedouin and HMS Punjabi proceeded to Loch Ewe arriving in the early evening of the 11th.
HMS Repulse, HMS Furious, HMS Aurora, HMS Newcastle, HMS Southampton, HMS Glasgow, HMS Somali, HMS Mashona, HMS Eskimo, HMS Ashanti, HMS Fame, HMS Foresight, HMS Jervis, HMS Jackal, HMS Janus and HMS Jupiter (which by now as able to proceed under her own power) arrived at Scapa Flow on the 11th. They had been joined at sea before arrival by two more destroyers which came from Scapa Flow; HMS Fearless (Cdr. K.L. Harkness, RN) and HMS Foxhound (Lt.Cdr. P.H. Hadow, RN).
HMS Edinburgh had been detached and proceeded to Rosyth where she arrived on the 10th.
HMS Sheffield had already been detached on the 9th with orders to patrol in the Denmark Strait.
13 Oct 1939
The light cruiser HMS Southampton (Capt. F.W.H. Jeans, CVO, RN, flying the flag of Vice-Admiral G.F.B. Edward-Collins, CB, KCVO, RN) and the destroyers HMS Jervis (Capt. P.J. Mack, RN), HMS Jackal (Cdr. T.M. Napier, RN), HMS Janus (Lt.Cdr. J.A.W. Tothill, RN), HMS Jupiter (Lt.Cdr. D.B. Wyburd, RN) and HMS Matabele (Cdr. G.K. Whitmy-Smith, RN) departed Scapa Flow around 1030 hours for a patrol off Norway (near Bergen).
HMS Matabele was detached for escort duty at 1600 hours. (4)
14 Oct 1939
Convoy HN 0
This convoy was assembled in Norwegian waters near Bergen on 14 October 1939 and arrived at Methil on 16 October 1939.
The convoy was made up of the following merchant vessels; Chorzow (Polish, 845 GRT, built 1921), Kroman (Polish, 1864 GRT, built 1912), Limousin (French, 7619 GRT, built 1930), Manoula (Greek, 1966 GRT, built 1920), Narocz (Polish, 1795 GRT, built 1915), Robur IV (Polish, 1971 GRT, built 1930) and Wilno (Polish, 2018 GRT, built 1926).
The convoy was escorted by the The light cruiser HMS Southampton (Capt. F.W.H. Jeans, CVO, RN, flying the flag of Vice-Admiral G.F.B. Edward-Collins, CB, KCVO, RN) and the destroyers HMS Jervis (Capt. P.J. Mack, RN), HMS Jackal (Cdr. T.M. Napier, RN), HMS Janus (Lt.Cdr. J.A.W. Tothill, RN) and HMS Jupiter (Lt.Cdr. D.B. Wyburd, RN).
The destroyers HMS Jackal and HMS Janus parted company with the convoy around 1615/15 and proceeded to Scapa Flow where they arrived around 1930/15.
HMS Southampton parted company with the convoy early on the 16th and proceeded to Rosyth arriving there around 0745/16.
HMS Jervis and HMS Jupiter remained with the convoy and arrived at Rosyth late in the evening of the 16th.
16 Oct 1939
While lying at anchor off Rosyth, Scotland, HMS Southampton (Capt. F.W.H. Jeans, CVO, RN, flying the flag of Vice-Admiral G.F.B. Edward-Collins, CB, KCVO, RN) sustained a bomb hit in a German air raid at 1435 hours. The 500-kg bomb, released from only 150m height by a Ju-88 of I/KG.30, hit the corner of the pom-pom magazine, passed through 3 decks at an angle and exited the hull, detonating in the water. There was minor structural damage and temporary failure of electrical systems. Repairs were completed in only three days. One rating was killed and three were injured.
17 Oct 1939
HMS Southampton (Capt. F.W.H. Jeans, CVO, RN, flying the flag of Vice-Admiral G.F.B. Edward-Collins, CB, KCVO, RN) proceeded to the Rosyth Dockyard for repairs. (4)
23 Oct 1939
HMS Southampton (Capt. F.W.H. Jeans, CVO, RN, flying the flag of Vice-Admiral G.F.B. Edward-Collins, CB, KCVO, RN) departed Rosyth at 2100 hours for Sullom Voe. (4)
23 Oct 1939
HMS Southampton (Capt. F.W.H. Jeans, CVO, RN, flying the flag of Vice-Admiral G.F.B. Edward-Collins, CB, KCVO, RN) arrived at Sullom Voe around 1245 hours.
She departed for the Northern Patrol around 2200 hours. She was ordered to patrol north of Iceland. (4)
6 Nov 1939
HMS Southampton (Capt. F.W.H. Jeans, CVO, RN, flying the flag of Vice-Admiral G.F.B. Edward-Collins, CB, KCVO, RN) arrived at Scapa Flow from the Northern Patrol.
She departed Scapa Flow for Rosyth around 2100 hours. (7)
7 Nov 1939
HMS Southampton (Capt. F.W.H. Jeans, CVO, RN, flying the flag of Vice-Admiral G.F.B. Edward-Collins, CB, KCVO, RN) arrived at Rosyth around 0915 hours. (4)
11 Nov 1939
The light cruisers HMS Southampton (Capt. F.W.H. Jeans, CVO, RN, flying the flag of Vice-Admiral G.F.B. Edward-Collins, CB, KCVO, RN), HMS Glasgow (Capt. F.H. Pegram, RN), HMS Belfast (Capt. G.A. Scott, DSC, RN), HMS Aurora (Capt. G.B. Middleton, RN, flying the flag of Rear-Admiral R.H.C. Hallifax, RN) and the destroyers HMS Bedouin (Cdr. J.A. McCoy, RN), HMS Gurkha (Lt.Cdr. P.V. James, RN), HMS Mashona (Cdr. P.V. McLaughlin, RN) and HMS Tartar (Lt.Cdr. D.E. Holland-Martin, RN) departed Rosyth around 0400A/11 for Immingham where they arrived around 1700A/11.
16 Nov 1939
The light cruisers HMS Southampton (Capt. F.W.H. Jeans, CVO, RN, flying the flag of Vice-Admiral G.F.B. Edward-Collins, CB, KCVO, RN), HMS Glasgow (Capt. F.H. Pegram, RN), HMS Belfast (Capt. G.A. Scott, DSC, RN), HMS Edinburgh (Capt. F.C. Bradley, RN) and the destroyers HMS Afridi (Capt. G.H. Cresswell, DSC, RN), HMS Gurkha (Lt.Cdr. P.V. James, RN), HMS Maori (Cdr. G.N. Brewer, RN) and HMS Zulu (Cdr. J.S. Crawford, RN) departed Immingham around 1700A/16 hours for Rosyth where they arrived around 0830A/17.
21 Nov 1939
Light cruisers HMS Southampton (Capt. F.W.H. Jeans, CVO, RN, flying the flag of Vice-Admiral G.F.B. Edward-Collins, CB, KCVO, RN) and HMS Belfast (Capt. G.A. Scott, DSC, RN) departed Rosyth around 0915A/21 for gunnery exercises off the Firth of Forth. The destroyer HMS Afridi (Capt. G.H. Cresswell, DSC, RN) was with them.
At 1059A/21, HMS Belfast detonated a magnetic mine in approximate position 56°05'N, 02°32'W. The mine had been laid on November 4th by the German submarine U-21.
HMS Belfast was badly damaged with her back broken. She was towed to the Rosyth Dockyard by the tugs Krooman, Bramham, Grangebourne and Oxcar. Tug Bulger was standing by as was the escort destroyer HMS Vivien (Lt.Cdr. W.D.G. Weir, RN). HMS Belfast was immediately docked in No.2 Dock. HMS Belfast, which had a broken back was out of action for about three years during which the ship was reconstruced.
23 Nov 1939
Sinking of the armed merchant cruiser HMS Rawalpindi
Around midday on 21 November 1939 the German battlecruisers Scharnhorst and Gneisenau, escorted by the light cruisers Köln and Leipzig and the destroyers Z 11 / Bernd von Arnim, Z 12 / Erich Giese and Z 20 / Karl Galster, departed Wilhelmshaven for a raid into the North Atlantic, this was to relieve the pressure of the pocket battleship Admiral Graf Spee operating in the South Atlantic. Late on the 21st the escorts left the battlecruisers.
Just after 1500A/23 the British armed merchant cruiser HMS Rawalpindi (Capt.(Retd.) E.C. Kennedy, RN) sighted the Scharnhorst. Rawalpindi was part of the British Northern Patrol and was stationed south-east of Iceland in the Iceland-Faroe gap. Captain Kennedy at first tried to get away from the German ship and report to the Admiralty that he sighted the German pocket battleship Deutschland, still believed to be operating in the North Atlantic, and so as to buy time so that other ships of the Northern patrol could come to his assistance. Just after 1600 hours, Rawalpindi came within range of the Scharnhorst and was quickly reduced to a flaming wreck. During this engagement Scharnhorst was hit by a 6in shell from Rawalpindi causing only light damage. Scharnhorst and Gneisenau together picked up 27 survivors from the Rawalpindi which finally sank around 2000 hours.
The British light cruiser HMS Newcastle (Capt J. Figgins, RN), that was also part of the Northern Patrol, picked up Rawalpindi's signal and closed the scene. She sighted the Gneisenau but the Germans managed to escape in the fog.
The Admiralty also thought the ship sighted by Rawalpindi and Newcastle was the Deutschland that was trying to return to Germany. In response to the sighting and destruction of the Rawalpindi the Admiralty took immediate action; The battleships HMS Nelson (Capt. G.J.A. Miles, RN, flying the flag of Admiral J.M. Forbes, KCB, DSO, RN) HMS Rodney (Capt. F.H.G. Dalrymple-Hamilton, RN) and the heavy cruiser HMS Devonshire (Capt. J.M. Mansfield, DSC, RN, flying the flag of Vice-Admiral J.H.D. Cunningham, CB, MVO, RN) escorted by the destroyers HMS Faulknor (Capt. C.S. Daniel, RN), HMS Fame (Cdr. P.N. Walter, RN), HMS Firedrake (Lt.Cdr. S.H. Norris, RN), HMS Foresight (Lt.Cdr. G.T. Lambert, RN), HMS Forester (Lt.Cdr. E.B. Tancock, RN), HMS Fortune (Cdr. E.A. Gibbs, RN) and HMS Fury (Cdr. G.F. Burghard, RN) departed the Clyde around 1930A/23 to patrol of Norway to cut off the way to Germany for the Deutschland.
The light cruisers HMS Southampton (Capt. F.W.H. Jeans, CVO, RN, flying the flag of Vice-Admiral G.F.B. Edward-Collins, CB, KCVO, RN), HMS Edinburgh (Capt. F.C. Bradley, RN) and HMS Aurora (Capt. G.B. Middleton, RN) escorted by the destroyers HMS Afridi (Capt. G.H. Creswell, DSC, RN), HMS Gurkha (Cdr. F.R. Parham, RN), HMS Bedouin (Cdr. J.A. McCoy, RN), HMS Kingston (Lt.Cdr. P. Somerville, RN) and HMS Isis (Cdr. J.C. Clouston, RN) departed Rosyth to patrol between the Orkney and Shetland islands.
Light cruiser HMS Sheffield (Capt. E. de F. Renouf, CVO, RN) was sent from Loch Ewe to the last known position of the German ship(s).
On northern patrol, south of the Faroes were the light cruisers HMS Caledon (Capt. C.P. Clark, RN), HMS Cardiff (Capt. P.K. Enright, RN) and HMS Colombo (Commodore R.J.R. Scott, RN). These were joined by HMS Dunedin (Capt. C.E. Lambe, CVO, RN) and HMS Diomede (Commodore E.B.C. Dicken, OBE, DSC, RN).
Of the ships of the Denmark strait patrol, the heavy cruisers HMS Suffolk (Capt. J.W. Durnford, RN) and HMS Norfolk (Capt. A.G.B. Wilson, MVO, DSO, RN) were ordered to proceed to the Bill Bailey Bank (to the south-west of the Faroe Islands).
The light cruiser HMS Glasgow (Capt. F.H. Pegram, RN) escorted by the destroyers HMS Maori (Cdr. G.N. Brewer, RN) and HMS Zulu (Cdr. J.S. Crawford, RN) were already at sea patrolling north-east of the Shetlands were to be joined by the destroyers HMS Inglefield (Capt. P. Todd, RN), HMS Imperial (Lt.Cdr. C.A.de W. Kitcat, RN), HMS Impulsive (Lt.Cdr. W.S. Thomas, RN) and HMS Imogen (Cdr. E.B.K. Stevens, RN).
The light cruisers HMS Calypso (Capt. N.J.W. William-Powlett, DSC, RN) and HMS Ceres (Capt. E.G. Abbott, AM, RN) were stationed off Kelso Light to act as a night attack striking force. The destroyers HMS Somali (Capt. R.S.G. Nicholson, DSC, RN), HMS Ashanti (Cdr. W.G. Davis, RN), HMS Mashona (Cdr. P.V. McLaughlin, RN) and HMS Punjabi (Cdr. J.T. Lean, RN) had just departed Belfast on escort duties. They were ordered to join Admiral Forbes. The ships they were escorting were ordered to return to Belfast.
The destroyers HMS Tartar (Lt.Cdr. D.E. Holland-Martin, RN), HMS Kandahar (Cdr. W.G.A. Robson, RN) and HMS Kashmir (Cdr. H.A. King, RN) departed Scapa Flow with orders to locate and shadow the German ships. HMS Tartar however had to return to Scapa Flow the next day due to a damaged rudder. The other two destroyers were ordered to join HMS Aurora which was to form a strike group of destroyers.
Despite the British effort to intercept the German ships, both German battlecruisers returned to Wilhelmshaven on the 27th.
30 Nov 1939
Convoy HN 3
This convoy was assembled in Norwegian waters near Bergen on 30 November 1939 and arrived at Methil on 3 December 1939.
The convoy was made up of the following merchant vessels; Albionic (British, 2468 GRT, built 1924), Amicus (British, 3660 GRT, built 1925), Asiatic (British, 3741 GRT, built 1923), Baltrover (British, 4916 GRT, built 1913), Bore III (Finnish, 1153 GRT, built 1915), Clarissa Radcliffe (British, 5754 GRT, built 1915), Eskdene (British, 3829 GRT, built 1934), Folda (British, 1165 GRT, built 1920), Glen Tilt (British, 871 GRT, built 1920), Kalev (Estonian, 1867 GRT, built 1917), King Edwin (British, 4536 GRT, built 1927), Majorca (British, 1126 GRT, built 1921), Mall (Estonian, 1863 GRT, built 1918), Ogmore Castle (British, 2481 GRT, built 1919), Sea Valour (British, 1950 GRT, built 1930), Stancourt (British, 965 GRT, built 1909), Thistleford (British, 4781 GRT, built 1928) and Treworlas (British, 4692 GRT, built 1922).
Escort (distant cover) was provided by the heavy cruiser HMS Suffolk (Capt. J.W. Durnford, RN) and the light cruiser HMS Southampton (Capt. F.W.H. Jeans, CVO, RN, flying the flag of Vice-Admiral G.F.B. Edward-Collins, CB, KCVO, RN). HMS Suffolk was relieved by the light cruiser HMS Glasgow (Capt. F.H. Pegram, RN) on 2 December.
Close escort (A/S) was provided by the destroyers HMS Ilex (Lt.Cdr. P.L. Saumarez, RN), HMS Icarus (Lt.Cdr. C.D. Maud, RN), HMS Eskimo (Cdr. St.J.A. Micklethwait, RN) and HMS Matabele (Cdr. G.K. Whitmy-Smith, RN).
Four of the merchant ships split off on 2 December for the west coast of the U.K. The destroyers HMS Isis (Cdr. J.C. Clouston, RN) and HMS Kandahar (Cdr. W.G.A. Robson, RN) came from Scapa Flow to escort these ships.
2 Dec 1939
Around 1000 hours, HMS Southampton (Capt. F.W.H. Jeans, CVO, RN, flying the flag of Vice-Admiral G.F.B. Edward-Collins, CB, KCVO, RN) arrived at Rosyth from patrol and escort duty. (8)
10 Dec 1939
Convoy TC 1.
This convoy of troopships departed Halifax around 0510Q/10, for the Clyde where it arrived on 17 December 1939.
The convoy was made up of the following troopships / liners; Aquitania (British, 44786 GRT, built 1914, carrying 2638 troops), Duchess of Bedford (British, 20123 GRT, built 1928, carrying 1312 troops), Empress of Australia (British, 21833 GRT, built 1914, carrying 1235 troops), Empress of Britain (British, 42348 GRT, built 1931, carrying 1303 troops) and Monarch of Bermuda (British, 22424 GRT, built 1931, carrying 961 troops),
Close escort was provided on leaving Halifax by the battleship HMS Resolution (Capt. O. Bevir, RN) and the Canadian destroyers HMCS Fraser (Cdr. W.N. Creery, RCN), HMCS Ottawa (Capt. G.C. Jones, RCN), HMCS Restigouche (Lt.Cdr. W.B.L. Holms, RCN) and HMCS St. Laurent (Lt.Cdr. H.G. de Wolf, RCN). These Canadian destroyers remained with the convoy until 12 December 1939 when they set course to return to Halifax.
Cover for the convoy was provided by the battlecruiser HMS Repulse (Capt. E.J. Spooner, DSO, RN), aircraft carrier HMS Furious (Capt. M.L. Clarke, DSC, RN), light cruiser HMS Emerald (Capt. A.W.S. Agar, VC, DSO, RN) and the destroyers HMS Hunter (Lt.Cdr. L. de Villiers, RN) and HMS Hyperion (Cdr. H.St.L. Nicholson, RN). At dusk on the 10th both destroyers were detached to join the local escort. They returned to Halifax with the Canadian destroyers.
Early on the 15th, HMS Emerald was detached, HMS Newcastle (Capt. J. Figgins, RN) had joined the cover force in the afternoon of the 14th to take her place.
When the convoy approached the British isles, the destroyers HMS Eskimo (Cdr. St.J.A. Micklethwait, RN), HMS Bedouin (Cdr. J.A. McCoy, RN), HMS Mashona (Cdr. P.V. McLaughlin, RN), HMS Somali (Capt. R.S.G. Nicholson, DSC, RN), HMS Kandahar (Cdr. W.G.A. Robson, RN), HMS Khartoum (Cdr. D.T. Dowler, RN), HMS Kingston (Lt.Cdr. P. Somerville, RN), HMS Kashmir (Cdr. H.A. King, RN), HMS Fearless (Cdr. K.L. Harkness, RN), HMS Ilex (Lt.Cdr. P.L. Saumarez, RN) and HMS Impulsive (Lt.Cdr. W.S. Thomas, RN) departed the Clyde on the 12th to sweep ahead of the convoy. HMS Imperial (Lt.Cdr. C.A.de W. Kitcat, RN) was also to have sailed but was unable to join. HMS Matabele (Cdr. G.K. Whitmy-Smith, RN) was sailed in her place and later joined the other destroyers at sea.
After German warships had been reported in the North Sea, and concerned for the safety of convoy TC.1, Admiral Forbes, departed the Clyde on the 13th to provide additional cover with the battleships HMS Warspite (Capt. V.A.C. Crutchley, VC, DSC, RN), HMS Barham (Capt. H.T.C. Walker, RN), battlecruiser HMS Hood (Capt. I.G. Glennie, RN, flying the flag of Rear-Admiral W.J. Whitworth, CB, DSO, RN) and the destroyers HMS Inglefield (Capt. P. Todd, RN), HMS Icarus (Lt.Cdr. C.D. Maud, RN), HMS Imogen (Cdr. E.B.K. Stevens, RN), HMS Imperial, HMS Isis (Cdr. J.C. Clouston, RN) and HMS Foxhound (Lt.Cdr. P.H. Hadow, RN). The destroyers HMS Forester (Lt.Cdr. E.B. Tancock, RN) and HMS Firedrake (Lt.Cdr. S.H. Norris, RN) sailed from Loch Ewe and later joined this force at sea. Three cruisers from the Northern Patrol were ordered to patrol in position 53°55’N, 25°00’W to provide cover for the convoy. These were the heavy cruisers HMS Berwick (Capt. I.M. Palmer, DSC, RN), HMS Devonshire (Capt. J.M. Mansfield, DSC, RN, flying the flag of Vice-Admiral J.H.D. Cunningham, CB, MVO, RN) and the light cruiser HMS Glasgow (Capt. F.H. Pegram, RN).
The light cruisers HMS Southampton (Capt. F.W.H. Jeans, CVO, RN), HMS Edinburgh (Cdr. C. Wauchope, RN, temporary in command) departed Rosyth to patrol between the Shetlands and the Faroes.
The destroyers HMS Afridi (Capt. G.H. Creswell, DSC, RN), HMS Maori (Cdr. G.N. Brewer, RN) and HMS Nubian (Cdr. R.W. Ravenhill, RN) departed Rosyth and proceeded north at high speed to try to cut of the enemy warhips if they were to enter the Atlantic.
The light cruisers HMS Cardiff (Capt. P.K. Enright, RN), HMS Ceres (Capt. E.G. Abbott, AM, RN), HMS Delhi (Capt L.H.K. Hamilton, DSO, RN), HMS Diomede (Commodore E.B.C. Dicken, OBE, DSC, RN) which were on the Northern Patrol were to concentrate near the Faroes where they were joined by HMS Colombo (Commodore R.J.R. Scott, RN) and HMS Dragon (Capt. R.G. Bowes-Lyon, MVO, RN) which were on passage to their patrol stations.
Around 0430Z/17, in foggy conditions, the outward bound liner Samaria (British, 19597 GRT, built 1921) collided with both HMS Furious and the Aquitania but no major damage was done to either one of the three ships.
The convoy arrived safely in the Clyde on 17 December 1939. (9)
13 Dec 1939
Around 2300Z/13, the light cruisers HMS Southampton (Capt. F.W.H. Jeans, CVO, RN, flying the flag of Vice-Admiral G.F.B. Edward-Collins, CB, KCVO, RN) and HMS Edinburgh (Cdr. C. Wauchope, RN, temporary in command) departed Rosyth very late in the evening to patrol between the Shetland Islands and the Faroes to provide cover for Convoy TC 1 carring troops from Canada to the U.K.
[For more info on this convoy see the event ' Convoy TC 1 ' for 10 December 1939.] (8)
15 Dec 1939
Shortly after noon the light cruisers HMS Southampton (Capt. F.W.H. Jeans, CVO, RN, flying the flag of Vice-Admiral G.F.B. Edward-Collins, CB, KCVO, RN) and HMS Edinburgh (Cdr. C. Wauchope, RN, temporary in command) arrived at Scapa Flow from patrol. (8)
17 Dec 1939
Vice-Admiral G.F.B. Edward-Collins, CB, KCVO, RN, transferred his flag from HMS Southampton (Capt. F.W.H. Jeans, CVO, RN) to HMS Edinburgh (Capt. C.M. Blackman, DSO, RN). (10)
18 Dec 1939
Convoy Narvik 2.
This convoy departed Narvik, Norway on 18 December 1939. It arrived at Methil on 24 December 1939.
This convoy was made up of the following merchant vessels; Baron Kelvin (British, 3081 GRT, built 1924), Baron Ruthven (British, 3178 GRT, built 1925), Clara Lilley (British, 3726 GRT, built 1917), Flimston (British, 4674 GRT, built 1925), Flora (Greek, 3010 GRT, built 1904), Fylingdale (British, 3918 GRT, built 1924) and Otterpool (British, 4876 GRT, built 1926).
It was escorted by the destroyers HMS Jervis (Capt. P.J. Mack, RN), HMS Jaguar (Lt.Cdr. J.F.W. Hine, RN) and HMS Janus (Lt.Cdr. J.A.W. Tothill, RN). HMS Juno (Cdr. W.E. Wilson, RN) joined the convoy on the 20th having been unable to sail with the other three destroyers earlier due to defects.
These four destroyers had departed Immingham at noon on 16 December 1939. They arrived at Sullom Voe to fuel at 1100/17. HMS Jervis, HMS Jaguar and HMS Janus departed again around 1500 hours to join the convoy. As stated earlier HMS Juno sailed later (on the 19th) after repairs had been made.
On 23 December HMS Jaguar was detached around 0400/23 to Scapa Flow with defects. She arrived there around 0900/23.
Cover for the convoy was provided by the light cruisers HMS Southampton (Capt. F.W.H. Jeans, CVO, RN, flying the flag of Vice-Admiral G.F.B. Edward-Collins, CB, KCVO, RN) and HMS Edinburgh (Capt. C.M. Blackman, DSO, RN, flying the flag of Vice-Admiral G.F.B. Edward-Collins, CB, KCVO, RN). These cruisers had departed Scapa Flow at 0800/18. HMS Edinburgh arrived at Rosyth at 0030/24. HMS Southampton arrived at Newcastle at 1200/24.
24 Dec 1939
HMS Southampton (Capt. F.W.H. Jeans, CVO, RN, flying the flag of Vice-Admiral G.F.B. Edward-Collins, CB, KCVO, RN) arrived at Newcastle for refit and repairs. (8)
28 Dec 1939
HMS Southampton (Capt. F.W.H. Jeans, CVO, RN) is docked at South Shields. (8)
24 Jan 1940
HMS Southampton (Capt. F.W.H. Jeans, CVO, RN) is undocked. (11)
1 Feb 1940
With her refit completed, HMS Southampton (Capt. F.W.H. Jeans, CVO, RN) departed the Tyne around 1100/1 for Scapa Flow where she arrived around 0930/2. (11)
2 Feb 1940
HMS Southampton (Capt. F.W.H. Jeans, CVO, RN) departed Scapa Flow around 2330 hours to patrol off northern Norway to intercept German shipping ('Operation WR'). (12)
16 Feb 1940
HMS Southampton (Capt. F.W.H. Jeans, CVO, RN) returned to Scapa Flow from patrol around 1430 hours. (12)
23 Feb 1940
HMS Southampton (Capt. F.W.H. Jeans, CVO,
RN) departed Scapa Flow for the Northern Patrol. She was to patrol between the Faroes and Iceland. (12)
4 Mar 1940
HMS Southampton (Capt. F.W.H. Jeans, CVO, RN) returned to Scapa Flow from patrol. (12)
10 Mar 1940
HMS Southampton (Capt. F.W.H. Jeans, CVO, RN) departed Scapa Flow for the Northern Patrol. She was to patrol between the Faroes and Iceland. (13)
20 Mar 1940
HMS Southampton (Capt. F.W.H. Jeans, CVO, RN) returned to Scapa Flow from patrol. (13)
26 Mar 1940
HMS Southampton (Capt. F.W.H. Jeans, CVO, RN) departed Scapa Flow for the Northern Patrol. She was to patrol between the Faroes and Iceland. (13)
2 Apr 1940
HMS Southampton (Capt. F.W.H. Jeans, CVO, RN) returned to Scapa Flow from patrol. (14)
5 Apr 1940
Convoy ON 25.
This convoy was formed off Methil on 5 April 1940. It was recalled on 8 April 1940.
This convoy was made up of the following merchant vessels; Ascania (Finnish, 838 GRT, built 1901), Begonia (Estonian, 1591 GRT, built 1890), Bertha (Danish, 966 GRT, built 1915), Bullaren (Swedish, 5722 GRT, built 1918), Caledonia (Swedish, 1268 GRT, built 1913), Cree (British, 4791 GRT, built 1920), Dalveen (British, 5193 GRT, built 1927), Delaware (Finnish, 2441 GRT, built 1902), Diana (Norwegian, 1154 GRT, built 1904), Einvik (Norwegian, 2000 GRT, built 1918), Eros (Norwegian, 974 GRT, built 1922), Forsvik (Norwegian, 1248 GRT, built 1919), Frey (Swedish, 1090 GRT, built 1911), Haga (Swedish, 1296 GRT, built 1918), Helder (Dutch, 3629 GRT, built 1920), Hjalmar Wessel (Norwegian, 1742 GRT, built 1935), Ibis (Norwegian, 1367 GRT, built 1918), Inger (Norwegian, 1409 GRT, built 1930), Lotte (Danish, 1420 GRT, built 1906), Magdalena (Swedish, 1265 GRT, built 1882), Magrix (British, 454 GRT, built 1938), Mette (Danish, 1909 GRT, built 1926), Nordost (Swedish, 1035 GRT, built 1918), Nyanza (British, 4974 GRT, built 1928), Orangemoor (British, 5775 GRT, built 1923), Roy (Norwegian, 1768 GRT, built 1921), Sjofna (Norwegian, 619 GRT, built 1918), Sophie (Danish, 945 GRT, built 1920), Swainby (British, 4935 GRT, built 1935), Vard (Norwegian, 681 GRT, built 1917), Veli Ragnar (Finnish, 2158 GRT, built 1914) and Vestland (Norwegian, 1934 GRT, built 1916).
On departure from Methil the convoy was escorted by the destroyers HMS Javelin (Cdr. A.F. Pugsley, RN), HMS Juno (Cdr. W.E. Wilson, RN), HMS Grenade (Cdr. R.C. Boyle, RN), HMS Eclipse (Lt.Cdr. I.T. Clark, RN) and the submarine HMS Thistle (Lt.Cdr. W.F. Haselfoot, RN). The light cruisers HMS Manchester (Capt. H.H. Bousfield, RN), HMS Southampton (Capt. F.W.H. Jeans, CVO, RN) and the AA cruiser HMS Calcutta (Capt. D.M. Lees, RN) provided close cover.
On 6 April the following ships departed Kirkwall to join convoy ON 25 at sea; Bullaren (Swedish, 5722 GRT, built 1918), C.F. Liljevalch (Swedish, 5492 GRT, built 1920), Elna E. (British, 1174 GRT, built 1925), Imperial Valley (British, 4573 GRT, built 1924), North Devon (British, 3658 GRT, built 1924), Ringulv (Norwegian, 5153 GRT, built 1903), Sarpfoss (Norwegian, 1493 GRT, built 1919), Solhavn (Norwegian, 1630 GRT, built 1918), Stanja (Norwegian, 1845 GRT, built 1915), Star (Norwegian, 1531 GRT, built 1922), Topdalsfjord (Norwegian, 4271 GRT, built 1921) and Wappu (Finnish, 1513 GRT, built 1930).
On departure from Kirkwall this part of the convoy was escorted by the destroyers HMS Janus (Cdr. J.A.W. Tothill, RN) and HMS Jupiter (Cdr. D.B. Wyburd, RN) which had come from Scapa Flow.
On joining the main convoy, HMS Janus joined the escort but HMS Jupiter was detached to search for the drifter HMS Seabreeze which was in trouble due to heavy weather and had made an SOS. This was later cancelled when a trawler met the Seabreeze and HMS Jupiter proceeded to Scapa Flow arriving there on the 7th.
In the evening of the 7th the convoy was disbanded an the ships were ordered to return to the U.K. due to enemy activity in the North Sea. The escorts were detailed for other duty.
7 Apr 1940
HMS Manchester (Capt. H.H. Bousfield, RN) and HMS Southampton (Capt. F.W.H. Jeans, CVO, RN) departed Scapa Flow together to provide cover for convoy ON 25 from Methill to Norway. They were near the convoy to provide cover around 1500 hours. The next day the convoy was ordered to return due to the German naval activity in Norwegian waters and the North Sea. Both cruisers were ordered to join the Home Fleet at sea which they did on the 9th. (15)
9 Apr 1940
Around 0700A/9, HMS Manchester (Capt. H.H. Bousfield, RN) and HMS Southampton (Capt. F.W.H. Jeans, CVO, RN) both joined the C-in-C in the Home Fleet.
Around 1140A/9, HMS Manchester (Capt. H.H. Bousfield, RN), HMS Southampton (Capt. F.W.H. Jeans, CVO, RN), HMS Sheffield (Capt. C.A.A. Larcom, RN) and HMS Glasgow (Capt. F.H. Pegram, RN) were detached for an operation in Norwegian territorial waters (operate against German forces in water at and around Bergen). They were escorted by the destroyers HMS Afridi (Capt. P.L. Vian, RN), HMS Gurkha (Cdr. A.W. Buzzard, RN), HMS Sikh (Cdr. J.A. Giffard, RN), HMS Mohawk (Cdr. J.W.M. Eaton, RN), HMS Somali (Capt. R.S.G. Nicholson, DSO, DSC, RN), HMS Matabele (Cdr. G.K. Whitmy-Smith, RN) and HMS Mashona (Cdr. W.H. Selby, RN).
Soon after 1400A/9 however a signal was received cancelling the operation and the ships set course to re-join the fleet.
In the afternoon the German Luftwaffe however started to attack the ships and near missed lightly damaged HMS Southampton and HMS Glasgow. HMS Gurkha was however sunk. Survivors were picked up by HMS Aurora (Capt. L.H.K. Hamilton, DSO, RN) who was also on her way to join the Home Fleet at sea.
Later on the 9th most of the ships involved in the intended opertion against Bergen were ordered to proceed to Scapa Flow or Sullom Voe for refuelling. (15)
10 Apr 1940
In the evening, HMS Southampton (Capt. F.W.H. Jeans, CVO, RN), arrived at Scapa Flow from operations. (14)
11 Apr 1940
Convoy NP 1.
This troop convoy departed the Clyde on 11 April 1940 for Harstad, Norway. In the end the convoy was split up and one part arrived at Harstad on 15 April. The other part arrived off Namsos on 16 April.
It was made up of the troopships Empress of Australia (British, 21833 GRT, built 1914), Monarch of Bermuda (British, 22424 GRT, built 1931) and Reina del Pacifico (British, 17702 GRT, built 1931).
They were escorted by the destroyer HMS Amazon (Lt.Cdr. N.E.G. Roper, RN).
Early in the afternoon of 12 April the troopships Batory (Polish, 14387 GRT, built 1936) and Chrobry (Polish, 11442 GRT, built 1939) departed Scapa Flow to join convoy NP 1 at sea.
They were escorted by the destroyers HMS Highlander (Cdr. W.A. Dallmeyer, RN), HMS Vanoc (Lt.Cdr. J.G.W. Deneys, RN), HMS Volunteer (Lt.Cdr. N. Lanyon, RN), HMS Whirlwind (Lt.Cdr. J.M. Rodgers, RN) and HMS Witherington (Lt.Cdr. J.B. Palmer, RN). The netlayer HMS Protector (Capt. W.Y la L. Beverley, RN) also departed Scapa Flow with these ships.
Around 1600/12, the light cruisers HMS Manchester (Capt. H.A. Packer, RN, flying the flag of Vice Admiral G. Layton, CB, DSO, RN) and HMS Birmingham (Capt. A.C.G. Madden, RN) departed Scapa Flow to join the convoy at sea which they did around 1945/12.
Shortly afterwards the convoy was also joined by the AA cruiser HMS Cairo (Capt. P.V. McLaughlin, RN) and the destroyers HMS Brazen (Lt.Cdr. M. Culme-Seymour, RN), HMS Fearless (Cdr. K.L. Harkness, RN) and HMS Griffin (Lt.Cdr. J. Lee-Barber, RN) which had sailed from Sullom Voe around 1130/12.
Late in the evening of 12 April repair ship HMS Vindictive (Capt. A.R. Halfhide, RN) escorted by the destroyers HMS Codrington (Capt. G.E. Creasy, MVO, RN), HMS Acasta (Cdr. C.E. Glasfurd, RN) and HMS Ardent (Lt.Cdr. J.F. Barker, RN) departed Scapa Flow to join the convoy which they did late in the afternoon of the 13th.
Coming south from a patrol off the Vestfjord area were the battleship HMS Valiant (Capt. H.B. Rawlings, OBE, RN), battlecruiser HMS Repulse (Capt. E.J. Spooner, DSO, RN) and the destroyers HMS Janus (Cdr. J.A.W. Tothill, RN), HMS Javelin (Cdr. A.F. Pugsley, RN) and HMS Juno (Cdr. W.E. Wilson, RN). These ships made rendez-vous with the convoy in the afternoon of the 13th after which HMS Repulse with the three J-class destroyers continued on towards Scapa Flow while HMS Valiant joined the convoy.
On April 14th it was decided that some of the troops were to be sent to Namsos and the convoy split up;
Troopships Chrobry and Empress of Australia escorted by the light cruisers HMS Manchester and HMS Birmingham, AA cruiser HMS Cairo and the destroyers HMS Highlander, HMS Vanoc and HMS Whirlwind split off late in the afternoon. This convoy arrived off Namsos early in the morning of the 16th.
The remainder of the ships; troopships Batory, Monarch of Bermuda, Reina del Pacifico, repair ship HMS Vindictive and netlayer HMS Protector with their escort made up of the battleship HMS Valiant and the destroyers HMS Codrington, HMS Amazon, HMS Acasta, HMS Ardent, HMS Brazen, HMS Fearless, HMS Griffin, HMS Volunteer and HMS Witherington arrived at Vaagsfjord late in the morning of the 15th. They had been escorted in by the light cruisers HMS Southampton (Capt. F.W.H. Jeans, CVO, RN) and HMS Aurora (Capt. L.H.K. Hamilton, DSO, RN).
12 Apr 1940
HMS Southampton (Capt. F.W.H. Jeans, CVO, RN) sailed from Scapa Flow around 1300 hours, carrying General Mackesy and two companies of Scots Guards. She was being escorted by the destroyers HMS Electra (Lt.Cdr. S.A. Buss, RN) and HMS Escapade (Cdr. H.R. Graham, RN). They arrived near Sjøvegan, Norway, at 0600/14 where the troops were disembarked.
At 1122 hours (Berlin time) the German submarine U-38 attacked HMS Southampton with two torpedoes in the Vestfjord. No hits were obtained. [There is no mention in the log of HMS Southampton regarding this attack so most likely it was not noticed.] (14)
15 Apr 1940
HMS Southampton (Capt. F.W.H. Jeans, CVO, RN) and HMS Aurora (Capt. L.H.K. Hamilton, DSO, RN) departed Vaagsfjord to escort the Harstad part of convoy NP 1 in.
[See the event 'Convoy NP 1' for 11 April 1940 for more info on this convoy.] (14)
17 Apr 1940
The empty troopships Monarch of Bermuda (British, 22424 GRT, built 1931) and Reina del Pacifico (British, 17702 GRT, built 1931) departed Vaagsfjord around 0300 hours to return to the U.K.
They were escorted by the destroyers HMS Amazon (Lt.Cdr. N.E.G. Roper, RN), HMS Volunteer (Lt.Cdr. N. Lanyon, RN) and HMS Witherington (Lt.Cdr. J.B. Palmer, RN).
They were escorted out until around 1530 hours by the light cruisers HMS Southampton (Capt. F.W.H. Jeans, CVO, RN). She remained out during the night patrolling north of the Lofoten. She returned to Harstad the following morning. (14)
26 Apr 1940
HMS Southampton (Capt. F.W.H. Jeans, CVO, RN) shifted from the Bydgdenfjord (to the west of Harstad) to the Lavangsfjord (to the south of Harstad). (16)
28 Apr 1940
HMS Southampton (Capt. F.W.H. Jeans, CVO, RN) departed the Lavangsfjord for the Lofoten. (14)
29 Apr 1940
HMS Southampton (Capt. F.W.H. Jeans, CVO, RN) arrived at the Skjelfjord, Lofoten. (14)
29 Apr 1940
Operation Klaxon, the evacuation of troops from Namsos.
Timespan: 29 April to 5 May 1940.
At 2000A/29 the French armed merchant cruisers El D’Jezair, El Kantara and El Mansour departed Scapa Flow for Namsos, Norway where they were to evacutate troops. They were escorted by the British destroyers HMS Kelly (Capt. L.F.A.V.N. Mountbatten, GCVO, RN), HMS Maori (Cdr. G.N. Brewer, RN), HMS Imperial (Lt.Cdr. C.A.de W. Kitcat, RN) and the French large destroyer Bison (Capt. J.A.R. Bouan).
A cover force departed Scapa Flow one hour later. It was made up of the British heavy cruisers HMS Devonshire (Capt. J.M. Mansfield, DSC, RN, flying the flag of Vice-Admiral J.H.D. Cunningham, CB, MVO, RN), HMS York (Capt. R.H. Portal, DSC, RN), the French light cruiser Montcalm (Capt. J.L. de Corbiere, flying the flag of Commodore (Contre-Admiral) E.L.H. Derrien) and the British destroyers HMS Grenade (Cdr. R.C. Boyle, RN) and HMS Griffin (Lt.Cdr. J. Lee-Barber, RN) and HMS Hasty (Lt.Cdr. L.R.K. Tyrwhitt, RN).
These forces were later reinforced by the British destroyers HMS Afridi (Capt. P.L. Vian, RN), HMS Nubian (Cdr. R.W. Ravenhill, RN) and the French destroyer Foudroyant Foudroyant (Cdr. P.L.A. Fontaine)
The force lead by Vice-Admiral Cunningham arrived off the Norwegian coast near Namsos on May 1st.
HMS Maori had been sent on ahead and reported fog. HMS Kelly, HMS Grenade, HMS Griffin and Bison were ordered to join her.
When entering the Namsenfjord in fog on 2 May 1940, HMS Maori is bombed and damaged from near misses. She had to retire for temporary repairs but was able to participate in the evacuation during the next night. The evacuation attempt was then postponed to the night of 2/3 May.
On 2 May the force was reinforced by the AA cruiser HMS Carlisle (Capt. G.M.B. Langley, OBE, RN).
In the evening of 2 May the force entered the Fjord to embark troops except HMS Devonshire, Montcalm, HMS Grenade, HMS Griffin, HMS Hasty and HMS Imperial which remained at sea to cover the operation.
A total of 1850 British, 2345 French, some Norwegian troops and 30 German prisoners were evacuated. The evacuation was completed around 0445A/3.
Heavy German air attacks developed when the Force was leaving the area. The attacks concentrated on the Devonshire and Montcalm but they were not hit.
The French destroyer Bison was hit at 1010 hours in position 65°42'N, 07°17'E and her forward magazine exploded blowing off the fore part of the ship.The survivors were rescued by HMS Grenade, HMS Imperial and HMS Afridi The wreck was then scuttled by HMS Afridi.
But the attacks continued and at 1400 hours HMS Afridi was hit in position 66°14'N, 05°45'E and sank around 1445 hours. Her survivors were picked up by HMS Griffin and HMS Imperial.
The destroyers with the survivors; HMS Grenade, HMS Griffin and HMS Imperial were detached to land these at Sullom Voe where they arrived around 1700A/4. They departed again around 2130A/4 for Scapa Flow where they arrived around 0730A/5.
Reinforcements had meanwhile been sent out from Sullom Voe these were the light cruiser HMS Southampton (Capt. F.W.H. Jeans, CVO, RN) and the destroyers HMS Beagle (Lt.Cdr. R.H. Wright, RN), HMS Hereward (Lt.Cdr. C.W. Greening, RN) and HMS Hyperion (Cdr. H.St.L. Nicholson, RN). They had departed Sullom Voe late in the evening of May, 2nd with orders to give support to the forces operating in the Namsos area.
Shortly before midnight during the night of 3/4 May, four more destroyers were sent out, these were; HMS Antelope (Lt.Cdr. R.T. White, DSO, RN), HMS Acheron (Lt.Cdr. R.W.F. Northcott, RN), HMS Foresight (Lt.Cdr. G.T. Lambert, RN) and HMS Fury (Cdr. E.W.B. Sim, RN).
All forces arrived at Scapa Flow in the evening of May 4th or the early hours of May 5th. (17)
29 Apr 1940
Evacuation of troops from the Åndalsnes area during the night of 30 April / 1 May 1940.
Around 1230A/29, the troopships Ulster Monarch (3791 GRT, built 1929) and Ulster Prince (3791 GRT, built 1930) departed Scapa Flow for for the evacuation of troops from Åndalsnes and Molde. They were escorted by the destroyers HMS Somali (Capt. R.S.G. Nicholson, DSO, DSC, RN), HMS Mashona (Cdr. W.H. Selby, RN) and HMS Tartar (Cdr. L.P. Skipwith, RN). The destroyer HMS Sikh (Cdr. J.A. Giffard, RN) departed Scapa Flow around 1540A/29 to join them at sea.
Around 1700A/29, the light cruisers HMS Galatea (Capt. B.B. Schofield, RN, flying the flag of Vice-Admiral G.F.B. Edward-Collins, CB, KCVO, RN), HMS Arethusa (Capt. Q.D. Graham, RN) and the destroyers HMS Walker (Lt.Cdr. A.A. Tait, RN), HMS Wanderer (Cdr. R.F. Morice, RN) and HMS Westcott (Lt.Cdr. W.F.R. Segrave, RN) departed Scapa Flow for the evacuation of troops from Åndalsnes and Molde.
They were joined around 1530A/30 by the light cruisers HMS Southampton (Capt. F.W.H. Jeans, CVO, RN) and HMS Sheffield (Capt. C.A.A. Larcom, RN, flying the flag of Rear-Admiral M.L. Clarke, DSC, RN) which had already been at sea.
All forces arrived in the area in the late evening of April 30th.
During the night of 30 April / 1 May, the Ulster Prince with HMS Tartar evacuated troops at Molde. While the light cruisers HMS Galatea, HMS Arethusa and HMS Sheffield evacuated troops at Åndalsnes. The Ulster Monarch was with this force but she did not take on board troops as there was no more time available. The destroyers HMS Sikh and HMS Wanderer evacuated troops from Åfarnes and ferried them to HMS Southampton. While doing so HMS Wanderer grounded and was damaged. She had to be towed off by HMS Sikh.
The destroyers HMS Mashona, HMS Walker and HMS Westcott picked up troops from Veblungsnes just to the south-west of Åndalsnes.
On leaving the Fjords, the ships came under attack from German aircraft but no ship sustained damage.
In the afternoon of May 1st, HMS Southampton, HMS Walker and HMS Westcott arrived at Sollom Voe.
HMS Sheffield arrived at Scapa Flow around 0615A/2.
HMS Galatea arrived at Scapa Flow around 0200A/2.
HMS Arethusa arrived at Scapa Flow around 0230A/2.
HMS Wanderder arrived at Sullom Voe around 0635A/2 after having been delayed by a u-boat hunt.
Around 1235A/2, the Ulster Monarch and Ulster Prince arrived at Scapa Flow escorted by HMS Sikh.
HMS Tartar arrived at Scapa Flow around 2100B/2.
HMS Somali and HMS Mashona apparently remained at sea and took part in the evacuation during the following night. (18)
30 Apr 1940
HMS Southampton (Capt. F.W.H. Jeans, CVO, RN) departed the Skjelfjord, Lofoten for Åndalsnes where troops were to be evacuated.
She arrived off Åndalsnes late in the evening. (14)
1 May 1940
HMS Southampton (Capt. F.W.H. Jeans, CVO, RN) took on board troops near Åfarnes, just north of Åndalsnes. The troops were ferried to her by the destroyers HMS Sikh (Cdr. J.A. Giffard, RN) and HMS Wanderer (Cdr. R.F. Morice, RN). However HMS Wanderer grounded and she had to be towed off by HMS Sikh.
HMS Southampton departed from the area around 0220 hours to proceed to the U.K.
She took the passage together with the destroyers HMS Walker (Lt.Cdr. A.A. Tait, RN) and HMS Westcott (Lt.Cdr. W.F.R. Segrave, RN).
The ships were ordered to proceed to Sullom Voe where they arrived early in the evening. HMS Southampton then transferred troops to HMS Westcott which took them Scapa Flow arriving there around 0800/2.
HMS Southampton and HMS Walker were ordered to return to Åndalsnes to evacuate more troop. This order was cancelled around 0445/2 and the ships were ordered to return to Sullom Voe where they arrived early in the afternoon. (19)
2 May 1940
HMS Southampton (Capt. F.W.H. Jeans, CVO, RN), HMS Beagle (Lt.Cdr. R.H. Wright, RN), HMS Hereward (Lt.Cdr. C.W. Greening, RN) and HMS Hyperion (Cdr. H.St.L. Nicholson, RN) departed Sullom Voe late in the evening to give support to forces operating off Namsos.
[See the event 'Operation Klaxon, the evacuation of troops from Namsos' for 29 April 1940 for more info on the operations off Namsos. (19)
5 May 1940
The British heavy cruiser HMS Devonshire (Capt. J.M. Mansfield, DSC, RN, flying the flag of Vice-Admiral J.H.D. Cunningham, CB, MVO, RN), French light cruiser Montcalm (Capt. J.L. de Corbiere, flying the flag of Commodore E.L.H. Derrien), British light cruiser HMS Southampton (Capt. F.W.H. Jeans, CVO, RN), French troopships (armed merchant cruisers) El D’Jezair, El Kantara, and the British destroyers HMS Acheron (Lt.Cdr. R.W.F. Northcott, RN), HMS Antelope (Lt.Cdr. R.T. White, DSO, RN), HMS Foresight (Lt.Cdr. G.T. Lambert, RN) and HMS Fury (Cdr. E.W.B. Sim, RN), HMS Hereward (Lt.Cdr. C.W. Greening, RN) and HMS Maori (Cdr. G.N. Brewer, RN) arrived at Scapa Flow at 0400/5th from operations off Namsos, Norway.
5 May 1940
Rear-Admiral M.L. Clarke, DSC, RN, transferred his flag from HMS Sheffield (Capt. C.A.A. Larcom, RN) to HMS Southampton (Capt. F.W.H. Jeans, CVO, RN). (20)
6 May 1940
HMS Southampton (Capt. F.W.H. Jeans, CVO, RN, flying the flag of Rear-Admiral M.L. Clarke, DSC, RN) departed Scapa Flow around 2245/6 for Rosyth where she arrived around 0830/7. She is then taken in hand for repairs at the Rosyth Dockyard. (19)
21 May 1940
HMS Southampton (Capt. F.W.H. Jeans, CVO, RN, flying the flag of Rear-Admiral M.L. Clarke, DSC, RN) conducted D/G trials in the Firth of Forth. (19)
22 May 1940
HMS Southampton (Capt. F.W.H. Jeans, CVO, RN, flying the flag of Rear-Admiral M.L. Clarke, DSC, RN) conducted D/G trials in the Firth of Forth and on completion of these she set course to proceed to Narvik, Norway. (19)
24 May 1940
Late in the evening, HMS Southampton (Capt. F.W.H. Jeans, CVO, RN, flying the flag of Rear-Admiral M.L. Clarke, DSC, RN), arrived at Harstad, Norway. (19)
25 May 1940
Shortly after noon, HMS Southampton (Capt. F.W.H. Jeans, CVO, RN, flying the flag of Rear-Admiral M.L. Clarke, DSC, RN), is lightly damaged by bombs from enemy aircraft while at Harstad. (19)
27 May 1940
In the morning, HMS Southampton (Capt. F.W.H. Jeans, CVO, RN, flying the flag of Rear-Admiral M.L. Clarke, DSC, RN), is again lightly damaged by bombs from enemy aircraft while at Harstad. (19)
27 May 1940
Assault on Narvik.
The following naval vessels were operating in the Narvik area supporting the assauly by the army; light cruiser HMS Southampton (Capt. F.W.H. Jeans, CVO, RN, flying the flag of Rear-Admiral M.L. Clarke, DSC, RN), AA cruisers HMS Coventry (Capt. D. Gilmour, RN, flying the flag of Rear-Admiral J.G.P. Vivian, RN) and HMS Cairo (Capt. P.V. McLaughlin, RN, flying the flag of Admiral of the Fleet W.H.D. Boyle (Lord Cork), GCB, GCVO, RN), destroyers HMS Walker (Lt.Cdr. A.A. Tait, RN), HMS Whirlwind (Lt.Cdr. J.M. Rodgers, RN), HMS Beagle (Lt.Cdr. R.H. Wright, RN), HMS Delight (Cdr. M. Fogg-Elliot, RN), HMS Echo (Cdr. S.H.K. Spurgeon, DSO, RAN), HMS Fame (Cdr. P.N. Walter, RN), HMS Firedrake (Lt.Cdr. S.H. Norris, DSC, RN), HMS Havelock (Capt. E.B.K. Stevens, DSC, RN) and sloop HMS Stork (Cdr. A.C. Behague, RN).
Some of these ships bombarded Narvik very late in the evening following which the final assault by the Allies on Narvik began.
Narvik was captured from the German in the evening of the 28th.
During the 28th multiple ships sustained damage due to German air attacks;
The most serious damage was to AA cruiser HMS Cairo. She was hit by hit by two bombs at 0620/28 and was badly damaged. One bomb struck abaft B gun. It penetrated the deck and exploded among the supply ammunition party. The other bomb hit the starboard .5" anti-aircraft gun mounting. Twelve of the crew were killed.
Light cruiser HMS Southampton was near missed and damaged by bomb splinters. Her Commanding Officer was wounded and two ratings were killed.
AA cruiser HMS Coventry was also near missed and had one rating killed by bomb splinters.
The destroyers HMS Walker, HMS Whirlwind and HMS Havelock all sustained minor damage from near misses. The most serious damage was to Walker. (19)
28 May 1940
Around 1045 hours, HMS Southampton (Capt. F.W.H. Jeans, CVO, RN, flying the flag of Rear-Admiral M.L. Clarke, DSC, RN), arrived at Harstad from operations.
She departed again late in the evening to patrol off Narvik. (19)
29 May 1940
HMS Southampton (Capt. F.W.H. Jeans, CVO, RN, flying the flag of Rear-Admiral M.L. Clarke, DSC, RN) patrolled in the Ofotfjord near Narvik also giving support to army operations. Early in the afternoon she shifted patrol to the Vestfjord, in the approaches to Narvik. HMS Beagle (Lt.Cdr. R.H. Wright, RN) and HMS Firedrake (Lt.Cdr. S.H. Norris, DSC, RN) then joined her as A/S screen until late in the evening. (19)
30 May 1940
During 30/31 May 1940, HMS Southampton (Capt. F.W.H. Jeans, CVO, RN, flying the flag of Rear-Admiral M.L. Clarke, DSC, RN), patrolled in the Vestfjord while destroyers were evacuating troops from Bodø. (19)
1 Jun 1940
Around 1330 hours, HMS Southampton (Capt. F.W.H. Jeans, CVO, RN, flying the flag of Rear-Admiral M.L. Clarke, DSC, RN), arrived at Harstad from patrol. (19)
7 Jun 1940
Admiral of the Fleet W.H.D. Boyle (Lord Cork), GCB, GCVO, RN, embarked in HMS Southampton (Capt. F.W.H. Jeans, CVO, RN, flying the flag of Rear-Admiral M.L. Clarke, DSC, RN) for passage to the U.K. (21)
8 Jun 1940
Evacuation of the 'Narvik / Harstad / Tromso area'.
2nd troop evacuation convoy from Harstad.
From 7 to 8 June 1940 the troopships Arandora Star (15501 GRT, built 1927), Duchess of York (20021 GRT, built 1929), Ormonde (14982 GRT, built 1917), Oronsay (20043 GRT, built 1925), Royal Ulsterman (3244 GRT, built 1936), Ulster Monarch (3791 GRT, built 1929) and Ulster Prince (3791 GRT, built 1930) embarked almost 10000 troops in the Andfiord, near Harstad, Norway. They did this one by one.
They then departed the Harstad area for the U.K. They were escorted by the light cruiser HMS Southampton (Capt. F.W.H. Jeans, CVO, RN, flying the flag of Rear-Admiral M.L. Clarke, DSC, RN), AA cruiser HMS Coventry (Capt. R.F.J. Onslow, DSC, RN) and the destroyers HMS Beagle (Lt.Cdr. R.H. Wright, RN), HMS Delight (Cdr. M. Fogg-Elliott, RN), HMS Echo (Cdr. S.H.K. Spurgeon, DSO, RAN), HMS Fame (Cdr. P.N. Walter, RN), HMS Firedrake (Lt.Cdr. S.H. Norris, DSC, RN) and HMS Havelock (Capt. E.B.K. Stevens, DSC, RN).
The aircraft carrier HMS Ark Royal (Capt. C.S. Holland, RN, flying the flag of Vice-Admiral L.V. Wells, CB, DSO, RN) and her escort, the destroyers HMS Highlander (Cdr. W.A. Dallmeyer, RN), HMS Diana (Lt.Cdr. E.G. Le Geyt, RN) and HMS Acheron (Lt.Cdr. R.W.F. Northcott, RN) initially operated near the convoy but they acted independently to enable flying operations which continued throught the entire day. A/S and most of all fighter patrols were flown.
They were joined in the evening of the 9th by the battleship HMS Valiant (Capt. H.B. Rawlings, OBE, RN) and the destroyers HMS Tartar (Capt. C. Caslon, RN), HMS Mashona (Cdr. W.H. Selby, RN), HMS Bedouin (Cdr. J.A. McCoy, DSO, RN) and HMS Ashanti (Cdr. W.G. Davis, RN).
Around 0930/10, HMS Repulse (Capt. E.J. Spooner, DSO, RN) joined.
Around 2115/10, the destroyers HMS Maori (Cdr. H.T. Armstrong, RN) and HMS Forester (Lt.Cdr. E.B. Tancock, RN) joined.
On the 11th, HMS Valiant, HMS Repulse, HMS Tartar, HMS Bedouin, HMS Maori, HMS Forester, HMS Diana and HMS Acheron were detached to proceed to Scapa Flow.
The convoy arrived in the Clyde very late in the evening of the 12th.
22 Jun 1940
Around 1600 hours, HMS Southampton (Capt. B.C.B. Brooke, RN, flying the flag of Rear-Admiral M.L. Clarke, DSC, RN), departed Greenock for Scapa Flow. (21)
23 Jun 1940
Around 1400 hours, HMS Southampton (Capt. B.C.B. Brooke, RN, flying the flag of Rear-Admiral M.L. Clarke, DSC, RN), arrived at Scapa Flow from Greenock. (21)
24 Jun 1940
In the late afternoon HMS Southampton (Capt. B.C.B. Brooke, RN, flying the flag of Rear-Admiral M.L. Clarke, DSC, RN) conducted gunnery exercises at Scapa Flow. (21)
26 Jun 1940
In the afternoon HMS Southampton (Capt. B.C.B. Brooke, RN, flying the flag of Rear-Admiral M.L. Clarke, DSC, RN) conducted a D/G test at Scapa Flow. (21)
27 Jun 1940
In the early afternoon HMS Southampton (Capt. B.C.B. Brooke, RN, flying the flag of Rear-Admiral M.L. Clarke, DSC, RN) conducted gunnery exercises at Scapa Flow. (21)
29 Jun 1940
Late in the morning, HMS Southampton (Capt. B.C.B. Brooke, RN, flying the flag of Rear-Admiral M.L. Clarke, DSC, RN), conducted gunnery exercises at Scapa Flow. (21)
1 Jul 1940
In the afternoon, HMS Southampton (Capt. B.C.B. Brooke, RN, flying the flag of Rear-Admiral M.L. Clarke, DSC, RN), conducted gunnery exercises at Scapa Flow. (22)
2 Jul 1940
In the morning, HMS Southampton (Capt. B.C.B. Brooke, RN, flying the flag of Rear-Admiral M.L. Clarke, DSC, RN), conducted gunnery exercises at Scapa Flow. (22)
4 Jul 1940
In the morning, HMS Southampton (Capt. B.C.B. Brooke, RN, flying the flag of Rear-Admiral M.L. Clarke, DSC, RN), conducted HA gunnery exercises at Scapa Flow. (22)
6 Jul 1940
Around 0230 hours, the light cruiser HMS Southampton (Capt. B.C.B. Brooke, RN, flying the flag of Rear-Admiral M.L. Clarke, DSC, RN), AA cruiser HMS Coventry (Capt. D. Gilmour, RN) and the destroyers HMS Cossack (Capt. P.L. Vian, DSO, RN), HMS Maori (Cdr. H.T. Armstrong, RN), HMS Fame (Cdr. P.N. Walter, RN) and HMS Fortune (Cdr. E.A. Gibbs, DSO, RN) departed Scapa Flow to go the aid of the submarine HMS Shark (Lt.Cdr. P.N. Buckley, RN) that had been depth charged and badly damaged by german A/S trawlers off Skudesnes, Norway and is unable to dive.
The submarine is however captured by the Germans. She later sank under tow.
HMS Fame was damaged shortly after noon by near misses from German bombs.
The 'rescue party' arrived at Rosyth around 0115/7. (22)
7 Jul 1940
Around 2045 hours HMS Southampton (Capt. B.C.B. Brooke, RN, flying the flag of Rear-Admiral M.L. Clarke, DSC, RN), HMS Coventry (Capt. D. Gilmour, RN), HMS Cossack (Capt. P.L. Vian, DSO, RN), HMS Maori (Cdr. H.T. Armstrong, RN) and HMS Fortune (Cdr. E.A. Gibbs, DSO, RN) departed Rosyth to return to Scapa Flow where they arrived around 1115/8 but not before HA gunnery exercises had been carried out in the Pentland Firth. (22)
10 Jul 1940
In the morning, HMS Southampton (Capt. B.C.B. Brooke, RN, flying the flag of Rear-Admiral M.L. Clarke, DSC, RN), conducted torpedo firing exercises at Scapa Flow. These were followed by HA gunnery exercises in the afternoon. (22)
12 Jul 1940
In the evening, HMS Southampton (Capt. B.C.B. Brooke, RN, flying the flag of Rear-Admiral M.L. Clarke, DSC, RN), conducted a speed trial at Scapa Flow. (22)
15 Jul 1940
In the afternoon, HMS Southampton (Capt. B.C.B. Brooke, RN, flying the flag of Rear-Admiral M.L. Clarke, DSC, RN), conducted gunnery exercises at Scapa Flow. She also acted as target for HMS Glasgow (Capt. H. Hickling, RN) which was carrying out torpedo firing exercises. (22)
16 Jul 1940
Around 1030A/16, a British force made up of the heavy cruisers HMS Shropshire (Capt. J.H. Edelsten, RN), HMS Sussex (Capt. R.V. Symonds-Tayler, DSC, RN), light cruisers HMS Glasgow (Capt. H. Hickling, RN), HMS Southampton (Capt. B.C.B. Brooke, RN, flying the flag of Rear-Admiral M.L. Clarke, DSC, RN) and the destroyers HMS Cossack (Capt. E.L. Berthon, DSC and Bar, RN), HMS Maori (Cdr. H.T. Armstrong, RN), HMS Sikh (Cdr. J.A. Giffard, RN), HMS Zulu (Cdr. J.S. Crawford, RN), HMS Inglefield (Capt. P. Todd, DSO, RN), HMS Imogen (Cdr. C.L. Firth, MVO, RN), HMS Fortune (Cdr. E.A. Gibbs, DSO, RN) and HMS Fury (Lt.Cdr. T.C. Robinson, RN) departed Scapa Flow to conduct a raid against German shipping off the west coast of Denmark.
The force proceeded towards the Danish west coast until shortly before 1600A/16 but then reversed course due to negative air reconnaissance reports.
HMS Shorpshire was detached to the Clyde, where she was to undergo further repairs to her turbines, around 2315A/16. She arrived at Govan around 1200A/18 and was then taken in hand at the Fairfield shipyard.
Shortly before midnight, while in the Pentland Firth and in thick fog, HMS Glasgow collided with HMS Imogen. The destroyer had to be abandoned. Seventeen ratings were killed but HMS Glasgow was able to pick up the remaining crew of which eleven were wounded, one of which later died from his wounds. HMS Glasgow sustained damage to her bow. HMS Imogen was not seen to sink but she was lost out of sight in the heavy fog.
The damaged HMS Glasgow proceeded to Scapa Flow with HMS Southampton arriving around 0945A/17.
HMS Sussex arrived at Scapa Flow around 1100A/17.
The destroyers remained out during the day searching for the hulk of HMS Imogen but it was not sighted. They arrived at Scapa Flow around 1800A/17.
20 Jul 1940
HMS Southampton (Capt. B.C.B. Brooke, RN, flying the flag of Rear-Admiral M.L. Clarke, DSC, RN) departed Scapa Flow for Sheerness around 1345 hours for anti-invasion purposes. (22)
21 Jul 1940
HMS Southampton (Capt. B.C.B. Brooke, RN, flying the flag of Rear-Admiral M.L. Clarke, DSC, RN) arrived at Sheerness around 1745 hours. While on passage from Scapa Flow she had been attacked by German aircraft at 1302/21 but the bombs dropped missed the cruiser and no damage was sustained. (22)
17 Aug 1940
HMS Birmingham (Capt. A.C.G. Madden, RN, flying the flag of Vice-Admiral G.F.B. Edward-Collins, CB, KCVO, RN) and HMS Southampton (Capt. B.C.B. Brooke, RN, flying the flag of Rear-Admiral M.L. Clarke, DSC, RN) departed Sheerness around 1800A/17 for Rosyth where they arrived around 1300A/18. They were relocated to Rosyth due to the almost continuous bombing of the south part England by the Luftwaffe. (23)
1 Sep 1940
Around 0001A/1, HMS Manchester (Capt. H.A. Packer, RN, flying the flag of Vice-Admiral G.F.B. Edward-Collins, CB, KCVO, RN), HMS Birmingham (Capt. A.C.G. Madden, RN) and HMS Southampton (Capt. B.C.B. Brooke, RN, flying the flag of Rear-Admiral M.L. Clarke, DSC, RN) departed Rosyth for the Humber. Around 0140A/1, near Fidra, they were joined by the destroyers HMS Versatile (Cdr.(Retd.) J.H. Jauncey, RN) and HMS Vimy (Lt.Cdr. D.J.B. Jewitt, RN) which parted company again around 0250A/1. HMS Woolston (Lt.Cdr. W.J. Phipps, OBE, RN) was also to have joined later but it does not appear that she actually did, presumably due to the fact that around 0305A/1 the cruisers were recalled and then returned to Rosyth arriving around 0600A/1. The destroyers returned to Methil. (24)
4 Sep 1940
Around 1230A/4, HMS Manchester (Capt. H.A. Packer, RN, flying the flag of Vice-Admiral G.F.B. Edward-Collins, CB, KCVO, RN), HMS Birmingham (Capt. A.C.G. Madden, RN) and HMS Southampton (Capt. B.C.B. Brooke, RN, flying the flag of Rear-Admiral M.L. Clarke, DSC, RN) departed Rosyth for immingham. They were escorted by the escort destroyer HMS Holderness (Lt.Cdr. D.E. Holland-Martin, DSC, RN).
The escort was reinforced around 2000A/4 by the destroyers HMS Jupiter (Cdr. D.B. Wyburd, RN) and HMS Kelvin (Cdr. J.H. Allison, DSO, RN) which had come from Immingham to rendez-vous with the cruisers and escort them in.
All ships, minus HMS Holderness which was detached shortly before arriving, arrived at Immingham, where they had been diverted to, shortly before midnight.
The cruisers were sent to Immingham for anti-invasion duty. (24)
5 Oct 1940
Rear-Admiral M.L. Clarke, DSC, RN, struck his flag in HMS Southampton (Capt. B.C.B. Brooke, RN). (25)
16 Oct 1940
HMS Southampton (Capt. B.C.B. Brooke, RN) departed Immingham around 1730/16 for Scapa Flow.
She arrived at Scapa Flow around 1245/17. (26)
18 Oct 1940
Late in the afternoon / early in the evening, HMS Southampton (Capt. B.C.B. Brooke, RN), conducted gunnery exercises at Scapa Flow. (26)
22 Oct 1940
HMS Southampton (Capt. B.C.B. Brooke, RN) conducted gunnery exercises at Scapa Flow. (26)
23 Oct 1940
Operations DN 2 and DNU
Anti shipping raids off the Norwegian coast.
The battlecruisers HMS Hood (Capt. I.G. Glennie, RN, flying the flag of Vice-Admiral W.J. Whitworth, CB, DSO, RN), HMS Repulse (Capt. W.G. Tennant, CB, MVO, RN), light cruisers HMS Dido (Capt. H.W.U. McCall, RN), HMS Phoebe (Capt. G. Grantham, RN) escorted by the destroyers HMS Isis (Cdr. C.S.B. Swinley, DSC, RN), HMS Mashona (Cdr. W.H. Selby, RN), HMS Keppel (Lt. R.J. Hanson, RN), HMS Douglas (Cdr.(Retd.) J.G. Crossley, RN) and HMS Bulldog (Lt.Cdr. F.J.G. Hewitt, RN) departed Scapa Flow for exercises in the Pentland Firth. Upon completion of these they took op a position off Obrestad to cover operations DN 2 and DNU.
Further cover was provided by the cruisers HMS Norfolk (Capt. A.J.L. Phillips, RN), HMS Southampton (Capt. B.C.B. Brooke, RN) and HMS Arethusa (Capt. Q.D. Graham, RN) which proceeded to an area off Stadlandet.
For operation DN.2 the light cruisers HMS Bonaventure (Capt. H.J. Egerton, RN) and HMS Naiad (Capt. M.H.A. Kelsey, DSC, RN, flying the flag of Rear-Admiral E.L.S. King, CB, MVO, RN) went to sea from Rosyth.
The destroyers HMS Somali (Capt. C. Caslon, RN), HMS Matabele (Cdr. R.St.V. Sherbrooke, DSO, RN) and HMS Punjabi (Cdr. J.T. Lean, DSO, RN) had departed Sullom Voe on 22 October and were on patrol to the east of the Shetlands. They were ordered to intercept (operation DNU) a group of 20 'German' fishing vessels and a patrol vessel that were reported off Egersund.
These destroyers intercepted and sank the German weather ship WBS 5 / Adolf Vinnen (391 GRT, built 1929) west of Stadlandet in position 62°29'N, 04°23'E on 24 October 1940. This weather ship had been operating north of Iceland and was on the return trip back to Norway.
All ships arrived back at their bases on 24 October 1940. HMS Bonaventure had sustained some damage to her forecastle in the heavy weather conditions (27)
25 Oct 1940
HMS Southampton (Capt. B.C.B. Brooke, RN) conducted gunnery exercises off Scapa Flow. (26)
26 Oct 1940
HMS Southampton (Capt. B.C.B. Brooke, RN) and HMS Arethusa (Capt. Q.D. Graham, RN) conducted exercises off Scapa Flow. (26)
28 Oct 1940
The battlecruisers HMS Hood (Capt. I.G. Glennie, RN, flying the flag of Vice-Admiral W.J. Whitworth, CB, DSO, RN), HMS Repulse (Capt. W.G. Tennant, CB, MVO, RN), aircraft carrier HMS Furious (Capt. T.H. Troubridge, RN), light cruisers HMS Southampton (Capt. B.C.B. Brooke, RN), HMS Dido (Capt. H.W.U. McCall, RN), HMS Phoebe (Capt. G. Grantham, RN), destroyers HMS Somali (Capt. C. Caslon, RN), HMS Eskimo (Cdr. St. J.A. Micklethwait, DSO and Bar, RN) and HMS Mashona (Cdr. W.H. Selby, RN), HMS Punjabi (Cdr. J.T. Lean, DSO, RN), HMS Douglas (Cdr.(Retd.) J.G. Crossley, RN), HMS Keppel (Lt. R.J. Hanson, RN), HMS Vimy (Lt.Cdr. D.J.B. Jewitt, RN) and the escort destroyer HMS Cleveland (Lt.Cdr. W.S. Clouston, RN) departed Scapa Flow at 1430A/28 with orders to proceed to the Denmark Strait as a ship thought to be a German armed merchant cruiser had been reported in the North-Atlantic in position 56°46'N, 25°44'W steering east-north-east.
HMS Vimy and HMS Cleveland were detached around midnight and returned to Scapa Flow at 1000A/29.
The British ships encountered very heavy weather and several ships sustained damage.
Damage to HMS Dido was of such extent that she was forced on the 29th to proceed to the Faroes for repairs. She arrived at Scapa Flow at 0040/1 escorted by HMS Keppel.
At 0445A/30, light cruiser HMS Southampton encountered the Finnish merchant vessel Bore X. (5058 GRT, built 1939). HMS Southampton turned her over to armed boarding vessel HMS Northern Sky (Lt. J.E. Bromley, RNR) around 0900A/31 which escorted the merchant vessel to Kirkwall.
HMS Hood, HMS Repulse, HMS Furious, HMS Somali, HMS Eskimo, HMS Mashona, HMS Punjabi and HMS Douglas, returned to Scapa Flow around 1400A/31.
HMS Southampton returned to Scapa Flow shortly before midnight on 31 October.
HMS Phoebe returned to Scapa Flow around 0815A/1.
5 Nov 1940
Hunt for the German pocket battleship Admiral Scheer after the attack on convoy HX 84.
Timespan: 5 to 23 November 1940.
In response to the attack on convoy HX 84 by the German pocket battleship Admiral Scheer the Admiralty acted quickly.
The battlecruisers HMS Hood (Capt. I.G. Glennie, RN, flying the flag of Vice-Admiral W.J. Whitworth, CB, DSO, RN), HMS Repulse (Capt. W.G. Tennant, CB, MVO, RN), light cruisers HMS Naiad (Capt. M.H.A. Kelsey, DSC, RN, flying the flag of Rear-Admiral E.L.S. King, CB, MVO, RN), HMS Phoebe (Capt. G. Grantham, RN), HMS Bonaventure (Capt. H.J. Egerton, RN) and the destroyers HMS Somali (Capt. C. Caslon, RN), HMS Eskimo (Cdr. St. J.A. Micklethwait, DSO and Bar, RN), HMS Mashona (Cdr. W.H. Selby, RN), HMS Matabele (Cdr. R.St.V. Sherbrooke, DSO, RN), HMS Punjabi (Cdr. J.T. Lean, DSO, RN) and HMS Electra (Lt.Cdr. S.A. Buss, MVO, RN) departed Scapa Flow at 2330A/5 to proceed to the last reported position of the German pocket battleship 52°50'N, 32°15'W at 2003A/5.
At 1050A/6 the force split up; HMS Hood, HMS Naiad, HMS Phoebe, HMS Somali, HMS Eskimo and HMS Punjabi proceeded to patrol off the Bay of Biscay to cover the approaches to Brest and Lorient.
HMS Repulse, HMS Bonaventure, HMS Mashona, HMS Matabele and HMS Electra towards the Admiral Scheer's last known position.
At 0700A/6 the battleships HMS Nelson (Capt. G.J.A. Miles, RN, flying the flag of Admiral of the Fleet C.M. Forbes, GCB, DSO, RN) and HMS Rodney (Capt. F.H.G. Dalrymple-Hamilton, RN), light cruiser HMS Southampton (Capt. B.C.B. Brooke, RN) and the destroyers HMS Cossack (Capt. P.L. Vian, DSO, RN), HMS Maori (Cdr. H.T. Armstrong, RN), HMS Brilliant (Lt.Cdr. F.C. Brodrick, RN), HMS Douglas (Cdr.(Retd.) J.G. Crossley, RN), HMS Keppel (Lt. R.J. Hanson, RN) and HMS Vimy (Lt.Cdr. D.J.B. Jewitt, RN) departed Scapa Flow to cover the patrols in the Iceland-Faroes Channel.
Shortly before midnight during the night of 6/7 November HMS Rodney was detached to escort to escort convoy HX 83 and once this convoy was safe, HX 85 from Halifax.
Three armed merchant cruisers, which were on patrol were recalled to port on the 8th. These were HMS Chitral (Capt.(Retd.) G. Hamilton, RN), which was to the northwest of Iceland and HMS California (Capt. C.J. Pope, RAN) and HMS Worcestershire (A/Capt. J. Creswell, RN), which were to the south of Iceland. The light cruiser HMS Southampton was ordered to take over the place of HMS Chitral. She split off from HMS Nelson at 1600A/8. HMS Worcestershire joined HMS Nelson and her escorting destroyers around 1500A/9.
There were also the destroyers HMS Churchill (Cdr.(Retd.) G.R. Cousins, RN), HMS Lewes (Lt.Cdr. J.N.K. Knight, RN), HMS Lincoln (Cdr. A.M. Sheffield, RN) and HMS Ludlow (Cdr. G.B. Sayer, RN). They were en-route to the U.K. and had departed Halifax on 31 October and refuelled at St. Johns on 3 November. After receiving distress signals from ships in convoy HX 84 they rushed to the reported location. The only thing they found was an empty lifeboat. They then continued their Atlantic crossing and arrived at Londonderry on 9 November.
The destroyer HMS Stanley (A/Lt.Cdr. R.B. Stannard, VC, RNR) had departed Halifax on 1 November and St. Johns on 5 November. Now she and the Canadian destroyer HMCS St.Francis (Lt.Cdr. H.F. Pullen, RCN) escorted convoy HX 85, which had been recalled, back to Nova Scotia.
On 8 November, after machinery defects had been repaired, the heavy cruiser HMAS Australia (Capt. R.R. Stewart, RN) departed the Clyde to protect convoys.
The battlecruiser HMS Renown (Capt C.E.B. Simeon, RN) and the destroyers HMS Encounter (Lt.Cdr. E.V.St J. Morgan, RN), HMS Forester (Lt.Cdr. E.B. Tancock, RN) and HMS Gallant (Lt.Cdr. C.P.F. Brown, RN) departed Gibraltar at 0500A/6 to provide cover for convoys HG 46 and SL 53.
At 1225A/6, off Cape St Vincent, the submarine HMS Utmost (Lt. J.H. Eaden, DSC, RN) was identified as enemy by HMS Encounter which then rammed the submarine which was en-route to Gibraltar. HMS Encounter was escorted to Gibraltar by HMS Forester. They arrived at 0800A/7.
On 11 November, HMAS Australia relieved Renown from covering convoy HG 46 and Renown arrived back at Gibraltar around 1515A/12. Renown had been joined at 0807A/12 by the destroyers HMS Duncan (Cdr. A.D.B. James, RN) and HMS Forester.
Aircraft carrier HMS Argus (Capt. E.G.N. Rushbrooke, DSC, RN), light cruiser HMS Despatch (Commodore 2nd cl. C.E. Douglas-Pennant, DSC, RN) and the destroyers HMS Verity (Cdr. R.H. Mills, RN), HMS Vesper (Lt.Cdr. W.F.E. Hussey, DSC, RN) and HMS Windsor (Lt.Cdr. G.P. Huddart, RN) departed the Clyde on 7 November for Gibraltar and were also ordered to keep a look out for the German pocket battleship. The destroyers were later detached; HMS Windsor around 0100A/9 and HMS Verity and HMS Vesper around 0600A/9. HMS Despatch was detached at 1000A/13 and proceeded to Gibraltar where she arrived around noon the next day. Shortly before HMS Despatch was detached the destroyers HMS Wishart (Cdr. E.T. Cooper, RN) and HMS Wrestler (Lt. E.L. Jones, DSC, RN) had joined followed later in the day by HMS Vidette (Lt. E.N. Walmsley, RN). HMS Argus, HMS Vidette, HMS Wishart and HMS Wrestler arrived at Gibraltar very late on the 14th.
Battlecruiser HMS Repulse escorted by the destroyers HMS Matabele and HMS Electra arrived at Scapa Flow for refuelling around 1100A/11.
Light cruiser HMS Bonaventure and destroyer HMS Mashona arrived at Scapa Flow around 1130A/11 for refuelling.
Battlecruiser HMS Hood, light cruisers HMS Naiad, HMS Phoebe and the destroyers HMS Somali, HMS Eskimo and HMS Punjabi returned to Scapa Flow around 1400A/11 for refuelling. HMS Eskimo had suffered weather damage to her asdic dome and had some forecastle deck plates buckled. She was docked for repairs in the floating drydock at Scapa Flow from 13 to 16 November. HMS Phoebe had also sustained weather damage for which she was later taken in hand for repairs at Glasgow.
After fuelling HMS Bonaventure departed Scapa Flow at 2300A/11 to continue to search for survivors from convoy HX 84. Armed merchant cruiser HMS Chitral was also back at sea to search for survivors. She had departed from Reykjavik, Iceland around 2330A/10.
HMS Bonaventure returned to Scapa Flow on the 19th with weather damage.
The armed merchant cruiser HMS Letitia (A/Capt. E.H. Longsdon, RN) departed the Clyde around 1300A/11 for the Northern Patrol.
HMS Repulse, HMS Naiad departed Scapa Flow around 1330A/12 for patrol and also to provide cover for ships of the Northern Patrol. They were escorted by the destoyers HMS Sikh (Cdr. G.H. Stokes, RN), HMS Mashona, HMS Matabele and HMS Punjabi.
HMS Naiad parted company on the 13th to proceed to Jan Mayen Island where a German weather / wireless station in Jameson Bay was to be raided.
HMS Repulse returned to Scapa Flow at 0015A/19 being escorted by the destroyers HMS Ashanti (Cdr. W.G. Davis, RN), HMS Mashona and HMS Matabele. They had provided cover for HMS Naiad during her raid on Jan Mayen Island.
The battleship HMS Nelson arrived at Scapa Flow around 1630A/13 escorted by the destroyers Maori, HMS Beagle (Lt.Cdr. R.H. Wright, RN), HMS Bulldog (Lt.Cdr. F.J.G. Hewitt, RN) and Keppel.
Battleship HMS Rodney only arrived at Scapa Flow around 1500A/23. She had been joined at dawn the previous day by the destroyers HMS Beagle, HMS Brilliant, HMS Bulldog and HMS Electra. (27)
8 Nov 1940
HMS Southampton (Capt. B.C.B. Brooke, RN) is ordered to detach from the battleship force and to arrive at the Clyde on the 13th.
This was later changed for her to arrive at Belfast on the 11th. (25)
11 Nov 1940
HMS Southampton (Capt. B.C.B. Brooke, RN) arrived at Belfast. (28)
13 Nov 1940
HMS Southampton (Capt. B.C.B. Brooke, RN) is docked at Belfast. (28)
15 Nov 1940
HMS Southampton (Capt. B.C.B. Brooke, RN) is undocked.
She departed Belfast for convoy escort duty shortly before midnight. (28)
16 Nov 1940
HMS Manchester (Capt. H.A. Packer, RN) arrived at Scapa Flow. After gunnery exercises she departed for Gibraltar later the same day.
During the passage to Gibraltar she was to act as cover, together with HMS Southampton (Capt. B.C.B. Brooke, RN), for a convoy made up of the British merchants / troopships Clan Forbes (7529 GRT, built 1938), Clan Fraser (7529 GRT, built 1939), Franconia (20175 GRT, built 1923) and New Zealand Star (10740 GRT, built 1935). Other ships of the escort force were aircraft carrier HMS Furious (Capt. T.H. Troubridge, RN), light cruiser HMS Dido (Capt. H.W.U. McCall, RN) that were to proceed to Takoradi. HMS Furious was transporting 34 Hurricane fighters for Egypt. The AA cruiser HMS Cairo (Capt. P.V. McLaughlin, RN) was with the convoy until she was detached on 17 November. Destroyers provided A/S escort, initially by HMS Havelock (Cdr. E.H. Thomas, RN) and HMS Hesperus (Lt.Cdr. D.G.F.W. MacIntyre, RN) these were later joined by HMS Jaguar (Lt.Cdr. J.F.W. Hine, RN) and HMS Kelvin (Cdr. J.H. Allison, DSO, RN).
On 19 November 1940, the light cruiser HMS Sheffield (Capt. C.A.A. Larcom, RN) departed Gibraltar to make rendezvous with the convoy and relieve HMS Southampton. Around 1200A/21 rendezvous was effected. (29)
18 Nov 1940
Convoy WS 4B.
This convoy departed Liverpool / the Clyde on 17/18 November 1940 for Suez where it arrived on 28 December 1940.
The convoy was made up of the troopships; Andes (British, 25689 GRT, built 1939), Duchess of Atholl (British, 20119 GRT, built 1928), Empress of Canada (British, 21517 GRT, built 1922), Orcades (British, 23456 GRT, built 1937), Otranto (British, 20026 GRT, built 1925), Reina del Pacifico (British, 17702 GRT, built 1931), Strathaird (British, 22281 GRT, built 1932), Strathallan (British, 23722 GRT, built 1938), Strathnaver (British, 22283 GRT, built 1931) and Viceroy of India (British, 19627 GRT, built 1929).
The convoy was formed at sea at 0830/18 when the two sections made rendez-vous west of Oversay Light.
The convoy was escorted by the heavy cruiser HMS Norfolk (Capt. A.J.L. Phillips, RN), light cruiser HMS Edinburgh (Capt. C.M. Blackman, DSO, RN) and the destroyers HMS Highlander (Cdr. W.A. Dallmeyer, RN), HMCS Ottawa (Cdr. E.R. Mainguy, RCN), HMCS St. Laurent (Lt. H.S. Rayner, RCN), HMCS Saguenay (Cdr. G.R. Miles, RCN), HMCS Skeena (Lt.Cdr. J.C. Hibbard, RCN), HMS Bath (Cdr.(Retd.) A.V. Hemming, RN) and HMS St. Albans (Lt.Cdr.(Emgy.) S.G.C. Rawson, RN).
The AA cruiser HMS Cairo (Capt. P.V. McLaughlin, RN) joined at 0945/18.
An additional destroyer, HMS St. Marys (Lt. K.H.J.L. Phibbs, RN), joined the convoy in the afternoon of the 18th.
Destroyers HMS Bath, HMS St. Albans and HMS St. Marys parted company with the convoy at 1730/19 followed by HMS Cairo one hour later.
Destroyer HMS Highlander parted company with the convoy at 0900/20 followed at 1800/20 by the four Canadian destroyers.
Heavy cruiser HMS Devonshire (Capt. R.D. Oliver, DSC, RN) joined the convoy at 1300/23. HMS Norfolk parted company with the convoy at 1600/23 and proceeded to patrol east of the Azores.
The convoy arrived at Freetown on 29 November 1940 escorted by HMS Devonshire and HMS Edinburgh.
--------------------------------------------------
The convoy departed Freetown on 1 December 1940 escorted by HMS Devonshire and HMS Cumberland (Capt. G.H.E. Russell, RN).
HMS Cumberland parted company with the convoy late in the morning of December 4th having been relieved by HMS Hawkins (Capt. H.P.K. Oram, RN). HMS Cumberland then proceeded to join the South America Division.
HMS Hawkins was detached with orders to proceed to Simonstown in the morning of December 8th. After fuelling at Simonstown, she was to rejoin the convoy. She arrived at Simonstown around 1630B/9 and departed again around 2110B/9 rejoining the convoy around dawn on the 10th.
The convoy arrived at Durban on 12 December 1940 escorted by HMS Devonshire and HMS Hawkins.
--------------------------------------------------
The convoy departed Durban on 16 December 1940 escorted by HMS Devonshire and HMS Shropshire (Capt. J.H. Edelsten, RN).
At 1000/18, the light cruiser HMS Southampton (Capt. B.C.B. Brooke, RN) took over from HMS Devonshire. This last cruiser then set course to return to Durban.
The convoy arrived near Aden on 25 December 1940 but it did not enter the port. HMS Southampton was briefly detached to fuel at Aden after which she rejoined the convoy. The escort was reinforced with the AA cruiser HMS Carlisle (Capt. G.M.B. Langley, OBE, RN) and the destroyers HMS Kandahar (Cdr. W.G.A. Robson, RN) and HMS Kimberley (Lt.Cdr. J.S.M. Richardson, RN). HMS Shropshire was then detached from the convoy and entered Aden.
HMS Carlisle and HMS Kimberey parted company with the convoy on 27 December 1940 and joined a southbound convoy.
The convoy arrived at Suez on 28 December 1940 escorted by HMS Southampton and HMS Kandahar. (30)
22 Nov 1940
HMS Southampton (Capt. B.C.B. Brooke, RN) arrived at Gibraltar having been relieved on convoy escort duty by HMS Sheffield (Capt. C.A.A. Larcom, RN) around 1330 hours the previous day. (28)
23 Nov 1940
Operation MB 9.
Convoy operations in the Eastern Mediterranean.
See also the event for 25 November 1940 called ‘Operation Collar and the resulting Battle of Cape Spartivento’ for the events in the Western Mediterranean.
23 November 1940.
Convoy MW 4 departed Alexandria for Malta today. The convoy was made up of the transports HMS Breconshire (9776 GRT, built 1939), Memnon (7506 GRT, built 1931), Clan Ferguson (7347 GRT, built 1938) and Clan Macaulay (10492 GRT, built 1936). Close escort was provided by (‘Force D’) the AA cruisers HMS Coventry (Capt. D. Gilmour, RN), HMS Calcutta (Capt. D.M. Lees, DSO, RN) and the destroyers HMS Greyhound (Cdr. W.R. Marshall A'Deane, DSC, RN), HMAS Vampire (Capt. H.M.L. Waller, DSO, RAN), HMAS Vendetta (Lt.Cdr. R. Rhoades RAN) and HMAS Voyager (Cdr. J.C. Morrow, DSO, RAN).
A cover force (‘Force C’) for this convoy also departed Alexandria today. They were to proceed to Suda Bay where they were to refuel. This cover force was made up of the battleships HMS Malaya (Capt. A.F.E. Palliser, DSC, RN), HMS Ramillies (Capt. A.D. Read, RN), aircraft carrier HMS Eagle (Capt. A.R.M. Bridge, RN), light cuisers HMS Orion (Capt. G.R.B. Back, RN, flying the flag of Vice-Admiral H.D. Pridham-Whippell, CB, CVO, RN), HMS Ajax (Capt. E.D. McCarthy, RN), HMAS Sydney (Capt. J.A. Collins, CB, RAN) and the destroyers HMS Hyperion (Cdr. H.St.L. Nicolson, DSO and Bar, RN), HMS Hasty (Lt.Cdr. L.R.K. Tyrwhitt, RN), HMS Havock (Cdr. R.E. Courage, DSO, DSC, RN), HMS Ilex (Lt.Cdr. P.L. Saumarez, DSC and Bar, RN), HMS Gallant (Lt.Cdr. C.P.F. Brown, RN), HMS Dainty (Cdr. M.S. Thomas, DSO, RN), HMS Defender (Lt.Cdr. G.L. Farnfield, RN) and HMS Diamond (Lt.Cdr. P.A. Cartwright, RN).
HMS Berwick (Capt. G.L. Warren, RN) departed Alexandria later this day to make rendez-vous with ‘Force C’ off Suda Bay next morning.
24 November 1940.
Both ‘Force C’ and ‘Force D’ passed the Kaso Strait early this day. ‘Force C’ arrived at Suda Bay to refuel at 0800B/24.
At noon, the convoy was attacked by three enemy torpedo bombers in position 36°13’N, 24°48’E. The enemy planes were forced to drop their torpedoes from long range by the effective AA fire from the escorts and no hits were obtained.
In the afternoon both forces passed the Kithera Channel.
25 November 1940.
At 0200B/25, the 3rd Cruiser Squadron, HMS York (Capt. R.H. Portal, DSC, RN), HMS Gloucester (Capt. H.A. Rowley, RN, flying the flag of Rear-Admiral E. de F. Renouf, CVO, RN) and HMS Glasgow (Capt. H. Hickling, RN), departed Alexandria for exercises.
Around 0300B/25, ‘Force A’ departed Alexandria to provide cover for the operations. This force was made up of the battleships HMS Warspite (Capt. D.B. Fisher, CBE, RN, flying the flag of Admiral Sir A.B. Cunningham, KCB, DSO, RN), HMS Valiant (Capt. C.E. Morgan, DSO, RN), aircraft carrier HMS Illustrious (Capt. D.W. Boyd, DSC, RN, flying the flag of Rear-Admiral A.L.St.G. Lyster, CVO, DSO, RN) and the destroyers HMS Jervis (Capt. P.J. Mack, DSO, RN), HMS Janus (Cdr. J.A.W. Tothill, RN), HMS Juno (Cdr. St.J.R.J. Tyrwhitt, RN), HMS Nubian (Cdr. R.W. Ravenhill, RN), HMS Mohawk (Cdr. J.W.M. Eaton, RN), HMS Griffin (Lt.Cdr J. Lee-Barber, DSO, RN), HMS Decoy (Cdr. E.G. McGregor, DSO, RN), HMS Wryneck (Lt.Cdr. R.H.D. Lane, RN) and HMAS Waterhen (Lt.Cdr. J.H. Swain, RN). HMS Decoy had completed temporary repairs at Alexandria to the damage she had sustained in an air attack on 13 November. She was to proceed to the Malta Dockyard for permanent repairs.
At 0500B/25, HMS Hero (Cdr. H.W. Biggs, DSO, RN) and HMS Hereward (Lt.Cdr. C.W. Greening, RN) departed Malta to make rendez-vous the next day with ‘Force A’.
At 0645B/25, Illustrious flew off fighter and A/S patrols.
Around 1600B/25, having completed their exercises, the 3rd Cruiser Squadron joined ‘Force A’.
At 2000B/25, ‘Force A’ was in position 34°25’N, 26°33’E, steering 000°.
26 November 1940.
At 0030B/26, ‘Force A’ changed course to 285°.
At 0230B/26, HMS Illustrious, with HMS Gloucester, HMS Glasgow, HMS Janus, HMS Juno, HMS Mohawk and HMS Nubian split off for an air attack on Port Laki, Leros.
At 0300B/26, HMS Illustrious began to fly off the aircraft involved in the raid, which were a total of 15.
At 0600B/26, off Suda Bay, the aircraft returned to HMS Illustrious. They reported that targets were difficult to distinguish but fires were started in the dockyard and other areas. Two aircraft attacked a ship, believed to be a cruiser, but the results were unobserved. One aircraft failed to return.
Meanwhile, at 0500B/26, HMS York, had been detached to refuel at Suda Bay and then to join the Rear-Admiral 3rd Cruiser Squadron (in Gloucester) off Cape Matapan.
The remainder of ‘Force A’ entered Suda Bay between 0700 and 0830B/26. The destroyers were fuelled there.
A fighter patrol was maintained over the harbour until ‘Force A’ sailed again around 1030B/26. They then set course for the Kithera Channel.
Meanwhile convoy MW 4 had arrived at Malta around 0800B/26. Also HMS Malaya and HMS Ramillies had put into the harbour.
At noon, ‘Force A’ was in position 35°37’N, 24°20’E. As it was considered that the fleet had been located by enemy aircraft a fighter patrol was flown off and maintained for the remainder of the day (during daylight hours).
Also around noon HMS Ramillies, HMS Newcastle (Capt. E.A. Aylmer, DSC, RN), HMS Coventry, HMS Greyhound, HMS Gallant, HMS Hereward, HMS Defender and HMS Diamond departed Malta to join HMS Berwick at sea and then proceed westwards to join the fleet in the western Mediterranean.
At 1600B/26, ‘Force A’ was in position 35°44’N, 23°05’E. At 1630B/26, Convoy ME 4 departed Malta for Alexandria. This convoy was made up of the transports Waiwera (12435 GRT, built 1934), Cornwall (10603 GRT, built 1920), Rodi (3220 GRT, built 1928, former Italian), Volo (1587 GRT, built 1938) and Devis (6054 GRT, built 1938). Escort was provided by HMS Calcutta, HMAS Vampire, HMAS Vendetta and HMAS Voyager.
At 1815B/26, ‘Force A’ altered course to 220° and at 1930B/26, when in position 35°52’N, 22°08’E, to 290°. This course was maintained throughout the night to cover the convoy.
27 November 1940.
At 0001B/27, ‘Force A’ was in position 36°15’N, 20°40’E.
At 0600B/27, ‘Force A’ altered course to 230°.
At 0700B/27, an air search was flown off to search a sector of 295° to 025° but nothing was sighted.
At 1100B/27, the 3rd Cruiser Squadron (HMS York, HMS Gloucester and HMS Glasgow) rejoined the fleet having carried out a sweep to the north-west of the fleet through positions 36°06’N, 20°56’E and 37°48’N, 17°47’E.
At noon ‘Force A’ was in position 35°56’N, 17°47’E.
On receipt of enemy reports from ‘Force H’, the 3rd Cruiser Squadron was detached to the west to cover the ‘Collar convoy’ coming from that direction. They were to reach a rendez-vous position of 36°32’N, 12°00’E at 0400/28.
The fleet remained in a covering position for convoy ME 4 for the rest of the day. A second air search was flown off at 1430B/27 to search a sector between 310° and 010° but again sighted nothing.
28 November 1940.
At 0230B/28, ‘Force A’ was in position 35°15’N, 14°24’E. Course was altered to 320° to rendez-vous with the ‘Collar convoy’ in position 36°00’N, 13°25’E.
At 0700B/28, HMS Wryneck was detached to fuel at Malta, she returned in the afternoon.
At 0800B/28, the 3rd Cruiser Squadron was sighted and one hour later rendezvous was made with the ‘Collar convoy’ in position 36°02’N, 13°18’E. HMS Decoy and HMS Hotspur (Cdr. H.F.H Layman, DSO, RN) were detached with the merchant vessels Clan Forbes (7529 GRT, built 1938) and Clan Fraser (7529 GRT, built 1939) to Malta. Where they arrived at 1430B/27. The destroyers also remained at Malta where they were to refit / be repaired. At the same time HMS Greyhound joined the destroyer screen of the fleet.
The merchant vessel New Zealand Star (10740 GRT, built 1935) proceeded eastwards escorted by HMS Defender and HMS Hereward. Cover was provided by HMS Manchester (Capt. H.A. Packer, RN) and HMS Southampton (Capt. B.C.B. Brooke, RN).
At 1200B/28, ‘Force A’ was in position 35°41’N, 14°11’E. Half an hour later course was altered to 270° to close the corvettes HMS Peony (Lt.Cdr. (rtd.) M.B. Sherwood, DSO, RN), HMS Salvia (Lt.Cdr. J.I. Miller, DSO, RD, RNR), HMS Gloxinia (Lt.Cdr. A.J.C. Pomeroy, RNVR) and HMS Hyacinth (T/Lt. F.C. Hopkins, RNR) which were astern of the convoyas they had been unable to keep up. They were sighted at 1245B/28 and course was then altered to 180°.
At 1250B/28, HMS Glasgow was attacked by six Italian JU-87 dive bombers. One bomb fell within 30 yards from the ship but all the others missed by a wider margin. Glasgow sustained no damage or casualties.
Of the corvettes HMS Gloxinia had to put into Malta with the defects, while the remaining three proceeded to Suda Bay.
At 1600B/28, ‘Force A’ was in position 35°20’N, 14°37’E. The 3rd Cruiser Squadron was again detached to patrol to the north, this time to cover the passage of the corvettes to Suda Bay.
At 1700B/28, HMS Griffin was detached to Malta with engine defects.
Meanwhile from the escort of convoy ME 4 (the group with HMS Malaya) the destroyers HMS Diamond and HMAS Waterhen were detached to escort convoy AS 7 from the Aegean to Port Said.
29 November 1940.
At 0001B/29, ‘Force A’ was in position 35°18’N, 17°03’E.
At 0730B/29, an air search was flown off to search a sector between 310° and 020°.
At 1200B/29, ‘Force A’ was in position 35°00’N, 21°00’E. The three remaining corvettes were at that time 80 nautical miles to the north-westward.
At 1330B/29, the 3rd Cruiser Squadron was detached to Suda Bay.
At 1450B/29, HMS Manchester and HMS Southampton joined ‘Force A’ but at 1720B/29 they were detached to proceed independently to Alexandria.
At 2000B/29, ‘Force A’ was in position 34°37’N, 23°20’E.
Convoy ME 4 arrived at Alexandria this day as did her escort ‘Force C’. Some of the merchant vessels (Volo, Rodi and Cornwall) continued on to Port Said escorted by HMAS Vendetta and HMAS Voyager.
30 November 1940.
At 0001B/30, ‘Force A’ was in position 34°00’N, 24°45’E.
In the morning HMS Manchester and HMS Southampton arrived at Alexandria.
Also in the morning HMS York, HMS Gloucester and HMS Glasgow arrived at Suda Bay as did the three corvettes.
Around 1800B/30, ‘Force A’ arrived at Alexandria.
The remaining ships of the convoy and their escorts arrived at Port Said on this day. (31)
25 Nov 1940
Operation Collar and the resulting Battle of Cape Spartivento.
See also the event for 23 November 1940 called ‘Operation MB 9’ for the events in the Eastern Mediterranean.
Departure of the convoy from Gibraltar / passage through the Straits of Gibraltar and plan of the operation.
During the night of 24/25 November 1940 the three merchants / troop transports, Clan Forbes (7529 GRT, built 1938), Clan Fraser (7529 GRT, built 1939) and New Zealand Star (10740 GRT, built 1935), passed the Straits of Gibraltar. To the eastward of Gibraltar they were joined by the four corvettes (HMS Peony (Lt.Cdr. (rtd.) M.B. Sherwood, DSO, RN), (HMS Salvia (Lt.Cdr. J.I. Miller, DSO, RD, RNR), HMS Gloxinia (Lt.Cdr. A.J.C. Pomeroy, RNVR) and HMS Hyacinth (T/Lt. F.C. Hopkins, RNR) that were part of Force ‘F’, which was the close support force of the convoy. The other ships of Force ‘F’ were the light cruisers HMS Manchester (Capt. H.A. Packer, RN) and HMS Southampton (Capt. B.C.B. Brooke, RN) and the destroyer HMS Hotspur (Cdr. H.F.H Layman, DSO, RN), which was in a damaged state and was to proceed to Malta for full repairs. These last three ships sailed at 0800/25. The cruisers had each about 700 RAF and other military personnel onboard that were to be transported to Alexandria.
The cover force for this convoy, force ‘B’ also left Gibraltar at 0800/25. This force was made up of the battlecruiser HMS Renown (Capt. C.E.B. Simeon, RN, flying the flag of Vice-Admiral J.F. Somerville, KCB, DSO, RN), the aircraft carrier HMS Ark Royal (Capt. C.S. Holland, RN), the light cruisers HMS Sheffield (Capt. C.A.A. Larcom, RN) and HMS Despatch (Commodore 2nd cl. C.E. Douglas-Pennant, DSC, RN). They were escorted by destroyers from the 8th and 13th Destroyer Flotillas; HMS Faulknor (Capt. A.F. de Salis, RN, Capt. D.8), HMS Firedrake (Lt.Cdr. S.H. Norris, DSC, RN), HMS Forester (Lt.Cdr. E.B. Tancock, RN), HMS Fury (Lt.Cdr. T.C. Robinson, RN), HMS Duncan (Capt. A.D.B. James, RN, Capt. D.13), HMS Wishart (Cdr. E.T. Cooper, RN), HMS Vidette (Lt. E.N. Walmsley, RN), HMS Encounter (Lt.Cdr. E.V.St.J. Morgan, RN), HMS Kelvin (Cdr. J.H. Allison, DSO, RN) and HMS Jaguar (Lt.Cdr. J.F.W. Hine, RN).
Force ‘F’ and the merchant ship New Zealand Star were to proceed to Alexandria except for HMS Hotspur which was to detach to Malta as mentioned earlier as well as the other two merchant ships. Force ‘B’ was to cover Force ‘F’ and the merchant ships during the passage of the Western Mediterranean. To the south of Sardinia these forces were to be joined around noon on 27 November 1940 by Force ‘D’ which came from the Eastern Mediterranean and was made up of the battleship HMS Ramillies (Capt. A.D. Reid, RN), the heavy cruiser HMS Berwick (Capt. G.L. Warren, RN), the light cruiser HMS Newcastle (Capt. E.A. Aylmer, DSC, RN) and the AA cruiser HMS Coventry (Capt. D. Gilmour, RN). They were escorted by the destroyers HMS Defender (Lt.Cdr. G.L. Farnfield, RN), HMS Diamond (Lt.Cdr. P.A. Cartwright, RN), HMS Gallant (Lt.Cdr. C.P.F. Brown, RN), HMS Greyhound (Cdr. W.R. Marshall A'Deane, DSC, RN) and HMS Hereward (Lt.Cdr. C.W. Greening, RN). [actually HMS Diamond however did not join Force 'D'] All forces were then to proceed towards the Sicilian narrows for a position between Sicily and Cape Bon which was to be reached at dusk. After dark Force ’F’, reinforced by HMS Coventry and the destroyers from Force ‘D’ were then to proceed through the narrows to the Eastern Mediterranean where they would be met the next day by ships of the Mediterranean Fleet. Force ‘B’ with HMS Ramillies, HMS Berwick and HMS Newcastle from Force ‘D’ were then to return to Gibraltar.
Disposition of British forces at 0800 hours, 27 November 1940.
At 0800/27, about half an hour before sunrise, the situation was as follows. Vice-Admiral Somerville in HMS Renown, with HMS Ark Royal, HMS Sheffield and four destroyers were in position 37°48’N, 07°24’E (about 95 nautical miles south-west of Cape Spartivento, Sardinia) steering 083° at 16 knots.
Some 25 nautical miles to the south-west of him, the Vice-Admiral 18th cruiser squadron in HMS Manchester, with HMS Southampton, HMS Despatch and five destroyers were in company with the convoy in position 37°37’N, 06°54’E. The four corvettes had been unable to keep up with the convoy and were about 10 nautical miles to the westward of it. The visibility was excellent, the wind south-easterly, force 3 to 4 and the sea was calm.
At this time HMS Ark Royal flew off a section of fighters, one A/S patrol, one meteorological machine and seven reconnaissance aircraft. Vice-Admiral Somerville continued on his easterly course to concentrate with Force ‘D’ which was approaching from the Skerki Bank. At 0900 hours he changed course to the south-west to join the convoy to provide additional AA defence for the convoy for expected air attacks from Sardinian aerodromes.
Reconnaissance aircraft report enemy forces at sea.
Shortly before the course change, at 0852/27 one of Ark Royal’s aicraft sighted a group of enemy warships about 25 nautical miles to the southward of Cape Spartivento and while closing to investigate at 0906 hours sent an alarm report of four cruisers and six destroyers, which, however was not received by any ship of the British forces. On sighting the convoy at 0920 hours, HMS Renown maneuvered to pass astern of it and take station to the southward and up sun, in the probable direction of any air attack. At 0956 hours, while still on the port quarter of the convoy, Vice-Admiral Somerville received from HMS Ark Royal an aircraft report timed 0920/27, of five cruisers and five destroyers some 65 nautical miles to the north-eastward of him.
Steam was at once ordered for full speed and screens of two destroyers each were arranged for both HMS Ark Royal and the merchant ships. Further reports from aircraft, confirmed by HMS Ark Royal, established by 1015/27 the presence of enemy battleships and cruisers and HMS Renown altered course to 075° to join HMS Ramillies increasing speed as rapidly as possible to 28 knots.
Measures to safeguard the convoy and to join Force ‘D’.
At 1035/27 the plot showed enemy forces to the north-east but their composition and relative position were still in doubt. In these circumstances Vice-Admiral Somerville decided that the convoy should continue to its destination steering a south-easterly course (120°) in order to keep clear of any action which might develop. It was given an escort of two cruisers, HMS Despatch and HMS Coventry and the destroyers HMS Duncan and HMS Wishart. The remaining two cruisers and three destroyers of Force ‘F’ were ordered to join Force ‘B’ which steered to make contact with Force ‘D’ which was approaching from the east and then to attack the enemy together. HMS Ark Royal was ordered to prepare and fly off a torpedo bomber striking force. She was to act independently escorted by HMS Kelvin and HMS Jaguar and under cover from the battlefleet.
At 1058/27 a Sunderland flying boat closed HMS Renown and reported Force ‘D’ bearing 070°, range 34 nautical miles. As the junction of the two forces seemed to be assured, the speed was reduced to 24 knots, in order to maintain a position between the convoy and the enemy force which estimated position was bearing 025°, range 50 nautical miles. The Sunderland flying boat was ordered to shadow and report its composition.
The cruisers HMS Manchester, HMS Southampton and HMS Sheffield had meanwhile concentrated with the destroyers in the van, bearing 5 nautical miles from HMS Renown in the direction of the enemy.
Reports from the reconnaissance aircraft of HMS Ark Royal contained a number of discrepancies which made it impossible to obtain a clear picture of the situation. Two groups of cruisers had been reported, as well as two battleships. It seemed certain that five or six cruisers were present, but the number of battleships remained in doubt. But whatever the composition of the enemy force in order to get the convoy through Vice-Admiral Somerville wanted to attack as soon as possible. At 1115/27 the enemy was reported to be changing course to the eastward.
All this time Force ‘D’ had been coming westwards and at 1128/27 they were sighted from HMS Renown bearing 073°, range about 24 nautical miles. The aircraft reports now indicated that the enemy force was made up of two battleships, six or more cruisers and a considerable number of destroyers. The action seemed likely to develop into a chase, and HMS Ramillies was therefore ordered to steer 045°, so as not to lose ground due to her slow speed. Vice-Admiral Holland was put in command of all the cruisers in the van and HMS Berwick and HMS Newcastle from Force ‘D’ were ordered to join him. It was shortly after this that HMS Ark Royal flew off her first torpedo bombers striking force.
The approach on the enemy.
At 1134 hours, Vice-Admiral Somerville increased to 28 knots and at 1140 hours altered course to 050° to close the enemy. The position of the British forces was now as follows. Fine on the port bow of HMS Renown were HMS Manchester, HMS Southampton and HMS Sheffield in single line ahead. HMS Berwick and HMS Newcastle was coming from the eastward to join them. Two miles astern HMS Faulknor (Capt. D 8) was gradually collecting the other ships of his Flotilla and HMS Encounter some of which had been screening the convoy. The four destroyers of Force ‘D’, HMS Defender, HMS Gallant, HMS Greyhound and HMS Hereward were proceeding westwards to join and were eventually stationed bearing 270°, 3 nautical miles from her.
Ten nautical miles fine on the starboard bow of HMS Renown, HMS Ramillies was altering to a parallel course. HMS Ark Royal had dropped some distance astern. She was carrying out flying operations between the main force and the convoy, which was now about 22 nautical miles west-south-west of HMS Renown.
At 1154 hours, the Sunderland aircraft returned and reported six cruisers and eight destroyers bearing 330°, range 30 nautical miles from HMS Renown. Her report unfortunately did not give course and speed of the enemy and she disappeared from sight before these could be obtained. It appeared now that one of the enemy forces was further to the west than previously thought and might be in a position to outflank the main force and attack HMS Ark Royal and the convoy. Course was therefore altered to the north in order to avoid getting to far to the eastward.
Vice-Admiral Somerville’s appreciation of the situation at noon, 27 November 1940.
The prospects of bringing the enemy into action seemed favourable. The composition of the enemy force was still not definitely established but there did not appear to be more than two battleships with them. The British had effected their concentration of which the enemy seemed to be unaware, since no shadowing aircraft had been sighted or detected by RD/F. The speed of the enemy was reported as being 14 to 18 knots. The sun was immediately behind the British forces, giving them the advantage of light and if the nearest reported position of the enemy was correct there seemed every possibility of bringing off a simultaneous surface and torpedo bombers attack, providing that the enemy did not retire immediately at high speed. Vice-Admiral Somerville’s intentions were; To drive off the enemy from any position from which he could attack the convoy and to except some risk to the convoy providing there was a reasonable prospect of sinking one or more of the enemy battleships. To achieve the second of them he considered that the speed of the enemy would have to be reduced to 20 knots or less by torpedo bombers attacks and that the enemy battleships could be attacked by HMS Renown and HMS Ramillies in concert.
Contact with the enemy.
At 1207/27, HMS Renown developed a hot bearing on one shaft which limited her speed to 27.5 knots. At the same time puffs of smoke were observed on the horizon bearing 006°, and the cruisers of the van sighted masts between 006° and 346°. At 1213 hours a signal came in from HMS Ark Royal reporting the composition of the enemy as two battleships, six cruisers accompanied by destroyers. The British cruisers in the van by this time had formed a line of bearing 075° to 255° in the sequence from west to east, HMS Sheffield, HMS Southampton, HMS Newcastle, HMS Manchester, HMS Berwick.
The nine destroyers were stationed five miles bearing 040° from HMS Renown in order to be placed favourably to counter-attack any destroyers attempting a torpedo attack on HMS Renown or HMS Ramillies.
The situation as seen by the cruisers immediately before the action commenced was as follows. Between the bearings of 340° to 350° three enemy cruisers and some destroyers were visible at a range of about 11 nautical miles. These were steering a northerly course. This force will be referred to as ‘the Western Group’. A second group of cruisers, also accompanied by destroyers, which will be referred to as the ‘Eastern Group’ bore between 003° and 013°. This group was further away and steering approximately 100°.
The action
At 1220/27 the enemy cruisers in the ‘Western Group’ opened fire, and the British advanced forces immediately replied. The enemy’s first salvo fell close to HMS Manchester. As soon as fire was opened by the British cruisers, the Italians made smoke and retired on courses varying between north-west and north-east. Behind their smoke screen they seemed to be making large and frequent alterations of course.
At 1224 hours HMS Renown opened fire at the right hand ship in the ‘Western Group’ which was identified as a Zara-class heavy cruiser. Range was 26500 yards. After six salvoes, the target was lost in smoke. HMS Ramillies also fired two salvoes at maximum elevation to test the range but both fell short. She then dropped astern in the wake of HMS Renown and tried to follow at her best speed, 20.7 knots, throughout the action.
Just before opening fire HMS Renown had sighted two ships which were not making smoke, bearing 020° at extreme visibility. These were thought at first to be the Italian battleships but later turned out to be cruisers of the ‘Eastern Group’. On losing her first target HMS Renown altered course to starboard to close these supposed battleships and to bring the cruisers of the ‘Western Group’ broader on the bow. She had hardly done so when the centre ship of the latter group appeared momentarily through the smoke and was given two salvoes. Again course was altered to open ‘A’ arcs on the left hand ship, at which eight salvoes were fired before she too disappeared in the smoke at 1245 hours. At this moment two large ships steering westward emerged from the smoke cloud but before fire was opened these ships were identified as French liners.
The enemy by this time was on the run and had passed outside the range of our capital ships although at 1311 hours, HMS Renown fired two ranging salvoes at two ships of the ‘Eastern Group’ but both fell short. Meanwhile the British cruisers had been hotly engaged at ranges varying between 23000 and 16000 yards. Many straddles were obtained, but smoke rendered spotting and observation very difficult.
HMS Manchester, HMS Sheffield and HMS Newcastle all opened fire on the right-hand ship of the ‘Western Group’. HMS Berwick engaged the left-hand ship of the same group and HMS Southampton engaged the left-hand ship of the ‘Eastern Group’. HMS Manchester and HMS Sheffield continued to fire at the same ship for about 20 minutes (until 1236 and 1240 hours respectively) but HMS Newcastle shifted target to the ship already engaged by HMS Berwick after 18 salvoes. HMS Southampton, after 5 salvoes shifted target to a destroyer which was seen to be hit. At least one other destroyer is believed to have been hit during this phase and two hits by a large caliber shell on a cruiser were observed by HMS Faulknor at 1227 and HMS Newcastle at 1233 hours.
The enemy’s fire was accurate during the initial stages but when fully engaged it deteriorated rapidly and the spread became ragged. Their rate of fire was described as extremely slow. The only casualties on the British side occurred in HMS Berwick when at 1222 hours she received a hit from an 8” shell which put ‘Y’ turret out of action. HMS Manchester was straddled several times but despite being under continuous fire from 1221 to 1300 hours escaped unscatched. Her passengers were quite excited about having been in a sea battle.
At 1245 hours the cruisers altered course to 090° to prevent the enemy from working round ahead to attack the convoy. This brought the relative beating of the ‘Eastern Group’ to Red 40° and HMS Manchester once more engaged the left-hand ship. Five minutes later a further alteration of course to the southward was made to counter what appeared to be an attempt by the enemy to ‘cross the T’ of the cruisers. The enemy however at once resumed their north-easterly course and Vice-Admiral Holland led back to 070° at 1256 hours and 030° at 1258 hours. The rear ship of the enemy line was heavily on fire aft and she appeared to loose speed. But at 1259 hours picked up again and drew away with her consorts.
At 1301 hours the masts of a fresh enemy unit steering to the south-west were seen at extreme visibility right ahead of HMS Manchester. It bore 045° and two minutes later two battleships were identified in it. Their presence was quickly corroborated by large splashes which commenced to fall near HMS Manchester and HMS Berwick and these ships were reported to Vice-Admiral Somerville. The end on approach resulted in the range decreasing very rapidly and at 1305 hours Vice-Admiral Holland turned to cruisers to 120° with the dual purpose of working round the flank of the battleships and closing the gap to HMS Renown. The enemy battleships were not prepared to close and altered course to the north-eastward, presumably to join their 8” cruisers. Vice-Admiral Holland therefore altered course to 090° at 1308 hours and shortly afterwards to 050°. The enemy were by now rapidly running out of range and ten minutes later the action came to an end.
First attack by the torpedo bombers from HMS Ark Royal
Meanwhile a torpedo bomber striking force consisting of 11 Swordfish of no. 810 Squadron had been flown off from HMS Ark Royal at 1130 hours with orders to attack the Italian battleships. At 1216 hours they sighted two battleships and altered course as to approach them from the direction of the sun. The ships were identified as one Littorio-class and one Cavour-class. They were screened by seven destroyers. Enemy course was easterly at a speed of 18 knots. The leading battleship (Littorio-class) was selected as the target and all torpedoes were dropped inside the destroyer screen at ranges of 700 to 800 yards. One hit was observed abaft the after funnel and another explosion was seen just astern of the target. Yet another explosion was seen ahead of the Cavour-class. No other hits were seen. All aircraft returned safely to HMS Ark Royal.
Vice-Admiral Somerville’s Appreciation at 1315/27.
At 1315/27 firing had practically ceased owning to the enemy drawing out of range. The heavy smoke made by the Italians during the chase had prevented accurate fire, and so far as was known, no serious damage was inflicted on them. The torpedo bomber striking force from HMS Ark Royal had attacked but no report had been received yet but it seemed evident that the speed of the enemy had not been materially reduced.
The British forces were meanwhile rapidly closing the enemy coast. The main object of the whole operation was the safe passage of the convoy. The main enemy units had been driven off far enough that they could no longer interfere with it. It was also important to provide additional AA protection to the convoy against enemy air attack at dusk and in order to reach the convoy in time to do this course had to be set for it before 1400 hours so it was decided to break off the chase.
The chase broken off and further attacks by aircraft from HMS Ark Royal.
Around 1345/27, a damaged enemy cruiser was reported, Vice-Admiral Somerville considered sending HMS Berwick and HMS Newcastle north to finish this ship off. As these two cruisers also needed a cover/support force this idea was quickly abandoned. HMS Ark Royal was ordered to attack this cruiser with aircraft. A second torpedo bomber squadron was about to take off and Skua dive bombers were also being armed. Capt. Holland of the Ark Royal intended to attack the battleships again with the torpedo bombers and sent out the dive bombers to attack the damaged cruiser.
The torpedo bomber force of 9 Swordfish was flown off at 1415 hours. The Squadron Leader was given the enemy battleships as his objective, but with the full liberty to change it to his discretion, as he alone would be in a position to judge the possibility or otherwise achieving a successful attack.
The aircraft sighted three cruisers escorted by four destroyers about 12 nautical miles off the south-east coast of Sardinia, steering to the eastward at high speed. Some 8 nautical miles ahead of these cruisers were the two battleships escorted by about ten destroyers. There was a total absence of cloud cover, and it was considered essential to attack from the direction of the sun, if any degree of surprise were to be achieved. As any attempt, however, to gain such a position with regard to the battleships would inevitably have led to the striking force being sighted by the cruisers it was decided to attack the latter.
The attack was carried out at 1520/27 and was not sighted by the enemy until very late, only two salvoes being fired against the aircraft before the first torpedo was dropped. As the first aircraft reached the dropping position, the cruisers turned together to starboard causing several of the following Swordfish who had already committed to their drop to miss their targets. One hit was claimed on the rear cruiser and a possible one on the leading cruiser. Two Swordfish were hit by shrapnel from enemy AA fire but air aircraft returned safely to HMS Ark Royal.
A striking force of 7 Skua’s had meanwhile been flown off at 1500 hours. They failed to locate the reported damaged cruiser but reported to have carried out an attack on three light cruisers steering north of the south-west corner of Sardinia. Two near misses may have caused some damage to the rear ship. On the way back to HMS Ark Royal they encountered and shot down an Italian RO 43 reconnaissance aircraft from the battleship Vittorio Venoto.
Enemy air attacks on British Forces.
While these British flying operations were taking place Vice-Admiral Somerville had been steering to the southward in accordance with his decision to close the convoy. HMS Ark Royal had lost sight of HMS Renown to the north-eastward about 1250 hours, but since the receipt of the signal ordering the retirement of the British forces, Captain Holland had been making good a course of 090°, so far as his flying operations permitted, in order to rejoin the Flag. The first RD/F indications of the presence of enemy aircraft were received in HMS Renown at 1407 hours. Shortly afterwards bomb splashes were seen on the horizon when the Italian aircraft were attacked by Fulmars from the Ark Royal and several machines jettisoned their bombs. Ten enemy aircraft were then seen to be coming in and they eventually dropped their bombs well clear of the heavy ships but close to the screening destroyers.
Two further attacks were made around 1645/27 when two groups of five aircraft each concentrated on HMS Ark Royal, which by that time was in company with the Fleet, but owning to flying operations, not actually in the line. Apart from a few bombs being jettisoned again as a result of the interception by the Fulmar fighters, the high level bombing performed from a height of 13000 feet was most accurate. Some 30 bombs fell near HMS Ark Royal, two at least within 10 yards, and she was completely obscured by splashes.
About 1,5 minutes after this attack a stick of bombs dropped by four Caproni bombers, which had not been seen during the previous attack, missed HMS Ark Royal by a very narrow margin. HMS Ark Royal fortunately suffered no damage.
The British ships sighted the convoy at 1700/27 and proceeded to join it for passage to the Sicilian narrows.
The Battle of Cape Spartivento from the Italian side
At noon on 26 November 1940 the Italian had received reports that British forces had left Gibraltar and Alexandria the day before. The Italians then went to sea from Naples and Messina in three forces;
From Naples.
Battleships Vittorio Veneto and Giulio Cesare, escorted by the 13th Destroyer Flotilla made up of the Granatiere, Fuciliere,
From Messina. Heavy cruisers from the 3rd Cruiser Division Trieste, Trento and Bolzano and the 12th Destroyer Flotilla made up of the Lanciere, Ascari, Carabiniere and Libeccio. This last destroyer had temporarily replaced the Carabinieri.
These forces were to intercept the British forces coming from Gibraltar.
From Trapani, Sicily, torpedo-boats from the 10th Torpedo-boat Flotilla, Vega, Sagittario, Alcione and Sirio, were ordered to patrol in the Sicily narrows to scout for possible British forces proceeding westwards from the Eastern Meditarranean. Sirio actually made an unobserved torpedo attack shortly after midnight (during the night of 26/27 November) on a group of seven enemy warships (Force ‘D’).
By 1015/27 the Italian forces were in the Sardinia-Sicily Channel. The only information available to the Italian Commander-in-Chief (Admiral Campioni in the Vittorio Veneto) up to that moment was that Force H had left Gibraltar westwards on the 25th and on the same day a force had also left Alexandria westwards. He assumed correctly that the force attacked by the torpedo-boat Sirio was en-route to rendez-vous with Force H.
Then at 1015 hours he received an aircraft report (from an aircraft catapulted by the heavy cruiser Bolzano) that at 0945/27 it had sighted a group of enemy warships comprising one battleship, two light cruisers and four destroyers 20 nautical miles north of Cape de Fer. Enemy course was 090°. These were also seven warships, the same number as reported by torpedo-boat Sirio the night before but these were too far to the West to be the same ships.
Then at 1144 hours he received another aircraft report (from an aircraft catapulted by the heavy cruiser Gorizia) that confirmed the position given at 1015 hours. It did not report the two cruisers however but by that time these had split from HMS Renown and had gone ahead.
Acting on the report of the aircraft of the Bolzano the Italian Admiral turned to course 135° at 1128/27. Both divisions of cruisers also turned round. He then thought to be making for an encounter with HMS Renown and two cruisers supported by a few destroyers. The 1144/27 report from the aircraft of the Gorizia confirmed him in this belief. The Italian admiral was unaware of the fact that by that time Force ‘D’ had already joined with the other British forces. He was also unaware that HMS Ark Royal was present although he was aware of the fact that she had left Gibraltar westwards with the other ships two days before.
The Italian admiral was very careful, after the attack on Taranto only two battleships were operational and he could not afford any further reduction in strength of the capital ships. He therefore decided that his forces were not to come in action but before he could sent out a signal regarding this his cruiser were already in action with the British. They were ordered to break off the action and retire at high speed.
The Italians were then attacked by aircraft from the Ark Royal but despite the claim by the British for hits none were actually obtained. The Italians claimed to have shot down two aircraft but this also was not the case.
At 1235/27, the destroyer Lanciere was hit by a 6” shell in the after engine room. This shell is thought to have been originated from HMS Southampton. She continued at 23 knots on her forward engines but at 1240 hours another shell struck her amidships on the port side, penetrating a petrol tank. Then a third shell struck her on the starboard side without exploding and without penetrating the hull. Around 1300 hours she came to a stop with no water in her boilers, and asked for a tow. Ater about one hour her boilers were relit (seawater being used to feed them) and her forward engines were restarted. At 1440 hours, the Ascari took her in tow and both made for Cagliari at 7 knots. The 3rd Cruiser Division was ordered to protect the retreat of these destroyers.
A force of 10 bombers and 5 fighters had taken off at 1330 hours. These were driven off but the Fulmars from HMS Ark Royal. Almost two hours later, at 1520 hours a second force of 20 bombers took off. It were these aircraft that attacked and almost hit HMS Ark Royal.
Convoy operations in the Eastern Mediterranean and the subsequent movements of the ‘Collar’ convoy.
Before and during operation Collar there were also convoy movements in the Eastern Mediterranean going on. [See also the event for 23 November 1940 called ‘Operation MB 9’ for the events in the Eastern Mediterranean.]
After passing through the Sicilian narrows the Clan Forbes and Clan Fraser went to Malta escorted by HMS Hotspur and HMS Decoy. Both destroyers were to repair and refit at Malta. The New Zealand Star proceeded to Suda Bay escorted by HMS Defender and HMS Hereward and covered part of the way by HMS Manchester and HMS Southampton. (32)
2 Dec 1940
HMS Southampton (Capt. B.C.B. Brooke, RN) departed Alexandria for Port Said. (31)
3 Dec 1940
HMS Southampton (Capt. B.C.B. Brooke, RN) arrived at Port Said.
She then transited the Suez Canal southbound and arrived at Suez later the same day. (33)
4 Dec 1940
HMS Southampton (Capt. B.C.B. Brooke, RN) departed Suez for Aden. (33)
6 Dec 1940
HMS Southampton (Capt. B.C.B. Brooke, RN) arrived at Aden. (33)
7 Dec 1940
HMS Southampton (Capt. B.C.B. Brooke, RN) departed Aden to patrol off Italian Somaliland and to proceed to Mombasa afterwards. (33)
10 Dec 1940
HMS Southampton (Capt. B.C.B. Brooke, RN) conducted a bombardment against shipping anchored off Kismayu, Italian Somaliland.
She was assisted during the bombardment by Royal Air Force fighters. (34)
11 Dec 1940
HMS Southampton (Capt. B.C.B. Brooke, RN) arrived at Mombasa. (33)
14 Dec 1940
HMS Southampton (Capt. B.C.B. Brooke, RN) departed Mombasa for Zanzibar where she was to embark the Governor-designate for Aden.
Following this she set course for an ocean rendez-vous with convoy WS 4B.
[For more info on convoy WS 4B, see the event 'Convoy WS 4B' for 18 November 1940.] (35)
18 Dec 1940
Around 1000 hours (zone -3) HMS Southampton (Capt. B.C.B. Brooke, RN) joined convoy WS 4B in approximate position 22°30'S, 41°00'E.
[For more info on convoy WS 4B, see the event 'Convoy WS 4B' for 18 November 1940.] (36)
25 Dec 1940
HMS Southampton (Capt. B.C.B. Brooke, RN) briefly parted company with convoy WS 4B to fuel at Aden after which she immediately rejoined the convoy.
[For more info on convoy WS 4B, see the event 'Convoy WS 4B' for 18 November 1940.] (34)
28 Dec 1940
Convoy WS 4B arrived at Suez. It was escorted by the light cruiser HMS Southampton (Capt. B.C.B. Brooke, RN), AA cruiser HMS Carlisle (Capt. G.M.B. Langley, OBE, RN) and the destroyers HMS Kandahar (Cdr. W.G.A. Robson, RN) and HMS Kimberley (Lt.Cdr. J.S.M. Richardson, RN).
[For more info on this convoy, see the event 'Convoy WS 4B' for 18 November 1940.]
6 Jan 1941
Operations Excess and Operation MC 4.
Convoy operations in the Mediterranean.
Timespan; 6 January to 18 January 1941.
The principal object of this operation was the passage of a convoy of four ships (five were intended, see below) from Gibraltar to Malta and Piraeus (Operation Excess). One of these was to unload her stores at Malta, the other three had supplies on board for the Greek army.
Three subsidiary convoys (Operation M.C. 4) were to be run between Malta and Egypt. These consisted of two fast ships from Malta to Alexandria (convoy M.E. 5½), two fast ships from Alexandria to Malta (convoy M.W. 5½) and six slow ships from Malta to Port Said and Alexandria (convoy M.E. 6).
Composition of the convoys and their escort.
The ‘Excess convoy from Gibraltar’ was made up of one ship that was to proceed with stores to Malta. This was the Essex (11063 GRT, built 1936). The three other ships were to proceed with stores to Piraeus, these were the Clan Cumming (7264 GRT, built 1938), Clan Macdonald (9653 GRT, built 1939) and Empire Song (9228 GRT, built 1940). It had the light cruiser HMS Bonaventure (Capt. H.G. Egerton, RN) and the destroyers HMS Hasty (Lt.Cdr. L.R.K. Tyrwhitt, RN), HMS Hero (Cdr. H.W. Biggs, DSO, RN), HMS Hereward (Cdr. C.W. Greening, RN) and HMS Duncan (A/Capt. A.D.B. James, RN) as close escort (‘Force F’). A fifth merchant ship was to have been part of this convoy and was to have proceeded to Malta with stores and troops. However this ship, the Northern Prince (10917 GRT, built 1929) grounded at Gibraltar and was not able to join the convoy. The about four-hundred troops now boarded HMS Bonaventure for passage to Malta.
The most dangerous part of the ‘Excess convoy’ would be the part between Sardinia and Malta. For a stretch of about 400 nautical miles ships were exposed to enemy air attack from bases in Sardinia and Sicily less then 150 nautical miles away from the convoy’s track. Also submarines and surface torpedo craft were a constant menace. An attack by large enemy surface forces was thought less likely although this was potentially more dangerous.
’Convoy M.W.5 ½ from Alexandria to Malta’ made the passage westwards at the same time as the Mediterranean fleet moved westwards (see below). This convoy was made up of HMS Breconshire (9776 GRT, built 1939) and Clan Macauley (10492 GRT, built 1936). These ships were escorted by HMS Calcutta (Capt. D.M. Lees, DSO, RN), HMS Defender (Lt.Cdr. G.L. Farnfield, RN) and HMS Diamond (Lt.Cdr. P.A. Cartwright, RN).
’Convoy’s M.E. 5½ and M.E. 6’ that sailed from Malta to Egypt will be dealth with later on.
Cover forces for these convoy’s
At Gibraltar there was ‘Force H’ which had the following ships available for the operation. Battlecruiser HMS Renown (Capt. C.E.B. Simeon, RN and flagship of Vice-Admiral J.F. Somerville, RN, KCB, DSO, RN), battleship HMS Malaya (Capt. A.F.E. Palliser, DSC, RN), aircraft carrier HMS Ark Royal (Capt. C.S. Holland, RN), light cruiser HMS Sheffield (Capt. C.A.A. Larcom, RN) and the destroyers HMS Faulknor (Capt. A.F. de Salis, RN), HMS Firedrake (Lt.Cdr. S.H. Norris, DSO, DSC, RN), HMS Forester (Lt.Cdr. E.B. Tancock, DSC and Bar, RN), HMS Fortune (Lt.Cdr. E.N. Sinclair, RN), HMS Foxhound (Cdr. G.H. Peters, DSC, RN), HMS Fury (Lt.Cdr. T.C. Robinson, RN) and HMS Jaguar (Lt.Cdr. J.F.W. Hine, RN).
’Force H’ was to provide cover for the ‘Excess convoy’ from Gibraltar to the Sicilian narrows.
South-south-west of Sardina ‘Force H’ was to be reinforced by ‘Force B’ which came from the eastern Mediterranean and was made up of the light cruisers HMS Gloucester (Capt. H.A. Rowley, RN, flying the flag of Rear-Admiral E. de F. Renouf, CVO, RN), HMS Southampton (Capt. B.C.B. Brooke, RN) and the destroyer HMS Ilex (Capt. H.St.L. Nicholson, DSO and Bar, RN). The destroyer HMS Janus (Cdr. J.A.W. Tothill, RN) had also been part of 'Force B' during the passage from Alexandria to Malta but remained there for a quick docking. After this docking she departed Malta around noon on the 10th to join 'Force A'.
Further cover was to be provided by ‘Force A’, this was the Mediterranean fleet based at Alexandria. This force was made up of the following warships. Battleships HMS Warspite (Capt. D.B. Fisher, CBE, RN, flying the flag of Admiral Sir A.B. Cunningham, KCB, DSO, RN), HMS Valiant (Capt. C.E. Morgan, DSO, RN), aircraft carrier HMS Illustrious (Capt. D.W. Boyd, CBE, DSC, RN, flying the flag of Rear-Admiral A.L.St.G. Lyster, CB, CVO, DSO, RN) and the destroyers HMS Jervis (Capt. P.J. Mack, DSO, RN), HMS Juno (Cdr. St.J.R.J. Thyrwhitt, RN), HMS Mohawk (Cdr. J.W.M. Eaton, RN), HMS Nubian (Cdr. R.W. Ravenhill, RN), HMS Greyhound (Cdr. W.R. Marshall-A’Deane, DSO, DSC, RN), HMS Gallant (Lt.Cdr. C.P.F. Brown, DSC, RN), HMS Griffin (Lt.Cdr. J. Lee-Barber, RN) and HMS Dainty (Cdr. M.S. Thomas, DSO, RN).
During the passage of the ‘Excess convoy’ three submarines were stationed off Sardinia. HMS Pandora off the east coast and HMS Triumph and HMS Upholder were stationed to the south of Sardinia.
Chronology of events
The actual ‘Excess convoy’ and it’s escort (Force F) departed Gibraltar before dark in the evening of January 6th. Course was set to the west as if to proceed into the Atlantic. This was done to deceive enemy spies based in Spain. They turned back in the night after moonset and passes Europa Point well before daylight next morning. At dawn the next morning HMS Bonaventure parted company with the convoy to make rendez-vous with ‘Force H’ which departed Gibraltar around that time. All that day the ‘Excess convoy’ followed the Spanish coast so as if to make for a Spanish port. During the night of 7/8 January the convoy crossed over towards the coast of North-Africa and steered eastwards towards the Sicilian narrows while keeping about 30 nautical miles from the shore of North Africa. ‘Force H’ overtook the convoy during the night and was now stationed to the north-east of it to shield it from Italian air attack. If Italian naval units were reported the plan was that he would join the convoy.
In the morning of the 8th, HMS Bonaventure rejoined the actual ‘Excess convoy’. Late in the afternoon of the 8th HMS Malaya escorted by HMS Firedrake and HMS Jaguar parted company with ‘Force H’ and joined the ‘Excess convoy’ very early in the evening.
At dawn on the 9th ‘Force H’ was ahead of the convoy. At 0500/9, while in position 37°45’N, 07°15’E, HMS Ark Royal flew off five Swordfish aircraft for Malta which was still some 350 nautical miles away. All of which arrived safely. ‘Force H’ then turned back and joined the ‘Excess convoy’ at 0900/9 about 120 nautical miles south-west of Sardinia. HMS Ark Royal meanwhile had launched several aircraft, one of her reconnaissance aircraft reported at 0918 hours that it had sighted two enemy cruisers and two destroyers but this soon turned out to be Rear-Admiral Renouf’s ‘Force B’ which was to join the Excess convoy for the passage through the Sicilian narrows. They joined the convoy about one hour later.
’Force B’ had departed Alexandria in the morning of the 6th with troop for Malta on board. They had arrived at Malta in the morning of the 8th and after disembarking the troops (25 officers and 484 other ranks of the Army and RAF) sailed early in the afternoon. At 0900/9 ‘Force B’ was sighted by an Italian reconnaissance aircraft. This aircraft soon made off when being fired at. One hour later another Italian reconnaissance aircraft was however sighted. It was engaged by the fighter patrol from HMS Ark Royal but managed to escape. At 1320 hours, while in position 37°38’N, 08°31’E, Italian bombers arrived on the scene and made their attack on the convoy.
The convoy of the four merchant ships was steaming in two columns in line ahead, 1500 yards apart. HMS Gloucester and HMS Malaya were leading the columns while HMS Bonaventure and HMS Southampton were the sternmost ships. The seven destroyers were placed as a screen ahead of the convoy. ‘Force H’, with HMS Renown, HMS Ark Royal, HMS Sheffield and their five escorting destroyers were on the convoy’s port quarter, operating in close support. The mean line of advance was 088° and the ships were zigzagging at 14 knots.
The enemy consisted of ten Savoia bombers. HMS Sheffield detected them on her radar about 43 nautical miles off, this was the maximum range of her radar equipment. They were fine on the starboard bow and came into sight fourteen minutes later, flying down the starboard side of the convoy out of range of the AA guns at a eight of about 11000 feet. At 1346 hours, when they were broad on the bow, they started their attack. They came in from 145°, which was the bearing of the sun. All the ships opened up a very heavy fire and the enemy was diverted of their course. Eight of the aircraft were seen to drop bombs, some of which fell close to HMS Gloucester and HMS Malaya but no damage was caused. The other two bombers were seen to turn away during their approach. Both were shot down by a Fulmar fighter from HMS Ark Royal. Three men from their crews were picked up from the water. Another bombers is thought to have been shot down by HMS Bonaventure. The other seven are thought to have got away.
Nothing more happened during the afternoon of the 9th. Reconnaissance showed that the Italian fleet was not at sea so at dusk, while in position 37°42’N, 09°53’E, some 30 nautical miles west of the Sicilian narrows and north of Bizerta, Tunisia, ‘Force H’ parted company with the ‘Excess convoy’ and set course to return to Gibraltar. Rear-Admiral Renouf in HMS Gloucester meanwhile continued eastwards with the convoy with his three cruisers and five destroyers of forces ‘B’ and ‘F’.
They had a quiet night, passing Pantelleria after moonset. They remained in deep water to reduce the danger of mines. Next morning, at dawn on the 10th at 0720 hours, they encountered two Italian torpedo boats in position 36°30’N, 12°10’E. HMS Jaguar, the port wing destroyer in the screen, and HMS Bonaventure, stationed astern of the convoy columns, sighted the enemy at the same time. Initially thinking they might be destroyers from the Mediterranean Fleet, which the convoy was due to meet. British ships reported the contact by signal to Rear-Admiral Renouf. HMS Bonaventure challenged the ‘strangers’ and fired a star shell and then turned to engage the enemy working up to full speed. Rear-Admiral Renouf meanwhile turned away with the bulk of the convoy. HMS Southampton, HMS Jaguar and HMS Hereward hauled out from their stations on the engaged side of the convoy and made for the enemy. HMS Bonaventure meanwhile was engaging the right-hand ship of the pair. When the other three ships arrived on the scene Bonaventure shifted her fire to the other enemy ship which came towards her at full speed to attack. The enemy fired her torpedoes which HMS Bonaventure avoided. The four British ships now quickly stopped the enemy but she did not sink. In the end HMS Hereward torpedoed the damaged Italian torpedo boat some 40 minutes later. The other Italian torpedo-boat meanwhile had disappeared. [The Italian ships were the torpedo-boats Vega, which was sunk, and the Circe. HMS Boneventure had sustained some superficial damage from splinters during the action.
Enemy air attacks during 10 January.
At 0800/10, Admiral Cunningham arrived on the scene with ‘Force A’ before the fight was finished. ‘Force A’ turned to the south-east in the wake of the ‘Excess convoy around 0830 hours. While doing so, the destroyer HMS Gallant hit a mine and had her bow blown off. [This was a mine from the Italian minefield ‘7 AN’]. HMS Mohawk took the stricken destroyer in tow towards Malta escorted by HMS Bonaventure and HMS Griffin. They were later joined by HMS Gloucester and HMS Southampton. While HMS Mohawk was passing the towline two Italian torpedo planes attacked but they had to drop their torpedoes from long range and they missed. Between 1130 and 1800 hours, as the tow crept along at five or six knots, with their escort zig-zagging at 20 knots, they were attacked or threatened by aircraft ten times. Nearly all German high level bombers, which came in ones, twos or threes. The enemy dropped bombs in five out of the ten attempts but no hits were obtained. At 1300 hours German dive bombers arrived an obtained a near miss on HMS Southampton causing some minor damage.
At 0500/11, when about 15 nautical miles from Malta, all was going well and Rear-Admiral Renouf made off with for Suda Bay, Crete with HMS Gloucester, HMS Southampton and HMS Diamond. This last ship had joined the evening before. HMS Gallant, still being towed by HMS Mohawk and escorted by HMS Bonaventure and HMS Griffin arrived at Malta in the forenoon. At Malta, HMS Bonaventure disembarked the soldiers she had on board. [HMS Gallant was further damaged by bombs while at Malta and was eventually found to be beyond economical repair and was cannibalized for spares.]
Meanwhile, Admiral Cunningham in ‘Force A’ had a similar experience on a larger scale. He had sailed from Alexandria on the 7th and enemy aircraft spotted his force already on the same day. During the afternoon of the 10th heavy dive bombing attacks were pressed home by the enemy with skill and determination. The main target was HMS Illustrious. Had the enemy attacked the convoy itself the four transports would most likely all have been sunk, instead the Ilustrious was disabled and she would be out of action of many months.
At noon on the 10th the transports were steering south-eastward, zigzagging at 14 to 15 knots with an escort of three destroyers. At 1320 hours, HMS Calcutta joined them. HMS Warspite, HMS Illustrious and HMS Valiant were steaming in line ahead on the convoy’s starboard quarter, course 110° and zigzagging at 17 to 18 knots. These ships were screened by seven destroyers. The weather was clear, with high cloud.
The fleet was in position 35°59’N, 13°13’E some 55 nautical miles west of Malta when the battle began with an air attack by two Savoia torpedo planes which were detected six nautical miles away on the starboard beam at 1220 hours. They came in at a steady level, 150 feet above the water and dropped their torpedoes about 2500 yards from the battleships. They were sighted a minute before firing and the ships received them with a barrage from long- and short-range guns, altering course to avoid the torpedoes, which passed astern of the rearmost ship HMS Valiant. Five Fulmar fighters from the Illustrious had been patrolling above the fleet. One had returned before the attack being damaged while assisting to destroy a shadower some time before the attack. The other four aircraft chased the torpedo aircraft all the way to Linosa Island, which was about 20 miles to the westward. They claimed to have damaged both the enemy machines.
Directly after this attack, while the ships were reforming the line, a strong force of aircraft were reported at 1235 hours, coming from the northward some 30 miles away. The Fulmars, of course, were then a long way off, flying low and with little ammunition remaining. Actually two were even out of ammunition. They were ordered to return and the Illustrious sent up four fresh fighters as well as reliefs for the anti-submarine patrol. This meant a turn of 100° to starboard into the wind to fly off these aircraft. The enemy aircraft came into sight in the middle of this operation which lasted about four minutes. All the ships opened fire. The fleet had just got back to the proper course, 110°, and the Admiral had made the signal to assume loose formation, when the new attack began. The enemy had assembled astern of their target ‘in two very loose and flexible formations’ at a height of 12000 feet.
They were Junkers dive bombers, perhaps as many as 36, of which 18 to 24 attacked HMS Illustrious at 1240 hours, while a dozen attacked the battleships and the destroyer screen. They came down in flights of three on different bearings astern and on either beam, to release their bombs at heights from 1500 to 800 feet, ‘a very severe and brilliantly executed dive-bombing attack’ says Captain Boyd of the Illustrious. The ships altered course continually, and beginning with long-range controlled fire during the approach, shifted to barrage fire as the enemy dived for attack. The ships shot down at least three machines, while the eight Fulmar fighters that were up shot down five more, at the coast of one British machine. Even the two Fulmars that were out of ammo made dummy attacks and forced two Germans to turn away. But, as Captain Boyd pointed out ‘ at least twelve fighters in the air would have been required to make any impression on the enemy, and double that number to keep them off’.
HMS Illustrious was seriously damaged. She was hit six times, mostly with armour-piercing bombs of 1100 pounds. They wrecked the flight deck, destroyed nine aircraft on board and put half the 4.5” guns out of action, and did other damage, besides setting the ship on fire fore and aft and killing and wounding many of the ship’s company (13 officers and 113 ratings killed and 7 officers and 84 ratings injured) . The Warspite too, narrowly escaped serious injury, but got away with a split hawsepipe and a damaged anchor.
As HMS Illustrious was now useless as a carrier and likely to become a drag on the fleet Captain Boyd decided to make for Malta. The Commander-in-Chief gave her two destroyers as escort, one from his own screen and one from the convoy’s (these were HMS Hasty and HMS Jaguar) and she parted company accordingly. She had continual trouble with her steering gear, which at last broke down altogether, so that she had to steer with the engines, making only 17 to 18 knots. Her aircraft that were in the air also proceeded to Malta.
A third attack came at 1330 hours. By this time HMS Illustrious was 10 nautical miles north-eastward of the battleships which, due to the manoeuvres during the previous attack, were nearly as far away from the transports. The enemy came in again with high level bombers. Seven machines attacked the Illustrious and seven more the battleships. They were received with heavy AA fire. All the bombs they dropped fell wide. HMS Calcutta claimed to have destroyed one of the attackers.
More serious in it’s results was a second dive-bombing attack upon HMS Illustrious at 1610 hours. There were 15 JU-87’s Stuka’s escorted by 5 fighters. Actually 9 of the Stuka’s dropped their bombs, the other 6 were kept at bay due to heavy AA fire from the Illustrious, Hasty and Jaguar. One bomb hit and two near misses on the Illustrious were obtained by the enemy for the loss of one of their aircraft which was shot down by the Illustrious and the Jaguar. A few minutes later the 6 Stuka’s that had been driven off attacked the battleships but they again retired after fire was opened on them.
At 1715 hours, 17 more Stuka’s attacked the battleships. Again they were received with heavy AA fire. The enemy dropped their bombs from a greater height and non of them hit although splinters from a near miss killed a rating on board HMS Valiant and a bombs fell very near HMS Janus but it did not explode. The ships may have destroyed one aircraft with their AA fire. Three of the Fulmars from the Illustrious came from Malta and destroyed three of the attackers.
This turned out to be the end of the ordeal for the ‘Excess Convoy’ and its supporting ships of war, but not for HMS Illustrious which had one more encounter with the enemy before she reached Malta. At about 1920 hours, a little more then an hour after sunset and in moonlight, some aircraft approached from seaward when she was only five nautical miles from the entrance to Grand Harbour, Malta. She had received warning from Malta that enemy aircraft were about and she sighted two – probably torpedo planes. Illustrious, Hasty and Jaguar fired a blind barrage on which the enemy disappeared. Directly afterwards HMS Hasty obtained an Asdic contact and attacked it with depth charges, but whether it was a submarine remains uncertain. HMS Illustrious finally entered harbour at 2100 hours accompanied by HMS Jaguar which had passengers to land.
Movements of the actual ‘Excess Convoy’.
In the meantime, after the mild attack at 1340/10, the convoy went on its way unhindered. Its movements then became involved in those of the Malta to Egypt convoys, which were to sail under cover of the main operation with the special support of Vice-Admiral Pridham-Whippell’s ‘Force D’ which was made up of the cruisers HMS Orion (Capt. G.R.B. Back, RN, flying the flag of Vice-Admiral H.D. Pridham-Whippell, CB, CVO, RN), HMS Ajax (Capt. E.D.B. McCarthy, RN), HMAS Perth (Capt. P.W. Bowyer-Smith, RN) and HMS York (Capt. R.H. Portal, DSC, RN). The first of these convoys, the two ships of M.W. 5½ (see above), had left Alexandria for Malta on 7 January, some hours after Admiral Cunningham sailed westwards with ‘Force A’ to meet the ‘Excess Convoy’. To reinforce ' Force D ' the light cruiser HMAS Sydney (Capt. J.A. Collins, CB, RAN) and destroyer HMAS Stuart (Capt. H.M.L. Waller, DSO, RAN) departed Malta on 8 January 1941. They joined ' Force D ' on the 9th. Both transports of this convoy reached Malta without adventure in the morning of the 10th escorted by HMS Calcutta, HMS Diamond and HMS Defender. On arrival HMS Calcutta joined the six slow ships which made up convoy M.E. 6 which was bound for Port Said and Alexandria. The ships in this convoy were the; Devis (6054 GRT, built 1938), Hoegh Hood (tanker, Norwegian, 9351 GRT, built 1936), Pontfield (tanker, 8290 GRT, built 1940), Rodi (3220 GRT, built 1928, former Italian), Trocas (tanker, 7406 GRT, built 1927) and Volo (1587 GRT, built 1938). They were escorted by four corvettes; HMS Peony (Lt.Cdr.(Retd.) M.B. Sherwood, DSO, RN), HMS Salvia (Lt.Cdr. J.I. Miller, DSO, RN, RNR), HMS Hyacinth (T/Lt. F.C. Hopkins, RNR), HMS Gloxinia (Lt.Cdr. A.J.C. Pomeroy, RNVR). At the end of the searched channel this convoy was joined by ‘Force D’. HMS Calcutta was then ordered to join the ‘Excess Convoy’ and arrived in time to defend it from the Italian bombers as already described.
The last convoy, M.E. 5½, two fast ships (the Lanarkshire (8167 GRT, built 1940) and Waiwera (12435 GRT, built 1934)) bound for Alexandria, also left Malta in the morning of the 10th under escort of HMS Diamond. They were to join the ‘Excess Convoy’ until they were to turn to the south to clear Crete and then proceed to Alexandria. The ‘Excess Convoy’ would then proceed to Piraeus, Greece. The two convoys met that afternoon. The transport Essex then left and proceeded to Malta escorted by HMS Hero. After the Essex was safely inside Grand Harbour, HMS Hero joined the fleet.
Vice-Admiral Pridham-Whippell stayed with convoy M.E. 6 until dark on the 10th. As ‘Force A’ was somewhat behind due to the air attacks and Admiral Cunningham ordered Vice Admiral Pridham-Whippell to position HMS Orion and HMAS Perth to the north of the convoy to be in a good position in case of an attack by Italian surface forces. ‘Force A’ made good ground during the night and was some 25 nautical miles north of the convoy by daylight on the 11th at which time Orion and Perth joined ‘Force A’. Their forces stayed within a few miles of the convoy until the afternoon when they turned back to help HMS Gloucester, HMS Southampton which had come under air attack (see below). In the evening the ships destined for Alexandria left the convoy, while HMS Calcutta went ahead to Suda Bay to fuel there. The three ships and their destroyer escort continued on to Piraeus where they arrived safely next morning, at 1000 on the 12th.
HMS Ajax and HMS York had been ordered to join convoy M.E. 6. HMS Ajax however was ordered to proceed to Suda Bay soon after she had joined the convoy. In the morning of the 11th therefore, Rear-Admiral Renouf in HMS Gloucester and with HMS Southampton and HMS Diamond in company, was ordered to overtake the convoy and support it. They were at that moment steering for Suda Bay having left the disabled Gallant off Malta some hours before. Rear-Admiral Renouf altered course accordingly and made 24 knots against the convoys 9 to 10 knots. He also send up a Walrus aircraft to find the convoy.
The sinking of HMS Southampton.
At 1522 hours, when his ships were some 30 nautical miles astern of the convoy, and in position 34°56’N, 18°19’E, they were suddenly attacked by a dozen German Ju-87 ‘Stuka’ dive-bombers. Fortune was against them. The attack came as an entire surprise and according to Captain Rowley of the Gloucester the ‘aircraft were not sighted until the whistle of the first bomb was heard’. Six machines attacked each cruiser, diving steeply from the direction of the sun, releasing a 550-lb bomb each, at heights of around 1500 to 800 feet. The ships opened fire with 4” AA guns and smaller AA guns. They also increased speed and altered course to avoid the attack but two bombs, perhaps three hit HMS Southampton causing disastrous damage. Another hit and some near misses did some damage to HMS Gloucester, most important damage was to her DCT (director control tower). Half-an-hour later seven high-level bombers attacked but they were detected in time and taken under fire as a result of which all bombs fell wide. During the attack the Walrus from HMS Gloucester returned and ditched alongside HMS Diamond which took off the crew and then scuttled the aircraft.
Rear-Admiral Renouf immediately reported the damage to his cruisers to Admiral Cunningham who went to their aid. He send Vice-Admiral Pridham-Whippell ahead with the Orion, Perth, Jervis and Janus. From Malta HMS Griffin and HMS Mohawk were sent. Before they arrived however, Rear-Admiral Renouf reported that the Southampton must be abandoned and that he would sink her. HMS Gloucester took on board 33 officers and 678 ratings of which 4 officers and 58 ratings were wounded while HMS Diamond took on board 16 wounded ratings. Upon this signal the battleships turned east again. HMS Southampton had cought fire badly upon being hit. For a time the ships company fought the fire successfully and kept the ship in action and under control but in the end the fire got out of control. Also it was found that some magazines could not be flooded. In the end the crew had to give it up and was taken off. A torpedo was fired into her by HMS Gloucester but it did not sink her. Soon afterwards Vice-Admiral Pridham-Whippell arrived on the scene and his flagship, HMS Orion then scuttled her with three more torpedoes (four were fired).
Further proceedings of the convoys and the fleet.
Next morning, the 12th, HMS Orion, HMS Perth, HMS Gloucester, HMS Jervis and HMS Janus joined Admiral Cunningham’s Force off the west end of Crete meeting there also A/Rear-Admiral Rawlings (‘Force X’) in HMS Barham (Capt. G.C. Cooke, RN, flying the flag of A/Rear-Admiral H.B. Rawlings, OBE, RN) and with HMS Eagle (Capt. A.R.M. Bridge, CBE, RN), HMS Ajax and their destroyer screen made up of HMAS Stuart, HMAS Vampire (Cdr. J.A. Walsh, RAN), HMAS Vendetta (Lt.Cdr. R. Rhodes, RAN), HMAS Voyager (Cdr. J.C. Morrow, DSO, RAN) and HMS Wryneck (Lt.Cdr. R.H.D. Lane, RN) which had departed Alexandria on 11 January. These ships were to have begun a series of attacks on the Italian shipping routes but the disabling of HMS Illustrious put an end to that part of the plan so Admiral Cunningham took HMS Warspite, HMS Valiant, HMS Gloucester and the destroyers HMS Jervis, HMS Janus, HMS Greyhound, HMS Diamond, HMS Defender, HMS Hero and HMAS Voyager straight to Alexandria where they arrived in the early morning hours of the 13th.
HMS Barham, HMS Eagle, HMS York, HMS Orion, HMS Ajax, HMAS Perth, HMAS Stuart, HMAS Vampire, HMAS Vendetta, HMS Wryneck, HMS Griffin and HMS Mohawk then proceeded to Suda Bay to fuel where they arrived around 1900/12.
After fuelling at Suda Bay, Vice-Admiral Pridham-Whippell took HMS Orion, HMAS Perth to Piraeus where they arrived at 0230/13. There they took some troops from the ‘Excess Convoy’ on board and departed for Malta at 0600/13, a task the Southampton was to have done. They arrived at Malta around 0830/14. After unloading HMS Orion departed for Alexandria later the same day together with HMS Bonaventure and HMS Jaguar. They arrived at Alexandria in the morning of the 16th. HMAS Perth remained at Malta due to defects.
Meanwhile the six ships of convoy M.E. 6 arrived safely at their destinations on 13 January.
HMS Barham, HMS Eagle, HMS Ajax, HMAS Stuart, HMS Juno, HMS Hereward, HMS Hasty and HMS Dainty departed Suda Bay for operations south-west of Crete early in the morning of the 13th. The destroyers HMS Ilex, HMS Wryneck, HMAS Vampire and HMAS Vendetta also departed Suda Bay to conduct a sweep in the Kythera Channel. They joined ‘Force X’ around noon but Vampire and Vendetta were soon detached to investigate explosions which turned out to be underwater volcano activity. Meanwhile Ilex and Wryneck were also detached for a sweep towards Stampalia. These four destroyers fuelled at Suda Bay on the 14th and then departed for Piraeus where they arrived in the evening of the 14th. An A/S sweep had been carried out en-route.
’Force X’ returned to Suda Bay in the afternoon of the 15th and departed from there on the 16th for Alexandria where they arrived on the 18th, although some of the destroyers remained behind at Suda Bay.Leave van given to their crews at Piraeus and the destroyers departed Piraeus early on the 16th. HMS Ilex proceeded independently while HMAS Vampire, HMAS Vendetta and HMS Wryneck peroceeded to Suda Bay joining ' Force X ' on its departure.
Not a single of the 14 merchant ships in the convoys was lost but the fleet paid a heavy price for this loosing a light cruiser and a valuable aircraft carrier out of action for many months. As there were now German aircraft based in Italy future operations for the supply of Malta would be extremely difficult and dangerous.
The return of ' Force H' to Gibraltar.
That now leaves us with the return of ' Force H ' to Gibraltar which parted company with the eastbound convoy and its escort at 1920/9 in position 37°42'N, 09°53'E. ' Force H ' turned away to port. At 1935/9, ' Force H ' alter course to 300° and increased speed to 20 knots. Further alterations to course were made at 2200/9 to 260° and at mindnight durng the night of 9/10 January to 290°.
At 0100/10 course was altered for a quarter of an hour to clear three merchant vessels which had been sighted to the northward in position 38°03'N, 07°58'N, steering 180°. At 0900/10, course was altered to 246° and speed reduced to 18 knots.
A reconnaissance flight of seven aircraft was flown off to carry out an all round search to a depth of 50 miles from position 38°44'N, 05°18'E. On their return at 1030/10, they had nothing to report. Visibility was variable - from 5 to 15 miles. There was a slight sea and wind, force 3 from south-south-west. Speed was increased to 19 knots at 1110/10 since there appeared vibration in HMS Malaya when proceeding at 18 knots.
During the afternoon, three attack exercises were carried out on ' Force H ' by a total of nine Swordfish. Flying was completed by 1800/10. Moonlight exercises were cancelled due to a deterioration of weather and visibility. During the night the wind veered to the southwest and increased to force 6.
At 2345/10, Captain (D), 8th Destroyer Flottila, reported that the destroyers could maintain 19 knots provided that their A/S domes were housed, but would have to reduce to 16 knots if they were to remain lowered. Destroyers were accordingly orderd to house their domes.
The sea increased considerably, and by 0020/11 it was necessary to reduce speed to 14 knots in order to prevent damage to the destroyers. Course was altered for a short time at 0135/11 to avoid a merchant ship sighted in position 36°37'N, 00°06'W, steering to the north. Speed was further reduced to 11 knots by 0310/11, but gradual improvement in sea conditions permitted a corresponding increase of speed, so that by 0700/11, ' Force H ' was proceeding at 17 knots. Later in the day HMS Fury reported tat her forward gun shield had been distorted and that the gun could not be trained.
Six Swordfish were flown off by HMS Ark Royal at 0715/11 in order to carry out a light torpedo attack on ' Force H '. They were landed at 0815/11. At 0930/11, course was altered to 270° and speed increased to 19 knots. Weather conditions continued unfavourable, and not only had air training to be abandoned, but also the projected reconnaissance flight to Oran and Mers-el-Kebir to obtain photographs requisted by the Admiralty.
A London flying boat sent out from Gibraltar as A/S patrol ahead of ' Force H ' was sighted at 1015/11. By 1220/11, the sea had moderated sufficiently for the destroyers to increase speed and HMS Renown, HMS Sheffield, HMS Faulknor and HMS Foxhound proceeded ahead at 24 knots, increasing at 1730/11 to 26 knots. They arrived in harbour at 1920/11. The remainder of ' Force H ' arrived in harbour at 2020/11. (37)
8 Jan 1941
Around 0930 hours HMS Gloucester (Capt. H.A. Rowley, RN, flying the flag of Rear-Admiral E. de F. Renouf, CVO, RN), HMS Southampton (Capt. B.C.B. Brooke, RN), HMS Ilex (Capt. H.St.L. Nicholson, DSO and Bar, RN) and HMS Janus (Cdr. J.A.W. Tothill, RN) arrived at Malta where the disembarked the troops they had on board. They departed again for operations around 1515 hours minus HMS Janus which was left at Malta for a quick docking.
[see the event: 'Operations Excess and Operation M.C. 4' for 6 January 1941 for more info on these operations.] (38)
Sources
- ADM 53/110663
- ADM 53/109397 + ADM 53/110663
- ADM 53/109417
- ADM 53/110664
- ADM 53/109364
- ADM 53/109418
- ADM 53/110665
- ADM 53/110666
- ADM 199/367 + ADM 199/393
- ADM 53/108464 + ADM 53/110666
- ADM 53/113248
- ADM 53/113249
- ADM 53/113250
- ADM 53/113251
- ADM 53/112663 + ADM 186/798
- ADM 113251
- ADM 199/361
- ADM 53/111410 + ADM 53/112280 + ADM 199/361 + ADM 199/376 + ADM 199/379
- ADM 53/113252
- ADM 53/113211 + ADM 53/113252
- ADM 53/113253
- ADM 53/113254
- ADM 53/111578 + ADM 53/113255 + ADM 199/385
- ADM 53/111579 + ADM 53/112668 + ADM 53/113256 + ADM 199/385
- ADM 199/385
- ADM 53/113257
- ADM 199/379
- ADM 53/113258
- ADM 53/112670 + ADM 199/361
- ADM 199/1136
- ADM 199/387
- ADM 234/325 + ADM 234/326
- ADM 199/2570
- ADM 199/383
- ADM 199/380
- ADM 53/114093
- ADM 199/414 + ADM 199/656 + ADM 223/679 + ADM 234/335
- ADM 53/114341 + ADM 199/414
ADM numbers indicate documents at the British National Archives at Kew, London.