
| Navy | The Royal Navy |
| Type | Light cruiser |
| Class | Belfast |
| Pennant | 16 |
| Built by | Swan Hunter and Wigham Richardson Ltd. (Wallsend-on-Tyne, U.K.) |
| Ordered | 15 Aug 1936 |
| Laid down | 30 Dec 1936 |
| Launched | 31 Mar 1938 |
| Commissioned | 6 Jul 1939 |
| Lost | 2 May 1942 |
| Loss position | 71° 51'N, 35° 10'E |
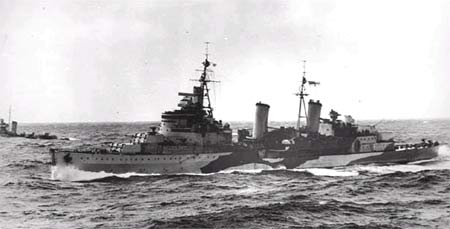
| History | HMS Edinburgh (Capt. Hugh Webb Faulkner, RN) was scuttled in position 71°51'N, 35°10'E by a torpedo from the British destroyer HMS Foresight after being damaged by two torpedoes from the German submarine U-456 and one torpedo from the German destroyer Z 24. See also this website (offsite link). |
Commands listed for HMS Edinburgh (16)
Please note that we're still working on this section
and that we only list Commanding Officers for the duration of the Second World War.
| Commander | From | To | |
| 1 | Capt. Frederic Cyril Bradley, RN | 15 Feb 1939 | 13 Dec 1939 |
| 2 | Cdr. Colin Wauchope, RN | 13 Dec 1939 | 16 Dec 1939 |
| 3 | Capt. Charles Maurice Blackman, DSO, RN | 16 Dec 1939 | 20 Jun 1940 |
| 4 | Cdr. Colin Wauchope, RN | 20 Jun 1940 | 10 Oct 1940 |
| 5 | Capt. Charles Maurice Blackman, DSO, RN | 10 Oct 1940 | 31 May 1941 |
| 6 | Capt. Hugh Webb Faulkner, RN | 31 May 1941 | 2 May 1942 |
You can help improve our commands section
Click here to Submit events/comments/updates for this vessel.
Please use this if you spot mistakes or want to improve this ships page.
Notable events involving Edinburgh include:
The page of HMS Edinburgh was last updated in January 2022.
28 Aug 1939
HMS Edinburgh (Capt. F.C. Bradley, RN) arrived at Govan from Scapa Flow. She is immediately docked. (1)
31 Aug 1939
HMS Edinburgh (Capt. F.C. Bradley, RN) is undocked at Govan and departed the Clyde for Scapa Flow later the same day. (1)
1 Sep 1939
HMS Edinburgh (Capt. F.C. Bradley, RN) arrived at Scapa Flow from the Clyde. (2)
4 Sep 1939
HMS Edinburgh (Capt. F.C. Bradley, RN) conducted AA gunnery exercises at Scapa Flow. (2)
5 Sep 1939
Around 0530A/5, battlecruiser HMS Renown (Capt. C.E.B. Simeon, RN), light cruiser HMS Edinburgh (Capt. F.C. Bradley, RN) and the destroyers HMS Foresight (Lt.Cdr. G.T. Lambert, RN) and HMS Fury (Cdr. G.F. Burghard, RN) departed Scapa Flow for exercises.
At sea, at 0830A/5, they made rendezvous with the light cruiser HMS Belfast (Capt. G.A. Scott, DSC, RN) who was returning from operations with the Home Fleet. (3)
6 Sep 1939
Around 0545A/6, HMS Renown (Capt. C.E.B. Simeon, RN), light cruisers HMS Belfast (Capt. G.A. Scott, DSC, RN), HMS Edinburgh (Capt. F.C. Bradley, RN) and the destroyers HMS Foresight (Lt.Cdr. G.T. Lambert, RN) and HMS Fury (Cdr. G.F. Burghard, RN) arrived at Scapa Flow. (3)
7 Sep 1939
HMS Edinburgh (Capt. F.C. Bradley, RN) conducted AA gunnery exercises at Scapa Flow. (2)
8 Sep 1939
Around 0715A/8, the battlecruisers HMS Hood (Capt. I.G. Glennie, RN, flying the flag of Rear-Admiral W.J. Whitworth, CB, DSO, RN), HMS Renown (Capt. C.E.B. Simeon, RN), light cruisers HMS Belfast (Capt. G.A. Scott, DSC, RN), HMS Edinburgh (Capt. F.C. Bradley, RN) and the destroyers HMS Fame (Cdr. P.N. Walter, RN), HMS Fearless (Cdr. K.L. Harkness, RN), HMS Forester (Lt.Cdr. E.B. Tancock, RN) sailed from Scapa Flow to patrol between Iceland and the Faroes as cover for the cruisers of the Northern Patrol. The destroyer HMS Fury (Cdr. G.F. Burghard, RN) joined the force at sea later on the 8th.
12 Sep 1939
Around 1200A/12, the battlecruisers HMS Hood (Capt. I.G. Glennie, RN, flying the flag of Rear-Admiral W.J. Whitworth, CB, DSO, RN), HMS Renown (Capt. C.E.B. Simeon, RN) and the destroyers HMS Fame (Cdr. P.N. Walter, RN), HMS Fearless (Cdr. K.L. Harkness, RN), HMS Forester (Lt.Cdr. E.B. Tancock, RN) and HMS Fury (Cdr. G.F. Burghard, RN) returned to Scapa Flow.
The light cruisers HMS Belfast (Capt. G.A. Scott, DSC, RN) and HMS Edinburgh (Capt. F.C. Bradley, RN) had in the meantime been detached on the evening of the 9th, for patrol duties with the Northern Patrol. They refuelled at Sullom Voe on 15 September and then continued their patrol. They only returned to Scapa Flow on 20 September.
22 Sep 1939
HMS Newcastle (Capt. J. Figgins, RN) and HMS Edinburgh (Capt. F.C. Bradley, RN) conducted gunnery and torpedo firing exercises off Scapa Flow. (4)
23 Sep 1939
In the late afternoon and evening, HMS Newcastle (Capt. J. Figgins, RN) and HMS Edinburgh (Capt. F.C. Bradley, RN), conducted exercises off Scapa Flow. (4)
25 Sep 1939
HMS Newcastle (Capt. J. Figgins, RN) and HMS Edinburgh (Capt. F.C. Bradley, RN) conducted exercises off Scapa Flow. (4)
26 Sep 1939
HMS Newcastle (Capt. J. Figgins, RN) and HMS Edinburgh (Capt. F.C. Bradley, RN) conducted exercises off Scapa Flow. (4)
27 Sep 1939
HMS Newcastle (Capt. J. Figgins, RN) and HMS Edinburgh (Capt. F.C. Bradley, RN) conducted HA gunnery exercises at Scapa Flow. (4)
28 Sep 1939
HMS Newcastle (Capt. J. Figgins, RN) and HMS Edinburgh (Capt. F.C. Bradley, RN) both conducted exercises off Scapa Flow (independently). (4)
30 Sep 1939
HMS Edinburgh (Capt. F.C. Bradley, RN) departed Scapa Flow for Rosyth. (2)
1 Oct 1939
HMS Edinburgh (Capt. F.C. Bradley, RN) arrived at Rosyth. (5)
6 Oct 1939
The light cruisers HMS Southampton (Capt. F.W.H. Jeans, CVO, RN, flying the flag of Vice-Admiral G.F.B. Edward-Collins, CB, KCVO, RN), HMS Glasgow (Capt. F.H. Pegram, RN) and HMS Edinburgh (Capt. F.C. Bradley, RN) and the destroyers HMS Jervis (Capt. P.J. Mack, RN), HMS Jaguar (Lt.Cdr. J.F.W. Hine, RN) and HMS Jupiter (Lt.Cdr. D.B. Wyburd, RN) conducted exercises off the Firth of Forth. (6)
8 Oct 1939
A force of German warships departed Kiel to operate off the south coast of Norway. They were to sink Allied shipping and lure the British Home Fleet into the range of Luftwaffe aircraft. This force was made up of the battlecruiser Gneisenau, light cruiser Köln and the destroyers Z 3 / Max Schultz, Z 5 / Paul Jacobi, Z 11 / Bernd von Arnim, Z/14 Friedrich Ihn, Z 15 / Erich Steinbrinck, Z 16 / Friedrich Eckholdt, Z 17 / Diether von Roeder, Z 20 / Karl Galster, Z 21 / Wilhelm Heidkamp. In addition, four submarines were deployed in a patrol line to attack the Home Fleet, these were U-10, U-18, U-20 and U-23.
The Admiralty took the bait and around 1600A/8 the battlecruisers HMS Hood (Capt. I.G. Glennie, RN, flying the flag of Rear-Admiral W.J. Whitworth, CB, DSO, RN), HMS Repulse (Capt. E.J. Spooner, DSO, RN), light cruisers HMS Aurora (Capt. G.B. Middleton, RN, flying the flag of Rear-Admiral R.H.C. Hallifax, RN) and HMS Sheffield (Capt. E. de F. Renouf, CVO, RN) and the destroyers HMS Somali (Capt. R.S.G. Nicholson, DSC, RN), HMS Mashona (Cdr. P.V. McLaughlin, RN), HMS Eskimo (Cdr. St. J.A. Micklethwait, RN) and HMS Ashanti (Cdr. W.G. Davis, RN) departed Scapa Flow for a position about 50 miles to the north-west of Stadlandet, Norway.
Around 1900A/8, the battleships HMS Nelson (Capt. G.J.A. Miles, RN, flying the flag of Admiral J.M. Forbes, KCB, DSO, RN), HMS Rodney (Capt. E.N. Syfret, RN), aircraft carrier HMS Furious (Capt. M.L. Clarke, DSC, RN), light cruiser HMS Newcastle (Capt. J. Figgins, RN) and the destroyers HMS Faulknor (Capt. C.S. Daniel, RN), HMS Fame (Cdr. P.N. Walter, RN), HMS Firedrake (Lt.Cdr. S.H. Norris, RN), HMS Foresight (Lt.Cdr. G.T. Lambert, RN), HMS Forester (Lt.Cdr. E.B. Tancock, RN), HMS Fury (Cdr. G.F. Burghard, RN), HMS Punjabi (Cdr. J.T. Lean, RN) and HMS Bedouin (Cdr. J.A. McCoy, RN) departed Scapa Flow for a position north of Muckle Flugga. Both forces were to reach their positions by dawn the following day and then steam towards each other in a pincer movement to cut off the German ships from their home ports.
The light cruisers HMS Southampton (Capt. F.W.H. Jeans, CVO, RN, flying the flag of Vice-Admiral G.F.B. Edward-Collins, CB, KCVO, RN), HMS Glasgow (Capt. F.H. Pegram, RN), HMS Edinburgh (Capt. F.C. Bradley, RN) and the destroyers HMS Jervis (Capt. P.J. Mack, RN), HMS Jaguar (Lt.Cdr. J.F.W. Hine, RN) and HMS Jupiter (Lt.Cdr. D.B. Wyburd, RN) departed Rosyth around 0945A/8. They were joined at sea by the destroyers HMS Jackal (Cdr. T.M. Napier, RN) and HMS Janus (Lt.Cdr. J.A.W. Tothill, RN) which came from Grimsby. This force was ordered to operate off the western end of the Skagerrak and then sweep northwards.
At 0600A/9 HMS Jaguar was ordered to return to Rosyth to refuel. En-route there she was attacked by German aircraft but she was not hit.
HMS Jervis and HMS Jupiter were ordered to search for the small Danish merchant vessel Teddy (503 GRT, built 1907) which had reported that she had picked up the crew of a German flying boat whih was shot down on the 8th. They were attacked by German aircraft at 1518A/9, but neither destroyer was damaged. However, about 1.5 hours laters HMS Jupiter broke down and had to be taken in tow by her sister ship.
HMS Jaguar meanwhile had completed refuelling at Rosyth. She left that port together with HMS Jersey (Lt.Cdr. A.M. McKillop, RN) which just finished repairs to the damage sustained in her collision of 22 September.
The were ordered to screen the withdrawal of HMS Jervis and HMS Jupiter. But it was not to be as shorty after departing Rosyth, Jaguar struck a small islet above the Forth bridge and damaged her starboard propeller shaft and HMS Jersey struck the Rosyth boom defence. Both destroyers proceeded to Leith for repairs.
Between 1120A/9 and 1645A/9 the Luftwaffe heavily bombed the 'Humber force' made up at that time of HMS Southampton, HMS Glasgow, HMS Edinburgh, HMS Jackal and HMS Janus which had arrived off the western entrance to the Skagerrak by that time. HMS Southampton and HMS Glasgow were near missed but were not damaged.
The German force returned to Kiel shortlyafter midnight during the night of 9/10 October. This news reached the C-in-C, Home Fleet in the afternoon of the 10th after which all ships were ordered to return to port.
HMS Nelson, HMS Rodney, HMS Hood, HMS Faulknor, HMS Firedrake, HMS Forester, HMS Fury, HMS Bedouin and HMS Punjabi proceeded to Loch Ewe arriving in the early evening of the 11th.
HMS Repulse, HMS Furious, HMS Aurora, HMS Newcastle, HMS Southampton, HMS Glasgow, HMS Somali, HMS Mashona, HMS Eskimo, HMS Ashanti, HMS Fame, HMS Foresight, HMS Jervis, HMS Jackal, HMS Janus and HMS Jupiter (which by now as able to proceed under her own power) arrived at Scapa Flow on the 11th. They had been joined at sea before arrival by two more destroyers which came from Scapa Flow; HMS Fearless (Cdr. K.L. Harkness, RN) and HMS Foxhound (Lt.Cdr. P.H. Hadow, RN).
HMS Edinburgh had been detached and proceeded to Rosyth where she arrived on the 10th.
HMS Sheffield had already been detached on the 9th with orders to patrol in the Denmark Strait.
12 Oct 1939
Shortly after midnight, HMS Edinburgh (Capt. F.C. Bradley, RN), departed Rosyth. She was however ordered to return shortly over an hour later. (5)
16 Oct 1939
HMS Edinburgh (Capt. F.C. Bradley, RN) sustained some splinter damage during an attack by German aircraft on the Firth of Forth. Eight of the crew were wounded and two died of their wounds. (5)
26 Oct 1939
Convoy Narvik 1.
This convoy departed Narvik, Norway on 26 October 1939. It arrived at Methil on 31 October 1939.
This convoy was made up of the following merchant vessels; Albuera (British, 3494 GRT, built 1921), Alex (British, 3892 GRT, built 1914), Carperby (British, 4890 GRT, built 1928), Cree (British, 5596 GRT, built 1920), Creekirk (British, 3793 GRT, built 1912), Imperial Monarch (British, 5835 GRT, built 1926), Leo Dawson (British, 4734 GRT, built 1918), Lindenhall (British, 5248 GRT, built 1937), Polzella (British, 4751 GRT, built 1929), Riley (British, 4993 GRT, built 1936), Santa Clara Valley (British, 4685 GRT, built 1928) and Starcross (British, 4662 GRT, built 1936).
Escort / cover for this convoy was provided by the battleships HMS Nelson (Capt. G.J.A. Miles, RN, flying the flag of Admiral J.M. Forbes, KCB, DSO, RN), HMS Rodney (Capt. E.N. Syfret, RN), battlecruiser HMS Hood (Capt. I.G. Glennie, RN, flying the flag of Rear-Admiral W.J. Whitworth, CB, DSO, RN) and the destroyers HMS Intrepid (Cdr. J.W. Josselyn, RN), HMS Icarus (Lt.Cdr. C.D. Maud, RN), HMS Ivanhoe (Cdr. B. Jones, RN), HMS Kelly (Capt. L.F.A.V.N. Mountbatten, GCVO, RN) and HMS Kingston (Lt.Cdr. P. Somerville, RN). These ships sailed from Loch Ewe at 1800A/23.
On the 25th the destroyer HMS Impulsive (Lt.Cdr. W.S. Thomas, RN) sailed from Scapa Flow to join the force at sea. HMS Kingston had to be detached to Scapa Flow due to defects on the 28th. On the 29th another destroyer joined the force at sea; HMS Firedrake (Lt.Cdr. S.H. Norris, RN).
Light cruiser HMS Edinburgh (Capt. F.C. Bradley, RN) departed Rosyth on 23 October and joined the cover force at sea around 1200A/24. HMS Aurora (Capt. G.B. Middleton, RN, flying the flag of Rear-Admiral R.H.C. Hallifax, RN) sailed from Loch Ewe on 23 October and joined the convoy itself off the Norwegian coast around 0130A/26. Destroyers HMS Somali (Capt. R.S.G. Nicholson, DSC, RN), HMS Ashanti (Cdr. W.G. Davis, RN), HMS Tartar (Lt.Cdr. D.E. Holland-Martin, RN) and HMS Fame (Cdr. P.N. Walter, RN) also joined the convoy having sailed from Scapa Flow.
HMS Fame was later detached with two of the merchant vessels as these were to join an Atlantic convoy.
29 Oct 1939
HMS Edinburgh (Capt. F.C. Bradley, RN) arrived at Rosyth from operations. (5)
4 Nov 1939
Convoy ON 1.
This convoy departed Methil on 4 November 1939 and arrived in Norwegian waters near Bergen on 7 November 1939.
The convoy was made up of the following merchant vessels; Folda (British, 1165 GRT, built 1920), Glen Tilt (British, 871 GRT, built 1920), Majorca (British, 1126 GRT, built 1921), Treworlas (British, 4692 GRT, built 1922) and Warlaby (British, 4875 GRT, built 1927).
A close escort was provided for the convoy made up of the destroyers HMS Somali (Capt. R.S.G. Nicholson, DSC, RN), HMS Ashanti (Cdr. W.G. Davis, RN), HMS Tartar (Lt.Cdr. D.E. Holland-Martin, RN) and HMS Fame (Cdr. P.N. Walter, RN).
The AA cruiser HMS Curlew (Capt. B.C.B. Brooke, RN) departed Scapa Flow around 0100A/5 to join the close escort which she did around 0830A/5.
The destroyer HMS Punjabi (Cdr. J.T. Lean, RN) joined the convoy at 1700A/5 and HMS Fame then parted company.
The light cruiser HMS Edinburgh (Capt. F.C. Bradley, RN) departed Rosyth around 1800A/5 to provide close cover for the convoy.
At 0720A/6, HMS Ashanti parted company to proceed to Sullum Voe to repair defects.
Ships from the Home Fleet were at sea to provide distant cover.
6 Nov 1939
HMS Edinburgh (Capt. F.C. Bradley, RN) departed Rosyth to provide close cover during convoy operation to and from Norway.
[For more info on these convoys see the events ' Convoy ON 1 ' for 4 November 1939 and ' Convoy HN 1 ' for 7 November 1939.] (7)
7 Nov 1939
Convoy HN 1.
This convoy was formed near Bergen, Norway on 7 November 1939 and arrived off Methil on 10 November 1939.
The convoy was made up of the following merchant vessels; Egton (British, 4363 GRT, built 1938), Goodleigh (British, 5448 GRT, built 1938), Hardingham (British, 5415 GRT, built 1933), Hetton (British, 2714 GRT, built 1924), Rozewie (Polish, 766 GRT, built 1938), Thomas Walton (British, 4460 GRT, built 1917) and Vina (British, 1021 GRT, built 1894).
On forming up the convoy was escorted by the AA cruiser HMS Curlew (Capt. B.C.B. Brooke, RN) and the destroyers HMS Somali (Capt. R.S.G. Nicholson, DSC, RN), HMS Punjabi (Cdr. J.T. Lean, RN) and HMS Tartar (Lt.Cdr. D.E. Holland-Martin, RN).
The light cruiser HMS Edinburgh (Capt. F.C. Bradley, RN) provided close cover for the convoy.
At 1800A/8, the destroyer HMS Ashanti (Cdr. W.G. Davis, RN) joined the convoy escort having departed Sullum Voe at 1630A/7.
HMS Curlew parted company with the convoy at 1715A/9 and proceeded to Scapa Flow.
9 Nov 1939
HMS Edinburgh (Capt. F.C. Bradley, RN) returned to Rosyth from operations (7)
13 Nov 1939
Around 1630A/13, HMS Edinburgh (Capt. F.C. Bradley, RN), HMS Afridi (Capt. G.H. Cresswell, DSC, RN) and HMS Maori (Cdr. G.N. Brewer, RN), departed Rosyth for Immingham.
They were joined around 1645A/13, by HMS Curlew (Capt. B.C.B. Brooke, RN) which was also on passage to Immingham. She had departed Scapa Flow around 2330A/12.
HMS Edinburgh, HMS Curlew, HMS Ashanti and HMS Maori arrived at Immingham around 1300A/14. (5)
16 Nov 1939
The light cruisers HMS Southampton (Capt. F.W.H. Jeans, CVO, RN, flying the flag of Vice-Admiral G.F.B. Edward-Collins, CB, KCVO, RN), HMS Glasgow (Capt. F.H. Pegram, RN), HMS Belfast (Capt. G.A. Scott, DSC, RN), HMS Edinburgh (Capt. F.C. Bradley, RN) and the destroyers HMS Afridi (Capt. G.H. Cresswell, DSC, RN), HMS Gurkha (Lt.Cdr. P.V. James, RN), HMS Maori (Cdr. G.N. Brewer, RN) and HMS Zulu (Cdr. J.S. Crawford, RN) departed Immingham around 1700A/16 hours for Rosyth where they arrived around 0830A/17.
23 Nov 1939
Sinking of the armed merchant cruiser HMS Rawalpindi
Around midday on 21 November 1939 the German battlecruisers Scharnhorst and Gneisenau, escorted by the light cruisers Köln and Leipzig and the destroyers Z 11 / Bernd von Arnim, Z 12 / Erich Giese and Z 20 / Karl Galster, departed Wilhelmshaven for a raid into the North Atlantic, this was to relieve the pressure of the pocket battleship Admiral Graf Spee operating in the South Atlantic. Late on the 21st the escorts left the battlecruisers.
Just after 1500A/23 the British armed merchant cruiser HMS Rawalpindi (Capt.(Retd.) E.C. Kennedy, RN) sighted the Scharnhorst. Rawalpindi was part of the British Northern Patrol and was stationed south-east of Iceland in the Iceland-Faroe gap. Captain Kennedy at first tried to get away from the German ship and report to the Admiralty that he sighted the German pocket battleship Deutschland, still believed to be operating in the North Atlantic, and so as to buy time so that other ships of the Northern patrol could come to his assistance. Just after 1600 hours, Rawalpindi came within range of the Scharnhorst and was quickly reduced to a flaming wreck. During this engagement Scharnhorst was hit by a 6in shell from Rawalpindi causing only light damage. Scharnhorst and Gneisenau together picked up 27 survivors from the Rawalpindi which finally sank around 2000 hours.
The British light cruiser HMS Newcastle (Capt J. Figgins, RN), that was also part of the Northern Patrol, picked up Rawalpindi's signal and closed the scene. She sighted the Gneisenau but the Germans managed to escape in the fog.
The Admiralty also thought the ship sighted by Rawalpindi and Newcastle was the Deutschland that was trying to return to Germany. In response to the sighting and destruction of the Rawalpindi the Admiralty took immediate action; The battleships HMS Nelson (Capt. G.J.A. Miles, RN, flying the flag of Admiral J.M. Forbes, KCB, DSO, RN) HMS Rodney (Capt. F.H.G. Dalrymple-Hamilton, RN) and the heavy cruiser HMS Devonshire (Capt. J.M. Mansfield, DSC, RN, flying the flag of Vice-Admiral J.H.D. Cunningham, CB, MVO, RN) escorted by the destroyers HMS Faulknor (Capt. C.S. Daniel, RN), HMS Fame (Cdr. P.N. Walter, RN), HMS Firedrake (Lt.Cdr. S.H. Norris, RN), HMS Foresight (Lt.Cdr. G.T. Lambert, RN), HMS Forester (Lt.Cdr. E.B. Tancock, RN), HMS Fortune (Cdr. E.A. Gibbs, RN) and HMS Fury (Cdr. G.F. Burghard, RN) departed the Clyde around 1930A/23 to patrol of Norway to cut off the way to Germany for the Deutschland.
The light cruisers HMS Southampton (Capt. F.W.H. Jeans, CVO, RN, flying the flag of Vice-Admiral G.F.B. Edward-Collins, CB, KCVO, RN), HMS Edinburgh (Capt. F.C. Bradley, RN) and HMS Aurora (Capt. G.B. Middleton, RN) escorted by the destroyers HMS Afridi (Capt. G.H. Creswell, DSC, RN), HMS Gurkha (Cdr. F.R. Parham, RN), HMS Bedouin (Cdr. J.A. McCoy, RN), HMS Kingston (Lt.Cdr. P. Somerville, RN) and HMS Isis (Cdr. J.C. Clouston, RN) departed Rosyth to patrol between the Orkney and Shetland islands.
Light cruiser HMS Sheffield (Capt. E. de F. Renouf, CVO, RN) was sent from Loch Ewe to the last known position of the German ship(s).
On northern patrol, south of the Faroes were the light cruisers HMS Caledon (Capt. C.P. Clark, RN), HMS Cardiff (Capt. P.K. Enright, RN) and HMS Colombo (Commodore R.J.R. Scott, RN). These were joined by HMS Dunedin (Capt. C.E. Lambe, CVO, RN) and HMS Diomede (Commodore E.B.C. Dicken, OBE, DSC, RN).
Of the ships of the Denmark strait patrol, the heavy cruisers HMS Suffolk (Capt. J.W. Durnford, RN) and HMS Norfolk (Capt. A.G.B. Wilson, MVO, DSO, RN) were ordered to proceed to the Bill Bailey Bank (to the south-west of the Faroe Islands).
The light cruiser HMS Glasgow (Capt. F.H. Pegram, RN) escorted by the destroyers HMS Maori (Cdr. G.N. Brewer, RN) and HMS Zulu (Cdr. J.S. Crawford, RN) were already at sea patrolling north-east of the Shetlands were to be joined by the destroyers HMS Inglefield (Capt. P. Todd, RN), HMS Imperial (Lt.Cdr. C.A.de W. Kitcat, RN), HMS Impulsive (Lt.Cdr. W.S. Thomas, RN) and HMS Imogen (Cdr. E.B.K. Stevens, RN).
The light cruisers HMS Calypso (Capt. N.J.W. William-Powlett, DSC, RN) and HMS Ceres (Capt. E.G. Abbott, AM, RN) were stationed off Kelso Light to act as a night attack striking force. The destroyers HMS Somali (Capt. R.S.G. Nicholson, DSC, RN), HMS Ashanti (Cdr. W.G. Davis, RN), HMS Mashona (Cdr. P.V. McLaughlin, RN) and HMS Punjabi (Cdr. J.T. Lean, RN) had just departed Belfast on escort duties. They were ordered to join Admiral Forbes. The ships they were escorting were ordered to return to Belfast.
The destroyers HMS Tartar (Lt.Cdr. D.E. Holland-Martin, RN), HMS Kandahar (Cdr. W.G.A. Robson, RN) and HMS Kashmir (Cdr. H.A. King, RN) departed Scapa Flow with orders to locate and shadow the German ships. HMS Tartar however had to return to Scapa Flow the next day due to a damaged rudder. The other two destroyers were ordered to join HMS Aurora which was to form a strike group of destroyers.
Despite the British effort to intercept the German ships, both German battlecruisers returned to Wilhelmshaven on the 27th.
2 Dec 1939
HMS Edinburgh (Capt. F.C. Bradley, RN) returned to Rosyth from operations. (8)
5 Dec 1939
Convoy ON 4.
This convoy departed Methil on 5 December 1939 and arrived in Norwegian waters near Bergen on 8 December 1939.
The convoy was made up of the following merchant vessels; Baron Kelvin (British, 3081 GRT, built 1924), Crown Arun (British, 2372 GRT, built 1938), Flyingdale (British, 3918 GRT, built 1924), Otterpool (British, 4876 GRT, built 1926), Polzella (British, 4751 GRT, built 1929), Santa Clara Valley (British, 4665 GRT, built 1928) and Teano (British, 762 GRT, built 1925).
A close escort provided for the convoy was made up of the destroyers HMS Eskimo (Cdr. St.J.A. Micklethwait, RN), HMS Matabele (Cdr. G.K. Whitmy-Smith, RN), HMS Icarus (Lt.Cdr. C.D. Maud, RN) and HMS Ilex (Lt.Cdr. P.L. Saumarez, RN).
A close cover force, made up of the light cruisers HMS Glasgow (Capt. F.H. Pegram, RN) and HMS Edinburgh (Capt. F.C. Bradley, RN) departed Rosyth on 6 December.
Ships from the Home Fleet were at sea to provide distant cover.
6 Dec 1939
Around 1500Z/6, HMS Glasgow (Capt. F.H. Pegram, RN) and HMS Edinburgh (Capt. F.C. Bradley, RN), departed Rosyth to provide cover for convoys to and from Norway.
[For more info on these convoys see the events ' Convoy ON 4 ' for 5 December 1939 and ' Convoy HN 4 ' for 8 December 1939.] (9)
8 Dec 1939
Convoy HN 4.
This convoy departed from Norwegian waters near Bergen on 8 December 1939 and arrived at Methil on 12 December 1939, though four of the merchant vessels had parted company to proceed to west coast ports.
The convoy was made up of the following merchant vessels; Albuera (British, 3477 GRT, built 1921), Anglo Norse (British (tanker), 7988 GRT, built 1914), Baltannic (British, 1739 GRT, built 1913), Hardingham (British, 5415 GRT, built 1933), Hindsholm (British, 1512 GRT, built 1922), Imperial Monarch (British, 5831 GRT, built 1926), Lornaston (British, 4934 GRT, built 1925), Springtide (British, 1579 GRT, built 1937) and Temple Moat (British, 4427 GRT, built 1928).
On departure the convoy was escorted by the destroyers HMS Eskimo (Cdr. St.J.A. Micklethwait, RN), HMS Matabele (Cdr. G.K. Whitmy-Smith, RN), HMS Icarus (Lt.Cdr. C.D. Maud, RN) and HMS Ilex (Lt.Cdr. P.L. Saumarez, RN).
A close cover force, made up of the light cruisers HMS Glasgow (Capt. F.H. Pegram, RN) and HMS Edinburgh (Capt. F.C. Bradley, RN) was also present.
The convoy encountered heavy weather and at 1100Z/9 it was forced to heave to due to gale force winds. The weather did not improve until 2000Z/10. By then HMS Matabele had lost touch with the other destroyers and only four of the merchant vessels could be rounded up by the remaining destroyers. HMS Matabele never gained touch and eventually arrived in the Clyde on 12 December via the Fair Isle Channel.
At 0650Z/11, the destroyers HMS Maori (Cdr. G.N. Brewer, RN), HMS Nubian (Cdr. R.W. Ravenhill, RN) and HMS Electra (Lt.Cdr. S.A. Buss, MVO, RN) joined the escort having departed Rosyth around 2015Z/10. Another destroyer HMS Escort (Lt.Cdr. J. Bostock, RN) also joined the convoy on the 10th.
At 0835Z/11, HMS Eskimo, HMS Icarus and HMS Ilex parted company with the convoy. HMS Eskimo and HMS Ilex proceeded to the Clyde arriving there on the 12th. HMS Icarus taking the only 'westcoast' merchant vessel that was with the convoy at that time with her.
HMS Glasgow arrived at Scapa Flow on the 11th of December. HMS Edinburgh arrived at Rosyth on the same day.
What was left of the convoy arrived at Methil on 12 December 1939.
10 Dec 1939
Convoy TC 1.
This convoy of troopships departed Halifax around 0510Q/10, for the Clyde where it arrived on 17 December 1939.
The convoy was made up of the following troopships / liners; Aquitania (British, 44786 GRT, built 1914, carrying 2638 troops), Duchess of Bedford (British, 20123 GRT, built 1928, carrying 1312 troops), Empress of Australia (British, 21833 GRT, built 1914, carrying 1235 troops), Empress of Britain (British, 42348 GRT, built 1931, carrying 1303 troops) and Monarch of Bermuda (British, 22424 GRT, built 1931, carrying 961 troops),
Close escort was provided on leaving Halifax by the battleship HMS Resolution (Capt. O. Bevir, RN) and the Canadian destroyers HMCS Fraser (Cdr. W.N. Creery, RCN), HMCS Ottawa (Capt. G.C. Jones, RCN), HMCS Restigouche (Lt.Cdr. W.B.L. Holms, RCN) and HMCS St. Laurent (Lt.Cdr. H.G. de Wolf, RCN). These Canadian destroyers remained with the convoy until 12 December 1939 when they set course to return to Halifax.
Cover for the convoy was provided by the battlecruiser HMS Repulse (Capt. E.J. Spooner, DSO, RN), aircraft carrier HMS Furious (Capt. M.L. Clarke, DSC, RN), light cruiser HMS Emerald (Capt. A.W.S. Agar, VC, DSO, RN) and the destroyers HMS Hunter (Lt.Cdr. L. de Villiers, RN) and HMS Hyperion (Cdr. H.St.L. Nicholson, RN). At dusk on the 10th both destroyers were detached to join the local escort. They returned to Halifax with the Canadian destroyers.
Early on the 15th, HMS Emerald was detached, HMS Newcastle (Capt. J. Figgins, RN) had joined the cover force in the afternoon of the 14th to take her place.
When the convoy approached the British isles, the destroyers HMS Eskimo (Cdr. St.J.A. Micklethwait, RN), HMS Bedouin (Cdr. J.A. McCoy, RN), HMS Mashona (Cdr. P.V. McLaughlin, RN), HMS Somali (Capt. R.S.G. Nicholson, DSC, RN), HMS Kandahar (Cdr. W.G.A. Robson, RN), HMS Khartoum (Cdr. D.T. Dowler, RN), HMS Kingston (Lt.Cdr. P. Somerville, RN), HMS Kashmir (Cdr. H.A. King, RN), HMS Fearless (Cdr. K.L. Harkness, RN), HMS Ilex (Lt.Cdr. P.L. Saumarez, RN) and HMS Impulsive (Lt.Cdr. W.S. Thomas, RN) departed the Clyde on the 12th to sweep ahead of the convoy. HMS Imperial (Lt.Cdr. C.A.de W. Kitcat, RN) was also to have sailed but was unable to join. HMS Matabele (Cdr. G.K. Whitmy-Smith, RN) was sailed in her place and later joined the other destroyers at sea.
After German warships had been reported in the North Sea, and concerned for the safety of convoy TC.1, Admiral Forbes, departed the Clyde on the 13th to provide additional cover with the battleships HMS Warspite (Capt. V.A.C. Crutchley, VC, DSC, RN), HMS Barham (Capt. H.T.C. Walker, RN), battlecruiser HMS Hood (Capt. I.G. Glennie, RN, flying the flag of Rear-Admiral W.J. Whitworth, CB, DSO, RN) and the destroyers HMS Inglefield (Capt. P. Todd, RN), HMS Icarus (Lt.Cdr. C.D. Maud, RN), HMS Imogen (Cdr. E.B.K. Stevens, RN), HMS Imperial, HMS Isis (Cdr. J.C. Clouston, RN) and HMS Foxhound (Lt.Cdr. P.H. Hadow, RN). The destroyers HMS Forester (Lt.Cdr. E.B. Tancock, RN) and HMS Firedrake (Lt.Cdr. S.H. Norris, RN) sailed from Loch Ewe and later joined this force at sea. Three cruisers from the Northern Patrol were ordered to patrol in position 53°55’N, 25°00’W to provide cover for the convoy. These were the heavy cruisers HMS Berwick (Capt. I.M. Palmer, DSC, RN), HMS Devonshire (Capt. J.M. Mansfield, DSC, RN, flying the flag of Vice-Admiral J.H.D. Cunningham, CB, MVO, RN) and the light cruiser HMS Glasgow (Capt. F.H. Pegram, RN).
The light cruisers HMS Southampton (Capt. F.W.H. Jeans, CVO, RN), HMS Edinburgh (Cdr. C. Wauchope, RN, temporary in command) departed Rosyth to patrol between the Shetlands and the Faroes.
The destroyers HMS Afridi (Capt. G.H. Creswell, DSC, RN), HMS Maori (Cdr. G.N. Brewer, RN) and HMS Nubian (Cdr. R.W. Ravenhill, RN) departed Rosyth and proceeded north at high speed to try to cut of the enemy warhips if they were to enter the Atlantic.
The light cruisers HMS Cardiff (Capt. P.K. Enright, RN), HMS Ceres (Capt. E.G. Abbott, AM, RN), HMS Delhi (Capt L.H.K. Hamilton, DSO, RN), HMS Diomede (Commodore E.B.C. Dicken, OBE, DSC, RN) which were on the Northern Patrol were to concentrate near the Faroes where they were joined by HMS Colombo (Commodore R.J.R. Scott, RN) and HMS Dragon (Capt. R.G. Bowes-Lyon, MVO, RN) which were on passage to their patrol stations.
Around 0430Z/17, in foggy conditions, the outward bound liner Samaria (British, 19597 GRT, built 1921) collided with both HMS Furious and the Aquitania but no major damage was done to either one of the three ships.
The convoy arrived safely in the Clyde on 17 December 1939. (10)
11 Dec 1939
Around 1300Z/11, HMS Glasgow (Capt. F.H. Pegram, RN) arrived at Scapa Flow after providing cover to convoys to and from Norway.
HMS Edinburgh (Capt. F.C. Bradley, RN) arrived at Rosyth from the same duties around 1530Z/11. (9)
13 Dec 1939
Around 2300Z/13, the light cruisers HMS Southampton (Capt. F.W.H. Jeans, CVO, RN, flying the flag of Vice-Admiral G.F.B. Edward-Collins, CB, KCVO, RN) and HMS Edinburgh (Cdr. C. Wauchope, RN, temporary in command) departed Rosyth very late in the evening to patrol between the Shetland Islands and the Faroes to provide cover for Convoy TC 1 carring troops from Canada to the U.K.
[For more info on this convoy see the event ' Convoy TC 1 ' for 10 December 1939.] (11)
15 Dec 1939
Shortly after noon the light cruisers HMS Southampton (Capt. F.W.H. Jeans, CVO, RN, flying the flag of Vice-Admiral G.F.B. Edward-Collins, CB, KCVO, RN) and HMS Edinburgh (Cdr. C. Wauchope, RN, temporary in command) arrived at Scapa Flow from patrol. (11)
17 Dec 1939
Vice-Admiral G.F.B. Edward-Collins, CB, KCVO, RN, transferred his flag from HMS Southampton (Capt. F.W.H. Jeans, CVO, RN) to HMS Edinburgh (Capt. C.M. Blackman, DSO, RN). (12)
18 Dec 1939
Convoy Narvik 2.
This convoy departed Narvik, Norway on 18 December 1939. It arrived at Methil on 24 December 1939.
This convoy was made up of the following merchant vessels; Baron Kelvin (British, 3081 GRT, built 1924), Baron Ruthven (British, 3178 GRT, built 1925), Clara Lilley (British, 3726 GRT, built 1917), Flimston (British, 4674 GRT, built 1925), Flora (Greek, 3010 GRT, built 1904), Fylingdale (British, 3918 GRT, built 1924) and Otterpool (British, 4876 GRT, built 1926).
It was escorted by the destroyers HMS Jervis (Capt. P.J. Mack, RN), HMS Jaguar (Lt.Cdr. J.F.W. Hine, RN) and HMS Janus (Lt.Cdr. J.A.W. Tothill, RN). HMS Juno (Cdr. W.E. Wilson, RN) joined the convoy on the 20th having been unable to sail with the other three destroyers earlier due to defects.
These four destroyers had departed Immingham at noon on 16 December 1939. They arrived at Sullom Voe to fuel at 1100/17. HMS Jervis, HMS Jaguar and HMS Janus departed again around 1500 hours to join the convoy. As stated earlier HMS Juno sailed later (on the 19th) after repairs had been made.
On 23 December HMS Jaguar was detached around 0400/23 to Scapa Flow with defects. She arrived there around 0900/23.
Cover for the convoy was provided by the light cruisers HMS Southampton (Capt. F.W.H. Jeans, CVO, RN, flying the flag of Vice-Admiral G.F.B. Edward-Collins, CB, KCVO, RN) and HMS Edinburgh (Capt. C.M. Blackman, DSO, RN, flying the flag of Vice-Admiral G.F.B. Edward-Collins, CB, KCVO, RN). These cruisers had departed Scapa Flow at 0800/18. HMS Edinburgh arrived at Rosyth at 0030/24. HMS Southampton arrived at Newcastle at 1200/24.
29 Dec 1939
Convoy ON 6.
This convoy departed Methil on 29 December 1939 and arrived in Norwegian waters near Bergen on 1 January 1940.
The convoy was made up of the following merchant vessels; Highlander (British, 1216 GRT, built 1916), Rigel (Finnish, 1477 GRT, built 1937), Salerno (British, 870 GRT, built 1924), Vienti (Finnish, 1715 GRT, built 1911) and Wanda (Finnish, 1902 GRT, built 1897).
The small minelayer HMS Ringdove (Lt. C.R. Pilgrim, RN) was also part of this convoy.
A close escort was provided for the convoy made up of the destroyers HMS Exmouth (Cdr. R.S. Benson, DSO, RN), HMS Eclipse (Lt.Cdr. I.T. Clark, RN), HMS Encounter (Lt.Cdr. E.V.St.J. Morgan, RN), HMS Escapade (Cdr. H.R. Graham, RN) and the submarine ORP Orzel (Kpt.mar. (Lt.Cdr.) J. Grudzinski, DSO).
A close cover force, made up of the light cruisers HMS Glasgow (Capt. F.H. Pegram, RN) and HMS Edinburgh (Capt. C.M. Blackman, DSO, RN, flying the flag of Vice-Admiral G.F.B. Edward-Collins, CB, KCVO, RN) departed Rosyth on 30 December.
At 0050Z/30, the Highlander parted company to proceed to Aberdeen escorted by HMS Eclipse. HMS Eclipse rejoined the convoy screen around 1000Z/30.
During the night of 29/30 December, the Vienti had straggled from the convoy and was not seen again before the convoy arrived in Norwegian waters.
At 1100Z/30, HMS Eclipse was again detached but now to escort HMS Ringdove towards Scapa Flow. At 1555Z/30, the escort was taken over by the auxiliary A/S trawler HMS Arctic Explorer (Skr. C.L. Buchan, RNR). HMS Eclipse rejoined the convoy screen around 15 minutes later. By that time the Rigel and Wanda had also straggled from the convoy being unable to keep up even at 6.5 knots. They rejoined the convoy the next day after the remainder of the convoy had doubled back for a while as Capt. Benson had been ordered to do so due the important cargoes the ships had on board.
The convoy arrived in Norwegian waters on 1 January where it was dispersed.
30 Dec 1939
Around 1500Z/30, HMS Glasgow (Capt. F.H. Pegram, RN) and HMS Edinburgh (Capt. C.M. Blackman, DSO, RN, flying the flag of Vice-Admiral G.F.B. Edward-Collins, CB, KCVO, RN) departed Rosyth to provide close cover during convoy operation to and from Norway.
[For more info on these convoys see the events ' Convoy ON 6 ' for 29 December 1939 and ' Convoy HN 6 ' for 1 January 1940.] (9)
1 Jan 1940
Convoy HN 6.
This convoy departed from Norwegian waters near Bergen on 1 January 1940 and the bulk of the convoy arrived at Methil on 4 January 1940.
The convoy was made up of the following merchant vessels; Boreas (Norwegian, 2801 GRT, built 1920), Catherine (Estonian, 1885 GRT, built 1904), Consul Bratt (Swedish, 1117 GRT, built 1913), Corona (Finish, 1569 GRT, built 1922), Crown Arun (British, 2372 GRT, built 1938), Dokka (Norwegian, 1168 GRT, built 1925), Dux (Norwegian, 1590 GRT, built 1934), Eros (Norwegian, 974 GRT, built 1922), Fagerbro (Norwegian, 994 GRT, built 1923), Garm (Swedish, 1231 GRT, built 1912), Gaston Micard (Norwegian, 982 GRT, built 1917), Glen Tilt (British, 871 GRT, built 1920), Granli (Norwegian, 1577 GRT, built 1935), Hague (British, 974 GRT, built 1919), Haukefjell (Norwegian, 2495 GRT, built 1921), Havtor (Norwegian, 1524 GRT, built 1930), Hektos (Finnish, 2108 GRT, built 1903), Ibis (Norwegian, 1367 GRT, built 1918), Iris (Swedish,1974 GRT, built 1886), Kalix (Swedish, 2801 GRT, built 1913), Kis (Norwegian, 1249 GRT, built 1915), Majorca (British, 1126 GRT, built 1921), Maurita (Norwegian, 1569 GRT, built 1925), Miranda (Norwegian, 1328 GRT, built 1920), Oria (Norwegian, 2127 GRT, built 1920), Plato (Swedish, 836 GRT, built 1898), Porjus (Swedish, 2965 GRT, built 1906), Saimaa (Finnish, 2001 GRT, built 1922), Sarmatia (Finnish, 2417 GRT, built 1901), Sirius (Swedish, 1832 GRT, built 1889), Skarv (Norwegian, 852 GRT, built 1923), Svarton (Swedish, 2475 GRT, built 1906), Transport (Norwegian, 1998 GRT, built 1921), Ulv (Norwegian, 938 GRT, built 1920), Wiima (Finnish, 3272 GRT, built 1897) and Zilos (Finnish, 1711 GRT, built 1884).
On departure the convoy was escorted by the destroyers HMS Exmouth (Cdr. R.S. Benson, DSO, RN), HMS Eclipse (Lt.Cdr. I.T. Clark, RN), HMS Encounter (Lt.Cdr. E.V.St.J. Morgan, RN), HMS Escapade (Cdr. H.R. Graham, RN) and the submarine ORP Orzel (Lt.Cdr. J. Grudzinski, DSO).
A distant cover force for the convoy was also nearby, it was made up of the light cruisers HMS Glasgow (Capt. F.H. Pegram, RN) and HMS Edinburgh (Capt. C.M. Blackman, DSO, RN, flying the flag of Vice-Admiral G.F.B. Edward-Collins, CB, KCVO, RN).
On forming up in bad visibility four of the merchant ships failed to join the convoy.
Around 1015Z/2, the destroyers HMS Eskimo (Cdr. St.J.A. Micklethwait, RN) and HMS Tartar (Lt.Cdr. D.E. Holland-Martin, DSC, RN) joined the close escort.
Around 0800Z/3, the destroyers HMS Fearless (Cdr. K.L. Harkness, RN) and HMS Fury (Cdr. G.F. Burghard, RN) joined the convoy to take the ' westcoast section ' with them. The ships that were to proceed to the westcoast were the Consul Bratt, Fagerbro, Hektos, Maurita, Oria, Saimaa and Zilos.
Around 0630A/4, the Glen Tilt and Hague parted company with the convoy and proceeded to Dundee.
The remainder of the convoy arrived off Methil on 4 January.
3 Jan 1940
Around midnight during the night of 3/4 January 1940, HMS Glasgow (Capt. F.H. Pegram, RN) and HMS Edinburgh (Capt. C.M. Blackman, DSO, RN, flying the flag of Vice-Admiral G.F.B. Edward-Collins, CB, KCVO, RN) arrived at Rosyth from convoy cover duty. (13)
6 Jan 1940
Convoy ON 7.
Convoy ON 7 departed Methill on 6 January 1940 for Norway where it was dissolved off Bergen on 9 January 1940.
It was made up of the following merchant ships; Breda (Norwegian, 1260 GRT, built 1915), Briarwood (British, 4019 GRT, built 1930), Ingerois (Finnish, 1995 GRT, built 1909), Leda (Finnish, 1283 GRT, built 1908), Otto (Estonian, 1959 GRT, built 1918), Sally (Finnish, 2547 GRT, built 1896) and Vestra (British, 1141 GRT, built 1921).
Escort was provided by the destroyers HMS Eskimo (Cdr. St.J.A. Micklethwait, DSO, RN), HMS Tartar (Lt.Cdr. D.E. Holland-Martin, DSC, RN), HMS Kashmir (Cdr. H.A. King, RN) and HMS Khartoum (Cdr. D.T. Dowler, RN). HMS Khartoum departed from Scapa Flow on the 7th and it therefore appears that she joined the convoy at sea on the 7th. HMS Eskimo developed engine problems and was replaced by HMS Encounter (Lt.Cdr. E.V.St J. Morgan, RN), Encounter herself was relieved on the 8th by HMS Kandahar (Cdr. W.G.A. Robson, RN) which had departed Scapa Flow on that day.
Also the submarine HMS Triton (Lt.Cdr. E.F. Pizey, RN) was part of the escort of the convoy.
Cover for this convoy was provided by the light cruisers HMS Glasgow (Capt. F.H. Pegram, RN) and HMS Edinburgh (Capt. C.M. Blackman, DSO, RN, flying the flag of Vice-Admiral G.F.B. Edward-Collins, CB, KCVO, RN) which sailed from Rosyth on the 7th. (14)
7 Jan 1940
Around 1500Z/7, HMS Glasgow (Capt. F.H. Pegram, RN) and HMS Edinburgh (Capt. C.M. Blackman, DSO, RN, flying the flag of Vice-Admiral G.F.B. Edward-Collins, CB, KCVO, RN) departed Rosyth to provide close cover during convoy operation to and from Norway.
[For more info on these convoys see the events ' Convoy ON 7 ' for 6 January 1940 and ' Convoy HN 7 ' for 9 January 1940.] (13)
9 Jan 1940
Convoy HN 7
This convoy was assembled in Norwegian waters near Bergen on 9 January 1940 and arrived at Methil on 12 January 1940.
Convoy ON 7 arrived in Norwegian waters near Bergen. After a few hours convoy HN 7 departed for the U.K. The convoy was made up of the following merchant vessels; Abisko (Swedish, 3088 GRT, built 1913), Activ (Norwegian, 507 GRT, built 1903), Basel (Norwegian, 1110 GRT, built 1924), Bauta (Norwegian, 1657 GRT, built 1919), Begonia (Estonian, 1591 GRT, built 1890), Bokn (Norwegian, 697 GRT, built 1890), Bolette (Norwegian, 1167 GRT, built 1920), Bollsta (Norwegian, 1832 GRT, built 1934), Burgos (Norwegian, 3220 GRT, built 1920), Corvus (Norwegian, 1317 GRT, built 1921), Elsa S. (Finnish, 1219 GRT, built 1910), Fintra (British, 2089 GRT, built 1918), Forsvik (Norwegian, GRT, 1248 built 1919), Gudvang (Norwegian, 1469 GRT, built 1912), Gudveig (Norwegian, 1300 GRT, built 1919), Hadrian (Norwegian, 1620 GRT, built 1919), Inari (Finnish, 2216 GRT, built 1900), Ivalo (Finnish, 2035 GRT, built 1902), Kaupanger (Norwegian, 1584 GRT, built 1930), Lysland (Norwegian, 1335 GRT, built 1907), Margo (British, 1245 GRT, built 1895), Merisaar (Estonian, 2136 GRT, built 1900), Merkur (Estonian, 1291 GRT, built 1913), Nordost (Swedish, 1035 GRT, built 1918), Risoy (Norwegian, 793 GRT, built 1918), Rolf (Swedish, 1120 GRT, built 1919), Salerno (British, 870 GRT, built 1924), Sarpfoss (Norwegian ,1493 GRT, built 1919), Skum (Norwegian, 1304 GRT, built 1916), Urd (Swedish, 989 GRT, built 1922), Vestmanrod (Norwegian, 691 GRT, built 1919), Vienti (Finnish, 1915 GRT, built 1911), Vim (Norwegian, 1114 GRT, built 1913), Wanda (Finnish, 1902 GRT, built 1897), Wilke (Finnish, 2598 GRT, built 1909) and Wirpi (Finnish, 1227 GRT, built 1899).
Escort was provided by the destroyers HMS Tartar (Lt.Cdr. D.E. Holland-Martin, DSC, RN) (later relieved by HMS Maori (Cdr. G.N. Brewer, RN)), HMS Kashmir (Cdr. H.A. King, RN), HMS Khartoum (Cdr. D.T. Dowler, RN) and HMS Kandahar (Cdr. W.G.A. Robson, RN). HMS Forester (Lt.Cdr. E.B. Tancock, DSC, RN) later joined at sea. Also part of the escort was the submarine HMS Triton (Lt.Cdr. E.F. Pizey, RN).
Cover for this convoy, like with convoy ON 7, was provided by the light cruisers HMS Glasgow (Capt. F.H. Pegram, RN) and HMS Edinburgh (Capt. C.M. Blackman, DSO, RN, flying the flag of Vice-Admiral G.F.B. Edward-Collins, CB, KCVO, RN).
HMS Kharthoum split off from the convoy on the 11th with five merchant vessels she was to take to the Clyde. Off Scapa Flow they were joined by two tankers; Arndale (RFA, 8296 GRT, built 1937) and Scottish American (6999 GRT, built 1920). They arrived in the Clyde on 13 January 1940. (14)
12 Jan 1940
Around 0440Z/12, HMS Glasgow (Capt. F.H. Pegram, RN) and HMS Edinburgh (Capt. C.M. Blackman, DSO, RN, flying the flag of Vice-Admiral G.F.B. Edward-Collins, CB, KCVO, RN) arrived at Rosyth from convoy cover duty. (13)
15 Jan 1940
Convoy ON 8.
Convoy ON 8 departed Methill on 15 January 1940 for Norway where it was dissolved off Bergen on 19 January 1940.
It was made up of the following merchant ships; Baron Kelvin (British, 3081 GRT, built 1924), Eros (Norwegian, 974 GRT, built 1922), Fredensborg (Danish, 2094 GRT, built 1922), Glen Tilt (British, 871 GRT, built 1920), Gullpool (British, 4868 GRT, built 1928), Hague (British, 974 GRT, built 1919), Haukefjell (British, 2495 GRT, built 1921), Mathilda (Norwegian, 3650 GRT, built 1920), Oslo (Danish, 2094 GRT, built 1922) and Vienti (Finnish, 1715 GRT, built 1911).
A close escort provided for the convoy made was up of the destroyers HMS Duncan (Cdr. J.S.C. Salter, RN), HMS Imperial (Lt.Cdr. C.A.de W. Kitcat, RN), HMS Impulsive (Lt.Cdr. W.S. Thomas, RN) and HMS Isis (Cdr. J.C. Clouston, RN) and the submarine HMS Narwhal (Lt.Cdr. E.R.J. Oddie, RN).
Close cover was provided by the light cruisers HMS Edinburgh (Capt. C.M. Blackman, DSO, RN, flying the flag of Vice-Admiral G.F.B. Edward-Collins, CB, KCVO, RN) and HMS Glasgow (Capt. F.H. Pegram, RN).
The convoy arrived in Norwegian waters on 19 January 1940.
17 Jan 1940
Around 0430Z/17, HMS Glasgow (Capt. F.H. Pegram, RN) and HMS Edinburgh (Capt. C.M. Blackman, DSO, RN, flying the flag of Vice-Admiral G.F.B. Edward-Collins, CB, KCVO, RN) to provide close cover during convoy operation to and from Norway.
[For more info on these convoys see the events ' Convoy ON 8 ' for 15 January 1940 and ' Convoy HN 8 ' for 19 January 1940.] (13)
19 Jan 1940
Convoy HN 8
This convoy was assembled in Norwegian waters near Bergen on 19 January 1940 and arrived at Methil on 22 January 1940.
The convoy was made up of the following merchant vessels; Almora (Norwegian, 2433 GRT, built 1905), Baltanglia (British, 1523 GRT, built 1921), Briarwood (British, 4019 GRT, built 1930), Brott (Norwegian, 1583 GRT, built 1937), Bruse (Norwegian, 2205 GRT, built 1933), Canopus (Finnish, 1592 GRT, built 1911), Castor (Finnish, 1225 GRT, built 1906), Cygnus (Norwegian, 1333 GRT, built 1921), Delfinus (Norwegian, 1293 GRT, built 1912), Erica (Norwegian, 1592 GRT, built 1919), Folda (British, 1165 GRT, built 1920), Galatea (Norwegian, GRT, 1151 built 1912), Granfoss (Norwegian, 1461 GRT, built 1913), Graziella (Norwegian, 2137 GRT, built 1917), Havborg (Norwegian, 1234 GRT, built 1924), Helfrid (Swedish, 719 GRT, built 1922), Komet (Norwegian, 1147 GRT, built 1912), Kongshaug (Norwegian, 1156 GRT, built 1898), Libra (Norwegian, 1536 GRT, built 1917), Nina (Norwegian, 1371 GRT, built 1917), Nydalen (Norwegian, 625 GRT, built 1920), Oinaas (Finnish, 1423 GRT, built 1910), Parma (Finnish, 2010 GRT, built 1898), Pluto (Norwegian, 1598 GRT, built 1918), Rosenborg (Finnish, 1512 GRT, built 1919), Rym (Norwegian, 1369 GRT, built 1919), Saxen (Swedish, 1135 GRT, built 1921), Sitona (Norwegian, 1143 GRT, built 1920), Skum (Norwegian, 1304 GRT, built 1916), Snyg (Norwegian, 1326 GRT, built 1918), Solhavn (Norwegian, 1630 GRT, built 1918), Spes (Norwegian, 1142 GRT, built 1918), Svanholm (British, 1321 GRT, built 1922), Sverre Nergaard (Swedish, 1030 GRT, built 1900), Thyra (Norwegian, 1655 GRT, built 1918), Torbrand (Norwegian, 308 GRT, built 1918), Veni (Norwegian, 2982 GRT, built 1901), Vespasian (Norwegian, 1570 GRT, built 1935), Vesta (Norwegian, 1310 GRT, built 1930) and Vestra (Norwegian, 1422 GRT, built 1904).
Escort was provided by the following destroyers; HMS Inglefield (Capt. P. Todd, RN), HMS Icarus (Lt.Cdr. C.D. Maud, RN), HMS Imogen (Cdr. C.L. Firth, MVO, RN), HMS Impulsive (Lt.Cdr. W.S. Thomas, RN), HMS Kashmir (Cdr. H.A. King, RN), HMS Icarus (Lt.Cdr. C.D. Maud, RN) and HMS Kimberley (Lt.Cdr. R.G.K. Knowling, RN) which all joined at sea.
Cover was provided by the light cruisers HMS Glasgow (Capt. F.H. Pegram, RN) and HMS Edinburgh (Capt. C.M. Blackman, DSO, RN, flying the flag of Vice-Admiral G.F.B. Edward-Collins, CB, KCVO, RN).
21 Jan 1940
Around 2100Z/21, HMS Glasgow (Capt. F.H. Pegram, RN) and HMS Edinburgh (Capt. C.M. Blackman, DSO, RN, flying the flag of Vice-Admiral G.F.B. Edward-Collins, CB, KCVO, RN) arrived at Scapa Flow from convoy cover duty. (13)
22 Jan 1940
HMS Glasgow (Capt. F.H. Pegram, RN) and HMS Edinburgh (Capt. C.M. Blackman, DSO, RN, flying the flag of Vice-Admiral G.F.B. Edward-Collins, CB, KCVO, RN) conducted gunnery exercises at Scapa Flow. (13)
23 Jan 1940
HMS Glasgow (Capt. F.H. Pegram, RN) and HMS Edinburgh (Capt. C.M. Blackman, DSO, RN, flying the flag of Vice-Admiral G.F.B. Edward-Collins, CB, KCVO, RN) conducted gunnery exercises off Scapa Flow. (13)
24 Jan 1940
In the afternoon, HMS Glasgow (Capt. F.H. Pegram, RN) and HMS Edinburgh (Capt. C.M. Blackman, DSO, RN, flying the flag of Vice-Admiral G.F.B. Edward-Collins, CB, KCVO, RN) conducted gunnery exercises off Scapa Flow.
Before these gunnery exercises HMS Edinburgh conducted torpedo firing exercises. (13)
24 Jan 1940
Convoy ON 9.
This convoy was formed off Methill on 24 January 1940. It arrived in Norwegian waters near Bergen on 27 January 1940.
This convoy was made up of the following merchant vessels; Anna (Finnish, 1043 GRT, built 1897), Basel (Norwegian, 1110 GRT, built 1924), Bolette (Norwegian, 1167 GRT, built 1920), Fanefjeld (Norwegian, 1354 GRT, built 1920), Helder (Dutch, 3629 GRT, built 1920), Kalix (Swedish, 2801 GRT, built 1913), Kurikka (British, 3106 GRT, built 1918), Majorca (British, 1126 GRT, built 1921), Minorca (British, GRT, 1123 built 1921), Pollux (Finnish, 1284 GRT, built 1898), Sekstant (Norwegian, 1626 GRT, built 1919), Transport (Norwegian, 1998 GRT, built 1921) and Wanda (Finnish, 1902 GRT, built 1897).
Escort was provided by the destroyers HMS Inglefield (Capt. P. Todd, RN), HMS Isis (Cdr. J.C. Clouston, RN), HMS Tartar (Cdr. L.P. Skipwith, RN) and HMS Kashmir (Cdr. H.A. King, RN).
The submarine HMS Seal (Lt.Cdr. R.P. Lonsdale, RN) was also part of the escort.
HMS Tartar was relieved on the 25th by HMS Khartoum (Cdr. D.T. Dowler, RN) which in turn was relieved later that day by HMS Imogen (Cdr. C.L. Firth, MVO, RN).
Close cover for this convoy was provided by the light cruisers HMS Edinburgh (Capt. C.M. Blackman, DSO, RN, flying the flag of Vice-Admiral G.F.B. Edward-Collins, CB, KCVO, RN) and HMS Glasgow (Capt. F.H. Pegram, RN) which departed Scapa Flow on the 25th.
The convoy arrived safely off the Norwegian coast on the 27th.
25 Jan 1940
Around 2345Z/25, HMS Glasgow (Capt. F.H. Pegram, RN) and HMS Edinburgh (Capt. C.M. Blackman, DSO, RN, flying the flag of Vice-Admiral G.F.B. Edward-Collins, CB, KCVO, RN) to provide close cover during convoy operations to and from Norway.
[For more info on these convoys see the events ' Convoy ON 9 ' for 24 January 1940 and ' Convoy HN 9A ' for 27 January 1940.] (13)
27 Jan 1940
Convoy HN 9A.
This convoy was formed near Bergen, Norway on 27 January 1940. It arrived at Methill on 31 January 1940.
This convoy was made up of the following merchant vessels; Albert (Swedish, 1745 GRT, built 1922), Carbonia (Swedish, 1918 GRT, built 1916), Ceres (Finnish, 996 GRT, built 1889), Edna (Norwegian, 915 GRT, built 1905), Eikhaug (Norwegian, 1436 GRT, built 1903), Ergo (Finnish, 1928 GRT, built 1893), Favorit (Norwegian, 2826 GRT, built 1920), Haardrade (Norwegian, 750 GRT, built 1922), Helios (Estonian, 1309 GRT, built 1894), Inga (Finnish, 2410 GRT, built 1907), Ingaro (Swedish, 1999 GRT, built 1916), Inger (Norwegian, 1409 GRT, built 1930), Ingerfire (Norwegian, 3835 GRT, built 1905), Julia (Greek, 4352 GRT, built 1914), Juta (Estonian, 1559 GRT, built 1908), Kjell Billner (Norwegian, 1128 GRT, built 1907), Knoll (Norwegian, 1151 GRT, built 1916), Kul (Norwegian, 1310 GRT, built 1907), Lab (Norwegian, 1118 GRT, built 1912), Ledaal (Norwegian, 3076 GRT, built 1899), Leonardia (Swedish, 1583 GRT, built 1906), Louis de Geer (Swedish, 1847 GRT, built 1916), Makefjell (Norwegian, 1567 GRT, built 1932), Mammy (Norwegian, 1656 GRT, built 1911), Namdo (Swedish, 2738 GRT, built 1907), Nordia (Swedish, 1316 GRT, built 1921), Nurgis (Norwegian, 700 GRT, built 1919), Ramava (Latvian, 2141 GRT, built 1900), Rigel (Nowegian, 3828 GRT, built 1924), Skotfoss (Norwegian, 1465 GRT, built 1917), Tautra (Norwegian, 1749 GRT, built 1920), Torne (Swedish, 3792 GRT, built 1913), Torni (British, 2044 GRT, built 1918), Vaga (Norwegian, 1612 GRT, built 1924), Veni (Norwegian, 2982 GRT, built 1901), Vesla (Norwegian, 1107 GRT, built 1913) and Vestfoss (Norwegian, 1388 GRT, built 1909).
Escort was provided by the destroyers HMS Inglefield (Capt. P. Todd, RN), HMS Imogen (Cdr. C.L. Firth, MVO, RN), HMS Isis (Cdr. J.C. Clouston, RN), HMS Kashmir (Cdr. H.A. King, RN) amd the submarine HMS Seal (Lt.Cdr. R.P. Lonsdale, RN).
Close cover for this convoy was provided by the light cruisers HMS Edinburgh (Capt. C.M. Blackman, DSO, RN, flying the flag of Vice-Admiral G.F.B. Edward-Collins, CB, KCVO, RN) and HMS Glasgow (Capt. F.H. Pegram, RN).
The destroyer HMS Mohawk (Cdr. J.W.M. Eaton, RN) joined on 30 January and then split off from the convoy together with HMS Inglefield and twelve ships from the convoy to proceed to the west coast of the U.K.
The bulk of the convoy arrived safely at Methill on 31 January.
31 Jan 1940
Around 1345Z/31, HMS Glasgow (Capt. F.H. Pegram, RN) and HMS Edinburgh (Capt. C.M. Blackman, DSO, RN, flying the flag of Vice-Admiral G.F.B. Edward-Collins, CB, KCVO, RN) arrived at Rosyth from convoy cover duty. (15)
5 Feb 1940
Convoy ON 10.
This convoy was formed off Methil on 5 February 1940. It arrived in Norwegian waters near Bergen on 8 February 1940.
This convoy was made up of the following merchant vessels; Abisko (Swedish, 3088 GRT, built 1913), Activ (Norwegian, 507 GRT, built 1903), Asiatic (British, 3741 GRT, built 1923), Bokn (Norwegian, 697 GRT, built 1890), Bruse (Norwegian, 2205 GRT, built 1933), Castor (Finnish, 1225 GRT, built 1906), Ek (Norwegian, 995 GRT, built 1911), Folda (British, 1165 GRT, built 1920), Forsvik (Norwegian, 1248 GRT, built 1919), Haarlem (British, 970 GRT, built 1917), Halmstad (Swedish, 1546 GRT, built 1907), Helmwood (British, 2156 GRT, built 1923), Jetta (Norwegian, 368 GRT, built 1914), Lysland (Norwegian, 1335 GRT, built 1907), Margareta (Finnish, 1860 GRT, built 1919), Pan (Norwegian, 1309 GRT, built 1922), Porjus (Swedish, 2965 GRT, built 1906), Regulus (Finnish, 1821 GRT, built 1921), Saga (Swedish, 1077 GRT, built 1909), Saimaa (Finnish, 2001 GRT, built 1922), Salerno (British, 870 GRT, built 1924), Severn Leigh (British, 5242 GRT, built 1919), Sirius (Swedish, 1832 GRT, built 1889), Svanholm (British, 1321 GRT, built 1922), Taberg (Swedish, 1392 GRT, built 1920), Teano (British, 762 GRT, built 1925), Themis (Norwegian, 706 GRT, built 1919), Tiberton (British, 5225 GRT, built 1920), Tonu (Estonian, 1431 GRT, built 1884), Torbrand (Norwegian, 308 GRT, built 1918) and Vim (Norwegian, 1114 GRT, built 1913),
Escort was provided by the destroyers HMS Delight (Cdr. M. Fogg-Elliott, RN), HMS Ilex (Lt.Cdr. P.L. Saumarez, DSC, RN), HMS Imogen (Cdr. C.L. Firth, MVO, RN), HMS Imperial (Lt.Cdr. C.A.de W. Kitcat, RN) and HMS Tartar (Cdr. L.P. Skipwith, RN). Also part of the convoy escort was the submarine HMS Narwhal (Lt.Cdr. E.R.J. Oddie, RN).
Cover for the convoy was provided by the light cruisers HMS Arethusa (Capt. Q.D. Graham, RN) and HMS Edinburgh (Capt. C.M. Blackman, DSO, RN, flying the flag of Vice-Admiral G.F.B. Edward-Collins, CB, KCVO, RN).
HMS Tartar was relieved on the 6th by HMS Kimberley (Lt.Cdr. R.G.K. Knowling, RN).
Also on the 6th, HMS Delight was detached as she had been ordered to proceed to Scapa Flow with dispatch.
6 Feb 1940
HMS Edinburgh (Capt. C.M. Blackman, DSO, RN, flying the flag of Vice-Admiral G.F.B. Edward-Collins, CB, KCVO, RN) departed Rosyth around 1400Z/6.
HMS Arethusa (Capt. Q.D. Graham, RN) departed Scapa Flow around 1645Z/6.
They made rendezvous around 1100Z/7 to provide close cover during convoy operation to and from Norway.
[For more info on these convoys see the events ' Convoy ON 10 ' for 5 February 1940 and ' Convoy HN 10 ' for 8 February 1940. (16)
8 Feb 1940
Convoy HN 10.
This convoy was formed off Bergen, Norway on 8 February 1940. It arrived at Methil on 11 February 1940.
This convoy was made up of the following merchant vessels; Ada Gorthon (Swedish, 2405 GRT, built 1917), Asgerd (Norwegian, 1308 GRT, built 1924), Avance I (Norwegian, 1300 GRT, built 1912), Briarwood (British, 4019 GRT, built 1930), Brisk (Norwegian, 1838 GRT, built 1913), C.A. Banck (Swedish, 1838 GRT, built 1913), Castor (Norwegian, 1683 GRT, built 1920), Dagmar Bratt (Swedish, 1421 GRT, built 1920), Edda (Swedish, 1451 GRT, built 1919), Edle (Norwegian, 654 GRT, built 1916), Falken (Swedish, 1308 GRT, built 1893), Frisia (Swedish, 1059 GRT, built 1909), Gallia (Swedish, 1436 GRT, built 1926), Glen Tilt (British, 871 GRT, built 1920), Gunny (Panamanian, 1367 GRT, built 1882), Halse (Norwegian, 2136 GRT, built 1910), Hermes (Estonian, 1545 GRT, built 1901), Karen (Norwegian, 750 GRT, built 1900), Keret (Norwegian, 1718 GRT, built 1927), Kuressaar (Estonian, 2283 GRT, built 1914), Lake Lucerne (Estonian, 2317 GRT, built 1909), Meero (Estonian, 1866 GRT, built 1918), Minorca (British, 1123 GRT, built 1921), Nea (Norwegian, 1877 GRT, built 1921), P.G. Halvorsen (Norwegian, 1101 GRT, built 1912), Raftsund (Norwegian, 610 GRT, built 1919), Rask (Norwegian, 632 GRT, built 1890), Regin (Norwegian, 1386 GRT, built 1917), Salonica (Norwegian, 2694 GRT, built 1912), Selbo (Norwegian, 1778 GRT, built 1921), Sjofna (Norwegian, 619 GRT, built 1918), Sollund (Norwegian, 941 GRT, built 1908), Stargard (Norwegian, 1113 GRT, built 1915), Ubari (Estonian, 1392 GRT, built 1899), Uranus (Estonian, 1329 GRT, built 1906), Varmdo (Swedish, 2956 GRT, built 1901), Vienti (Finnish, 1715 GRT, built 1911) and Wirma (Finnish, 2609 GRT, built 1903).
Escort was provided by the destroyers HMS Delight (Cdr. M. Fogg-Elliott, RN), HMS Ilex (Lt.Cdr. P.L. Saumarez, DSC, RN), HMS Imogen (Cdr. C.L. Firth, MVO, RN), HMS Imperial (Lt.Cdr. C.A.de W. Kitcat, RN) and the submarine HMS Narwhal (Lt.Cdr. E.R.J. Oddie, RN).
Close cover was provided by the light cruisers HMS Edinburgh (Capt. C.M. Blackman, DSO, RN, flying the flag of Vice-Admiral G.F.B. Edward-Collins, CB, KCVO, RN) and HMS Arethusa (Capt. Q.D. Graham, RN).
The convoy was split into two sections on the 10th. The west coast section was joined by the destroyers HMS Nubian (Cdr. R.W. Ravenhill, RN) and HMS Kimberley (Lt.Cdr. R.G.K. Knowling, RN). On this day the HMS Kandahar (Cdr. W.G.A. Robson, RN), HMS Kashmir (Cdr. H.A. King, RN), HMS Khartoum (Cdr. D.T. Dowler, RN) and HMS Kingston (Lt.Cdr. P. Somerville, DSO, RN) departed the Clyde to meet this section and take over escort duties from the other destroyers on the 11th. This section of the convoy arrived in the Clyde on the 12th.
9 Feb 1940
Convoy ON 11.
This convoy departed Methil on 9 February 1940 and arrived in Norwegian waters near Bergen on 12 February 1940.
The convoy was made up of the following merchant vessels; Albuera (British, 3477 GRT, built 1921), Ask (Norwegian, 1541 GRT, built 1917), Baron Blythswood (British, 3668 GRT, built 1929), Bessheim (Norwegian, 1774 GRT, built 1912), Finland (Danish, 1345 GRT, built 1930), Hjalmar Wessel (Norwegian, 1742 GRT, built 1935), Iris (Swedish, 1974 GRT, built 1886), Jetta (Norwegian, 368 GRT, built 1914), Leka (Norwegian, 1599 GRT, built 1922), Nordborg (Danish, 1998 GRT, built 1930), Olev (Estonian, 1377 GRT, built 1909), Osric (Swedish, 1418 GRT, built 1919), Rikke (Norwegian, 1432 GRT, built 1909), Risoy (Norwegian, 793 GRT, built 1918), Roy (Norwegian, 1768 GRT, built 1921), Sado (Norwegian, 925 GRT, built 1917), Sarmatia (Finnish, 2417 GRT, built 1901), Solhavn (Norwegian, 1630 GRT, built 1918), Vaga (Norwegian, 1612 GRT, built 1924), Vesla (Norwegian, 1107 GRT, built 1913), Vestmanrod (Norwegian, 691 GRT, built 1919) and Wiima (Finnish, 3272 GRT, built 1897).
A close escort was provided for the convoy made up of the destroyers HMS Echo (Cdr. S.H.K. Spurgeon, DSO, RAN), HMS Eclipse (Lt.Cdr. I.T. Clark, RN), HMS Encounter (Lt.Cdr. E.V.St.J. Morgan, RN), HMS Escapade (Cdr. H.R. Graham, RN) and the submarine HMS Narwhal (Lt.Cdr. E.R.J. Oddie, RN). These were joined on the 11th by the AA cruiser HMS Cairo (Capt. P.V. McLaughlin, RN).
Cover for the convoy was provided by HMS Edinburgh (Capt. C.M. Blackman, DSO, RN, flying the flag of Vice-Admiral G.F.B. Edward-Collins, CB, KCVO, RN) and HMS Arethusa (Capt. Q.D. Graham, RN).
The convoy arrived in Norwegian waters on 12 February 1940.
10 Feb 1940
HMS Edinburgh (Capt. C.M. Blackman, DSO, RN, flying the flag of Vice-Admiral G.F.B. Edward-Collins, CB, KCVO, RN) and HMS Arethusa (Capt. Q.D. Graham, RN) arrived at Rosyth from convoy cover duty.
They departed again later the same day for another round of convoy cover duty.
[For more info on these convoys see the events ' Convoy ON 11 ' for 9 February 1940 and ' Convoy HN 11 ' for 12 February 1940.] (17)
12 Feb 1940
Convoy HN 11.
This convoy was formed near Bergen, Norway on 12 February 1940. It arrived at Methil on 15 February 1940
This convoy was made up of the following merchant vessels; Balder (Norwegian, 1129 GRT, built 1901), Bjornvik (Norwegian, 812 GRT, built 1918), Convallaria (Swedish, 1996 GRT, built 1921), Dahlia (Swedish, 1057 GRT, built 1907), Drabant (Swedish, 1767 GRT, built 1897), Eros (Norwegian, 974 GRT, built 1922), Frisco (Norwegian, 1582 GRT, built 1939), Gol (Norwegian, 985 GRT, built 1920), Jacob Christensen (Norwegian, 3594 GRT, built 1920), Jaederen (Norwegian, 902 GRT, built 1918), La France (Norwegian, 617 GRT, built 1909), Listo (Norwegian, 1998 GRT, built 1918), Lyng (Norwegian, 953 GRT, built 1920), Lysland (Norwegian, 1335 GRT, built 1907), Majorca (British, 1126 GRT, built 1921), Mari (Norwegian, 563 GRT, built 1920), Maria Gorthon (Swedish, 1572 GRT, built 1930), Northumbria (Swedish, 1396 GRT, built 1898), Omberg (Swedish, 1284 GRT, built 1920), Orania (Norwegian, 1182 GRT, built 1919), Orland (Norwegian, 1899 GRT, built 1917), Oscar (Swedish, 1394 GRT, built 1914), Otto (Finnish, 1343 GRT, built 1907), Sando (Swedish, 1334 GRT, built 1902), Sigrid (Norwegian, 965 GRT, built 1920), Sixten (Norwegian, 2171 GRT, built 1912), Spero (Norwegian, 3619 GRT, built 1919), Storfors (Norwegian, 545 GRT, built 1918) and Vestland (Norwegian, 1934 GRT, built 1916).
Escort was provided by the destroyers HMS Cossack (Capt. P.L. Vian, RN), HMS Mohawk (Cdr. J.W.M. Eaton, RN), HMS Sikh (Cdr. J.A. Giffard, RN) and HMS Tartar (Cdr. L.P. Skipwith, RN). The AA cruiser HMS Cairo (Capt. P.V. McLaughlin, RN) also joined the convoy on the 12th.
Cover for the convoy was provided by the light cruisers HMS Edinburgh (Capt. C.M. Blackman, DSO, RN, flying the flag of Vice-Admiral G.F.B. Edward-Collins, CB, KCVO, RN) and HMS Arethusa (Capt. Q.D. Graham, RN).
HMS Cairo parted company with the convoy on the 13th and arrived at Scapa Flow later the same day.
Destroyer HMS Diana (Lt.Cdr. E.G. Le Geyt, RN) sailed from Rosyth on the 13th and joined the close convoy escort. The movements of each induvial escort is not clear to us at the moment but it appears all escorts were back in harbour before the convoy arrived at Methil.
14 Feb 1940
HMS Edinburgh (Capt. C.M. Blackman, DSO, RN, flying the flag of Vice-Admiral G.F.B. Edward-Collins, CB, KCVO, RN) and HMS Arethusa (Capt. Q.D. Graham, RN) arrived at Rosyth from convoy cover duty. (17)
16 Feb 1940
Convoy HN 12
This convoy departed from Norway, near Bergen on 16 February 1940. The bulk of the convoy arrived at Methil on 19 February 1940.
The convoy was made up of the following merchant vessels; Activ (Norwegian , 507 GRT, built 1903), Amsterdam (Dutch, 7329 GRT, built 1922), Arnold Bratt (Swedish, 1430 GRT, built 1925), Bera (Swedish, 11286 GRT, built 1939), Columba (Norwegian, 1118 GRT, built 1929), Consul Bratt (Swedish, 1117 GRT, built 1913), Frode (Norwegian, 697 GRT, built 1917), Gottfrid (Finnish, 1592 GRT, built 1899), Hundvaag (Norwegian, 690 GRT, built 1908), Iberia (Swedish, 1399 GRT, built 1903), Kongshavn (Norwegian, 751 GRT, built 1906), Liv (Norwegian, 3068 GRT, built 1906), Maria Toft (Danish, 1911 GRT, built 1928), Meteor (Norwegian, 3717 GRT, built 1904), Mimer (Norwegian, 1143 GRT, built 1905), Rex (Swedish, 1013 GRT, built 1877), Rosten (Norwegian, 737 GRT, built 1920), Roy (Norwegian, 1768 GRT, built 1921), Sekstant (Norwegian, 1626 GRT, built 1919), Skarv (Norwegian, 852 GRT, built 1923), Stig Gorthon (Swedish, 2241 GRT, built 1924), Svanholm (British, 1321 GRT, built 1922), Vaga (Norwegian, 1612 GRT, built 1924), Viiu (Estonian, 1908 GRT, built 1917), Vim (Norwegian, 1114 GRT, built 1913) and Wipunen (Finnish, 4103 GRT, built 1913).
Escort was provided by the destroyers HMS Inglefield (Capt. P. Todd, RN), HMS Ilex (Lt.Cdr. P.L. Saumarez, DSC, RN), HMS Imogen (Cdr. C.L. Firth, MVO, RN) and HMS Delight (Cdr. M. Fogg-Elliott, RN). Anti-Aircraft protection was provided until the afternoon of the 17th by the anti-aircraft cruiser HMS Calcutta (Capt. H.A. Packer, RN) which then proceeded to Sullom Voe. The submarine HMS Thistle (Cdr. R.W. Stirling-Hamilton, RN) was also part of the convoy escort.
The destroyer HMS Daring (Cdr. S.A. Cooper, RN) joined the convoy at sea on the 16th having departed Rosyth on the 15th.
Cover for the convoy was provided from the afternoon of February 17th until early on the 18th by the light cruisers HMS Edinburgh (Capt. C.M. Blackman, DSO, RN, flying the flag of Vice-Admiral G.F.B. Edward-Collins, CB, KCVO, RN) and HMS Arethusa (Capt. Q.D. Graham, RN).
On the 18th the convoy was joined by three merchant ships from the Orkneys and by their escort, the destroyer HMS Imperial (Lt.Cdr. C.A.de W. Kitcat, RN).
Shortly before 0400 hours, on the 18th, HMS Daring was torpedoed and sunk by German U-boat U-23 about 40 nautical miles east of the Pentland Firth in position 58°40'N, 01°35'W. HMS Thistle sights the sinking destroyer and directs the other destroyers to the rescue. HMS Inglefield (appartenly returned) picked up one officer and three ratings from a Carley float and HMS Ilex another rating from wreckage, they are the only survivors. 156 of the crew are lost. HMS Ilex also hunted the U-boat without success.
Following the sinking of HMS Daring the destroyers HMS Gallant (Lt.Cdr. C.P.F. Brown, RN), HMS Nubian (Cdr. R.W. Ravenhill, RN), HMS Sikh (Cdr. J.A. Giffard, RN) and HMS Jaguar (Lt.Cdr. J.F.W. Hine, RN) were sent out from Rosyth to join the convoy and escort the merchant vessels to Methil so that the original destroyer escort could hunt the submarine. [It remains unclear to us though if HMS Jaguar actually joined the convoy as she also departed Methil as escort for an east coast convoy on the 18th.] (18)
17 Feb 1940
HMS Edinburgh (Capt. C.M. Blackman, DSO, RN, flying the flag of Vice-Admiral G.F.B. Edward-Collins, CB, KCVO, RN) departed Rosyth to provide cover for convoy HN 12.
[For more info on this convoy see the event ' Convoy HN 12 ' for 16 February 1940.] (19)
17 Feb 1940
Convoy ON 14.
This convoy departed Methil on 17 February 1940 and arrived in Norwegian waters near Bergen on 22 February 1940.
The convoy was made up of the following merchant vessels; Baron Kelvin (British, 3081 GRT, built 1924), Canopus (Finnish, 1592 GRT, built 1911), Ceres (Finnish, 996 GRT, built 1889), Clarissa Radcliffe (British, 5754 GRT, built 1915), Crown Arun (British, 2372 GRT, built 1938), Delfinus (Norwegian, 1293 GRT, built 1912), Eikhaug (Norwegian, 1436 GRT, built 1903), Elsa S. (Finnish, 1219 GRT, built 1910), Fintra (British, 2089 GRT, built 1918), Flowergate (British, 5161 GRT, built 1911), Gallia (Swedish, 1436 GRT, built 1926), Iris (Norwegian, 1171 GRT, built 1901), Kirnwood (British, 3829 GRT, built 1928), Kotka (Finnish, 1286 GRT, built 1918), Margo (British, 1245 GRT, built 1895), Oddevold (British, 1186 GRT, built 1883), Rosenborg (Finnish, 855 GRT, built 1919), Snefjeld (Norwegian, 1643 GRT, built 1901), Varde (Norwegian, 860 GRT, built 1938), Varegg (Norwegian, 943 GRT, built 1910), Vesta (Norwegian, 1310 GRT, built 1930), Vina (British, 1021 GRT, built 1894) and Warlaby (British, 4875 GRT, built 1927).
A close escort was provided for the convoy made up of the destroyers HMS Escapade (Cdr. H.R. Graham, RN), HMS Eclipse (Lt.Cdr. I.T. Clark, RN), HMS Electra (Lt.Cdr. S.A. Buss, MVO, RN), HMS Escort (Lt.Cdr. J. Bostock, RN) and the submarine HMS Narwhal (Lt.Cdr. E.R.J. Oddie, RN).
Cover for the convoy was provided by the light cruisers HMS Edinburgh (Capt. C.M. Blackman, DSO, RN, flying the flag of Vice-Admiral G.F.B. Edward-Collins, CB, KCVO, RN) and HMS Arethusa (Capt. Q.D. Graham, RN).
During the night of 18/19 February the convoy arrived at Kirkwall as it had been ordered to go there due to reported enemy naval activities off the Norwegian coast.
In the afternoon of the 20th the convoy left Kirkwall to continue its passage.
Around 1730Z/21, the AA cruiser HMS Cairo (Capt. P.V. McLaughlin, RN) joined the close escort.
The convoy arrived in Norwegian waters on 22 February 1940.
18 Feb 1940
HMS Edinburgh (Capt. C.M. Blackman, DSO, RN, flying the flag of Vice-Admiral G.F.B. Edward-Collins, CB, KCVO, RN) and HMS Arethusa (Capt. Q.D. Graham, RN) arrived at Scapa Flow from convoy cover duty and operations (Arethusa only). (17)
20 Feb 1940
HMS Edinburgh (Capt. C.M. Blackman, DSO, RN, flying the flag of Vice-Admiral G.F.B. Edward-Collins, CB, KCVO, RN) and HMS Arethusa (Capt. Q.D. Graham, RN) departed Scapa Flow to provide close cover during convoy operations to and from Norway.
[For more info on these convoys see the events ' Convoy ON 14 ' for 17 February 1940 and ' Convoy HN 14 ' for 22 February 1940.] (17)
22 Feb 1940
Convoy HN 14.
This convoy departed from Norwegian waters near Bergen on 22 February 1940 and the bulk of the convoy arrived at Methil on 26 February 1940.
The convoy was made up of the following merchant vessels; Baron Blythswood (British, 3668 GRT, built 1929), Fanjefjeld (Norwegian, 1354 GRT, built 1920), Framnas (Swedish, 721 GRT, built 1931), Hilda (Finnish, 1144 GRT, built 1915), Hjalmar Wessel (Norwegian, 1742 GRT, built 1935), Inga (Danish, 1494 GRT, built 1921), Kalix (Swedish, 2801 GRT, built 1913), Mall (Estonian, 1863 GRT, built 1918), Narvik (Swedish, 4251 GRT, built 1914), Orion (Estonian, 770 GRT, built 1870), Peet (Estonian, 2111 GRT, built 1913), Sado (Norwegian, 925 GRT, built 1917), Skagen (Danish, 900 GRT, built 1914), Snyg (Norwegian, 1326 GRT, built 1918), Sten (Norwegian, 1464 GRT, built 1910), Tora Elise (Norwegian, 721 GRT, built 1919), Toran (Norwegian, 3318 GRT, built 1918) and Utklippan (Swedish, 1599 GRT, built 1883).
More merchant vessels were to have been part of the convoy but due to the late arrival of convoy ON 14 and the bad weather conditions these ships had returned to Bergen.
[The eventual composition of the convoy remains a bit unclear to us and further research will be needed.]
A close escort was provided for the convoy made up of the AA cruiser HMS Cairo (Capt. P.V. McLaughlin, RN) and the destroyers HMS Escapade (Cdr. H.R. Graham, RN), HMS Eclipse (Lt.Cdr. I.T. Clark, RN), HMS Electra (Lt.Cdr. S.A. Buss, MVO, RN), HMS Escort (Lt.Cdr. J. Bostock, RN) and the submarine HMS Narwhal (Lt.Cdr. E.R.J. Oddie, RN).
Cover for the convoy was provided by the light cruisers HMS Edinburgh (Capt. C.M. Blackman, DSO, RN, flying the flag of Vice-Admiral G.F.B. Edward-Collins, CB, KCVO, RN) and HMS Arethusa (Capt. Q.D. Graham, RN).
At 1300/24, HMS Cairo parted company with the convoy and proceeded to Sullom Voe.
Around 0400/25, HMS Eclipse and HMS Electra were detached taking the merchant ships for the west coast with them.
Around 0730/25, the destroyers HMS Inglefield (Capt. P. Todd, RN) and HMS Imogen (Cdr. C.L. Firth, MVO, RN) joined.
Shortly afterwards HMS Narwhal signalled to HMS Escapade that she sighted something. HMS Escapade immediately altered course to investigate and soon sighted a surfaced submarine. She did not open fire in the hope of getting closer. When the range was 5000 to 6000 yards the submarine submerged. HMS Escapade ran in for a further three minutes and then started the use her Asdic. She soon got a contact and started attacking with depth charges. She was joined by the other destroyers. The enemy submarine, which was the U-63, was eventually forced to the surface and her crew was being picked up by HMS Inglefield, HMS Imogen and HMS Escort.
The convoy arrived at Methil on 26 February 1940.
26 Feb 1940
HMS Edinburgh (Capt. C.M. Blackman, DSO, RN, flying the flag of Vice-Admiral G.F.B. Edward-Collins, CB, KCVO, RN) arrived at Rosyth from convoy cover duty. (19)
3 Mar 1940
Convoy ON 17.
This convoy was formed off Methil on 3 March 1940. It arrived in Norwegian waters near Bergen on 7 March 1940.
This convoy was made up of the following merchant vessels; Aina (British, 1698 GRT, built 1904), Aspen (Swedish, 1305 GRT, built 1908), Becheville (British, 4228 GRT, built 1924), Borgund (Norwegian, 303 GRT, built 1917), Brita (Swedish, 1252 GRT, built 1908), Carbonia (Swedish, 1918 GRT, built 1916), Drabant (Swedish, 1767 GRT, built 1897), Edle (Norwegian, 654 GRT, built 1916), Falken (Swedish, 1308 GRT, built 1893), Finlandia (Finnish, 1464 GRT, built 1920), Flimston (British, 4674 GRT, built 1925), Frans (Swedish, 1169 GRT, built 1924), Frode (Norwegian, 697 GRT, built 1917), Greenawn (British, 784 GRT, built 1924), Helfrid (Swedish, 719 GRT, built 1922), Iron Baron (Norwegian, 3231 GRT, built 1911), Jacob Christensen (Norwegian, 3594 GRT, built 1920), Karen (Danish, 1194 GRT, built 1917), Knud Villemoes (Danish, 1582 GRT, built 1905), Kongshavn (Norwegian, 751 GRT, built 1906), Kul (Norwegian, 1310 GRT, built 1907), Lily (Danish, 1281 GRT, built 1920), Marianne (Danish, 1239 GRT, built 1924), Marita (Finnish, 1869 GRT, built 1923), Merkur (Estonian, 1291 GRT, built 1913), Minona (Norwegian, 1147 GRT, built 1919), Nicke (Swedish, 1170 GRT, built 1918), Nurgis (Norwegian, 700 GRT, built 1919), Regin (Norwegian, 1386 GRT, built 1917), Rolf (Swedish, 1120 GRT, built 1919), Roy (Norwegian, 1768 GRT, built 1921), Sirius (Swedish, 1832 GRT, built 1889), Sixten (Swedish, 2171 GRT, built 1912), Skarv (Norwegian, 852 GRT, built 1923), Sophie (Danish, 945 GRT, built 1920), Svanholm (Norwegian, 696 GRT, built 1917), Thore Hafte (Norwegian, 626 GRT, built 1896), Torafire (Norwegian, 823 GRT, built 1920), Trewellard (British, 5201 GRT, built 1936), Varanges (Norwegian, 2214 GRT, built 1908) and Vim (Norwegian, 1114 GRT, built 1913).
Escort was provided by the AA cruiser HMS Calcutta (Capt. H.A. Packer, RN), the destroyers HMS Delight (Cdr. M. Fogg-Elliott, RN), HMS Diana (Lt.Cdr. E.G. Le Geyt, RN), HMS Ilex (Lt.Cdr. P.L. Saumarez, DSC, RN), HMS Gurkha (Cdr. A.W. Buzzard, RN) and HMS Nubian (Cdr. R.W. Ravenhill, RN) and the submarine HMS Narwhal (Lt.Cdr. R.J. Burch, RN).
The light cruisers HMS Edinburgh (Capt. C.M. Blackman, DSO, RN, flying the flag of Vice-Admiral G.F.B. Edward-Collins, CB, KCVO, RN) and HMS Arethusa (Capt. Q.D. Graham, RN) departed Rosyth on the 4th to provide cover.
On the 4th the merchant vessel Greenawn was detached to Scapa Flow escorted by HMS Diana. HMS Narwhal was also detached with orders to proceed to Scapa Flow.
4 Mar 1940
HMS Edinburgh (Capt. C.M. Blackman, DSO, RN) and HMS Arethusa (Capt. Q.D. Graham, RN) departed Scapa Flow to provide close cover during convoy operations to and from Norway.
Before departure Vice-Admiral G.F.B. Edward-Collins, CB, KCVO, RN, had struck his flag in HMS Edinburgh and departed from the ship.
[For more info on these convoys see the events ' Convoy ON 17 ' for 3 March 1940, ' Convoy HN 17A ' for 4 March 1940, ' Convoy HN 17 ', ' Convoy ON 18 ' for 7 March 1940 and ' Convoy HN 18 ' for 10 March 1940] (20)
4 Mar 1940
Convoy ON 17A.
This convoy was formed off Methil on 4 March 1940. It arrived in Norwegian waters near Bergen on 8 March 1940.
This convoy was made up of the following merchant vessels; Almora (Norwegian, 2433 GRT, built 1905), Ardanbhan (British, 4980 GRT, built 1929), Ardun (Norwegian, 1304 GRT, built 1925), Balticia (Swedish, 1966 GRT, built 1905), Banian (Norwegian, 1581 GRT, built 1912), Bolette (Norwegian, 1167 GRT, built 1920), Bore (Swedish, 1216 GRT, built 1910), Briarwood (British, 4019 GRT, built 1930), Brisk (Norwegian, 1594 GRT, built 1923), Dagmar Bratt (Swedish, 1421 GRT, built 1920), Dahlia (Swedish, 1057 GRT, built 1907), Ena de Larrinaga (British, 5200 GRT, built 1925), Erica (Norwegian, 1592 GRT, built 1919), Eros (Norwegian, 974 GRT, built 1922), Frisia (Swedish, 1059 GRT, built 1909), Gottfird (Finnish, 1592 GRT, built 1899), Heilo (Norwegian, 989 GRT, built 1921), Helny (Finnish, 1506 GRT, built 1886), Julia (Estonian, 1892 GRT, built 1906), Kare (Swedish, 1202 GRT, built 1902), Karen (Norwegian, 750 GRT, built 1900), King Alfred (British, 5272 GRT, built 1919), Komet (Norwegian, 1147 GRT, built 1912), Margareta (British, 3103 GRT, built 1904), Margareta (Finnish, 1860 GRT, built 1919), Nina (Norwegian, 1371 GRT, built 1917), Oinas (Finnish, 1423 GRT, built 1910), Ostrobotnia (Finnish, 2335 GRT, built 1921), Otto (Estonian, 1959 GRT, built 1918), Rex (Swedish, 1013 GRT, built 1877), Rigel (Norwegian, 3828 GRT, built 1924), Sedgepool (British, 5556 GRT, built 1918), Sjofna (Norwegian, 619 GRT, built 1918), Stargard (Norwegian, 1113 GRT, built 1915), Tautra (Norwegian, 1749 GRT, built 1920), Tilda (Finnish, 2768 GRT, built 1903), Tora (Norwegian, 851 GRT, built 1918), Toran (Norwegian, 3318 GRT, built 1918), Tyra Bratt (Swedish, 1301 GRT, built 1923), Uranus (Estonian, 1329 GRT, built 1906) and Vaga (Norwegian, 1612 GRT, built 1924).
Escort was provided by HMS Jervis (Capt. P.J. Mack, RN), HMS Jaguar (Lt.Cdr. J.F.W. Hine, RN), HMS Janus (Cdr. J.A.W. Tothill, RN), HMS Juno (Cdr. W.E. Wilson, RN) and HMS Jupiter (Cdr. D.B. Wyburd, RN). HMS Juno later had to be detached to return to Rosyth with defects.
Later, at sea, the convoy was joined by the AA cruiser HMS Calcutta (Capt. H.A. Packer, RN).
Cover for the convoy was provided by the light cruisers HMS Edinburgh (Capt. F.C. Bradley, RN) and HMS Arethusa (Capt. Q.D. Graham, RN).
7 Mar 1940
Convoy ON 18.
This convoy departed Methil on 7 March 1940 and arrived in Norwegian waters near Bergen on 10 March 1940.
The convoy was made up of the following merchant vessels; Agne (Swedish, 2468 GRT, built 1917), Amsterdam (Swedish, 889 GRT, built 1903), Ashbury (British, 3901 GRT, built 1924), Bessheim (Norwegian, 1774 GRT, built 1912), C.A. Banck (Swedish, 1838 GRT, built 1913), Dalveen (British, 5193 GRT, built 1927), Demeterton (British, 5251 GRT, built 1926), Edna (Norwegian, 915 GRT, built 1905), Ergo (Finnish, 1928 GRT, built 1893), Gunny (Panamanian, 1367 GRT, built 1882), Hjalmar Wessel (Norwegian, 1742 GRT, built 1935), Iris (Norwegian, 1171 GRT, built 1901), Mari (Norwegian, 563 GRT, built 1920), Maria Toft (Danish, 1911 GRT, built 1928), Mona (Swedish, 2326 GRT, built 1902), Omberg (Swedish, 1284 GRT, built 1920), Regulus (Estonian, 893 GRT, built 1902), Rosenholm (Swedish, 1740 GRT, built 1895, Rosten (Norwegian, 737 GRT, built 1920), Rydal Force (British, 1101 GRT, built 1924), Sado (Norwegian, 925 GRT, built 1917), Selbo (Norwegian, 1778 GRT, built 1921), Sigrid (Norwegian, 965 GRT, built 1920), Skagen (Danish, 900 GRT, built 1914), Snyg (Norwegian, 1326 GRT, built 1918), Strait Fisher (British, 573 GRT, built 1917), Ulea (British, 1574 GRT, built 1936), Uto (Swedish, 1444 GRT, built 1914), Vestra (Norwegian, 1422 GRT, built 1904), Vienti (Finnish, 1715 GRT, built 1911), Viiu (Estonian, 1908 GRT, built 1917) and Visten (Swedish, 993 GRT, built 1921).
A close escort was provided for the convoy made up of the destroyers HMS Cossack (Capt. P.L. Vian, RN), HMS Eclipse (Lt.Cdr. I.T. Clark, RN), HMS Electra (Lt.Cdr. S.A. Buss, MVO, RN), HMS Encounter (Lt.Cdr. E.V.St J. Morgan, RN) and HMS Escort (Lt.Cdr. J. Bostock, RN).
On 8 March 1940, ten more mercant vessels departed Kirkwall to join the convoy, these were the; Airisto (Finnish, 2410 GRT, built 1907), Bradburn (British, 4736 GRT, built 1930), Graculus (Swedish, 1977 GRT, built 1923), Gudrun (British, 844 GRT, built 1924), Masilia (Swedish, 1608 GRT, built 1917), Mergus (Swedish, 1368 GRT, built 1906), Modesta (Finnish, 3830 GRT, built 1917), Navarra (Norwegian, 2118 GRT, built 1920), Pennington Court (British, 6098 GRT, built 1924) and Wentworth (British, 5212 GRT, built 1919).
These were escorted by the destroyer HMS Kelly (Capt. L.F.A.V.N. Mountbatten, GCVO, RN) which had departed Scapa Flow for Kirkwall to pick up the convoy and was then to make rendezvous with the convoy coming from Methil. While en-route from Kirkwall to join the convoy they were attacked by German aircraft but no damage was done.
Around 0520/9, HMS Kelly and HMS Gurkha (Cdr. A.W. Buzzard, RN), which was escorting Convoy HN 17, collided. The two convoys having met during dark hours. HMS Kelly was unable to continue and had to proceed to Lerwick.
Around the same time HMS Cossack parted company with convoy ON 18 and joined convoy HN 17.
Cover for the convoy was provided by the light cruisers HMS Edinburgh (Capt. F.C. Bradley, RN) and HMS Arethusa (Capt. Q.D. Graham, RN).
On 9 March 1940, the AA cruiser HMS Cairo (Capt. P.V. McLaughlin, RN) joined the convoy.
The convoy arrived in Norwegian waters on 10 March 1940.
7 Mar 1940
Convoy HN 17.
This convoy was formed off Bergen, Norway on 7 March 1940. The bulk of the convoy arrived at Methil on 10 March 1940.
This convoy was made up of the following merchant vessels; Albuera (British, 3477 GRT, built 1921), Baron Kelvin (British, 3081 GRT, built 1924), Bonde (Norwegian, 1570 GRT, built 1936), Effie Maersk (Danish, 1308 GRT, built 1925), Einvik (Norwegian, 2000 GRT, built 1918), Ek (Norwegian, 995 GRT, built 1911), Fairwater (British, 4108 GRT, built 1928), Gol (Norwegian, 985 GRT, built 1920), Hafnia (Norwegian, 1315 GRT, built 1920), Havborg (Norwegian, 1234 GRT, built 1924), Jaederen (Norwegian, 902 GRT, built 1918), Janna (Norwegian, 2197 GRT, built 1919), Kirnwood (British, 3829 GRT, built 1928), Lysaker (Norwegian, 910 GRT, built 1919), Margareta (Finnish, 1860 GRT, built 1919), Maurita (Norwegian, 1569 GRT, built 1925), Nesstun (Norwegian, 1271 GRT, built 1917), Notos (Norwegian, 2712 GRT, built 1898), Orland (Norwegian, 1899 GRT, built 1917), Ovington Court (British, 6095 GRT, built 1924), Reias (Norwegian, 1128 GRT, built 1918), Royal (Norwegian, 759 GRT, built 1918), Spica (Norwegian, 500 GRT, built 1915), Stanja (Norwegian, 1845 GRT, built 1915), Star (Norwegian, 1531 GRT, built 1922), Varegg (Norwegian, 943 GRT, built 1910), Vesta (Norwegian, 1310 GRT, built 1930) and Warlaby (British, 4875 GRT, built 1927).
Escort was provided by the destroyers HMS Delight (Cdr. M. Fogg-Elliott, RN), HMS Diana (Lt.Cdr. E.G. Le Geyt, RN), HMS Ilex (Lt.Cdr. P.L. Saumarez, DSC, RN), HMS Nubian (Cdr. R.W. Ravenhill, RN) and HMS Gurkha (Cdr. A.W. Buzzard, RN).
Close cover was provided by the light cruisers HMS Edinburgh (Capt. C.M. Blackman, DSO, RN) and HMS Arethusa (Capt. Q.D. Graham, RN).
On the 9th the convoy split and the west coast section was then escorted by HMS Delight and HMS Diana. They were reinforced by HMS Kimberley (Lt.Cdr. R.G.K. Knowling, RN) which came from Scapa Flow. Also HMS Kelly (Capt. L.F.A.V.N. Mountbatten, GCVO, RN) joined having sailed late in the afternoon of the 8th.
In the moring of the 9th, HMS Kelly (Capt. L.F.A.V.N. Mountbatten, GCVO, RN) joined the escort but she collided with HMS Gurkha in bad weather and soon had to be detached to Lerwick for emergency repairs.
At 1412/9, HMS Gurkha obtained an A/S contact and attacked with several pattern of depth charges in position 59.07’N, 00.44’W. HMS Ilex then took over the hunt and HMS Gurkha rejoined the east coast section of the convoy. HMS Foxhound (Lt.Cdr. G.H. Peters, DSC, RN) joined from Scapa Flow in the early hours of the 10th to replace HMS Ilex which was still hunting Gurkha’s A/S contact. She eventually rejoined the convoy before it arrived at Methil. The A/S contact was later determined to be a wreck.
10 Mar 1940
Convoy HN 18.
This convoy departed from Norwegian waters near Bergen on 10 March 1940 and the bulk of the convoy arrived at Methil on 13 March 1940.
The convoy was made up of the following merchant vessels; Atlas (Finnish, 1098 GRT, built 1901), Borosund (Finnish, 1015 GRT, built 1920), Brita Thorden (Finnish, 1899 GRT, built 1920), Clive (Swedish, 1079 GRT, built 1924), Eldrid (Norwegian, 1712 GRT, built 1915), Elna E. (Norwegian, 1174 GRT, built 1925), Ericus (Finnish, 2215 GRT, built 1919), Ferm (Swedish, 1026 GRT, built 1936), Forsvik (Norwegian, 1248 GRT, built 1919), Frey (Swedish, 1090 GRT, built 1911), Graziella (Norwegian, 2137 GRT, built 1917), Hagfors (Swedish, 654 GRT, built 1917), Halvard Bratt (Swedish, 1031 GRT, built 1921), Ibis (Norwegian, 1367 GRT, built 1918), Jaak (Estonian, 1351 GRT, built 1906), Kaupanger (Norwegian, 1584 GRT, built 1930), Kaupo (Latvian, 2905 GRT, built 1905), Magdalena (Swedish, 1278 GRT, built 1882), Marvi (Estonian, 1429 GRT, built 1883), Nordost (Swedish, 1035 GRT, built 1918), P.L. Pahlsson (Swedish, 1533 GRT, built 1916), Porjus (Swedish, 2965 GRT, built 1906), Regulus (Finnish, 1821 GRT, built 1921), Sarp (Norwegian, 1113 GRT, built 1916), Sarpfoss (Norwegian, 1493 GRT, built 1919), Sif (Swedish, 1365 GRT, built 1913), Snefjeld (Norwegian, 1643 GRT, built 1901), Toratre (Norwegian, 1016 GRT, built 1920), Transport (Norwegian, 1998 GRT, built 1921), Union (Norwegian, 607 GRT, built 1893), Urd (Swedish, 989 GRT, built 1922), Vina (British, 1021 GRT, built 1894), Wappu (Finnish, 1513 GRT, built 1930) and Wiima (Finnish, 3272 GRT, built 1897).
On departure the convoy was escorted by the destroyers HMS Eclipse (Lt.Cdr. I.T. Clark, RN), HMS Electra (Lt.Cdr. S.A. Buss, MVO, RN), HMS Encounter (Lt.Cdr. E.V.St J. Morgan, RN) and HMS Escort (Lt.Cdr. J. Bostock, RN).
The destroyer HMS Kimberley (Lt.Cdr. R.G.K. Knowling, RN) had departed Scapa Flow at 1800/9 to join the close convoy escort.
Cover for the convoy was provided by the light cruisers HMS Edinburgh (Capt. C.M. Blackman, DSO, RN) and HMS Arethusa (Capt. Q.D. Graham, RN).
The destroyer HMS Fame (Cdr. P.N. Walter, RN) departed Scapa Flow on the 11th to join the convoy and then take the west coast section of nine merchant vessels under her orders together with HMS Kimberley. The merchant vessels which made up the ' west coast section ' were the following; Atlas, Clive, Graziella, Harvard Bratt, Kaupanger, Sarpfoss, Snefjeld, Toratre and Wappu.
The bulk of the convoy arrived at Methil on the 13th.
11 Mar 1940
Convoy ON 19.
This convoy departed Methil on 11 March 1940 and arrived in Norwegian waters near Bergen on 14 March 1940.
The convoy was made up of the following merchant vessels; Akabahra (Norwegian, 1524 GRT, built 1929), Bruse (Norwegian, 2205 GRT, built 1933), Cetus (Norwegian, 2614 GRT, built 1920), Convallaria (Swedish, 1996 GRT, built 1921), Diana (Norwegian, 1154 GRT, built 1904), Emmi (Finnish, 1592 GRT, built 1905), Framnas (Swedish, 721 GRT, built 1931), Fylingdale (British, 3918 GRT, built 1924), Grenaa (Danish, 1261 GRT, built 1917), Gudrun (Norwegian, 1128 GRT, built 1919), Harmonic (British, 4558 GRT, built 1930), Hermes (Estonian, 1545 GRT, built 1901), Hilda (Norwegian, 1237 GRT, built 1925), Jarl (Norwegian, 437 GRT, built 1889), Karl-Erik (Finnish, 1945 GRT, built 1923), Kem (Norwegian, 1706 GRT, built 1925), Marx (Danish, 1259 GRT, built 1924), Meero (Estonian, 1866 GRT, built 1918), Meteor (Norwegian, 3717 GRT, built 1904), Minorca (British, 1123 GRT, built 1921), Mira (Norwegian, 1152 GRT, built 1891), Oscar (Swedish, 1394 GRT, built 1914), Sally (Finnish, 2547 GRT, built 1896), Sarimner (Swedish, 2294 GRT, built 1909), Trident (British, 4317 GRT, built 1917), Urania (Estonian, 1180 GRT, built 1884), Wirma (Finnish, 2609 GRT, built 1903) and Yewkyle (British, 824 GRT, built 1917).
On departure from Methil the convoy had a close A/S escort made up of the destroyers HMS Cossack (Capt. P.L. Vian, RN), HMS Gurkha (Cdr. A.W. Buzzard, RN), HMS Nubian (Cdr. R.W. Ravenhill, RN) and HMS Ilex (Lt.Cdr. P.L. Saumarez, DSC, RN).
Cover for the convoy was provided by the light cruiser HMS Edinburgh (Capt. C.M. Blackman, DSO, RN)
On 12 March 1940, eleven more mercant vessels departed Kirkwall to join the convoy, these were the; Barrwhin (British, 4998 GRT, built 1929), Brighton I. (British, 5359 GRT, built 1928), Oswin (Swedish, 1332 GRT, built 1913), Raftsund (Norwegian, 610 GRT, built 1919), Singoalla (Swedish, 1468 GRT, built 1913), Sonja (Swedish, 1828 GRT, built 1923), Torridal (Norwegian, 1381 GRT, built 1930), Tregenna (British, 5242 GRT, built 1919), Ubari (Estonian, 1392 GRT, built 1899), Umberleigh (British, 4950 GRT, built 1927) and Vigor (Norwegian, 1518 GRT, built 1935).
These were escorted by the destroyers HMS Faulknor (Capt. A.F. de Salis, RN) and HMS Fortune (Cdr. E.A. Gibbs, DSO, RN) which had departed Scapa Flow on 11 March. These destroyers joined the close escort after which HMS Ilex was detached to Scapa Flow.
At 0725A/14, the AA cruiser HMS Calcutta (Capt. H.A. Packer, RN) joined the convoy having sailed from Sullom Voe around 0700A/13.
The convoy arrived in Norwegian waters around noon on the 14th.
12 Mar 1940
Around 0800A/12, HMS Edinburgh (Capt. C.M. Blackman, DSO, RN) parted company with HMS Arethusa (Capt. Q.D. Graham, RN) and proceeded to Scapa Flow where she arrived around 1230A/12.
HMS Arethusa proceeded to Rosyth, where she arrived around 2000A/12.
After fuelling, HMS Edinburgh, departed Scapa Flow again (at 2200A/12) to provide cover for convoys ON 19 and HN 19 to and from Norway.
[For more info on these convoys see the events ' convoy ON 19 ' for 11 March 1940 and ' Convoy HN 19 ' for 14 March 1940.] (20)
14 Mar 1940
Convoy HN 19.
This convoy was formed off Bergen, Norway on 14 March 1940. The bulk of the convoy arrived at Methil on 17 March 1940.
The convoy was made up of the following merchant vessels; Begonia (Estonian, 1591 GRT, built 1890), Brage (Swedish, 774 GRT, built 1903), Corolus (Finnish, 2375 GRT, built 1919), Crown Arun (British, 2372 GRT, built 1938), Ester Thorden (Finnish, 1940 GRT, built 1921), Evviva (Norwegian, 1597 GRT, built 1921), Granfoss (Norwegian, 1461 GRT, built 1913), Heien (Norwegian, 995 GRT, built 1926), Ingeborg (Swedish, 1156 GRT, built 1908), Inger (Norwegian, 1409 GRT, built 1930), Iris (Norwegian, 1171 GRT, built 1930), Kalev (Estonian, 1867 GRT, built 1917), Kongshaug (Norwegian, 1156 GRT, built 1898), Kotka (Finnish, 1286 GRT, built 1918), Margo (Estonian, 1245 GRT, built 1895), Meggie (Swedish, 1583 GRT, built 1906), Najaden (Finnish, 1963 GRT, built 1906), Newton Ash (British, 4625 GRT, built 1925), North Devon (British, 3658 GRT, built 1924), Olev (Estonian, 1377 GRT, built 1909), Rapid II (Norwegian, 714 GRT, built 1916), Ruth I (Norwegian, 3531 GRT, built 1900), Saga (Swedish, 1077 GRT, built 1909), Selvik (Norwegian, 1557 GRT, built 1920), Siak (Norwegian, 1150 GRT, built 1930), Skotfoss (Norwegian, 1465 GRT, built 1917), Solhavn (Norwegian, 1630 GRT, built 1918), Sulev (Estonian, 2233 GRT, built 1908), Svanholm (Norwegian, 696 GRT, built 1917), Taberg (Swedish, 1392 GRT, built 1920), Themis (Norwegian, 706 GRT, built 1919), Tor (Swedish, 1052 GRT, built 1911), Tore Jarl (Norwegian, 1514 GRT, built 1920) and Vim (Norwegian, 1114 GRT, built 1913).
Escort was provided by the AA cruiser HMS Calcutta (Capt. H.A. Packer, RN) and the destroyers HMS Cossack (Capt. P.L. Vian, RN), HMS Gurkha (Cdr. A.W. Buzzard, RN), HMS Nubian (Cdr. R.W. Ravenhill, RN), HMS Faulknor (Capt. A.F. de Salis, RN) and HMS Fortune (Cdr. E.A. Gibbs, DSO, RN).
Cover for the convoy was provided by the light cruiser HMS Edinburgh (Capt. C.M. Blackman, DSO, RN).
HMS Calcutta parted company with the convoy in the morning of the 15th and proceeded to Sullom Voe.
When the convoy split in the west and east coast section HMS Faulknor and HMS Foretune took 15 merchant vessels with them; these were most likely the; Brage, Crown Arun, Granfoss, Heien, Iris, Kalev, Kongshaug, Meggie, North Devon, Olev, Ruth I, Saga, Skotfoss, Solhavn and Sulev.
The bulk of the convoy arrived at MEthil on 17 March 1940.
17 Mar 1940
HMS Edinburgh (Capt. C.M. Blackman, DSO, RN) arrived in the Tyne from convoy cover duty.
At South Shields she was to be taken in hand for repairs and refit by the Middle Docks & Engineering Company Ltd. It had become apparent that the design of the hull had been inadequate and the hull needed stiffening. (20)
23 Apr 1940
HMS Edinburgh (Capt. C.M. Blackman, DSO, RN) was reduced to care and maintenance while refitting at South Shields. (21)
21 Oct 1940
HMS Edinburgh (Capt. C.M. Blackman, DSO, RN) completed to full complement. (22)
29 Oct 1940
With her refit and repairs completed, HMS Edinburgh (Capt. C.M. Blackman, DSO, RN), proceeded from the Tyne to Rosyth.
31 Oct 1940
HMS Edinburgh (Capt. C.M. Blackman, DSO, RN) departed Rosyth for Scapa Flow. (22)
1 Nov 1940
HMS Edinburgh (Capt. C.M. Blackman, DSO, RN) arrived at Scapa Flow to commence a work-up period.
[As said before (see above), details might be missing as no log is available for this period.] (24)
14 Nov 1940
Around 1730A/14, HMS Edinburgh (Capt. C.M. Blackman, DSO, RN) and HMS Phoebe (Capt. G. Grantham, RN) departed Scapa Flow for the Clyde.
HMS Edinburgh was required for escort duty despite the fact that she had not fully worked-up yet. (25)
15 Nov 1940
Around 1500A/15, HMS Edinburgh (Capt. C.M. Blackman, DSO, RN) and HMS Phoebe (Capt. G. Grantham, RN) arrived at Greenock from Scapa Flow. (25)
18 Nov 1940
Convoy WS 4B.
This convoy departed Liverpool / the Clyde on 17/18 November 1940 for Suez where it arrived on 28 December 1940.
The convoy was made up of the troopships; Andes (British, 25689 GRT, built 1939), Duchess of Atholl (British, 20119 GRT, built 1928), Empress of Canada (British, 21517 GRT, built 1922), Orcades (British, 23456 GRT, built 1937), Otranto (British, 20026 GRT, built 1925), Reina del Pacifico (British, 17702 GRT, built 1931), Strathaird (British, 22281 GRT, built 1932), Strathallan (British, 23722 GRT, built 1938), Strathnaver (British, 22283 GRT, built 1931) and Viceroy of India (British, 19627 GRT, built 1929).
The convoy was formed at sea at 0830/18 when the two sections made rendez-vous west of Oversay Light.
The convoy was escorted by the heavy cruiser HMS Norfolk (Capt. A.J.L. Phillips, RN), light cruiser HMS Edinburgh (Capt. C.M. Blackman, DSO, RN) and the destroyers HMS Highlander (Cdr. W.A. Dallmeyer, RN), HMCS Ottawa (Cdr. E.R. Mainguy, RCN), HMCS St. Laurent (Lt. H.S. Rayner, RCN), HMCS Saguenay (Cdr. G.R. Miles, RCN), HMCS Skeena (Lt.Cdr. J.C. Hibbard, RCN), HMS Bath (Cdr.(Retd.) A.V. Hemming, RN) and HMS St. Albans (Lt.Cdr.(Emgy.) S.G.C. Rawson, RN).
The AA cruiser HMS Cairo (Capt. P.V. McLaughlin, RN) joined at 0945/18.
An additional destroyer, HMS St. Marys (Lt. K.H.J.L. Phibbs, RN), joined the convoy in the afternoon of the 18th.
Destroyers HMS Bath, HMS St. Albans and HMS St. Marys parted company with the convoy at 1730/19 followed by HMS Cairo one hour later.
Destroyer HMS Highlander parted company with the convoy at 0900/20 followed at 1800/20 by the four Canadian destroyers.
Heavy cruiser HMS Devonshire (Capt. R.D. Oliver, DSC, RN) joined the convoy at 1300/23. HMS Norfolk parted company with the convoy at 1600/23 and proceeded to patrol east of the Azores.
The convoy arrived at Freetown on 29 November 1940 escorted by HMS Devonshire and HMS Edinburgh.
--------------------------------------------------
The convoy departed Freetown on 1 December 1940 escorted by HMS Devonshire and HMS Cumberland (Capt. G.H.E. Russell, RN).
HMS Cumberland parted company with the convoy late in the morning of December 4th having been relieved by HMS Hawkins (Capt. H.P.K. Oram, RN). HMS Cumberland then proceeded to join the South America Division.
HMS Hawkins was detached with orders to proceed to Simonstown in the morning of December 8th. After fuelling at Simonstown, she was to rejoin the convoy. She arrived at Simonstown around 1630B/9 and departed again around 2110B/9 rejoining the convoy around dawn on the 10th.
The convoy arrived at Durban on 12 December 1940 escorted by HMS Devonshire and HMS Hawkins.
--------------------------------------------------
The convoy departed Durban on 16 December 1940 escorted by HMS Devonshire and HMS Shropshire (Capt. J.H. Edelsten, RN).
At 1000/18, the light cruiser HMS Southampton (Capt. B.C.B. Brooke, RN) took over from HMS Devonshire. This last cruiser then set course to return to Durban.
The convoy arrived near Aden on 25 December 1940 but it did not enter the port. HMS Southampton was briefly detached to fuel at Aden after which she rejoined the convoy. The escort was reinforced with the AA cruiser HMS Carlisle (Capt. G.M.B. Langley, OBE, RN) and the destroyers HMS Kandahar (Cdr. W.G.A. Robson, RN) and HMS Kimberley (Lt.Cdr. J.S.M. Richardson, RN). HMS Shropshire was then detached from the convoy and entered Aden.
HMS Carlisle and HMS Kimberey parted company with the convoy on 27 December 1940 and joined a southbound convoy.
The convoy arrived at Suez on 28 December 1940 escorted by HMS Southampton and HMS Kandahar. (26)
29 Nov 1940
HMS Devonshire (Capt. R.D. Oliver, DSC, RN) and HMS Edinburgh (Capt. C.M. Blackman, DSO, RN) arrived at Freetown escorting convoy WS 4B. (27)
30 Nov 1940
HMS Edinburgh (Capt. C.M. Blackman, DSO, RN) departed Freetown to proceed to Scapa Flow. (22)
12 Dec 1940
HMS Edinburgh (Capt. C.M. Blackman, DSO, RN) arrived at Scapa Flow from Freetown and patrol.
She had been diverted to patrol north of the Azores for several days while en-route. (28)
17 Dec 1940
HMS Edinburgh (Capt. C.M. Blackman, DSO, RN) conducted gunnery exercises at Scapa Flow. (28)
18 Dec 1940
HMS Nelson (Capt. G.J.A. Miles, RN, flying the flag of A/Adm. J.C. Tovey, CB, DSO, RN), HMS Hood (Capt. I.G. Glennie, RN, flying the flag of Vice-Admiral W.J. Whitworth, CB, DSO, RN), HMS Repulse (Capt. W.G. Tennant, CB, MVO, RN) and HMS Manchester (Capt. H.A. Packer, RN, flying the flag of Vice-Admiral L.E. Holland, CB, RN), HMS Edinburgh (Capt. C.M. Blackman, DSO, RN), HMS Nigeria (Capt. J.G.L. Dundas, RN) departed Scapa Flow to conduct exercises west of the Orkneys. They were escorted by the destroyers HMS Cossack (Capt. P.L. Vian, DSO and Bar, RN), HMS Sikh (Cdr. G.H. Stokes, RN), HMS Tartar (Cdr. L.P. Skipwith, RN), HMS Brilliant (Lt.Cdr. F.C. Brodrick, RN), HMS Bulldog (Lt.Cdr. F.J.G. Hewitt, RN), HMS Beagle (Lt.Cdr. R.H. Wright, RN), HMS Douglas (Lt.Cdr. H.G. Bowerman, RN), HMS Escapade (Cdr. R.E. Hyde-Smith, RN), HMS Electra (Lt.Cdr. S.A. Buss, MVO, RN) and HMS Eclipse (Lt.Cdr. I.T. Clark, RN).
They returned to Scapa Flow on the 20th. (29)
23 Dec 1940
HMS Manchester (Capt. H.A. Packer, RN, flying the flag of Vice-Admiral L.E. Holland, CB, RN), HMS Edinburgh (Capt. C.M. Blackman, DSO, RN) and HMS Nigeria (Capt. J.G.L. Dundas, RN) conducted gunnery exercises at Scapa Flow. (29)
24 Dec 1940
Late in the afternoon the battlecruiser HMS Hood (Capt. I.G. Glennie, RN, flying the flag of Vice-Admiral W.J. Whitworth, CB, DSO, RN), light cruiser HMS Edinburgh (Capt. C.M. Blackman, DSO, RN), destroyers HMS Cossack (Capt. P.L. Vian, DSO and Bar, RN), HMS Echo (Cdr. S.H.K. Spurgeon, DSO, RAN), HMS Electra (Lt.Cdr. S.A. Buss, MVO, RN) and HMS Escapade (Cdr. R.E. Hyde-Smith, RN),departed Scapa Flow around 1730 hours to patrol to the east of the Iceland - Faroes passage.
28 Dec 1940
Around 1415A/28 the battleship HMS Nelson (Capt. G.J.A. Miles, RN, flying the flag of A/Adm. J.C. Tovey, CB, DSO, RN) and the destroyers HMS Bedouin (Cdr. J.A. McCoy, DSO, RN), HMS Sikh (Cdr. G.H. Stokes, RN), HMS Tartar (Cdr. L.P. Skipwith, RN) and HMS Beagle (Lt.Cdr. R.H. Wright, RN) departed Scapa Flow to patrol to the east of the Iceland - Faroes passage.
They were to be joined the next day, around 1230A/29, by the light cruiser HMS Edinburgh (Capt. C.M. Blackman, DSO, RN) which was already on patrol. (30)
31 Dec 1940
Around 1230A/31, HMS Nelson (Capt. G.J.A. Miles, RN, flying the flag of A/Adm. J.C. Tovey, CB, DSO, RN), HMS Bedouin (Cdr. J.A. McCoy, DSO, RN), HMS Sikh (Cdr. G.H. Stokes, RN), HMS Tartar (Cdr. L.P. Skipwith, RN) and HMS Beagle (Lt.Cdr. R.H. Wright, RN), arrived at Scapa Flow from patrol.
HMS Edinburgh (Capt. C.M. Blackman, DSO, RN) arrived a little earlier, around 1100A/31. (30)
2 Jan 1941
Laying of minefields SN 6 and SN 65.
Minelaying operation by the 1st Minelaying Squadron.
The auxiliary minelayers Southern Prince (A/Capt. E.M.C. Barraclough, RN, flying the flag of Rear-Admiral R.L. Burnett, OBE, RN), HMS Agamemnon (Capt. (Retd.) F. Ratsey, RN), HMS Menestheus (Capt. W.H.D. Friedberger, RN) and HMS Port Quebec (Capt. (Retd.) E.C. Watson, RN) departed Port ZA (Loch Alsh) to lay two minefields; SN 6 (997 mines) and SN 65 (1028 mines). They were being escorted on departure from Port ZA by the British destroyers HMS Douglas (Lt.Cdr. H.G. Bowerman, RN), HMS Keppel (Lt. R.J. Hanson, RN) and the Polish manned former French destroyer OF Ouragan (Kpt.mar. (Lt.Cdr.) Tadeusz Gorazdowski). Off the Butt of Lewis they were joined by the destroyer HMS Beagle (Lt.Cdr. R.H. Wright, RN).
Close cover for the minelayers was provided by the light cruiser HMS Edinburgh (Capt. C.M. Blackman, DSO, RN) which had departed Scapa Flow at 1000A/2.
Distant cover for the minelaying operation was provided by the battlecruiser HMS Hood (Capt. I.G. Glennie, RN, flying the flag of Vice-Admiral W.J. Whitworth, CB, DSO, RN) which was escorted by the destroyers HMS Sikh (Cdr. G.H. Stokes, RN), HMS Eskimo (Lt.Cdr. E.G. Le Geyt, RN), HMS Echo (Cdr. S.H.K. Spurgeon, DSO, RAN) and HMS Electra (Lt.Cdr. S.A. Buss, MVO, RN).
Minefield SN 6 was laid on 3 January 1941. It was laid along a line between positions 62°20'5"N, 07°02'0"W and 62°37'8"N, 07°38'6"W. The minelayers laid as follows; HMS Southern Prince 270 mines, HMS Agamemnon 255 mines, HMS Menestheus 196 mines and HMS Port Quebec 276 mines.
Minefield SN 65 was laid on 4 January 1941. It was laid along a line between positions 61°12'0"N, 06°39'0"W and 60°46'6"N, 06°22'5"W. The minelayers laid as follows; HMS Southern Prince 265 mines, HMS Agamemnon 275 mines, HMS Menestheus 214 mines and HMS Port Quebec 274 mines.
The distant cover force arrived at Scapa Flow around 0930A/5.
The minelaying force returned to Port ZA at 1700A/5 minus Ouragan which arrived at Scapa Flow at 1300/5 after having been detached due to shortage of fuel. HMS Beagle then departed almost immediately for the Clyde.
HMS Edinburgh returned to Scapa Flow at 1800A/5.
HMS Douglas and HMS Keppel arrived at Scapa Flow at 2345A/5 having first escorted the minelayers back to Loch Alsh. (31)
6 Jan 1941
HMS Manchester (Capt. H.A. Packer, RN, flying the flag of Vice-Admiral L.E. Holland, CB, RN) and HMS Edinburgh (Capt. C.M. Blackman, DSO, RN) departed Scapa Flow together to take up a position to the north-east of the Faroes as a German raider was suspected to be operating in the North Atlantic. (32)
7 Jan 1941
In the afternoon, HMS Manchester (Capt. H.A. Packer, RN, flying the flag of Vice-Admiral L.E. Holland, CB, RN) and HMS Edinburgh (Capt. C.M. Blackman, DSO, RN), returned to Scapa Flow. (32)
8 Jan 1941
Vice-Admiral L.E. Holland, CB, RN, trasferred his flag from HMS Manchester (Capt. H.A. Packer, RN) to HMS Edinburgh (Capt. C.M. Blackman, DSO, RN). (33)
10 Jan 1941
HMS Edinburgh (Capt. C.M. Blackman, DSO, RN, flying the flag of Vice-Admiral L.E. Holland, CB, RN) conducted 4" HA gunnery exercises at Scapa Flow. (34)
11 Jan 1941
As it was thought a German warship was operating west of Ireland the battlecruisers HMS Hood (Capt. I.G. Glennie, RN, flying the flag of Vice-Admiral W.J. Whitworth, CB, DSO, RN), HMS Repulse (Capt. W.G. Tennant, CB, MVO, RN), light cruisers HMS Edinburgh (Capt. C.M. Blackman, DSO, RN, flying the flag of Vice-Admiral L.E. Holland, CB, RN), HMS Birmingham (Capt. A.C.G. Madden, RN) and the destroyers HMS Somali (Capt. C. Caslon, RN), HMS Bedouin (Cdr. J.A. McCoy, DSO, RN), HMS Eskimo (Lt.Cdr. E.G. Le Geyt, RN), HMS Tartar (Cdr. L.P. Skipwith, RN), HMS Escapade (Cdr. R.E. Hyde-Smith, RN) and HMS Eclipse (Lt.Cdr. I.T. Clark, RN) sailed from Scapa Flow around 0100A/11 to try to intercept.
The force returned to Scapa Flow around 0100A/13 minus HMS Hood which was detached with orders to proceed to Rosyth. To escort her the destroyers HMS Echo (Cdr. S.H.K. Spurgeon, DSO, RAN), HMS Electra (Cdr. S.A. Buss, MVO, RN) and HMS Keppel (Lt. R.J. Hanson, RN) had departed Scapa Flow at 2300A/12.
16 Jan 1941
HMS Edinburgh (Capt. C.M. Blackman, DSO, RN, flying the flag of Vice-Admiral L.E. Holland, CB, RN), HMS Birmingham (Capt. A.C.G. Madden, RN) and HMS Nigeria (Capt. J.G.L. Dundas, RN) conducted torpedo firing exercises at Scapa Flow. (35)
17 Jan 1941
HMS Edinburgh (Capt. C.M. Blackman, DSO, RN, flying the flag of Vice-Admiral L.E. Holland, CB, RN) and HMS Nigeria (Capt. J.G.L. Dundas, RN) gunnery exercises off Scapa Flow. (35)
19 Jan 1941
HMS Edinburgh (Capt. C.M. Blackman, DSO, RN, flying the flag of Vice-Admiral L.E. Holland, CB, RN) bombardment exercises at Scapa Flow followed by 4" HA gunnery exercises in the Pentland Firth. (34)
22 Jan 1941
Operation Rubble
Escape of five Norwegian merchant vessels from Gotenburg, Sweden to the U.K.
The Norwegian merchant vessels; Elizabeth Bakke (5450 GRT, built 1937), John Bakke (4718 GRT, built 1929), Ranja (tanker, 6355 GRT, built 1928), Tai Shan (6962 GRT, built 1929) and Taurus (4767 GRT, built 1935).
During their escape the merchant vessels narrowly miss the German battlecruisers Scharnhorst and Gneisenau in the Kattegat during their passage to the Atlantic.
The light cruisers HMS Naiad (Capt. M.H.A. Kelsey, DSC, RN, flying the flag of Rear-Admiral E.L.S. King, CB, MVO, RN) and HMS Aurora (Capt. W.G. Agnew, RN) departed Scapa Flow at 2250A/23 to make rendez-vous with the escaping ships.
The light cruisers HMS Edinburgh (Capt. C.M. Blackman, DSO, RN, flying the flag of Vice-Admiral L.E. Holland, CB, RN) and HMS Birmingham (Capt. A.C.G. Madden, RN) with the destroyers HMS Echo (Cdr. S.H.K. Spurgeon, DSO, RAN), HMS Electra (Cdr. S.A. Buss, MVO, RN), HMS Escapade (Cdr. R.E. Hyde-Smith, RN) departed Scapa Flow at 0130A/24.
As the Elizabeth Bakke was the much faster then the other ships she proceeded independently. She arrived at Kirkwall at 0903A/25 not having been enable to make rendez-vous with the destroyer HMS Echo which had ben detached to escort her.
HMS Naiad and HMS Aurora met steamers Tai Shan and Taurus. They turned these steamers over the other warships group and then proceeded east again to meet the John Bakke and Ranja. These two merchant vessels were under air attack when the cruisers found them. Ranja sustained some minor damage and her First Officer was wounded.
Taurus arrived at Kirkwall at 0430A/25 escorted by HMS Electra, these were followed by the Tai Shan around 0535 hours.
The John Bakke arrived at Kirkwall at 0700A/25 escorted by HMS Aurora.
The final ship to arrive at Kirkwall was the tanker Ranja. She arrived at 0815A/25 escorted by HMS Naiad.
All warships involved then returned to Scapa Flow. All arrived on the 25th.
23 Jan 1941
In the late afternoon / early evening, HMS Edinburgh (Capt. C.M. Blackman, DSO, RN, flying the flag of Vice-Admiral L.E. Holland, CB, RN), HMS Birmingham (Capt. A.C.G. Madden, RN), HMS Nigeria (Capt. J.G.L. Dundas, RN) and HMS Mauritius (Cdr. A.R. Pedder, RN) conducted RIX (rangefinding and inclination) exercises off Scapa Flow. (35)
24 Jan 1941
Around 0115A/24, HMS Edinburgh (Capt. C.M. Blackman, DSO, RN, flying the flag of Vice-Admiral L.E. Holland, CB, RN), HMS Birmingham (Capt. A.C.G. Madden, RN), HMS Echo (Cdr. S.H.K. Spurgeon, DSO, RAN), HMS Electra (Cdr. S.A. Buss, MVO, RN) and HMS Escapade (Cdr. R.E. Hyde-Smith, RN) departed Scapa Flow to participate in operation Rubble.
They returned to Scapa Flow around 1115A/25.
[For more information on this operation see the event ' Operation Rubble ' for 22 January 1941.] (36)
25 Jan 1941
As the German battlecruisers Scharnhorst and Gneisenau were reported to have left Kiel, Germany for operations in the Atlantic the Home Fleet sailed around midnight during the night of the 25th/26th to intercept them.
The ships that sailed from Scapa Flow were the following, battleships HMS Nelson (Capt. G.J.A. Miles, RN, flying the flag of A/Adm. J.C. Tovey, KCB, DSO, RN), HMS Rodney (Capt. F.H.G. Dalrymple-Hamilton, RN), battlecruiser HMS Repulse (Capt. W.G. Tennant, CB, MVO, RN), light cruisers HMS Arethusa (Capt. Q.D. Graham, RN), HMS Galatea (Capt. B.B. Schofield, RN, flying the flag of Rear-Admiral A.T.B. Curteis, CB, RN), HMS Aurora (Capt. W.G. Agnew, RN), HMS Mauritius (Cdr. A.R. Pedder, RN), HMS Naiad (Capt. M.H.A. Kelsey, DSC, RN, flying the flag of Rear-Admiral E.L.S. King, CB, MVO, RN), HMS Phoebe (Capt. G. Grantham, RN), HMS Edinburgh (Capt. C.M. Blackman, DSO, RN, flying the flag of Vice-Admiral L.E. Holland, CB, RN) and HMS Birmingham (Capt. A.C.G. Madden, RN) and the destroyers HMS Bedouin (Cdr. J.A. McCoy, DSO, RN), HMS Matabele (Cdr. R.St.V. Sherbrooke, DSO, RN), HMS Punjabi (Cdr. J.T. Lean, DSO, RN), HMS Tartar (Cdr. L.P. Skipwith, RN), HMS Echo (Cdr. S.H.K. Spurgeon, DSO, RAN), HMS Electra (Cdr. S.A. Buss, MVO, RN), HMS Escapade (Cdr. R.E. Hyde-Smith, RN), HMS Beagle (Lt.Cdr. R.H. Wright, DSC, RN), HMS Brilliant (Lt.Cdr. F.C. Brodrick, RN), HMS Keppel (Lt. R.J. Hanson, RN) and ORP Piorun (Kmdr.por. (Cdr.) E.J.S. Plawski).
On the 27th, HMS Rodney, HMS Birmingham, HMS Edinburgh, HMS Mauritius and the destroyers HMS Beagle, HMS Brilliant, HMS Keppel and Piorun parted company to return to Scapa Flow which they did around 2345A/28 except for HMS Keppel and ORP Piorun which returned to Scapa Flow at 0700A/29.
They were to remain at Scapa Flow until 30 January when they would sail to relieve units still on patrol to enable them to return to base.
On 30 January the light cruisers HMS Naiad and HMS Phoebe arrived at Scapa Flow at 1100 hours. They were followed about half an hour later by the light cruisers HMS Galatea and HMS Arethusa.
HMS Nelson, HMS Repulse, HMS Bedouin, HMS Matabele, HMS Punjabi, HMS Tartar, HMS Echo, HMS Electra and HMS Escapade arrived at Scapa Flow at 1700A/30.
Light cruiser HMS Aurora also returned to Scapa Flow on 30 January.
4 Feb 1941
In the late afternoon and evening, HMS Edinburgh (Capt. C.M. Blackman, DSO, RN, flying the flag of Vice-Admiral L.E. Holland, CB, RN), HMS Birmingham (Capt. A.C.G. Madden, RN), HMS Nigeria (Capt. J.G.L. Dundas, RN) and HMS Mauritius (Capt. W.K.D. Dowding, RN) conducted exercises off Scapa Flow. (37)
5 Feb 1941
HMS Edinburgh (Capt. C.M. Blackman, DSO, RN, flying the flag of Vice-Admiral L.E. Holland, CB, RN), HMS Birmingham (Capt. A.C.G. Madden, RN) departed Scapa Flow for Greenock. (38)
6 Feb 1941
HMS Edinburgh (Capt. C.M. Blackman, DSO, RN, flying the flag of Vice-Admiral L.E. Holland, CB, RN), HMS Birmingham (Capt. A.C.G. Madden, RN) arrived at Greenock. (38)
8 Feb 1941
In response to the sighting of the German battlecruisers Scharnhorst and Gneisenau by HMS Ramillies (Capt. A.D. Read, RN) the battlecruiser HMS Repulse (Capt. W.G. Tennant, CB, MVO, RN), light cruisers HMS Galatea (Capt. B.B. Schofield, RN, flying the flag of Rear-Admiral A.T.B. Curteis, CB, RN), HMS Arethusa (Capt. Q.D. Graham, RN), HMS Aurora (Capt. W.G. Agnew, RN), HMS Nigeria (Capt. J.G.L. Dundas, RN) and the destroyers HMS Eskimo (Lt.Cdr. E.G. Le Geyt, RN), HMS Matabele (Cdr. R.St.V. Sherbrooke, DSO, RN) and HMS Punjabi (Cdr. J.T. Lean, DSO, RN) departed Scapa Flow at 1830A/8. They were ordered to proceed to position 62°30'N, 16°00'W.
At 1900A/8 the battleship HMS Nelson (Capt. G.J.A. Miles, RN, flying the flag of A/Adm. J.C. Tovey, KCB, DSO, RN), light cruisers HMS Mauritius (Capt. W.D. Stephens, RN), HMS Dido (Capt. H.W.U. McCall, RN), destroyers HMS Eclipse (Lt.Cdr. I.T. Clark, RN), HMS Electra (Cdr. C.W. May, RN) and HMS Tartar (Cdr. L.P. Skipwith, RN) departed Scapa Flow to take up a position seventy miles to the south-south-east of the 'Repulse'-group.
Around 2300A/8, the light cruiser HMS Edinburgh (Capt. C.M. Blackman, DSO, RN, flying the flag of Vice-Admiral L.E. Holland, CB, RN) departed the Clyde for operations. She was later ordered to join the 'Rodney'-group.
In the morning of February, 9th, the battleships HMS Rodney (Capt. F.H.G. Dalrymple-Hamilton, RN) and HMS King George V (Capt. W.R. Patterson, CVO, RN) escorted by the destroyers HMS Bedouin (Cdr. J.A. McCoy, DSO, RN), HMS Maori (Cdr. H.T. Armstrong, DSC, RN), HMS Zulu (Cdr. H.R. Graham, DSO, RN), HMS Boreas (Lt.Cdr. D.H. Maitland-Makgill Crichton, DSC, RN) and HMS Brilliant (Lt.Cdr. F.C. Brodrick, RN) departed Scapa Flow to proceed to position 65°00'N, 08°30'W.
HMS Arethusa and HMS Nigeria were sent to Reykjavik at 2100/12th to refuel prior after which they were to resume patrol.
HMS Mauritius and HMS Dido returned to Scapa Flow around 1700A/11.
HMS Nelson, HMS Eclipse, HMS Electra and HMS Tartar returned to Scapa Flow around 1830A/11.
Around 2030A/11, HMS Rodney and HMS King George V, HMS Edinburgh, HMS Bedouin, HMS Maori, HMS Zulu, HMS Brilliant returned to Scapa Flow. The destroyer HMS Inglefield (Capt. P. Todd, DSO, RN) was with them apprently she had joined them at sea. HMS Boreas had been detached to participate in an A/S hunt.
HMS Galatea and HMS Aurora returned to Scapa Flow around 0145A/13th.
HMS Repulse, HMS Eskimo, HMS Matabele and HMS Punjabi returned to Scapa Flow around 0315A/13.
15 Feb 1941
Laying of minefields SN 68A and SN 7B.
Minelaying operation by the 1st Minelaying Squadron.
The auxiliary minelayers Southern Prince (A/Capt. E.M.C. Barraclough, RN, flying the flag of Rear-Admiral R.L. Burnett, OBE, RN), HMS Agamemnon (Capt. (Retd.) F. Ratsey, RN) and HMS Port Quebec (Capt. (Retd.) E.C. Watson, RN) departed Port ZA (Loch Alsh) around 1815A/15 to lay two minefields; SN 68A (828 mines) and SN 7B (810 mines). They were escorted by the destroyers HMS Brighton (Cdr. (Retd.) C.W.V.T.S. Lepper, RN), HMS Charlestown (Lt.Cdr. T. Johnston, RN), HMS Lancaster (A/Cdr. N.H. Whatley, RN) and HMS Echo (Lt.Cdr. C.H.deB. Newby, RN).
They were joined around 0950A/15 by the light cruiser HMS Aurora (Capt. W.G. Agnew, RN) which had departed Scapa Flow around 0030A/16.
Distant cover was provided by the light cruisers HMS Edinburgh (Capt. C.M. Blackman, DSO, RN, flying the flag of Vice-Admiral L.E. Holland, CB, RN) and HMS Nigeria (Capt. J.G.L. Dundas, RN) which departed Scapa Flow around 0415A/16 and Reykjavik, Iceland at 0900A/14 respectively.
The minefields were laid on 17 February as follows; SN 68A, made up of 828 mines, was laid along a line between positions 62°45'1"N, 10°46'0"W and 63°00'2"N, 11°15'8"W. The minelayers laid as follows, HMS Southern Prince 282 mines, HMS Agamemnon 272 mines and HMS Port Quebec 274 mines.
SN 7B, made up of 810 mines, was laid along a line between positions 62°59'0"N, 08°23'0"W and 63°13'7"N, 08°54'8"W. The minelayers laid as follows, HMS Southern Prince 280 mines, HMS Agamemnon 257 mines and HMS Port Quebec 273 mines.
HMS Southern Prince, HMS Agamemnon, HMS Port Quebec, HMS Brighton, HMS Charlestown, HMS Lancaster and HMS Echo arrived at Port Z.A. (Loch Alsh) on the 18th.
HMS Edinburgh and HMS Nigeria arrived at Scapa Flow around 1630A/18.
HMS Aurora arrived at Scapa Flow around 1915A/18 having parted company with the 1st Minelaying Squadron around 1415A/18.
HMS Echo arrived at Scapa Flow around 0800A/19. (39)
17 Feb 1941
Convoy TC 9.
This troop convoy departed Halifax on 17 February 1941 and arrived in the Clyde on 27 February 1941.
Is was made up of the troopships: Dempo (Dutch, 17024 GRT, built 1931), Duchess of York (British, 20021 GRT, built 1929), Johan van Oldenbarneveld (Dutch, 19429 GRT, built 1930), Orontes (British, 20097 GRT, built 1925) and Warwick Castle (British, British, 20107 GRT, built 1930).
On departure from Halifax it was escorted by the battleship HMS Royal Sovereign (Capt. H.B. Jacomb, RN) and the armed merchant cruiser HMS Wolfe (A/Capt.(Retd.) W.G.A. Shuttleworth, RN).
HMS Wolfe was detached on 18 February 1941.
On 20 February the light cruiser HMS Edinburgh (Capt. C.M. Blackman, DSO, RN, flying the flag of Vice-Admiral L.E. Holland, CB, RN) departed Scapa Flow to join the convoy, She relieved HMS Royal Sovereign on 23 February which then returned to Halifax arriving on 28 February. On 24 February the destroyers HMCS Assiniboine (A/Lt.Cdr. J.H. Stubbs, RCN), HMCS Ottawa (Cdr. E.R. Mainguy, RCN), HMCS Restigouche (Cdr. H.N. Lay, OBE, RN) and HMS Havelock (Cdr. E.H. Thomas, DSC, RN) joined the convoy. HMS Havelock was detached on 25 February. The three Canadian destroyers remained with the convoy until 26 February.
On the 25 February, light cruiser HMS Aurora (Capt. W.G. Agnew, RN) and the destroyers HMS Inglefield (Capt. P. Todd, DSO, RN), HMS Echo (Lt.Cdr. C.H.deB. Newby, RN), HMS Eclipse (Lt.Cdr. I.T. Clark, RN) and Léopard (Lt.Cdr. J. Evenou) joined the convoy; Léopard already being detached later on the 25th. Destroyer HMS Mistral (Cdr. C.H. Brooks, RAN) joined the convoy on the 26th. Destroyer HMS Churchill (Cdr.(Retd.) G.R. Cousins, RN) also escorted the convoy in the Western Approaches. The convoy reached the Minches in the evening of 26 February. Light cruiser HMS Edinburg with the destroyers HMS Inglefield, HMS Echo and HMS Eclipse then proceeded to Scapa Flow arriving at 0100/27.
Light cruiser HMS Aurora with the destroyers Mistral and HMS Churchill took the convoy into the Clyde and arrived at Greenock on the 27th.
2 Mar 1941
Around 1430A/2, the battleships HMS Nelson (Capt. G.J.A. Miles, RN, flying the flag of A/Adm. J.C. Tovey, KCB, DSO, RN), HMS King George V (Capt. W.R. Patterson, CVO, RN), light cruisers HMS Edinburgh (Capt. C.M. Blackman, DSO, RN, flying the flag of Vice-Admiral L.E. Holland, CB, RN), HMS Nigeria (Capt. J.G.L. Dundas, RN) and the destroyers HMS Inglefield (Capt. P. Todd, DSO, RN), HMS Maori (Cdr. H.T. Armstrong, DSC, RN), HMS Punjabi (Cdr. S.A. Buss, MVO, RN), HMS Echo (Lt.Cdr. C.H.deB. Newby, RN) and HMS Eclipse (Lt.Cdr. I.T. Clark, RN) departed Scapa Flow to provide cover for operation Claymore.
[For more info on this operation see the event ' Operation Claymore ' 4 March 1941.] (40)
4 Mar 1941
Operation Claymore.
Commando raid on the Lofoten Islands, Norway.
Around 2345A/28 the destroyers HMS Somali (Capt. C. Caslon, RN), HMS Bedouin (Cdr. J.A. McCoy, DSO, RN), HMS Eskimo (Lt.Cdr. E.G. Le Geyt, RN), HMS Tartar (Cdr. L.P. Skipwith, RN), HMS Legion (Cdr. R.F. Jessel, RN) and the landing ships HMS Princess Beatrix (A/Cdr. T.B. Brunton, RN) and HMS Queen Emma (Lt.Cdr. E.J.R. North, RNR) departed Scapa Flow for operation ' Claymore '. These ships fuelled at Skálafjørður, Faeroer Islands arriving there around 1900A/1. They departed about five hour later.
A cover force, made up the battleships HMS Nelson (Capt. G.J.A. Miles, RN, flying the flag of A/Adm. J.C. Tovey, KCB, DSO, RN), HMS King George V (Capt. W.R. Patterson, CVO, RN), light cruisers HMS Edinburgh (Capt. C.M. Blackman, DSO, RN, flying the flag of Vice-Admiral L.E. Holland, CB, RN), HMS Nigeria (Capt. J.G.L. Dundas, RN) and the destroyers HMS Inglefield (Capt. P. Todd, DSO, RN), HMS Maori (Cdr. H.T. Armstrong, DSC, RN), HMS Punjabi (Cdr. S.A. Buss, MVO, RN), HMS Echo (Lt.Cdr. C.H.deB. Newby, RN) and HMS Eclipse (Lt.Cdr. I.T. Clark, RN) departed Scapa Flow around 1430A/2.
At 1900A/3, HMS Edinburgh and HMS Nigeria were detached to provide close cover for the landing force. '
During the operation the submarine HMS Sunfish (Lt. G.R. Colvin, RN) acted as a beacon to guide the ships of the landing force in.
During the operation HMS Somali remained at sea in the Vestfiord. She managed to enter the German patrol vessel NN 04 / Krebs during which imported Enigma coding meterial was captured. Krebs was then sunk.
The landing ship HMS Queen Emma and the destroyers HMS Bedouin and HMS Tartar proceeded to Svolvaer.
The landing ship HMS Princess Beatrix and the destroyers HMS Eskimo and HMS Legion proceeded to Stamsund.
The commandoes were landed. At Stamsund they destroyed the Lofotens Cod Boiling Plant while two factories were destroyed at Henningsvær and thirteen at Svolvær. About 800000 gallons (3600 m3) of fish oil and paraffin were set on fire.
The commandoes captured 225 prisoners including Norwegian collaborators and also took 314 Norwegian volunteers with them which wanted to join the Norwegian armed forces.
Besides that the merchant vessels Bernard Schulte (1058 GRT, built 1923), Eilenau (1404 GRT, built 1910) and Felix Heumann (2468 GRT, built 1921) were sunk by demolition charges at Svolvær.
HMS Tartar sank the German merchant vessels Hamburg (fishmeal factory ship, 6136 GRT, built 1911) and Pasajes (1996 GRT, built 1923).
The German merchant vessel Gumbinnen (1381 GRT, built 1922) was sunk by with demolition charges by the Army landing party.
The Norwegian passenger/cargo vessel Mira (1152 GRT, built 1891) was sunk by HMS Bedouin.
The Norwegian fishing vessel (trawler) Myrland (321 GRT, built 1918) joined the British force and proceeded to the Faroes, arriving there on 7 March 1941.
HMS Edinburgh and HMS Nigeria arrived at Scapa flow around 1200A/6.
HMS Somali, HMS Bedouin, HMS Eskimo, HMS Tartar, HMS Legion, HMS Princess Beatrix and HMS Queen Emma arrived at Scapa Flow around 1300A/6.
HMS Nelson, HMS King George V, HMS Inglefield, HMS Maori, HMS Punjabi, HMS Echo and HMS Eclipse arrived at Scapa Flow around 1400A/6. (40)
9 Mar 1941
Laying of minefield SN 68B.
Minelaying operation by the 1st Minelaying Squadron.
Around 1630A/9, the destroyers HMS Maori (Cdr. H.T. Armstrong, DSC, RN) and HMS Zulu (Cdr. H.R. Graham, DSO, RN) departed Scapa Flow followed around 1800A/9 by their sister ship HMS Cossack (Capt. P.L. Vian, DSO and Bar, RN). They were to make rendezous with the 1st Minelaying Squadron in the Minches for escort duty during a minelaying mission.
Southern Prince (A/Capt. E.M.C. Barraclough, RN, flying the flag of Rear-Admiral R.L. Burnett, OBE, RN), HMS Agamemnon (Capt. (Retd.) F. Ratsey, RN), HMS Menestheus (Capt. J.S. Crawford, DSO, RN, RN) and HMS Port Quebec (Capt. (Retd.) E.C. Watson, RN) departed Port ZA (Loch Alsh) around 1815A/9 to lay minefield SN 68B. They were escorted by the destroyer HMS St. Marys (Lt. K.H.J.L. Phibbs, RN). At sea they were joined by the three Tribal-class destroyers mentioned above.
The light cruisers HMS Edinburgh (Capt. C.M. Blackman, DSO, RN, flying the flag of Vice-Admiral L.E. Holland, CB, RN) and HMS Nigeria (Capt. J.G.L. Dundas, RN) departed Scapa Flow around 2330A/9 to provide cover. They rendezvoused with the minelayers and their escorts around A/10.
On 11 March the minefield was laid along a line between positions 62°57'1"0N, 11°24'0"W and 63°42'0"N, 12°20'0"W. The minelayers laid as follows, HMS Southern Prince 562 mines, HMS Agamemnon 530 mines, HMS Menestheus 410 mines and HMS Port Quebec 548 mines.
The 1st Minelaying Squadron and the four escorting destroyers arrived back at Port Z.A. (Loch Alsh) around 2359A/12. HMS Cossack, HMS Maori and HMS Zulu then fuelled and departed 0835A/14 for convoy escort duty (with convoy OB 297).
HMS Edinburgh arrived at Scapa Flow around 1930A/12 followed by HMS Nigeria around 2115A/12. (41)
18 Mar 1941
HMS Edinburgh (Capt. C.M. Blackman, DSO, RN, flying the flag of Vice-Admiral L.E. Holland, CB, RN) conducted A/S exercises at Scapa Flow with the submarine HMS L 23 (Lt. L.F.L. Hill, RNR). [No log is available for HMS L 23 and the log of HMS Edinburgh does not give the name of the submarine but as L 23 was the only submarine at Scapa Flow it must have been her.]
These were followed by torpedo firing exercises. (42)
19 Mar 1941
HMS Edinburgh (Capt. C.M. Blackman, DSO, RN, flying the flag of Vice-Admiral L.E. Holland, CB, RN) and HMS Fiji (Capt. P.B.R.W. William-Powlett, RN) conducted gunnery and RIX (rangefinding and inclination) exercises off Scapa Flow. (43)
20 Mar 1941
Around 1100A/20, the light cruiser HMS Edinburgh (Capt. C.M. Blackman, DSO, RN, flying the flag of Vice-Admiral L.E. Holland, CB, RN) and the destroyers HMS Somali (Capt. C. Caslon, RN), HMS Bedouin (Cdr. J.A. McCoy, DSO, RN), HMS Mashona (Cdr. W.H. Selby, RN), HMS Matabele (Cdr. R.St.V. Sherbrooke, DSO, RN) departed Scapa Flow for Greenock.
In the late evening they were ordered to proceed to position 54°00'N, 20°00'W but they were ordered to continue their passage to the Clyde early in the afternoon of 21 March 1941.
They arrived at Greenock around 0800A/22. (44)
23 Mar 1941
Convoy SL 69.
This convoy departed Freetown on 23 March 1941.
On departure from Freetown this convoy was made up of the following ships; Agioi Victores (Greek, 4344 GRT, built 1918), Alberte le Borgne (British, 3921 GRT, built 1914), Anna (Greek, 5173 GRT, built 1919), Aurillac (British, 4733 GRT, built 1921), Baron Napier (British, 3559 GRT, built 1930), Baronesa (British, 8663 GRT, built 1918), British Justice (British (tanker), 6932 GRT, built 1928), Bulysses (British, 7519 GRT, built 1927), Christine Marie (British, 3895 GRT, built 1919), City of Bath (British, 5079 GRT, built 1926), City of Wellington (British, 5732 GRT, built 1925), Clan Maquarrie (British, 6471 GRT, built 1913), Corilla (Dutch (tanker), 8096 GRT, built 1939), Dago II (British, 1993 GRT, built 1917), Daru (British, 3854 GRT, built 1927), Dornoch (British, 5186 GRT, built 1939), Empire Advocate (British, 5787 GRT, built 1913), Floristan (British, 5478 GRT, built 1928), Glenaffric (British, 7782 GRT, built 1920), Glenbeg (British, 9461 GRT, built 1922), Harpalycus (British, 5629 GRT, built 1935), Hopecastle (British, 5178 GRT, built 1937), L.A. Christensen (Norwegian, 4362 GRT, built 1925), Lekhaven (Dutch, 4802 GRT, built 1921), Madras City (British, 5080 GRT, built 1940), Marton (British, 4969 GRT, built 1933), Mobeka (Belgian, 6111 GRT, built 1937), Mountpark (British, 4648 GRT, built 1938), Narkunda (British, 16632 GRT, built 1920), Nijkerk (Dutch, 5843 GRT, built 1915), Palembang (Dutch, 7070 GRT, built 1921), Pantelis (Greek, 3845 GRT, built 1911), Pontfield (British (tanker), 8319 GRT, built 1940), Roumanie (Belgian, 3658 GRT, built 1906), Salland (Dutch, 6447 GRT, built 1920), San Francisco (Swedish, 4933 GRT, built 1915), Sangara (British, 4174 GRT, built 1939), Sarthe (British, 5271 GRT, built 1920), Selvistan (British, 5136 GRT, built 1924), St. Usk (British, 5472 GRT, built 1909), Swedru (British, 5379 GRT, built 1937) and Tekoa (British, 8695 GRT, built 1922).
On departure from Freetown the convoy was escorted by the armed merchant cruiser HMS Arawa (A/Capt. G.R. Deverell, RN), sloop Commandant Domine and the corvettes HMS Clematis (Cdr. Y.M. Cleeves, DSC, RD, RNR) and HMS Cyclamen (Lt. H.N. Lawson, RNR).
Around 0620N/24, in position 08°34'N, 14°58'W, the Bulysses was detached to return to Freetown due to engine trouble.
At 0836N/24, the Empire Advocate reported that she could not keep up with the convoy and that she would proceed independently. [She arrived at São Miguel Island, Azores on 13 April 1941.]
Around 1700N/24, in position 08°32'N, 16°16'W, the Dornoch fell out off the convoy with engine trouble. She did not rejoin the convoy. [She returned to Freetown on 28 March.]
Around 1100N/26, the armed merchant cruiser HMS Bulolo (Capt.(Retd.) R.L. Hamer, RN) joined the convoy in position 09°30'N, 19°59'W.
Around 1200N/27, in position 09°30'N, 19°20'W, the battlecruiser HMS Repulse (Capt. W.G. Tennant, CB, MVO, RN) arrived near the convoy to provide 'distant' cover. Shortly afterwards HMS Bulolo then parted company.
In the early hours of the 28th, the aircraft carrier HMS Furious (Capt. A.G. Talbot, DSO, RN and the destroyers HMS Duncan (Lt.Cdr. A.N. Rowell, RN) and HMS Foxhound (Cdr. G.H. Peters, DSC, RN) joined the convoy in position 13°38'N, 18°40'W. The destroyers had escorted HMS Furious from Freetown to the rendezvous with the convoy but they parted company later in the day to proceed to Bathurst to fuel.
Around 1900N/28, the light cruiser HMS Mauritius (Capt. W.D. Stephens, RN) joined the convoy in position 14°45'N, 18°43'W coming from Bathurst.
Around 1300Z/30, in position 19°30'N, 18°52'W, HMS Clematis and HMS Cyclamen parted company with the convoy.
Around 1840Z/30, in position 19°55'N, 18°51'W, HMS Repulse, HMS Furious and the Narkunda parted company to proceed to Gibraltar where they arrived in the morning of 3 April 1941. They had been joined around 1130A/2 by the destroyers HMS Highlander (Cdr. S. Boucher, RN), HMS Velox (Lt.Cdr. E.G. Roper, DSC, RN) and HMS Wrestler (Lt. E.L. Jones, DSC, RN) which had departed Gibraltar on 1 April.
Around 0800Z/5, in position 30°54'N, 23°38'W, the light cruiser HMS Edinburgh (Capt. C.M. Blackman, DSO, RN, flying the flag of Vice-Admiral L.E. Holland, CB, RN) joined the convoy. HMS Mauritius then parted company.
At 1414Z/9, in position 42°17'N, 23°41'W, the Mountpark fell out of the convoy with engine trouble and did not rejoin the convoy. [She turned back southwards and arrived at São Miguel Island, Azores on 13 April 1941.]
Around 0615Z/14, in position 52°23'N, 19°47'W, HMS Arawa parted company with the convoy to proceed independently to the Clyde.
Around 1300A/14, HMS Edinburgh parted company with the convoy when the local escort joined, which was made up of the sloop HMS Weston (Cdr.(Retd.) J.G. Sutton, RN, Senior Officer of the A/S escort), destroyers HMS Roxborough (Lt. V.A. Wight-Boycott, OBE, RN), HMS Sherwood (Lt.Cdr. S.W.F. Bennetts, RN), corvettes HMS Clarkia (Lt.Cdr. F.J.G. Jones, RNR), HMS Gladiolus (Lt.Cdr. H.M.C. Sanders, DSC, RNR) and the A/S trawler HMS St. Elstan (T/Lt. G. Butcher, RNVR) joined.
Around 1600A/14, the A/S trawler HMS Vizalma (T/Lt. M.M. Firth, RNVR) also joined.
Around 1930A/14, in position 53°43'N, 18°03'W, the Christine Marie fell out of the convoy due to engine trouble. HMS Vizalma was ordered to stand by her to Donegal Bay if required but preferably to Lough Foyle. [She indeed proceeded to Lough Foyle where she arrived on 18 April.]
At 0815A/15, the destroyers; HMS Saladin (Lt.Cdr. L.J. Dover, RN) and HMS Salisbury (Lt.Cdr. H.M.R. Crichton, RN) joined.
Around 1200A/15, in position 54°37'N, 16°48'W, the Pantelis dropped out of the convoy with engine trouble. She did not rejoin the convoy. [She arrived in Barry Roads on 19 April.]
At 0931A/16, in position 55°27'N, 12°26'W, the Swedru was hit by bombs from a single German FW 200. She was soon heavily on fire and was being abandoned. HMS Gladiolus was ordered to standby the stricken vessel and she picked up the survivors, 38 in number of which 18 were wounded (there were 24 dead). It was intended for the wounded to be transferred to HMS Weston but this proved not possible in the heavy swell. It was also not possible to transfer the doctor so HMS Gladiolus was ordered to take them to Londonderry. HMS Roxborough was then ordered to stay by the stricken vessel. She later reported that the vessel was impossible to salvage and she was allowed to sink the stricken vessel with a torpedo.
The convoy arrived in U.K. waters on 17 April 1941. (45)
25 Mar 1941
Convoy WS 7.
This convoy was assembled off Oversay on 25 March 1941 for several destinations in the Middle and Far East.
This convoy was made up of the following troopships / transports; Andes (British, 25689 GRT, built 1939), Dempo (Dutch, 17024 GRT, built 1931), Denbighshire (British, 8983 GRT, built 1938), Duchess of Atholl (British, 20119 GRT, built 1928), Duchess of York (British, 20021 GRT, built 1929), Empress of Canada (British, 21517 GRT, built 1922), Georgic (British, 27759 GRT, built 1932), Glenorchy (British, 8982 GRT, built 1939), Johan van Oldenbarnevelt (Dutch, 19429 GRT, built 1930), Orcades (British, 23456 GRT, built 1937), Orion (British, 23371 GRT, built 1935), Otranto (British, 20026 GRT, built 1925), Pasteur (British, 29253 GRT, built 1938), Stirling Castle (British, 25550 GRT, built 1936), Strathaird (British, 22281 GRT, built 1932), Strathallan (British, 23722 GRT, built 1938), Stratheden (British, 23722 GRT, built 1937), Strathmore (British, 23428 GRT, built 1935), Strathnaver (British, 22283 GRT, built 1931), Viceroy of India (British, 19627 GRT, built 1929) and Warwick Castle (British, 20107 GRT, built 1930).
These ships had come from Liverpool and from the Clyde. While proceeding to the Oversay rendezvous (from the Clyde) the Strathaird collided with the Stirling Castle and was forced to return due to the damage sustained. The Stirling Castle also had damage but was able to continue.
On departure from the U.K. waters the convoy was escorted by the battleships HMS Nelson (Capt. G.J.A. Miles, RN) (came from Scapa Flow), HMS Revenge (Capt. E.R. Archer, RN) (came from the Clyde), light cruiser HMS Edinburgh (Commodore C.M. Blackman, DSO, RN) (came from the Clyde), AA cruiser HMS Cairo (A/Capt. I.R.H. Black, RN) (came from Moelfre Bay) and the destroyers HMS Somali (Capt. C. Caslon, RN), HMS Bedouin (Cdr. J.A. McCoy, DSO, RN), HMS Mashona (Cdr. W.H. Selby, RN), HMS Matabele (Cdr. R.St.V. Sherbrooke, DSO, RN), HMS Legion (Cdr. R.F. Jessel, RN), ORP Piorun (Kmdr.por. (Cdr.) E.J.S. Plawski), HMS Broadwater (Lt.Cdr. W.M.L. Astwood, RN) (these destroyers came with the Clyde section of the convoy), HMS Whitehall (Lt.Cdr. A.B. Russell, RN), HMS Winchelsea (Lt.Cdr. W.A.F. Hawkins, DSC, RN) (came with the Liverpool section of the convoy), HMS Viceroy (Lt.Cdr. D.P. Trentham, RN), HMS Rockingham (Lt. A.H.T. Johns, RN), Léopard (Lt.Cdr. J. Evenou) (came from Londonderry), HMS Arrow (Cdr. R.E. Hyde-Smith, RN), HMS Eclipse (Lt.Cdr. I.T. Clark, RN), HMS Eskimo (Lt.Cdr. E.G. Le Geyt, RN) (had come from Scapa Flow with HMS Nelson) and HMCS St. Clair (Lt.Cdr. D.C. Wallace, RCNR) (came from Tobermory).
On assembly of the convoy, around 0800A/25, the destroyers HMS Winchelsea, HMS Arrow, HMS Eclipse and HMS Eskimo first proceeded to Londonderry to fuel. All rejoined the convoy later the same day, HMS Winchelsea at 1330A/25, at the same time HMCS St. Clair also joined. HMS Arrow, HMS Eclipse and HMS Eskimo rejoined around 1830A/25.
Around 2130A/26, HMS Winchelsea, HMS Viceroy, HMS Rockingham, HMS Legion, ORP Piorun and Léopard parted company with the convoy in position 54°05'N, 20°41'W.
Around 2200A/26, HMS Cairo also parted company with the convoy.
Around 2130A/27, HMS Arrow and HMS Eclipse parted company with the convoy to return to Scapa Flow via Londonderry. They arrived at Londonderry to fuel on the 29th and then left at 1100A/30 for Scapa Flow where they arrived around 0400A/31.
Around 0830A/28, HMS Broadwater and HMCS St. Clair parted company with the convoy in position 52°52'N, 23°54'W.
Around 1200A/28, HMS Somali, HMS Bedouin,HMS Eskimo, HMS Mashona and HMS Matabele parted company with the convoy in position 46°54'N, 27°50'W. They then set course to proceed to Scapa Flow where they arrived around 1425A/31.
Around 1230A/28, HMS Revenge parted company taking Georgic with her to escort her to Halifax.
Around 2200A/29, HMS Edinburgh parted company with the convoy to proceed to Gibraltar.
Around 1000A/1, the destroyers HMS Duncan (Lt.Cdr. A.N. Rowell, RN) and HMS Foxhound (Cdr. G.H. Peters, DSC, RN) joined the convoy coming from Bathurst.
Around 1350A/2, the destroyers HMS Wishart (Cdr. E.T. Cooper, RN) and HMS Vidette (Lt. E.N. Walmsley, RN) joined the convoy also coming from Bathurst.
The convoy arrived at Freetown on 4 April 1941.
------------------------------------------------------------------------------------------------------
The convoy departed Freetown for South Africa (Capetown and Durban) on 7 April 1941. The composition of the convoy was the same in which it had arrived at Freetown.
Escort on departure was also the same as on the convoy's arrival, battleship HMS Nelson, HMS Foxhound, HMS Duncan, HMS Wishart and HMS Vidette.
In the evening of April 7th, HMS Foxhound, picked up three crewmembers from the merchant vessel Umona that had been torpedoed and sunk on 30 March 1941 by the German submarine U-124.
At 0830Z/8 HMS Foxhound parted company with the convoy to return to Freetown due to defects.
The remaining three destroyers parted company at 1800Z/9 to return to Freetown.
Around 1430B/15, the light cruiser HMS Newcastle (Capt. E.A. Aylmer, DSC, RN) joined the convoy in position 30°30'S, 14°23'E and took over the escort. HMS Nelson then parted company to proceed to Capetown to fuel and then on to Simonstown for repairs to her leaking hull.
At 0900B/16, the convoy split up in position 33°53'S, 17°47'E in a Capetown portion and a Durban portion.
The Durban position was made up of the Denbighshire, Glenorchy, Johan van Oldenbarnevelt, Orontes, Otranto, Stirling Castle, Strathnaver, Viceroy of India and Warwick Castle. HMS Newcastle remained with this section until its arrival at Durban on 19 April 1941.
The remaining ships made up the Capetown section and arrived there on 16 April 1941. Dempo later went on independently to Durban arriving there on 20 April 1941.
------------------------------------------------------------------------------------------------------
On 20 April 1941 the Capetown portion of the convoy departed. It was made up of the Andes, Duchess of Athol, Duchess of York, Empress of Canada, Orcades, Orion, Pasteur, Strathallan, Stratheden, and Strathmore. They were escorted by the cruiser HMS Hawkins (Capt. H.P.K. Oram, RN).
On 23 April 1941 the Durban portion of the convoy departed. It was made up of the Dempo, Denbighshire, Empress of Australia, Glenorchy, Johan van Oldenbarnevelt, Orontes, Otranto, Strathnaver, Viceroy of India and Warwick Castle. They were escorted by the armed merchant cruiser HMS Carthage (Capt.(Retd.) H.L.I. Kirkpatrick, OBE, RN). The Stirling Castle which had arrived with the Durban section sailed on 26 April indepedently to Melbourne, Australia where she arrived on 10 May 1941.
These groups made rendezvous at 0900C/24 after which HMS Carthage parted company while HMS Hawkins continued on with the convoy.
Around 1600C/28, HMS Hawkins was relieved by the light cruisers HMS Glasgow (Capt. H. Hickling, RN) and HMS Colombo (Capt. C.A.E. Stanfield, RN) which both had departed Mombasa earlier that day.
On 1 May the Bombay section of the convoy split off. it was made up of the Duchess of York, Johan van Oldebarnevelt, Strathmore and Warwick Castle. HMS Colombo went with them as escort. They arrived at Bombay on 5 May 1941.
The remainder of the convoy continued on, escorted by HMS Glasgow until it was dispersed on 3 May after which the ships proceeded independently to Suez. (46)
1 Apr 1941
Around 0845A/1, HMS Edinburgh (Capt. C.M. Blackman, DSO, RN, flying the flag of Vice Admiral L.E. Holland, CB, RN), arrived at Gibraltar after convoy escort duty. (47)
2 Apr 1941
Around 1830A/2, HMS Edinburgh (Capt. C.M. Blackman, DSO, RN, flying the flag of Vice Admiral L.E. Holland, CB, RN), departed Gibraltar to join the escort of convoy SL 69.
[See the event ' Convoy SL 69 ' for 23 March 1941 for more info on this convoy.] (47)
15 Apr 1941
Around 2100A/15, HMS Edinburgh (Capt. C.M. Blackman, DSO, RN, flying the flag of Vice-Admiral L.E. Holland, CB, RN), arrived at Scapa Flow from convoy escort duty. (47)
19 Apr 1941
Intelligence reported the German battleship Bismarck proceeding to sea, British movements to intercept.
In the early morning hours of 19 April 1941 the Admiralty received reports that the German battleship Bismarck was reported to have passed the Skaw together with two cruisers and three destroyers.
The battlecruiser HMS Hood (Capt. R. Kerr, CBE, RN, flying the flag of Vice-Admiral W.J. Whitworth, CB, DSO, RN) with the light cruiser HMS Kenya (Capt. M.M. Denny, CB, RN) and the destroyers HMS Cossack (Capt. P.L. Vian, DSO and Bar, RN), HMS Maori (Cdr. H.T. Armstrong, RN) and HMS Zulu (Cdr. H.R. Graham, DSO, RN) were already at sea (departed Scapa Flow around 1700/18) proceeding southwards to relieve HMS King George V (Capt. W.R. Patterson, CVO, RN, flying the flag of A/Adm. J.C. Tovey, KCB, DSO, RN) and HMS Nigeria (Capt. J.G.L. Dundas, RN) on the Bay of Biscay patrol. They were now ordered to proceed northwards to provide cover for the cruiser patrol in the Island-Faroes passage. HMS King George V and HMS Nigeria initially turned north but soon returned to their patrol area off the Bay of Biscay. Their escorting destroyers, HMS Mashona (Cdr. W.H. Selby, RN), HMS Electra (Cdr. C.W. May, RN), HMS Escapade (Lt.Cdr. E.N.V. Currey, DSC, RN) had been detached to fuel at Londonderry on the morning of the 15th. They returned from fuelling on the morning of the 20th.
For these cruiser patrols the following ships were sailed. From Iceland (Hvalfjord); heavy cruiser HMS Norfolk (Capt. A.J.L. Phillips, RN, flying the flag of Rear-Admiral W.F. Wake-Walker CB, OBE, RN), light cruisers HMS Galatea (Capt. E.W.B. Sim, RN, flying the flag of Rear-Admiral A.T.B. Curteis, CB, RN) and HMS Arethusa (Capt. Q.D. Graham, RN). From Scapa Flow; heavy cruisers HMS Suffolk (Capt. R.M. Ellis, RN), HMS Exeter (Capt. O.L. Gordon, MVO, RN), light cruiser HMS Edinburgh (Capt. C.M. Blackman, DSO, RN, flying the flag of Vice Admiral L.E. Holland, CB, RN), destroyers HMS Inglefield (Capt. P. Todd, DSO, RN), HMS Tartar (Cdr. L.P. Skipwith, RN), HMS Echo (Lt.Cdr. C.H.deB. Newby, RN), HMS Achates (Lt.Cdr. Viscount Jocelyn, RN) and HMS Anthony (Lt.Cdr. J.M. Hodges, RN).
HMS Inglefield joined the force of HMS Hood around 1045/20.
Shortly before midnight the battleship HMS Rodney (Capt. F.H.G. Dalrymple-Hamilton, RN) sailed from the Clyde escorted by ORP Piorun (Cdr. E.J.S. Plawski), ORP Garland (Lt.Cdr. K.F. Namiesniowski) and HMS Saladin (Lt.Cdr. L.J. Dover, RN). In the early hours of the 20th HMS Rodney collided with the auxiliary A/S trawler HMS Topaze (Ch.Skr. G.R. Gale, RNR) which sank with its entire crew as a result.
The reported German movements turned out to be false and most of the British forces were back in port by the early morning of 23 April 1941 at latest.
HMS Hood and her four escorting destroyers had arrived at Hvalfiord, Iceland in the morning on 21 April. HMS Kenya had been ordered to join the Iceland - Faroer Islands patrol as was HMS Edinburgh. (48)
23 Apr 1941
Minelaying operation SN 71.
Minelaying operation by the 1st Minelaying Squadron.
At 0935/23, the auxiliary minelayers Southern Prince (A/Capt. E.M.C. Barraclough, RN, flying the flag of Rear-Admiral R.L. Burnett, OBE, RN), HMS Menestheus (Capt. J.S. Crawford, DSO, RN, RN), HMS Port Quebec (Capt. (Retd.) E.C. Watson, RN) and the destroyers HMS Achates (Lt.Cdr. Viscount Jocelyn, RN), HMS Anthony (Lt.Cdr. J.M. Hodges, RN), HMS Brighton (Cdr. (Retd.) C.W.V.T.S. Lepper, RN) and HMS St. Marys (Lt. K.H.J.L. Phibbs, RN) departed Loch Alsh (Port Z.A.) for minelaying mission SN 71.
The operation was covered by the light cruisers HMS Edinburgh (Capt. C.M. Blackman, DSO, RN, flying the flag of Vice Admiral L.E. Holland, CB, RN) and HMS Kenya (Capt. M.M. Denny, CB, RN) from the Iceland - Faroer Islands patrol.
The destroyers HMS Cossack (Capt. P.L. Vian, DSO and Bar, RN) and HMS Zulu (Cdr. H.R. Graham, DSO, RN) departed from Hvalfjord at 0100/25 to carry out an anti-submarine sweep in the line of advance of the minelayers. On completion of the A/S sweep, they relieved destroyers HMS Achates and HMS Anthony in the screen of the minelayers which then proceeded to Reykjavik.
Minefield SN 71 was laid on the 26th. It was made up as follows; SN 71A; between 66°44'9"N, 24°13'7"W and 66°47'5"N, 24°52'0'W
SN 71B; between 66°56'5"N, 24°01'9"W and 67°14'0"N, 24°01'9"W
SN 71C; between 67°09'6"N, 23°46'0"W and 67°08'5"N, 23°44'2"W.
The minelayers laid as follows; HMS Southern Prince 562 mines, HMS Menestheus 410 mines and HMS Port Quebec 548 mines.
HMS Edinburgh, HMS Kenya, after the minelay, proceeded to Scapa Flow where they arrived on the 29th.
HMS Cossack and HMS Zulu arrived at Scapa Flow at 2130/29.
HMS Southern Prince, HMS Menetheus, HMS Port Quebec, HMS Brighton and HMS St.Marys arrived at Loch Alsh (Port Z.A.) at 1957/29. (41)
5 May 1941
HrMs O 14 (Lt.Cdr. G. Quint, RNN(R)) conducted A/S exercises at Scapa Flow with HMS Edinburgh (Capt. C.M. Blackman, DSO, RN). (49)
5 May 1941
Minelaying operation SN 9A.
Minelaying operation by the 1st Minelaying Squadron.
At 0925B/5, the auxiliary minelayers HMS Agamemnon (Capt.(Retd.) F. Ratsey, RN, flying the flag of Rear-Admiral R.L. Burnett, OBE, RN), HMS Menestheus (Capt. J.S. Crawford, DSO, RN), and HMS Port Quebec (Capt.(Retd.) E.C. Watson, RN) of the 1st Minelaying Squadron departed Loch Alsh to lay minefield SN 9A. They were escorted by the destroyers HMS Intrepid (Cdr. R.C. Gordon, DSO, RN), HMS Impulsive (Lt.Cdr. W.S. Thomas, DSC, RN), HMS St. Marys (Lt. K.H.J.L. Phibbs, RN) and HMS Brighton (Cdr. (Retd.) C.W.V.T.S. Lepper, RN).
Around 1310B/5, the light cruiser HMS Kenya (Capt. M.M. Denny, CB, RN) joined the force off the Butt of Lewis to provide close cover. She had departed Scapa Flow at 0750B/5.
The light cruisers HMS Edinburgh (Capt. C.M. Blackman, DSO, RN, flying the flag of Vice Admiral L.E. Holland, CB, RN), HMS Manchester (Capt. H.A. Packer, RN) and HMS Birmingham (Capt. A.C.G. Madden, RN) of the 18th Cruiser Squadron which had departed Scapa Flow around 1445B/5 to cover the minelaying operation. On completion of this they proceeded on operation EB.
Minefield SN 9A was laid between 1812B/6 and 2058B/6. It was laid along a line between positions 63°20'0"N, 11°36'0"W and 63°57'5"N, 12°02'0"W.
The minelayers laid as follows; HMS Agamemnon 532 mines, HMS Menestheus 410 mines and HMS Port Quebec 548 mines.
At 0952B/8, HMS Kenya parted company with the 1st Minelaying Squadron.
HMS Agamemnon, HMS Menestheus, HMS Port Quebec, HMS St. Marys and HMS Brighton returned to Port Z.A. (Loch Alsh) at 1331B/8.
HMS Kenya arrived at Scapa Flow around 1500B/8.
HMS Intrepid and HMS Impulsive arrived at Scapa Flow around 1030B/9 hiving been diverted for an A/S hunt on the 8th while en-route from Port Z.A. to Scapa Flow. (50)
6 May 1941
On completion of minelaying operation SN 9A (see 5 May 1941 on the pages of the ships involved) the cover force, made up of the light cruisers HMS Edinburgh (Capt. C.M. Blackman, DSO, RN, flying the flag of Vice Admiral L.E. Holland, CB, RN), HMS Manchester (Capt. H.A. Packer, RN) and HMS Birmingham (Capt. A.C.G. Madden, RN) proceeded on operation EB.
At 1110B/6 the destroyers HMS Somali (Capt. C. Caslon, RN), HMS Bedouin (Cdr. J.A. McCoy, DSO, RN), HMS Eskimo (Lt.Cdr. E.G. Le Geyt, RN) and HMAS Nestor (Cdr. G.S. Stewart, RAN) joined they started to search for a German weather reporting vessel. These destroyers had departed Skaalefjord around 0730B/6.
On the 7th they succeeded in capturing the German weather vessel München. HMS Somali was able to recover an Enigma machine and important documents from this ship.
Around 2359B/7, HMAS Nestor parted company to return to Scapa Flow where she arrived around 2100B/8.
On the 9th, HMS Somali was detached. She arrived at Scapa Flow around 0700B/10.
HMS Edinburgh, HMS Manchester and HMS Birmingham arrived at Scapa Flow around 1945B/10.
HMS Bedouin and HMS Eskimo arrived at Scapa Flow around 2145B/10 having been detached at 1250B/10 from the cruisers to hunt for a reported enemy submarine. (51)
12 May 1941
Vice Admiral L.E. Holland, CB, RN, struck his flag in HMS Edinburgh (Capt. C.M. Blackman, DSO, RN) and hoisted it in HMS Hood (Capt. R. Kerr, CBE, RN). (52)
14 May 1941
HMS Edinburgh (Capt. C.M. Blackman, DSO, RN) conducted gunnery exercises off Scapa Flow. These included night exercises during the night of 14/15 May 1941. (52)
15 May 1941
HMS Edinburgh (Capt. C.M. Blackman, DSO, RN) conducted torpedo firing exercises at Scapa Flow. (52)
16 May 1941
HMS Galatea (Capt. E.W.B. Sim, RN, flying the flag of Rear-Admiral K.T.B. Curteis, CB, RN), HMS Arethusa (Capt. A.C. Chapman, RN) and HMS Edinburgh (Capt. C.M. Blackman, DSO, RN) conducted exercises off Scapa Flow.
Shortly after noon they were ordered to proceed to the west at speed to be in a more westward position (to intercept) as a large warship had been reported in position 60°10'N, 04°05'5W at 0647/16 proceeding westwards. This reports was not followed up with more sightings of this supposed enemy warship and the cruisers were ordered to return to Scapa Flow around 2140 hours and course was reversed 180 degrees. (53)
18 May 1941
HMS Edinburgh (Capt. C.M. Blackman, DSO, RN) departed Scapa Flow for a patrol west of the Bay of Biscay / north of the Azores to search for enemy blockade runners. (54)
18 May 1941
Chase and sinking of the German battleship Bismarck, 18 to 27 May 1941.
Part I.
Departure of the Bismarck from the Baltic.
At 2130B/18 the German battleship Bismarck and the German heavy cruiser Prinz Eugen departed Gotenhafen for an anti-shipping raid in the North Atlantic. The following morning they were joined off Cape Arkona by the German destroyers Z 16 / Friedrich Eckhold and Z 23. They then proceeded through the Great Belt. The four ships were joined by a third destroyer, Z 10 / Hans Lody shortly before midnight on 19 May.
First reports of Bismarck and British dispositions 20-21 May 1941.
On 20 May 1941 two large warships with a strong escort were seen at 1500 hours northward out of the Kattegat. This information originated from the Swedish cruiser Gotland which had passed the Germans off the Swedish coast in the morning. The Naval Attaché at Stockholm received the news at 2100/20 and forwarded it to the Admiralty. At 0900/21 the Bismarck and her consorts entered Kors Fjord, near Bergen, Norway and anchored in nearby fiords. A reconnaissance aircraft flying over Bergen at 1330/21 reported having seen two Hipper class heavy cruisers there. One of these ships was later identified on a photograph as being the Bismarck. This intelligence went out at once to the Home Fleet.
The ships of the Home Fleet were at this time widely dispersed on convoy duties, patrols, etc. Some of the units were ranging as far as Gibraltar and Freetown. The Commander-in-Chief, A/Admiral Sir John Tovey, was at Scapa Flow in his flagship, HMS King George V (Capt. W.R. Patterson, CVO, RN). With him were her newly commissioned sister ship HMS Prince of Wales (Capt. J.C. Leach, MVO, RN), the battlecruiser HMS Hood (Capt. R. Kerr, CBE, RN, with Vice-Admiral L.E. Holland, CB, RN, onboard), the aircraft carrier HMS Victorious (Capt. H.C. Bovell, RN), the light cruisers HMS Galatea (Capt. E.W.B. Sim, RN, flying the flag of Rear-Admiral K.T.B. Curteis, CB, RN), HMS Aurora (Capt. W.G. Agnew, RN), HMS Kenya (Capt. M.M. Denny, CB, RN), HMS Neptune (Capt. R.C. O'Conor, RN) and the destroyers HMS Achates (Lt.Cdr. Viscount Jocelyn, RN), HMS Active (Lt.Cdr. M.W. Tomkinson, RN), HMS Antelope (Lt.Cdr. R.B.N. Hicks, DSO, RN), HMS Anthony (Lt.Cdr. J.M. Hodges, RN), HMS Echo (Lt.Cdr. C.H.deB. Newby, RN), HMS Electra (Cdr. C.W. May, RN), HMS Icarus (Lt.Cdr. C.D. Maud, DSO, RN), HMS Punjabi (Cdr. S.A. Buss, MVO, RN) and HMAS Nestor (Cdr. A.S. Rosenthal, RAN). HMS Victorious was under orders to escort troop convoy WS 8B from the Clyde to the Middle East. HMS Neptune was working up for service with the Mediterranean Fleet and was to escort convoy WS 8X from the Clyde to the Middle East on completion. She did not sail to operate against the Bismarck having only just began her post-refit work-up programme.
Rear-Admiral W.F. Wake-Walker (commanding the first Cruiser Squadron), with the heavy cruisers HMS Norfolk (Capt. A.J.L. Phillips, RN) (flag) and HMS Suffolk (Capt. R.M. Ellis, RN) was on patrol in the Denmark Straight. The light cruisers HMS Manchester (Capt. H.A. Packer, RN) and HMS Birmingham (Capt. A.C.G. Madden, RN) were patrolling between Iceland and the Faeroes. The battlecruiser HMS Repulse (Capt. W.G. Tennant, CB, MVO, RN) was at the Clyde to escort troop convoy WS 8B.
Action taken by the Commander-in-Chief, Home Fleet
Admiral Tovey took the following action when he received the news the Bismarck had been spotted at Bergen. Vice-Admiral Holland with the Hood, Prince of Wales, Achates, Antelope, Anthony, Echo, Electra and Icarus was ordered to cover Rear Admiral Wake-Walker's cruisers in the Denmark Straight. His force departed Scapa Flow around 0100/22.
HMS Arethusa (Capt. A.C. Chapman, RN), which was taking the Vice-Admiral, Orkneys and Shetlands, to Reykjavik on a visit of inspection, was ordered to remain at Hvalfiord and placed at Rear-Admiral Wake-Walkers disposal. HMS Manchester and HMS Birmingham were ordered to top off with fuel at Skaalefiord and them to resume their patrol. The other ships that remained at Scapa Flow were brought to short notice for steam.
The Free French submarine FFS Minerve (Lt. P.M. Sonneville), which was on patrol off south-west Norway was ordered to proceed to position 61°53'N, 03°15'E and HMS P 31 (Lt. J.B.de B. Kershaw, RN) was ordered to proceed to position 62°08'N, 05°08'E which is to the west of Stadtlandet.
The sailing of HMS Repulse and HMS Victorious with troop convoy WS 8B was cancelled and the ships were placed at the disposal of Admiral Tovey.
A reconnaissance aircraft flying over Bergen reported that the German ships were gone. This information reached Admiral Tovey at 2000/22. HMS Suffolk which had been fuelling at Hvalfiord was ordered to rejoin HMS Norfolk in the Denmark Strait. HMS Arethusa was ordered to join HMS Manchester and HMS Birmingham to form a patrol line between Iceland and the Faeroes. Vice-Admiral Holland, on his way to Iceland was told to cover the patrols in Denmark Strait north of 62°N. Admiral Tovey would cover the patrols south of 62°N.
Commander-in-Chief leaves Scapa Flow on 22 May 1941
The King George V, with Admiral Tovey on board, departed Scapa Flow at 2245/22. With the King George V sailed, HMS Victorious, HMS Galatea, HMS Aurora, HMS Kenya, HMS Hermione (Capt. G.N. Oliver, RN), HMS Windsor (Lt.Cdr. J.M.G. Waldegrave, DSC, RN), HMS Active, HMS Inglefield (Capt. P. Todd, DSO, RN), HMS Intrepid (Cdr. R.C. Gordon, DSO, RN), HMS Punjabi, HMS Lance (Lt.Cdr. R.W.F. Northcott, RN) and HMAS Nestor. HMS Lance however had to return to Scapa Flow due to defects.
At A.M. 23 May they were joined off the Butt of Lewis by HMS Repulse escorted by HMS Legion (Cdr. R.F. Jessel, RN), HMCS Assiniboine (A/Lt.Cdr. J.H. Stubbs, RCN) and HMCS Saguenay (Lt. P.E. Haddon, RCN) coming from the Clyde area which they departed on 22 May.
The Commander-in-Chief was 230 miles north-west of the Butt of Lewis in approximate position 60°20'N, 12°30'W when at 2032/23 a signal came in from HMS Norfolk that she had sighted the Bismarck in the Denmark Strait.
HMS Suffolk and HMS Norfolk made contact with the Bismarck in the Denmark Strait on 23 May 1941.
At 1922/23 HMS Suffolk sighted the Bismarck and Prinz Eugen in position 67°06'N, 24°50'W. They were proceeding to the south-west skirting the edge of the ice in Denmark Strait. HMS Suffolk immediately sent out an enemy report and made for the mist to the south-east. HMS Norfolk then commenced closing and sighted the enemy at 2030 hours. They were only some six nautical miles off and the Bismarck opened fire. HMS Norfolk immediately turned away, was not hit and also sent out an enemy report.
Although HMS Suffolk had sighted the enemy first and also sent the first contact report this was not received by the Commander-in-Chief. The enemy was 600 miles away to the north-westward.
Vice-Admiral Holland had picked up the signal from the Suffolk. He was at that moment about 300 nautical miles away. Course was changed to intercept and speed was increased by his force to 27 knots.
Dispositions, 23 May 1941.
At the Admiralty, when the Norfolk's signal came in, one of the first considerations was to safeguard the convoys at sea. At this time there were eleven crossing the North-Atlantic, six homeward and five outward bound. The most important convoy was troop convoy WS 8B of five ships which had left the Clyde the previous day for the Middle East. She was at this moment escorted by the heavy cruiser HMS Exeter (Capt. O.L. Gordon, MVO, RN), light cruiser (AA cruiser) HMS Cairo (A/Capt. I.R.H. Black, RN) and the destroyers HMS Cossack (Capt. P.L. Vian, DSO, RN), HMS Maori (Cdr. G.H. Stokes, DSC, RN), HMS Zulu (Cdr. H.R. Graham, DSO, RN), ORP Piorun (Kmdr.por. (Cdr.) E.J.S. Plawski), HMCS Ottawa (Cdr. E.R. Mainguy, RCN), HMCS Restigouche (Cdr. H.N. Lay, RCN) and the escort destroyer HMS Eridge (Lt.Cdr. W.F.N. Gregory-Smith, RN). HMS Repulse was also intended to have sailed with this convoy but she had joined the Commander-in-Chief instead.
Force H was sailed around 0200/24 from Gibraltar to protect this important convoy on the passage southwards. Force H was made up of the battlecruiser HMS Renown (Capt Sir R.R. McGrigor, RN), aircraft carrier HMS Ark Royal (Capt. L.E.H. Maund, RN), light cruiser HMS Sheffield (Capt. C.A.A. Larcom, RN) and the destroyers HMS Faulknor (Capt. A.F. de Salis, RN), HMS Foresight (Cdr. J.S.C. Salter, RN), HMS Forester (Lt.Cdr. E.B. Tancock, RN), HMS Foxhound (Cdr. G.H. Peters, DSC, RN), HMS Fury (Lt.Cdr. T.C. Robinson, RN) and HMS Hesperus (Lt.Cdr. A.A. Tait, RN).
HMS Norfolk and HMS Suffolk shadowing Bismarck 23 / 24 May 1941.
During the night of 23 / 24 May 1941 HMS Norfolk and HMS Suffolk hung on to the enemy, The Norfolk on their port quarter, Suffolk on their starboard quarter. All through the night they sent signals with updates on the position, course and speed of the enemy. At 0516 hours HMS Norfolk sighted smoke on her port bow and soon HMS Hood and HMS Prince of Wales came in sight.
HMS Hood and HMS Prince of Wales 23 / 24 May 1941.
At 2054/23 the four remaining escorting destroyers were ordered to follow at best speed in the heavy seas if they were unable to keep up with the capital ships which were proceeding at 27 knots. Two destroyers, HMS Antelope and HMS Anthony had been ordered to proceed to Iceland to refuel at 1400/23. The destroyers all managed to keep up for now and at 2318 hours they were ordered to form a screen ahead of both capital ships. At 0008/24 speed was reduced to 25 knots and course was altered to due north at 0017 hours. It was expected that contact with the enemy would be made at any time after 0140/24. It was just now that the cruisers lost contact with the enemy in a snowstorm and for some time no reports were coming in. At 0031 hours the Vice-Admiral signalled to the Prince of Wales that if the enemy was not in sight by 0210 hours he would probably alter course to 180° until the cruisers regained touch. He also signalled that he intended to engage the Bismarck with both capital ships and leave the Prinz Eugen to Norfolk and Suffolk.
The Prince of Wales' Walrus aircraft was ready for catapulting and it was intended to fly it off, but visibility deteriorated and in the end it was defuelled and stowed away at 0140 hours. A signal was then passed to the destroyers that when the capital ships would turn to the south they were to continue northwards searching for the enemy. Course was altered to 200° at 0203/24. As there was now little chance of engaging the enemy before daylight the crews were allowed to rest.
At 0247/24 HMS Suffolk regained touch with the enemy and by 0300 hours reports were coming in again. At 0353 hours HMS Hood increased speed to 28 knots and at 0400/24 the enemy was estimated to be 20 nautical miles to the north-west. By 0430 hours visibility had increased to 12 nautical miles. At 0440 hours orders were given to refuel the Walrus of HMS Prince of Wales but due to delays due to water in the fuel it was not ready when the action began and it was damaged by splinters and eventuelly jettisoned into the sea.
At 0535/24 hours a vessel was seen looming on the horizon to the north-west, it was the Bismarck. She was some 17 nautical miles away bearing 330°. Prinz Eugen was ahead of her but this was not immediately realised and as the silhoutte of the German ships was almost similar the leading ship was most likely thought to be the Bismarck on board HMS Hood.
Battle of the Denmark Strait, action with the Bismarck and Prinz Eugen. Loss of HMS Hood.
At 0537/24 HMS Hood and HMS Prince of Wales were turned together 40° to starboard towards the enemy. At 0549 hours course was altered to 300° and the left hand ship was designated as the target. This was a mistake as this was the Prinz Eugen and not the Bismarck. This was changed to the Bismarck just before fire was opened at 0552 hours. At 0554 hours the Bismarck and Prinz Eugen also opened fire. In the meantime Prince of Wales had also opened fire at 0053 hours. Her first salvo was over. The sixth salvo was a straddle. The Norfolk and Suffolk were too far astern of the enemy to take part in the action.
At 0555 hours Hood and Prince of Wales turned two points to port. This opened up Prince of Wales' A arcs as her ninth salvo was fired.
Shortly before 0605 hours Hood signalled that another turn of two points to port had to be executed. Bismarck had just fired her fifth salvo when the Hood was rent in two by a huge explosion rising apparently between the after funnel and the mainmast. The fore part began to sink seperately, bows up, whilst the after part remained shrouded in a pall of smoke. Three or four minutes later, the Hood had vanished between the waves leaving a vast cloud of smoke drifting away to the leeward. She sank in position 63°20'N, 31°50'W (the wreck was found in 2001 in approximate position 63°22'N, 32°17'W, the exact position has not been released to the public.)
The Prince of Wales altered course to starboard to avoid the wreckage of the Hood. The Bismarck now shifted fire from her main and secondary armament to her. Range was now 18000 yards. Within a very short time she was hit by four 15" and three 6" shells. At 0602 hours a large projectile wrecked the bridge, killing or wounding most of the personnel and about the same time the ship was holed underwater aft. It was decided temporarily to discontinue the action and at 0613 hours HMS Prince of Wales turned away behind a smoke screen. The after turret continued to fire but it soon malfunctioned and was out of action until 0825 hours. When the Prince of Wales ceased firing the range was 14500 yards. She had fired 18 salvos from the main armament and five from the secondary. The Bismarck made no attempt to follow or continue the action. She had also not escaped unscatched and had sustained two severe hits.
Such was the end of the brief engagement. The loss by an unlucky hit of HMS Hood with Vice-Admiral Holland, Captain Kerr and almost her entire ships company was a grievous blow, but a great concentration of forces was gathering behind the Commander-in-Chief, and Admiral Somerville with Force H was speeding towards him from the south.
The chase
When the Hood blew up, HMS Norfolk was 15 nautical miles to the northward coming up at 28 knots. By 0630/24 she was approaching HMS Prince of Wales and Rear-Admiral Wake-Walker, signalling his intention to keep in touch, told her to follow at best speed. The destroyers that had been with HMS Hood and HMS Prince of Wales were still to the northward. They were ordered to search for survivors but only HMS Electra found three. The Prince of Wales reported that she could do 27 knots and she was told to open out to 10 nautical miles on a bearing of 110° so that HMS Norfolk could fall back on her if she was attacked. Far off the Prinz Eugen could be seen working out to starboard of the Bismarck while the chase continued to the southward.
At 0757 hours, HMS Suffolk reported that the Bismarck had reduced speed and that she appeared to be damaged. Shortly afterwards a Sunderland that had taken off from Iceland reported that the Bismarck was leaving behind a broad track of oil. The Commander-in-Chief with HMS King George V was still a long way off, about 360 nautical miles to the eastward, and Rear-Admiral Wake-Walker on the bridge of HMS Norfolk had to make an important decision, was he to renew the action with the help of the Prince of Wales or was he to make it his business to ensure that the enemy could be intercepted and brought to action by the Commander-in-Chief. A dominant consideration in the matter was the state of the Prince of Wales. Her bridge had been wrecked, she had 400 tons of water in her stern compartments and two of her guns were unserverable and she could go no more then 27 knots. She had only been commissioned recently and barely a week had passed since Captain Leach had reported her ready for service. Her turrets were of a new and an untried model, liable for 'teething' problems and evidently suffering from them, for at the end of the morning her salvoes were falling short and wide. It was doubted if she was a match for the Bismarck in her current state and it was on these grounds that Rear-Admiral Wake-Walker decided that he would confine himself to shadowing and that he would not attempt to force on an action. Soon after 1100/24 visibility decreased and the Bismarck was lost out of sight in mist and rain.
Measures taken by the Admiralty, 24 May 1941.
After the loss of HMS Hood the following measures were taken by the Admiralty. To watch for an attempt by the enemy to return to Germany, HMS Manchester, HMS Birmingham and HMS Arethusa had been ordered at 0120/24 to patrol off the north-east point of Iceland. They were told to proceed to this location with all despatch.
HMS Rodney (Capt. F.H.G. Dalrymple-Hamilton, RN), which with four destroyers was escorting the troopship Britannic (26943 GRT, built 1930) westward, was ordered at 1022/24 to steer west on a closing course and if the Britannic could not keep up she was to leave her with one of the destroyers. Rodney was about 550 nautical miles south-east of the Bismarck. At 1200/24 she left the Britannic in position 55°15'N, 22°25'W and left HMS Eskimo (Lt.Cdr. E.G. Le Geyt, RN) with her. HMS Rodney then proceeded with HMS Somali (Capt. C. Caslon, RN), HMS Tartar (Cdr. L.P. Skipwith, RN) and HMS Mashona (Cdr. W.H. Selby, RN) westwards on a closing course.
Two other capital ships were in the Atlantic; HMS Ramillies (Capt. A.D. Read, RN) and HMS Revenge (Capt. E.R. Archer, RN). The Ramillies was escorting convoy HX 127 from Halifax and was some 900 nautical miles south of the Bismarck. She was ordered at 1144/24 to place herself to the westward of the enemy and leaving her convoy at 1212/24 in position 46°25'N, 35°24'W, she set course to the north. HMS Revenge was ordered to leave Halifax and close the enemy.
Light cruiser HMS Edinburgh (Capt. C.M. Blackman, DSO, RN) was patrolling in the Atlantic between 44°N and 46°N for German merchant shipping and was ordered at 1250/24 to close the enemy and take on relief shadower. At 1430/24 she reported her position as 44°17'N, 23°56'W and she was proceeding on course 320° at 25 knots.
Rear-Admiral Wake-Walker was ordered to continue shadowing even if he ran short of fuel so to bring the Commander-in-Chief into action.
The Bismack turns due south at 1320 hours on 24 May 1941.
In the low state of visibility, HMS Norfolk and HMS Suffolk had to be constantly on the alert against the enemy falling back and attacking them. At 1320/24 the Bismarck and Prinz Eugen altered course to the south and reduced speed. HMS Norfolk sighted them through the rain at a range of only 8 nautical miles. Norfolk had to quickly turn away under the cover of a smoke screen.
It was at 1530/24 when HMS Norfolk received a signal made by the Commander-in-Chief at 0800/24 from which it was estimated that the Commander-in-Chief would be near the enemy at 0100/25. This was later changed to 0900/25.
At 1545/24, Rear-Admiral Wake-Walker was asked by the Admiralty to answer four questions; 1) State the remaining percentage of the Bismarck's fighting efficiency. 2) What amout of ammunition had the Bismarck expended. 3) What are the reasons for the frequent alterations of course by the Bismarck. 4) What are your intentions as regards to the Prince of Wales' re-engaging the Bismarck.
The answers by Rear-Admiral Wake-Walker were as follows. 1) Uncertain but high. 2) About 100 rounds. 3) Unaccountable except as an effort to shake off HMS Norfolk and HMS Suffolk. 4) Consider it wisely for HMS Prince of Wales to not re-engage the Bismarck until other capital ships are in contact, unless interception failed. Doubtful if she has the speed to force an action.
The afternoon drew on towards evening. Still the Bismarck and Prinz Eugen held on to the south while the Norfolk, Suffolk and Prince of Wales were still keeping her in sight.
At 1711/24 in order to delay the enemy if possible, by attacking him from astern, the Prince of Wales was stationed ahead of the Norfolk. The enemy was not in sight from the Norfolk at that time, but the Suffolk was still in contact.
At 1841/24 the Bismarck opened fire on the Suffolk. Her salvoes fell short, but one or two shorts came near enough to cause some minor damage to her hull plating aft. HMS Suffolk replied with nine broadsides before turning away behind a smoke screen.
On seeing the Suffolk being attacked, HMS Norfolk turned towards and she and HMS Prince of Wales opened fire, the latter firing 12 salvoes. By 1856 hours the action was over. Two of the guns on the Prince of Wales malfuntioned again. After the action the cruisers started to zig-zag due to fear for German submarines.
British dispositions at 1800 hours on 24 May 1941.
From the Admiralty at 2025/24, there went out a signal summarising the situation at 1800/24. The position, course and speed of the Bismarck was given as 59°10'N, 36°00'W, 180°, 24 knots with HMS Norfolk, HMS Suffolk and HMS Prince of Wales still in touch. The Commander-in-Chiefs estimated position at 1800/24 was 58°N, 30°W, with HMS King George V and HMS Repulse. HMS Victorious was with the 2nd Cruiser Squadron (HMS Galatea, HMS Aurora, HMS Kenya). They had parted company with the Commander-in-Chief at 1509/24. Heavy cruiser HMS London (Capt. R.M. Servaes, CBE, RN) was in position 42°45'N, 20°10'W and had been ordered to leave her convoy and close the enemy. HMS Ramillies was in estimated position 45°45'N, 35°40'W. She had been ordered to place herself to the west of the enemy. HMS Manchester, HMS Birmingham and HMS Arethusa were returning from their position off the north-east of Iceland to refuel. HMS Revenge had left Halifax and was closing convoy HX 128. HMS Edinburgh was in approximate position 45°15'N, 25°10'W. She had been ordered to close and take over stand by shadower.
Evening of 24 May 1941.
At 2031/24 HMS Norfolk received a signal sent by the Commander-in-Chief at 1455/24 stating that aircraft from HMS Victorious might make an attack at 2200/24 and Rear-Admiral Wake-Walker now waited for an air attack which he expected at 2300 hours. By that time Bismarck had been lost from sight but at 2330/24 HMS Norfolk briefly sighted her at a distance of 13 nautical miles. At 2343/24 aircraft from HMS Victorious were seen approaching. They circled round HMS Prince of Wales and HMS Norfolk and the latter was able to direct them to the enemy. At 0009/25 heavy anti-aircraft gunfire was seen and the Bismarck was just visible as the aircraft attacked.
HMS Victorious and the 2nd Cruiser Squadron detached by the Commander-in-Chief.
At 1440/24 the Commander-in-Chief ordered the 2nd Cruiser Squadron (HMS Galatea, HMS Aurora, HMS Kenya, HMS Hermione) and HMS Victorious to a position within 100 nautical miles from Bismarck and to launch a torpedo bombing attack and maintain contact as long as possible. The object of the torpedo bombing attack was to slow the enemy down. On board the Victorious were only 12 Swordfish torpedo bombers and 6 Fulmar fighters. Victorious was only recently commissioned and her crew was still rather green. She had on board a large consignment of crated Hurricane fighters for Malta which were to be delivered to Gibraltar.
At 2208/24 HMS Victorious commenced launching 9 Swordfish in position 58°58'N, 33°17'E. Two minutes later al were on their way to find the Bismarck. The Squadron was led by Lt.Cdr.(A) E. Esmonde, RN.
HMS Victorious aircraft attack the Bismarck.
When the Swordfish took off from HMS Victorious the Bismarck was estimated to be in position 57°09'N, 36°44'W and was steering 180°, speed 24 knots. At 2330/24 they sighted the Bismarck but contact was lost in the bad weater. Shortly afterwards the Swordfish sighted HMS Prince of Wales, HMS Norfolk and HMS Suffolk. HMS Norfolk guided them to the enemy which was 14 nautical miles on her starboard bow. At 2350 hours a vessel was detected ahead and the squadron broke cloud to deliver an attack. To their surprise they found themselves over a United States Coastguard cutter. The Bismarck was 6 nautical miles to the southward and on sighting the aircraft opened up a heavy barrage fire. Lt.Cdr. Esmonde pressed home his attack, 8 of the Swordfish were able to attack, the other had lost contact in the clouds.
The 8 planes attacked with 18" torpedoes, fitted with Duplex pistols set for 31 feet. At midnight three Swordfish attacked simultaneously on the port beam. Three others made a longer approach low down attacking on the port bow a minute later. One took a longer course, attacking on the port quarter. One went round and attacked on the starboard bow a couple of minutes after midnight. At least one hit was claimed on the starboard side abreast the bridge. The Germans however state that no hit was scored but that the violent maneuvering of the ship to avoid the attack, together with the heavy firing by the Bismarck caused the leak in no.2 boiler room to open up. No.2 boiler room was already partially flooded and now had to be abandoned.
All Swordfish from the striking had returned to HMS Victorious by 0201/25. Two Fulmars launched at 2300/24 for shadowing failed to find their ship in the darkness due to the failure of Victorious' homing beacon. Their crews were in the end picked up from the chilly water.
HMS Norfolk and HMS Suffolk loose contact at 0306/25.
While the aircraft from HMS Victorious were making their attack, HMS Norfolk sighted a ship to the south-west and gave the order to open fire. HMS Prince of Wales was able to identify it in time as an American coast guard cutter, but in the movements prepartory to opening fire HMS Norfolk lost touch with the enemy for a time and it was not until 0116/25 that she suddenly sighted the Bismarck only 8 nautical miles away. There followed a brief exchange of fire. HMS Norfolk and HMS Prince of Wales turned to port to bring their guns to bear and the latter was ordered to engage. It was then 0130/25. The Prince of Wales fired two salvoes at 20000 yards by radar. The Bismarck answered with two salvoes which fell a long way short. The light was failing and the enemy was again lost to sight. HMS Suffolk, which had to most reliable RDF set was told to act independently so as to keep in touch.
Around 0306/25 the Suffolk lost touch with the Bismarck. At 0552/25 Rear-Admiral Wake-Walker asked if HMS Victorious could launch aircraft for a search at dawn.
Search measures, 25 May 1941.
With the disappearance of the Bismarck at 0306/25 the first phase of the pursuit ended. The Commander-in-Chief, in HMS King George V with HMS Repulse in company was then about 115 nautical miles to the south-east. At 0616/25, Rear-Admiral Wake-Walker signalled that it was most probable that Bismarck and Prinz Eugen made a 90° turn to the west or turned back and 'cut away' to the eastward astern of the cruisers. Suffolk was already searching to the south-west and Norfolk was waiting for daylight to do the same. Prince of Wales was ordered to join the King George V and Repulse.
Force H was still on a course to intercept the Bismarck while steaming on at 24 knots. The Rear-Admiral commanding the 2nd Cruiser Squadron in HMS Galatea had altered course at 0558/25 to 180° for the position where the enemy was last seen and the Victorious was getting 8 aircraft ready to fly off at 0730/25 for a search to the eastward. This plan however was altered on orders being recieved from the Commander-in-Chief to take the cruisers and Victorious and carry out a search to the north-west of the Bismarck's last reported position. Five Fulmars had already been up during the night, two of them had not returned to the ship. The search therefore had to be undertaken by Swordfish, the only aircraft available. At 0810/25, seven Swordfish were flown off from position 56°18'N, 36°28'W to search between 280° and 040° up to 100 nautical miles. The search was supplemented by Victorious herself as well as the cruisers from the 2nd Cruiser Squadron (Galatea, Aurora, Kenya and Hermione) which were spread some miles apart.
DF position of the Bismarck of 0852/25.
HMS King George V was still proceeding to the south-west when at 1030/25 the Commander-in-Chief recieved a signal from the Admiralty that the Bismarck's position had been obtained by DF (direction finding) and that it indicated that the Bismarck was on a course for the North Sea by the Faeroes-Iceland passage. To counter this move by the enemy the Commander-in-Chief turned round at 1047/25 and made for the Faeroes-Iceland passage at 27 knots. HMS Repulse was no longer in company with HMS King George V, she had been detached at 0906/25 for Newfoundland to refuel. Suffolk also turned to the eastward to search, her search to the south-west had been fruitless. The search by HMS Victorious, her aircraft and the 2nd Cruiser Squadron to the north-west also had no result. Six Swordfish were landed on by 1107/25, one failed to return. HMS Galatea, HMS Aurora and HMS Kenya now turned towards the DF position of the Bismarck to search in that direction. HMS Hermione had to be detached to Hvalfiord, Iceland to refuel as she was by now down to 40%. The other cruisers slowed down to 20 knots to economise their remaining fuel supply wich was also getting low. At this moment HMS King George V had about 60% remaining.
Events during 25 May 1941.
At 1100/25, HMS King George V, HMS Suffolk and HMS Prince of Wales were proceeding to the north-east in the direction of the enemy's DF signal. HMS Rodney was in position 52°34'N, 29°23'W some 280 nautical miles to the south-eastward on the route towards the Bay of Biscay. On receiving the Commander-in-Chiefs signal of 1047/25 she too proceeded to the north-east.
Meanwhile to Admiralty had come to the conclusion that the Bismarck most likely was making for Brest, France. This was signalled to the Commander-in-Chief at 1023/25 to proceed together with Force H and the 1st Cruiser Squadron on that assumption.
In the absence however of definite reports it was difficult to be certain of the position of the enemy. The DF bearings in the morning had not been very definite. At 1100/25, HMS Renown (Force H), was in position 41°30'N, 17°10'W was ordered to act on the assumption the enemy was making for Brest, France. She shaped course accordingly and prepared a comprehensive sheme of air search. At 1108/25, HMS Rodney, was told to act on the assumption that the enemy was making for the Bay of Biscay. At 1244/25 the Flag Officer Submarines ordered six submarines to take up intercepting positions about 120 nautical miles west of Brest. The submarines involved were HMS Sealion (Cdr. B. Bryant, DSC, RN), HMS Seawolf (Lt. P.L. Field, RN), HMS Sturgeon (Lt.Cdr. D. St. Clair-Ford, RN) from the 5th Submarine Flottilla at Portsmouth, HMS Pandora (Lt.Cdr. J.W. Linton, DSC, RN), which was on passage to the U.K. from the Mediterranean to refit, HMS Tigris (Lt.Cdr. H.F. Bone, DSO, DSC, RN), from the 3rd Submarine Flottilla at Holy Loch and HMS H 44 (Lt. W.N.R. Knox, DSC, RN), a training boat from the 7th Submarine Flotilla at Rothesay which happened to be at Holyhead. Seawolf, Sturgeon and Tigris were already on patrol in the Bay of Biscay, Sealion departed Portsmouth on the 25th as did H 44 but she sailed from Holyhead. Pandora was on passage to the U.K. to refit and was diverted.
At 1320/25 a good DF fix located an enemy unit within a 50 mile radius from position 55°15'N, 32°00'W. This was sent by the Admiralty to the Commander-in-Chief at 1419/25 and it was received at 1530/25. It was only in the evening that it was finally clear to all involved that Bismarck was indeed making for a French port. Air searches had failed to find her during the day. (55)
18 May 1941
Chase and sinking of the German battleship Bismarck, 18 to 27 May 1941.
Part II.
26 May 1941.
By now the question of fuel was becoming acute. For four days ships had been steaming at high speeds and the Commander-in-Chief was faced with the reality of fuel limits. HMS Repulse had already left for Newfoundland, HMS Prince of Wales had by now been sent to Iceland to refuel. HMS Victorious and HMS Suffolk had been forced to reduce speed to economise their fuel.
Coastal Command started air searches along the route towards the Bay of Biscay by long range Catalina flying boats. Lack of fuel was effecting the destroyer screens of the capital ships. There was no screen available for HMS Victorious. The 4th Destroyer Flotilla, escorting troop convoy WS 8B, was ordered at 0159/26 to join the Commander-in-Chief in HMS King George V and HMS Rodney as was HMS Jupiter (Lt.Cdr. N.V.J.P. Thew, RN) which sailed from Londonderry. Leaving the convoy the 4th D.F. proceeded to the north-east. Force H in the meantime was also approaching the immediate area of operations. These forces were to play an important part in the final stages of the chase of the Bismarck.
Force H, 26 May 1941.
HMS Renown, HMS Ark Royal and HMS Sheffield were having a rough passage north in heavy seas, high wind, rain and mist. Their escorting destroyers had already turned back towards Gibraltar at 0900/25. At dawn on the 26th there was half a gale blowing from the north-west. At 0716/26 HMS Ark Royal launched a security patrol in position 48°26'N, 19°13'W to search to the north and to the west just in case the Scharnhorst and Gneisenau had departed Brest to come to the aid of the Bismarck. At 0835/26 there followed an A/S patrol of ten Swordfish. All planes had returned by 0930. None had seen anything.
Bismarck sighted at 1030/26.
It was at 1030/26 that one of the long range Catalina's of the Coastal Command sighted the Bismarck in position 49°30'N, 21°55'W. It was received in HMS King George V at 1043 hours and in HMS Renown in 1038 hours. It placed the enemy well to the westward of the Renown. It was confirmed within the hour when two Swordfish from the Ark Royal which reported the Bismarck in position 49°19'N, 20°52'W some 25 miles east of the position given by the Catalina. The Commander-in-Chief was at that moment about 130 miles to the north of the Bismarck but it was soon clear that the Bismarck had too great a lead to permit her being overtaken unless her speed could be reduced. Nor was the question one merely of distance and speed. The Bismarck was approaching a friendly coast and could run her fuel tanks nearly dry and was sure of air protection, while the British ships would have a long journey back to base in the face of air and submarine attack. HMS Renown was ahead of the Bismarck but it was important that she did not engage the Bismarck unless the latter was already heavily engaged by the better armoured HMS King George V and HMS Rodney.
When the Catalina found the Bismarck at 1030 hours, the 4th Destroyer Flotilla was steering east to join the Commander-in-Chief. They seem to have crossed astern of the enemy's track about 0800/26. The Catalina's report reached Capt. Vian in HMS Cossack at 1054/26 and 'knowing that the Commander-in-Chief would order him to intercept the enemy' Capt. Vian altered course to the south-east.
First attack by aircraft from the Ark Royal.
At 1315/26 HMS Sheffield was detached to the southward with orders to close and shadow the enemy, who was estimated to be 40 nautical miles south-west of the Renown. The visual signal ordering this movement was not repeated to HMS Ark Royal, an omission which had serious consequenses for the aircraft that were to take off did not know that HMS Sheffield had parted company.
At 1450/26 HMS Ark Royal launched a striking force of 14 Swordfish aircraft with the orders to proceed to the south and attack the Bismarck with torpedoes. Weather and cloud conditions were bad and a radar contact was obtained on a ship some 20 nautical miles from the estimated position of the enemy that had been given to the leader shortly before takeoff. At 1550 hours they broke through the clouds and fired 11 torpedoes. Unfortunately the supposed enemy was HMS Sheffield which managed to avoid all torpedoes. The Bismarck at that time was some 15 nautical miles to the southward. The striking force then returned an all aircraft had landed on by 1720/26.
At 1740/26, HMS Sheffield, sighted the Bismarck in position 48°30'N, 17°20'W and took station about 10 nautical miles astern and commenced shadowing the enemy.
Ark Royal's second attack, 2047/26.
The first striking force on its way back sighted the 4th Destroyer Flotilla 20 nautical miles west of Force H. As soon as the aircraft from the first strike had landed they were refuelled and rearmed as fast as possible. Take off started at 1910/26, a total of 15 Swordfish were launched. Reports coming in from HMS Sheffield placed the Bismarck at 167°, 38 nautical miles from the Ark Royal. The striking force was ordered to contact HMS Sheffield who was told to use DF to guide them in.
At 1955/26 HMS Sheffield was sighted but soon lost in the bad weather conditions. She was found again at 2035 hours, she guided the Swordfish in and directed them by visual signal on the enemy bearing 110°, 12 nautical miles. The force took departure for the target in subflights in line astern at 2040/26.
At 2047/26 no.1 subflight of three Swordfish dived through the clouds and sighted the Bismarck 4 nautical miles off to the south-east. One Swordfish of no.3 subflight was with them. Approaching again just inside the cloud they made their final dive at 2053/26 on the port beam under a very intense and accurate fire from the enemy. They dropped four torpedoes of which one was seen to hit. No.2 subflight, made up of two Swordfish, lost touch with no.1 subflight in the clouds, climed to 9000 feet, then dived on a bearing obtained by radar and then attacked from the starboard beam, again under heavy and intense fire. They dropped two torpedoes for one possible hit. The third plane of this subflight had lost touch with the other two and had returned to HMS Sheffield to obtained another range and bearing to the enemy. It then flew ahead of the enemy and carried out a determined attack from his port bow under heavy fire and obtained a torpedo hit on the port side amidships.
Subflight no.4 followed subflight no.3 into the clouds but got iced up at 6600 feet. It then dived through the clouds and was joined by no.2 aircraft from subflight no.3. The Bismarck was then sighted engaging subflight no.2 to starboard. The four aircraft then went into the clouds and cicled the German battleships stern and then dived out of the clouds again and attack simultaneously from the port side firing four torpedoes. All however missed the Bismarck. They came under a very heavy and fierce fire from the enemy and one of the aircraft was heavily damaged, the pilot and air gunner being wounded.
The two aircraft of subflight no.5 lost contact with the other subflights and then with each other in the cloud. They climbed to 7000 feet where ice began to form. When coming out of the cloud at 1000 feet aircraft 4K sighted the Bismarck down wind, she then went back into the cloud under fire from the enemy. She saw a torpedo hit on the enemy's starboard side, reached a position on the starboard bow, withdrew to 5 miles, then came in just above the sea and just outside 1000 yards fired a torpedo which did not hit. The second plane of this flight lost his leader diving through the cloud, found himself on the starboard quarter and after two attempts to attack under heavy fire was forced to jettison his torpedo.
Of the two Swordfish of subflight no.6 one attacked the Bismarck on the starboard beam and dropped his torpedo at 2000 yards without success. The second plane lost the enemy, returned to the Sheffield for a new range and bearing and after searching at sea level attacked on the starboard beam but was driven off by intense fire. The attack was over by 2125/26. Thirteen torpedoes had been fired and it was thought two hits and one probable hit had been obtained. Two torpedoes were jettisoned. The severe nature and full effect of the damage done was at first not fully realised. Actually the Bismarck had received a deadly blow. The last of the shadowing aircraft to return had seen her make two complete circles. One torpedo had struck her on the port side amidships doing little damage but th other torpedo that hit was on the starboard quarter damaging her propellors, wrecking her steering gear and jambing her rudders, it was this torpedo hit that sealed her fate.
HMS Sheffield was still shadowing astern when at 2140/26 the Bismarck turned to port and fired six accurate salvoes of 15". None actually hit Sheffield but a near miss killed three men and seriously injured two. HMS Sheffield turned away and while doing so she sighted HMS Cossack and the other destroyers from the 4th DF approaching from the westward. She then gave them the approximate position of the Bismarck. At 2155/26, HMS Sheffield lost touch with the Bismarck. The destroyers continued to shadow and eventually attack. Meanwhile HMS Renown and HMS Ark Royal shaped course for the southward to keep the road clear for the Commander-in-Chief in HMS King George V and for HMS Rodney. Also in the Ark Royal aircraft were being got ready for an attack on the Bismarck at dawn.
Bismarck, 26 May 1941.
The Bismarck could no longer steer after the torpedo hit aft. The steering motor room was flooded up to the main deck and the rudders were jambed. Divers went down to the steering room and managed to centre one rudder but the other remained immovable. She was by this time urgently in need of fuel. It was hoped by the Germans that while she was nearing the French coast strong forces of aircraft and submarines would come to her assistance.
At 2242/26, Bismarck sighted the British destroyers. A heavy fire was opened on them. Their appearence greatly complicated the situation. Before their arrival however, Admiral Lütjens seems to have made up his mind as one hour earlier he had signalled to Berlin 'ship out of control. We shall fight to the last shell. Long live the Führer.'
The fourth Destroyer Flotilla makes contact, 26 May 1941.
Just as the sun was setting, Captain Vian (D.4) in HMS Cossack with HMS Maori, HMS Sikh, HMS Zulu and the Polish destroyer ORP Piorun arrived on the scene.
Shortly after 1900/26 HMS Renown and HMS Ark Royal were sighted to the northward. Ark Royal was just about to fly off the second striking force. The destroyers continued on the the south-east. At 2152/26 HMS Sheffield was sighted and from her Captain Vian obtained the approximate position of the enemy.
The destroyers were spread 2.5 nautical miles apart on a line bearing 250° - 070° in the order from north-east to south-west, Piorun, Maori, Cossack, Sikh, Zulu. During the latter stages of the approach speed was reduced and the flotilla manoeuvred so as to avoid making a high speed end-on contact.
At 2238/26, ORP Piorun on the port wing reported the Bismarck 9 nautical miles distant, bearing 145° and steering to the south-eastward.
Destroyers shadowing, late on 26 May 1941.
At the time the Piorun reported being in contact with the Bismarck the destroyers were steering 120°. All were at once ordered to take up shadowing positions. Four minutes later the Bismarck opened a heavy fire with her main and secondary armaments on the Piorun and Maori. Two attempts were made by these ships to work round to the northward of the enemy but they were silhouetted against the north-western horizon making them easy to spot. The Bismarck's fire was unpleasantly accurate, through neither destroyer was actually hit. The Commanding Officer of the Maori then decided to work round to the southward and altered course accordingly.
The Piorun closed the range and herself opened fire from 13500 yards but after firing three salvoes, she was straddled by a salvo which fell about 20 yards from the ships side. She then ceased fire and turned away to port while making smoke. During this engagement she lost touch with the other destroyers and later also with the Bismarck. She remained under fire for about one hour but was not hit. She worked round to the north-east of the Bismarck but eventually lost touch with her prey at 2355/26.
The other destroyers, meanwhile, had been working round to the southward of the enemy to take up shadowing positions to the eastward of him. Soon after the initial contact it was evident the the Bismarck's speed had been so seriously reduced that interception by the battlefleet was certain, provided that contact could be held. In these circumstances Captain Vian defined his object at firstly, to deliver the enemy to the Commander-in-Chief at the time he desired, and secondly, to sink or immoblise her with torpedoes during the night but not with to great a risk for the destroyers. Accordingly at 2248/26 as signal was made to all ordering them to shadow and this operation was carried out through the night, though torpedo attacks were carried out later under the cover of darkness.
As darkness came on, the weather deteriorated and heavy rain squalls became frequent. Visibility varied between 2.5 nautical miles and half a mile but the Bismarck, presumably using radar, frequently opened up accurate fire outside these ranges.
About half an hour after sunset, the destroyers were ordered at 2324/26 to take up stations prepartory to carrying out a synchronised torpedo attack. This was subsequently cancelled on account of the adverse weather conditions and they were ordered to attack independently as opportunity offered. At about 2300 hours the Bismarck altered course to the north-westward.
At this time HMS Zulu was in touch with her and kept her under observation from the southward. At 2342 hours the Bismarck opened fire on HMS Cossack, then about 4 miles to the south-south-west and shot away her aerials. The Cossack turned away under the cover of smoke, shortly afterwards resuming her course to the eastward.
A few minutes later, at 2350 hours, HMS Zulu came under heavy fire from the Bismarck's 15" guns. The first three salvoes straddled wounding an officer and two ratings. Drastic avoiding action was taken as a result of which Zulu lost touch. HMS Sikh, however, who had lost sight of the enemy half an hour previously, had observed her firing at HMS Cossack and now succeeded in shadowing from astern until 0020/27 when the enemy made a large alteration to port and commenced firing at her. HMS Sikh altered course to port, intending to fire torpedoes, but the view of the Torpedo Control Officer was obscured by shell splashes and Sikh then withdrew to the southward.
Destroyer night torpedo attacks, 26/27 May 1941.
HMS Zulu, after her escape at 2345/26, had steered to the northward and at 0030/27 fell in with HMS Cossack. Shortly afterwards she sighted ORP Piorun. On receipt of a signal from Captain Vian, timed 0040/27, to take any opporunity to fire torpedoes, HMS Zulu altered course to the westward,and at 0100/27 sighted the Bismarck steering 340°.
Positions of the destroyers was now as follows; to the north-eastward of the enemy, HMS Cossack was working round to the north and west. HMS Maori, since losing touch, had been making to the westward. She was now to the south-west of the Bismarck. HMS Sikh was some distance to the southward, not having received any information regarding the position of the Bismarck since 0025/27. HMS Zulu was astern of the enemy and in contact. Range was only 5000 yards. Bismarck finally spotted Zulu and at once opened fire with her main and secondary armament and straddled Zulu. She fired four torpedoes at 0121/27 but no hits were observed and they are believed to have missed ahead. Zulu then ran out to the northward in order to be clear of the other destroyers. Shortly afterwards they widnessed a successful attack by HMS Maori.
HMS Maori had seen the Bismarck opening fire on the Zulu at 0107/27. Maori then closed to 4000 yards on Bismarck's port quarter apparently undetected. When abeam of the enemy, who then appeared to be altering course to starboard Maori fired a star shell to see what he was about. Two minutes later, at 0137/27, two torpedoes were fired and course was altered towards the Bismarck with the intention of attacking again from her starboard bow once the enemy had steadied on her new course. Whilst Maori was turning a torpedo hit was observed on the enemy. A bright glow illuminated the waterline of the enemy battleship from stem to stern. Shortly afterwards there appeared between the bridge and the stem a glare that might have been a second hit. The enemy immediately opened up a very heavy fire with both main and secondairy armaments and quick firing guns. As the Maori was being straddled, she turned away, and increased to full speed. Shots continued to fall on both sides of the ship until the range had been opened up to 10000 yards. Maori was not actually hit. Meanwhile HMS Cossack had been creeping up from the north-eastward and at 0140/27, only three minutes after Maori had fired two torpedoes, Cossack launched three torpedoes from 6000 yards. Bismarck stood out plainly, silhoutted by the broadsides she was firing at the Maori. One torpedo was seen to hit. Flames blazed on the forecastle of the Bismarck after this hit but they were quickly extinguished. Probably as a consequence of the torpedo hits the Bismarck stopped dead in the water, this was reported by HMS Zulu at 0148/27. After about one hour the Bismarck got underway again. On receipt of this report, HMS Sikh, who was closing the scene of the action from the southward, made an attack. Four torpedoes were fired at 0218/27 at the stopped battleship. It is believed that one hit was obtained. After this attack Sikh remained in radar contact with the enemy until 0359/27 when contact was lost.
Around 0240/27 the Bismarck was underway again, proceeding very slowly to the north-westward. At 0335/27, HMS Cossack made another attack firing her last remaining torpedo from a range of 4000 yards. It missed. HMS Cossack then came under a heavy fire. She withdrew to the northward under the cover of smoke, altering to a westerly course shortly afterwards.
At 0400/27 all destroyers had lost touch with the enemy. HMS Cossack was then to the north-west and HMS Sikh, HMS Zulu and HMS Maori were between the south-west and south-east of the Bismarck. All destroyers now endeavoured to regain contact.
Touch with the enemy was not regained until shortly before 0600 hours. By that time ORP Piorun, which was running short of fuel, had been ordered to proceed to Plymouth.
Destroyers shadowing, morning twilight, 27 May 1941, final attack.
Touch was regained by HMS Maori at 0550/27 when she sighted the Bismarck zigzagging slowly on a base course of 340° at about 7 knots. Maori commenced shadowing until daylight. At 0625 hours, HMS Sikh was also in contact when the Bismarck emerged from a rain squal 7000 yards on her starboard bow. By then it was nearly full daylight but to the surprise of the crew of the Sikh she got away with it without being fired at.
Shortly before sunrise a final torpedo attack was carried out by HMS Maori, which fired two torpedoes at 0656/27 from 9000 yards. Both missed. The Bismarck opened fire and straddled Maori which escaped at 28 knots.
At daylight the destroyers were stationed in four sectors from which they were able to keep the enemy under continuous observation until the arrival of the Battle Fleet at 0845 hours.
Force H, 26/27 May 1941.
While the destroyers were shadowing the Bismarck, the pursuing forces were drawing steadily closer. To the north was the Commander-in-Chief with the King George V and the Rodney with the Norfolk closing on them. In the south HMS Dorsetshire (Capt. B.C.S. Martin, RN) was coming up, while Force H was waiting for the dawn. When Captain Vian's destroyers got in touch at 2251/26 the Renown and Ark Royal were north-west of the enemy. It was not possible to attack with aircraft during the night but all preparations were made to attack at dawn with 12 Swordfish. Course was shaped to the northward and then to the west for a time and at 0115/27 Force H turned south. Shortly afterwards instructions were received from the Commander-in-Chief to keep not less then 20 miles to the southward of the Bismarck so as to leave a clear approach for the Battle Fleet. Force H accordingly continued to the southward during the night. Bursts of starshell and gunfire could be seen during the night while the destroyers attacked. At 0509/27 an aircraft was flown off from HMS Ark Royal to act as a spotter for HMS King George V but it failed to find the Bismarck in the bad weather. The striking of force of 12 Swordfish was ready but due to the bad weather to strike was cancelled.
At 0810/27, HMS Maori was sighted. She reported the Bismarck 11 miles to the north of her. The made the enemy 17 miles to the north of HMS Renown so course was shaped to the south-west. At 0915/27 heavy gunfire could be heard and the striking force was flown off. They found the Bismarck at 1016/27. By then the battle was almost over, her guns were silenced and she was on fire. They saw her sink. At 1115/27 they had all landed back on HMS Ark Royal. A German Heinkel aircraft dropped a couple of bombs near HMS Ark Royal when they were landing on.
HMS Norfolk, 26/27 May 1941.
When the Catalina report (1030/26) came in, HMS Norfolk altered course to the south-west and increased speed to 27 knots. At 2130/26 the Bismarck was still some 160 nautical miles to the southward and speed was increased to 30 knots. At 2228/26 the report on the torpedo hit by the aircraft from Ark Royal came in and the Norfolk turned to the southward, continuing to close the enemy. At 0753/27 Norfolk sighted the Bismarck. She did not open fire and was lost to sight after ten minutes. At 0821/27, HMS King George V, was sighted to the westward, 12 nautical miles away. The position of the enemy was passed to the Commander-in-Chief. The action opened at 0847/27 at which time HMS Norfolk was then some 10 nautical miles from the Commander-in-Chief and due north of the Bismarck. HMS Norfolk had seen the beginning and was now to see the end.
HMS Dorsetshire, 26/27 May 1941.
On 26 May 1941, HMS Dorsetshire, was with convoy SL 74 proceeding from Freetown to the U.K. When she received the sighting report from the Catalina at 1056/26 she was some 360 nautical miles to the south of the Bismarck. She then left the protection of the convoy to the Armed Merchant Cruiser HMS Bulolo (Capt.(Retd.) R.L. Hamer, RN) and set course for the northward to take up the possible task of shadowing. By 2343/26 it became clear from reports that the Bismarck was making no ground to the eastward and that at 0230/27 she appeared to be laying stopped. Due to the heavy seas HMS Dorsetshire was forced to reduce speed to 25 knots and later even to 20 knots. At 0833/27 a destroyer was sighted ahead at a range of 8 nautical miles, it was HMS Cossack which reported the enemy at a range of 6 nautical miles. At 0850/27 the flashes of the Bismarck's guns could be seen to the westward. HMS Dorsetshire arrived at the scene of the action in the nick of time.
HMS King George V and HMS Rodney, 26/27 May 1941.
During 26 May 1941 the Commander-in-Chief in HMS King George V had been making hard to the south-east at 25 knots. He had been joined by HMS Rodney at 1806/26. They were then some 90 nautical miles north of the Bismarck. Fuel was a matter of grave anxiety. At noon on the 26th, HMS King George V, had only 32% remaining and HMS Rodney reported that she had to return at 0800/27. Speed had to be reduced on this account to 22 knots at 1705/26. In these circumstances it was no longer possible to hope to intercept the enemy, and the Commander-in-Chief decided that unless the enemy's speed had been reduced by 2400/26, he must turn at that hour. The only hope lay in the Bismarck being slowed up by the Swordfish attacking from HMS Ark Royal. A report came in that the striking force had left. Then at 2132/26, HMS Sheffield, reported that the enemy was steering 340° followed by 000° four minutes later. These reports indicated that the Bismarck was not able to hold her course and that her steering gear must have been damaged. It might still be possible to intercept her.
The Commander-in-Chief turned to the south at once hoping to make contact from the eastward in the failing light. Due to the bad weather conditions and visibility the Commander-in-Chief decided to haul off the the eastward and northward and then work round to engage from the westward at dawn. He turned eastward at 2306/26. During the night reports from Captain Vian's destroyers came in confirming the northerly course of the Bismarck. At 0236/27 the Commander-in-Chief ordered Captain Vian that the destroyers were to fire star-shell every half hour, but frequent rain squalls prevented these from being seen and they tended to attrack the enemy's fire. The Bismarck was still a formidable opponent for at 0353/27 Captain Vian reported that during the last hour she had done 8 nautical miles and that she was still capable of heavy and accurate fire. The Commander-in-Chief decided not to make a dawn approach but to wait until daylight while approaching from the west taking advantage of wind, sea and light. At 0529/27 HMS Rodney reported sighting HMS Norfolk to the eastward by DF. It was light at 0600 hours. At 0820 hours HMS Norfolk was sighted on the port bow of HMS King George V. She signalled 'enemy 130°, 16 nautical miles'. At 0843/27 looming on the starboard bow there emerges out of a rain squall the dark grey blot of a large ship. 'Enemy in sight'.
Bismarck 26/27 May 1941.
The Bismarck after altering course to the north-west had been labouring along with a jambed rudder, steering an erratic course at 8 knots. During the night the attacking destroyers were met with heavy and accurate salvoes. Sixteen torpedoes were fired at her. Early in the morning a glare of star-shell burst over her, lighting her up. Three torpedoes followed from a destroyer on the port bow (HMS Maori) of which one hit on the port side amidships. Three minutes later three more came from the starboard side (these were fired by HMS Cossack) of which one hit on the starboard bow. The damage that was sustained from these torpedo hits is not known. The Bismarck lay stopped for over one hour. At 0140/27 a message was received that a large number of Junkers bombers were coming to her aid as were U-boats but the Bismarck was beyond their help besides that the aircraft did not find her. One U-boat (U-556, which was out of torpedoes) on its way back from the Atlantic joined her and was within sight during the night. Another (U-74) arrived at 0600/27 but had been damaged in a depth charge attack and could do nothing as well. In the Bismarck the crew was exhausted and men were falling asleep at their posts. It was under these conditions that at 0840/27 two British battleships were seen to approach from the westward.
Situation before the action, 27 May 1941.
A north-westerly gale was blowing when dawn broke with a good light and clear horizon to the north-eastward. Reports received during the night indicated that, despite reduced speed and damaged rudders, Bismarck's armament was functioning effectively. Given the weather conditions the Commander-in-Chief decided to approach on a west-north-westerly bearing and, if the enemy continued his northerly course, to deploy to the southward on opposite course at a range of about 15000 yards. Further action was to be dictated by events.
Between 0600 and 0700 hours a series of enemy reports from HMS Maori which was herself located by DF bearings. This enabled HMS King George V to plot her position relatively to the Bismarck which had apparently settled down on a course of 330° at 10 knots. At 0708/27, HMS Rodney, was ordered to keep station 010° from the flagship. HMS Norfolk came in sight to the eastward at 0820/27 and provided a visual link between the Commander-in-Chief and the enemy. After the line of approach had been adjusted by two alterations of course, the Bismarck was sighted at 0843/27 bearing 118°, range about 25000 yards. Both British battleships was then steering 110° almost directly towards the enemy in line abreast formation, 8 cables apart.
Commencement of action 0847/27.
HMS Rodney opened fire at 0847/27, her first salvo sending a column of water 150 feet into the air. HMS King George V opened fire one minute later. Bismarck opened fire at 0850 hours after turning to open up A arcs. The first German salvo was short. The third and fourth salvoes straddled and nearly hit, but the Rodney manoeuvered succesfully to avoid them and the nearest fell 20 yards short. At 0854/27, HMS Norfolk joined in, but the target was not clearly visible and she opened fire without obtaining a range.
Observers state that the German gunnery was accurate at first, but commenced to deteriorate after 8 to 10 salvoes. The first hit on the Bismarck was believed to be scored by the Rodney at 0854 hours with her third salvo. Both British battleships made small alterations of course away from the enemy shortly after opening fire, the King George V to increase her distance from the Rodney and the latter to open her A arcs. From then onwards they manoeuvered independently although HMS Rodney conformed to the Flagship's general movements. The Bismarck's secondary armament came into action during this phase. HMS Rodney opened fire with her secondary armament at 0858 hours.
Run to the southward.
HMS King George V deployed to the southward at 0859/27 when the Bismarck was 16000 yards distant. HMS Rodney, 2.5 nautical miles to the northward, followed suit a minute or two later. Cordite smoke was hanging badly with the following wind and spotting was most difficult. Considerable smoke interference was therefore experienced on the southerly course which was partly overcome by radar. The Bismarck had transferred her fire to the King George V shortly after the turn but except for an occasional splash the latter hardly knew that she was under fire. At 0902/27, HMS Rodney saw a 16” shell hit the Bismarck on the upper deck forward, apparently putting the forward turrets out of action. At 0904 hours, HMS Dorsetshire joined in the firing from the eastwards from a range of 20000 yards but observation of the target was difficult and she had to check fire from 0913 to 0920 hours. Between 0910 and 0915 hours the range in King George V was more or less steady at 12000 yards.
The fate of the Bismarck was decided during this phase of the action although she did not sink until later. Around 0912 hours, the Bismarck was hit on her forward control position. During the run to the south HMS Rodney fired six torpedoes from 11000 yards and HMS Norfolk four from 16000 yards. No hits were obtained. The King George V’s secondary battery came into action at 0905 hours but this increased the smoke interference and was accordingly ordered to cease fire after two or three minutes.
Run to the northward.
At 0916/27 the Bismarck’s bearing was drawing rapidly aft and HMS Rodney turned 16 points to close and head her off. The King George V followed a minute or so later and both ships re-opened fire at ranges from 8600 and 12000 yards respectively. The Bismarck shifted her target to the Rodney about this time. A near miss damaged the sluice of her starboard torpedo tube. Most of the enemy’s guns had however been silenced at this time. Only one turret from her main armament was firing at this time as was part of her secondary armament. A fire was blazing amidships and she had a heavy list to port. During the run to the north HMS Rodney obtained a very favourable position on the Bismarck’s bow from which she poured in a heavy fire from close range. She also fired two torpedoes from 7500 yards but no hits were obtained.
HMS King George V’s position, further to leeward, was less favourable. Her view was obscured by smoke and splashes surrounding the target and her radar had temporarily broken down. Mechanical failures in the 14” turrets constituted, however, a more serious handicap at this stage. ‘A’, ‘X’ and ‘Y’ turrets were out of action for 30, 7 and a unspecified short period, respectively. This resulted in reduction of firepower of 80% for 7 minutes and 40% for 23 minutes which might have had serious effects under less favourable conditions. There were also several defects of individual guns in addition to those effecting the turrets.
At 0925/27, HMS King George V, altered outwards to 150° and reduced speed to avoid getting too far ahead of the Bismarck. She closed in again at 1005 hours, fired several salvoes from a range of only 3000 yards and then resumed her northerly course. Meanwhile HMS Rodney was zigzagging across the Bismarck’s line of advance at a range of about 4000 yards firing her main and secondary armaments. She also fired four torpedoes, one of which is thought to have hit. By 1015 hours the Bismarck was no more than a wreck. All her guns were silenced, her mast had been blown away, she was a black ruin, pouring high into the air a great cloud of smoke and flame. Men were seen jumping overboard at this time and the Captain of the King George V later remarked had he known it he would have ceased fire.
End of the action.
The Commander-in-Chief was confident that the enemy could never get back to harbour, and as both battleships were running short of fuel and as further gunfire was unlikely to hasten the Bismarck’s end, the Commander-in-Chief signalled the King George V and Rodney to steer 027° at 1015/27 in order to break off the action and return to base. At 1036/27 the Commander-in-Chief ordered HMS Dorsetshire to use her torpedoes, if she had any, on the enemy. In the meantime HMS Norfolk had been closing the target but due to the movements of the King George V and Rodney, had not fired her torpedoes until 1010 hours when she fired four torpedoes from 4000 yards and two possible hits were reported. The Dorsetshire was then approaching a mile or so to the southward, and anticipating the Commander-in-Chief’s signal at 1025 hours fired two torpedoes from 3600 yards into the enemy’s starboard side. She then steamed round the Bismarck’s bow and at 1036 hours fired another torpedo but now into her port side from 2600 yards. This was the final blow, the Bismarck heeled over quickly to port and commenced to sink by the stern. The hull turned over keel up and disappeared beneath the waves at 1040/27.
The Dorsetshire then closed and signalled to one of HMS Ark Royal’s aircraft to carry out a close A/S patrol while she was to pick up survivors assisted by HMS Maori. After 110 men had been picked up by both ships from the water both ships got underway again as a submarine was suspected to be in the area.
Damage to the Bismarck.
Survivors have told the story of terrible damage inflicted on her. The fore turrets seem to have been knocked out at 0902 hours. The fore control position was knocked out around 0912 hours. The after control position followed about 0915 hours. The after turrets were at that moment still in action. Then the aftermost gun turret was disabled by a direct hit on the left gun which burst sending a flash right through the turret. ‘C’ turret was the last one in action.
One survivor stated that around 0930 hours a shell penetrated the turbine room and another one entered a boiler room. A hit in the after dressing station killed all the medical staff and wounded that were in there at that moment. The upper deck was crowded with killed and wounded men and the seas surging in washed them overboard. Conditions below were even more terrible. Hatches and doors were jammed by concussion and blocked with wreckage. The air was thick with smoke and even more smoke was coming in from great holes in the upper deck. By 1000 hours all heavy guns were out of action and 10 minutes later the all secondary guns were also silent.
Commander-in-Chief returns.
As HMS King George V and HMS Rodney turned northwards they were joined by HMS Cossack, HMS Sikh and HMS Zulu at by 1600/28 more detroyers had joined the screen (HMS Maori, HMS Jupiter, HMS Somali, HMS Eskimo, HMS Punjabi, HMAS Nestor, HMS Inglefield, HMS Lance, HMS Vanquisher (Cdr. N.V. Dickinson, DSC, RN), HMCS St. Clair (Lt.Cdr. D.C. Wallace, RCNR), HMCS Columbia (Lt.Cdr. (Retd.) S.W. Davis, RN) and HMS Ripley (Lt.Cdr. J.A. Agnew, RN). Heavy air attacks were expected that day, but only four enemy aircraft appeared, one of which bombed the screen while another one jettisoned her bombs on being attacked by a Blenheim fighter. The destroyers HMS Mashona and HMS Tartar, 100 nautical miles to the southward, were not so furtunate. They were attacked in position 52°58’N, 11°36’W at 0955/28 by German aircraft. HMS Mashona was hit and sank at noon with the loss of 1 officer and 45 men. The Commander-in-Chief reached Loch Ewe at 1230/29. Vice-Admiral Somerville with Force H was on his way back to Gibraltar. HMS Renown, HMS Ark Royal, HMS Sheffield made rendezvous at 0800/29 with the destroyers HMS Faulknor (Capt. A.F. de Salis, RN), HMS Forester (Lt.Cdr. E.B. Tancock, DSC and Bar, RN), HMS Fury (Lt.Cdr. T.C. Robinson, RN) and HMS Wishart (Cdr. E.T. Cooper, RN). At 1605/29, HMS Forester and HMS Fury were detached to hunt a submarine further to the west. Force H, minus the two destroyers that had been detached, arrived at Gibraltar around 2030/29.
End of ‘Operation Rheinübung’.
The Bismarck’s consort, heavy cruiser Prinz Eugen, was not heard off until 4 June 1941 when aircraft reported her having arrived at Brest. After leaving the Bismarck at 1914/24, the Prinz Eugen’s primary need was to replenish her fuel stock. She set course for a rendez-vous with two tankers, the Spichern (9323 GRT, built 1935, former Norwegian Krossfonn) and the Esso Hamburg (9849 GRT, built 1939) which were position to the north-west of the Azores. All next day the German cruiser made her way southwards, and at 0906/26 , some 600 nautical miles west-north-west of the Azores she sighted the Spichern and refuelled. Two reconnaissance ships had also been ordered into this area, the Gonzenheim and the Kota Pinang. On the 28th Prinz Eugen fuelled from the Esso Hamburg. She then proceeded southwards to carry out cruiser warfare against independently routed ships in the area to the north and west of the Cape Verde Islands but an inspection of her engines the next day showed that an extensive overhaul was needed. Her Commanding Officer then decided to break off the action and course was set for Brest, France where she arrived at 2030/1 June.
A German reconnaissance ship, a supply vessel and two tankers were intercepted by Royal Navy warships and sunk by their own crew or sunk with gunfire. Also two tankers were captured. These were in chronological order; tanker Belchen (6367 GRT, built 1932, former Norwegian Sysla) by gunfire from HMS Kenya and HMS Aurora on 3 June 1941 in the Greenland area in approximate position 59°00'N, 47°00'W. On 4 June the tanker Esso Hamburg by HMS London and HMS Brilliant (Lt.Cdr. F.C. Brodrick, RN) in position 07°35'N, 31°25'W, tanker Gedania (8966 GRT, built 1920) was captured in the North Atlantic in position 43°38'N, 28°15'W by naval auxiliary (Ocean Boarding Vessel) HMS Marsdale (Lt.Cdr. D.H.F. Armstrong, RNR), she was put into service with the MOWT as Empire Garden, reconnaissance vessel Gonzenheim (4000 GRT, built 1937, former Norwegian Kongsfjord) was scuttled by her own crew after being sighted by HMS Esperance Bay ((Capt.(ret) G.S. Holden, RN) and intercepted by HMS Nelson (Capt. G.J.A. Miles, RN) and finally ordered to be boarded by HMS Neptune in position 43°29'N, 24°04'W. The next day (5 June) supply vessel Egerland (10040 GRT, built 1940) was intercepted by HMS London and HMS Brilliant in approximate position 07°00'N, 31°00'W. On 12 June, HMS Sheffield, intercepted tanker Friedrich Breme (10397 GRT, built 1936) in position 49°48'N, 22°20'W and finally on 15 June, HMS Dunedin (Capt. R.S. Lovatt, RN), captured the tanker Lothringen (10746 GRT, built 1940, former Dutch Papendrecht) in position 19°49'N, 38°30'W which had first been sighted by an aircraft from HMS Eagle (Capt. E.G.N. Rushbrooke, DSC, RN). The Lothringen was sent to Bermuda and was put into service by the MOWT as Empire Salvage. (55)
22 May 1941
HMS Edinburgh (Capt. C.M. Blackman, DSO, RN) intercepted the German blockade breaker Lech (3290 GRT, built 1939) in position 45°33'N, 23°25'W. Before the German ship can be captured she is scuttled by her own crew. HMS Edinburgh then takes the crew prisoner.
Two days later HMS Edinburgh is ordered to try to intercept and shadow the German battleship Bismarck. (52)
28 May 1941
In the late afternoon / early evening, HMS Edinburgh (Capt. C.M. Blackman, DSO, RN), makes a short stop at Londonderry to land the German Pow's and to embark Capt. H.W. Faulknor, RN which is to take over from Capt. Blackman. (52)
29 May 1941
HMS Edinburgh (Capt. C.M. Blackman, DSO, RN) arrived at Scapa Flow from patrol and operations against the German battleship Bismarck. (52)
1 Jun 1941
HMS Edinburgh (Capt. H.W. Faulkner, RN, flying the flag of Commodore C.M. Blackman, DSO, RN) departed Scapa Flow for Hvalfiord, Iceland. (56)
3 Jun 1941
HMS Edinburgh (Capt. H.W. Faulkner, RN, flying the flag of Commodore C.M. Blackman, DSO, RN) arrived at Hvalfiord, Iceland. (56)
4 Jun 1941
HMS Edinburgh (Capt. H.W. Faulkner, RN, flying the flag of Commodore C.M. Blackman, DSO, RN) departed Hvalfiord, Iceland to patrol in the Denmark Strait. She was to relieve HMS Hermione (Capt. G.N. Oliver, RN) which was currently on patrol in the Denmark Strait. (56)
12 Jun 1941
HMS Edinburgh (Capt. H.W. Faulkner, RN, flying the flag of Commodore C.M. Blackman, DSO, RN) arrived at Hvalfiord, Iceland from patrol. (56)
16 Jun 1941
HMS Edinburgh (Capt. H.W. Faulkner, RN, flying the flag of Commodore C.M. Blackman, DSO, RN) and HMS Inglefield (Capt. P. Todd, DSO, RN) departed Hvalfiord, Iceland to patrol in the Denmark Strait.
The next day they arrived in their patrol area but the Admiralty had decided to half the ships on the Denmark patrol so at 2200Z/17, HMS Edinburgh and HMS Inglefield parted company with HMS Edinburgh setting course to proceed to Scapa Flow. (56)
18 Jun 1941
HMS Edinburgh (Capt. H.W. Faulkner, RN, flying the flag of Commodore C.M. Blackman, DSO, RN) arrived at Scapa Flow from the Denmark Strait patrol. (57)
20 Jun 1941
Rear-Admiral E.N. Syfret, RN hoisted his flag on board HMS Edinburgh (Capt. H.W. Faulkner, RN). Commodore C.M. Blackman, DSO, RN, then left the ship. (57)
23 Jun 1941
HMS Edinburgh (Capt. H.W. Faulkner, RN), flying the flag of Rear-Admiral E.N. Syfret, RN) conducted torpedo firing and A/S exercises at Scapa Flow.
The A/S exercises must have been with HMS P 31 (Lt. J.B.de B. Kershaw, RN) as this was the only submarine at Scapa Flow at the time. [No log is available for the submarine for this period and the log of HMS Edinburgh does not give the name of the submarine.] (57)
24 Jun 1941
HMS Edinburgh (Capt. H.W. Faulkner, RN), flying the flag of Rear-Admiral E.N. Syfret, RN) conducted 4" HA gunnery exercises off Scapa Flow. (57)
25 Jun 1941
HMS Edinburgh (Capt. H.W. Faulkner, RN), flying the flag of Rear-Admiral E.N. Syfret, RN) departed Scapa Flow for Greenock. (57)
26 Jun 1941
HMS Edinburgh (Capt. H.W. Faulkner, RN), flying the flag of Rear-Admiral E.N. Syfret, RN) arrived at Greenock. (57)
30 Jun 1941
Convoy WS 9B.
This convoy was formed off Oversay on 30 June 1941. It arrived at Freetown on 13 July 1941.
On assembly it was made up of the following (troop)transports; Arundel Castle (British, 19118 GRT, built 1921), Athlone Castle (British, 25564 GRT, built 1936), Ceramic (British, 18713 GRT, built 1913), Clan Forbes (British, 7529 GRT, built 1938), Elizabeth Bakke (Norwegian, 5450 GRT, built 1937), Mataroa (British, 12390 GRT, built 1922), Monarch of Bermuda (British, 22424 GRT, built 1931), Oronsay (British, 20043 GRT, built 1925), Pampas (British, 6345 GRT, built 1941), Pulaski (Polish, 6345 GRT, built 1912), Rangitata (British, 16737 GRT, built 1929) and Tamaroa (British, 12405 GRT, built 1922).
The transport Anselm (British, 5954 GRT, built 1935) had been unable to keep the required speed up during the passage from Liverpool to the rendezvous point and was ordered to proceed to the Clyde. She was not allowed to join the convoy.
On assembly the convoy was escorted by the light cruisers HMS Edinburgh (Capt. H.W. Faulkner, RN), flying the flag of Rear-Admiral E.N. Syfret, RN), HMS Galatea (Capt. E.W.B. Sim, RN), AA cruiser HMS Cairo (A/Capt. I.R.H. Black, RN), armed merchant cruisers HMS Cathay (A/Capt.(Retd.) C.M. Merewether, RN), HMS Chitral (Capt.(Retd.) G. Hamilton, RN), HMS Moreton Bay (Capt.(Retd.) C.C. Bell, RN), armed boarding vessel HMS Corinthian (A/Cdr. E.J.R. Pollitt, RNR) and the destroyers HMS Vanquisher (Cdr. N.V. Dickinson, DSC, RN), HMS Winchelsea (Lt.Cdr. W.A.F. Hawkins, OBE, DSC, RN), HMS Wolverine (Lt.Cdr. J.M. Rowland, RN), HMS Castleton (Cdr. (Retd.) F.H.E. Skyrme, RN), HMS Reading (Lt.Cdr. D.V. Clift, RN), HMCS St.Francis (Lt.Cdr. H.F. Pullen, RCN), HMS Wells (Lt.Cdr. E.J. Lee, RN), HMS Maori (Cdr. R.E. Courage, DSO, DSC and Bar, RN), ORP Piorun (Cdr. S. Hryniewiecki) and ORP Garland (Lt.Cdr. K.F. Namiesniowski, ORP).
HMS Wolverine was detached with defects at 1324Z/31.
HMS Wells parted company with the convoy around 2200Z/1.
HMS Vanquisher, HMS Winchelsea, HMS Castleton and HMCS St. Francis parted company around 0400Z/2.
HMS Maori was detached at 1600Z/2.
HMS Cairo, ORP Piorun and ORP Garland parted company with the convoy around 1900Z/2 in position 49°20'N, 26°20'W.
HMS Reading was detached at 0400Z/3.
HMS Edinburgh parted company around 2315Z/3.
HMS Cathay parted company around 0630Z/4.
HMS Chitral and HMS Corinthian parted company around 0100Z/6.
Around 1115Z/10, in position 17.28'N, 20.50'W the destroyers HMS Wivern (Cdr. M.D.C. Meyrick, RN), HMS Wild Swan (Lt.Cdr. C.E.L. Sclater, RN), HMS Brilliant (Lt.Cdr. F.C. Brodrick, RN) and corvette HMS Asphodel (Lt.Cdr.(Retd.) K.W. Stewart, RN) joined.
The convoy arrived at Freetown on 13 July 1941.
------------------------------------------------------------------------------------------------------
The convoy left Freetown in the same composition as in which it had arrived.
It was now escorted by the light cruiser HMS Galatea and the destroyers HMS Brilliant, HMS Boreas (Lt.Cdr. D.H. Maitland-Makgill Crichton, DSC, RN), HMS Vansittart (Lt.Cdr. R.L.S. Gaisford, RN) and HMS Velox (Lt.Cdr. E.G. Roper, DSC, RN).
All destroyers parted company on the 18th, HMS Brilliant and HMS Velox at 1200/18 and HMS Boreas and HMS Vansittart at 1600/18.
At 0515/27, HMS Galatea parted company with the convoy and proceeded to Simonstown to fuel.
The transports Ceramic, Clan Forbes, Pampas, Elizabeth Bakke, Pulaski and Rangitata were detached to Capetown.
HMS Galatea departed Simonstown at 1530/27 and rejoined the remaining ships of the convoy at 0900/28.
The remaining ships and HMS Galatea arrived at Durban on 30 July 1941.
------------------------------------------------------------------------------------------------------
The Clan Forbes, Elisabeth Bakke, Pampas and Pulaski departed Capetown on 30 July 1941 escorted by the armed merchant cruiser Queen of Bermuda (Capt. A.T.G.C. Peachey, RN).
On 3 August 1941 the Arundel Castle, Athlone Castle, Monarch of Bermuda and Oronsay departed Durban escorted by HMS Galatea. The Capetown and Durban section then merged and set course for Aden. Both escorts remained with the convoy until it was dispersed off Aden on 14 August 1941.
On 13 August the Athlone Castle and Elizabeth Bakke parted company forming convoy WS 9BX. They were escorted by the armed merchant cruiser HMS Hector (Capt.(Retd.) F. Howard, DSC, RN) and arrived at Bombay on 16 August 1941. (46)
4 Jul 1941
Around 2230A/4, the aircraft carrier HMS Furious (Capt. A.G. Talbot, DSO, RN) and the troopships Cameronia (16297 GRT, built 1920) and Scythia (British, 19761 GRT, built 1920) departed Gibraltar for the Clyde.
They were escorted by the light cruiser HMS Hermione (Capt. G.N. Oliver, RN) and the destroyers HMS Legion (Cdr. R.F. Jessel, RN), HMS Lance (Lt.Cdr. R.W.F. Northcott, RN), HMS Fury (Lt.Cdr. T.C. Robinson, RN) and HMS Wishart (Cdr. E.T. Cooper, RN).
Around 2000A/5, HMS Furious was bombed by three German Focke Wulf aircraft but no damage was caused.
The light cruiser HMS Edinburgh (Capt. H.W. Faulkner, RN, flying the flag of Rear-Admiral E.N. Syfret, RN) relieved HMS Hermione around 0800A/6 after being detached from convoy WS.9B on 3 July. HMS Hermione then proceeded on patrol.
Destroyer HMS Faulknor (Capt. A.F. de Salis, RN) was detached from convoy OG 66 on 5 July to join the Furious group which she did around 1015B/8.
On HMS Faulknor joining, HMS Wishart departed the escort to proceed to Ponta Delgada, Azores to refuel and then return to Gibraltar.
HMS Edinburgh parted company around 1030A/8.
Around 1930B/9, HMS Furious made rendezvous with the battleship HMS Royal Sovereign (Capt. H.B. Jacomb, RN) and the destroyer ORP Piorun (Cdr. E.J.S. Plawski). HMS Faulknor and HMS Fury were then detached.
HMS Edinburgh and HMS Hermione arrived at Gibraltar on the 10th. HMS Faulknor and HMS Fury arrived back at Gibraltar on the 14th.
HMS Furious, HMS Royal Sovereign with the troopships arrived in the Clyde on 12 July escorted by the destroyers HMS Legion, HMS Lance and ORP Piorun. (58)
11 Jul 1941
HMS Edinburgh (Capt. H.W. Faulkner, RN, flying the flag of Rear-Admiral E.N. Syfret, RN) is docked in No.1 Dock at Gibraltar. (57)
16 Jul 1941
HMS Edinburgh (Capt. H.W. Faulkner, RN, flying the flag of Rear-Admiral E.N. Syfret, RN) is undocked. (57)
21 Jul 1941
Operation Substance, convoys to and from Malta
Passage through the Straits of Gibraltar of the eastbound convoy and sailing from Gibraltar of the remaining ships involved in the operation.
Around 0130B/21 convoy WS 9C passed the Straits of Gibraltar. The convoy at that moment consisted of six merchant ships; City of Pretoria (8049 GRT, built 1937), Deucalion (7516 GRT, built 1930), Durham (10893 GRT, built 1934), Melbourne Star (11076 GRT, built 1936), Port Chalmers (8535 GRT, built 1933) and Sydney Star (11095 GRT, built 1936).
At the time they passed through the Straits they were escorted by HMS Nelson (Capt. T.H. Troubridge, RN), HMS Edinburgh (Capt. H.W. Faulkner, RN, flying the flag of Rear-Admiral E.N. Syfret, RN), HMS Manxman (Capt. R.K. Dickson, RN), HMS Lightning (Cdr. R.G. Stewart, RN), HMAS Nestor (Cdr. A.S. Rosenthal, RAN), HMS Avon Vale (Lt.Cdr. P.A.R. Withers, RN), HMS Eridge (Lt.Cdr. W.F.N. Gregory-Smith, RN) and HMS Farndale (Cdr. S.H. Carlill, RN).
HMS Manchester (Capt. H. Drew, DSC, RN), HMS Arethusa (Capt. A.C. Chapman, RN), HMS Cossack (Capt. E.L. Berthon, DSC and Bar, RN), HMS Maori (Cdr. R.E. Courage, DSO, DSC and Bar, RN), HMS Sikh (Cdr. G.H. Stokes, RN) departed Gibraltar around 0200B/21 escorting troopship Leinster (4302 GRT, built 1937) which was to join the convoy. However Leinster grounded while leaving Gibraltar and had to left behind. The small fleet tanker RFA Brown Ranger (3417 GRT, built 1941, master D.B.C. Ralph) left Gibraltar around the same time escorted by the destroyer HMS Beverley (Lt.Cdr. J. Grant, RN).
About one hour later, around 0300B/21, HMS Renown (Rear-Admiral R.R. McGrigor, RN, flying the flag of Vice-Admiral J.F. Somerville, KCB, DSO, RN), HMS Ark Royal (Capt. L.E.H. Maund, RN), HMS Hermione (Capt. G.N. Oliver, RN), HMS Faulknor (Capt. A.F. de Salis, RN), HMS Fearless (Cdr. A.F. Pugsley, RN), HMS Firedrake (Lt.Cdr. S.H. Norris, DSO, DSC, RN), HMS Foresight (Cdr. J.S.C. Salter, RN), HMS Forester (Lt.Cdr. E.B. Tancock, DSC and Bar, RN), HMS Foxhound (Cdr. G.H. Peters, DSC, RN), HMS Fury (Lt.Cdr. T.C. Robinson, RN) and HMS Duncan (Lt.Cdr. A.N. Rowell, RN) departed Gibraltar to give convoy for the convoy during the passage to Malta.
At sea the forces were redistributed; Force H, the cover force HMS Renown, HMS Nelson, HMS Ark Royal, HMS Hermione, HMS Faulknor, HMS Foresight, HMS Forester, HMS Fury, HMS Lightning and HMS Duncan.
Force X, the close escort for the convoy HMS Edinburgh, HMS Manchester, HMS Arethusa, HMS Manxman, HMS Cossack, HMS Maori, HMS Sikh, HMAS Nestor, HMS Fearless, HMS Firedrake, HMS Foxhound, HMS Avon Vale, HMS Eridge and HMS Farndale.
Plan for the operation
Force H was to cover the convoy until it reached the narrows between Sicily and Tunisia. Force X was to escort the convoy all the way to Malta. Ships of Force X also had troops for Malta on board that had been taken to Gibraltar by troopship Pasteur. On 23 July 1941, the day the eastbound convoy would reach ‘the narrows’ five empty transports and two tankers would depart Malta for Gibraltar (Convoy MG 1) The seven empty transports were; Group 1 (speed 17 knots) HMS Breconshire (9776 GRT, built 1939), Talabot (6798 GRT, built 1936),
Group 2 (speed 14 knots) Thermopylae (6655 GRT, built 1930), Amerika (10218 GRT, built 1930),
Group 3 (speed 12 knots) Settler (6202 GRT, built 1939), Tanker Svenor (7616 GRT, built 1931) and Tanker Hoegh Hood (9351 GRT, built 1936) These were escorted by the destroyer HMS Encounter (Lt.Cdr. E.V.St J. Morgan, RN) which had been repairing and refitting at Malta.
Through intelligence it was known that the Italian Navy had five battleships operational (three of them at Taranto) and about ten cruisers divided between Taranto, Palermo and Messina. The Italian Air Force had about 50 torpedo planes and 150 bombers (30 of which were dive bombers) stationed in Sardinia and Sicily, roughly half of each type on both islands.
The Royal Air Force was able to be of more help than during the previous convoy trip from Gibraltar to Malta last January. Aircraft from Gibraltar conducted A/S patrols for the fleet during the first two days of the passage to the east. Also patrols were flown between Sardinia and the coast of Africa, while aircraft from Malta conducted reconnaissance between Sardinia and Sicily, besides watching the Italian ports. Malta would also provide fighter escort for Force X and the convoy after Force H would part with them and HMS Ark Royal could no longer provide fighter cover for them.
During the operation eight submarines (HMS Olympus (Lt.Cdr. H.G. Dymott, RN), HMS Unique (Lt. A.F. Collett, RN), HMS Upholder (Lt.Cdr. M.D. Wanklyn, RN), HMS Upright (Lt. J.S. Wraith, DSC, RN), HMS Urge (Lt. E.P. Tomkinson, RN), HMS Utmost (Lt.Cdr. R.D. Cayley, DSO, RN), HMS P 32 (Lt. D.A.B. Abdy, RN) and HrMs O 21 (Lt.Cdr. J.F. van Dulm, RNN)) were on patrol to report and attack Italian warships that might be sailed to intercept the convoy.
The passage East, 22 July 1941
On 22 July the destroyers from Force X oiled from the Brown Ranger two at a time. A task that took about 10 hours. Having completed the oiling of the destroyers the Brown Ranger and her escort returned to Gibraltar. An Italian aircraft had reported Force H in the morning but the convoy and Force X, at that moment about 100 nautical miles to the south-westward, appeared not to have been sighed. At 2317B/22 the Italian submarine Diaspro missed HMS Renown with torpedoes. HMAS Nestor sighted the torpedo tracks and was able to warn HMS Renown which was then able to avoid the torpedoes by doing an emergency turn to port.
The passage East and attacks by the Italian Air Force, 23 July 1941
Force H rejoined the convoy around 0800B/23 as the British were now approaching the danger area. Shadowing aircraft had already reported the position of the fleet that morning and heavy air attacks soon followed.
The first came at 0945 hours, a well times combination of nine high level bombers and six or seven torpedo planes approaching from the north-east. HMS Ark Royal had eleven fighters up, which met the bombers about 20 miles from the fleet. They managed to down two of the nine bombers but unfortunately three Fulmars were shot down by the enemy. The other seven bombers came on working round the head of the screen of destroyers to attack the convoy from the starboard beam at a height of 10000 feet. Their bombs fell harmlessly amongst the leading ships as they altered course to avoid the attack. The torpedo planes however were more successful. They came from ahead out of the sun, flying low, and as the destroyers opened fire they divided into groups of two or three and to attack the convoy on both sides. Two aircraft attacked HMS Fearless, stationed ahead in the screen, dropping their torpedoes at ranges of 1500 and 800 yards from a height of 70 feet. The destroyer avoided the first torpedo, but was hit by the second, set on fire, and completely disabled. Other aircraft went to press on their attacks on the convoy itself. One of them, dropping its torpedo between two merchant vessels hit HMS Manchester as she was turning to regain her station after avoiding two torpedoes fired earlier. She reversed helm once more but to no avail. During the attacks three enemy torpedo bombers were shot down by AA fire from the ships.
HMS Manchester was badly damaged and could only use one engine out of four. At first she could steam only 8 knots. She was ordered to make for Gibraltar with HMS Avon Vale as escort. That evening, further to the westward, they were attacked again by three enemy torpedo planes but their AA gunfire kept the enemy at a distance. Both ships successfully reached Gibraltar on the 26th.
At 1010B/23 five more bombers tried to attack the convoy crossing this time from north to south. Fighters from HMS Ark Royal forced them to drop their bombs from great height and mostly outside the screen.
At 1645B/23 five more torpedo planes led by a seaplane came in from the northward. Three Fulmars caught them about 20 miles away. They managed to shoot down two planes and drove the remainder away.
Soon afterwards the fleet arrived off the entrance to the Skerki Channel. There HMS Hermione was transferred to Force X to take the place of HMS Manchester. Six destroyers were assigned to Force H and eight to Force X. At 1713 hours Vice-Admiral Somerville hauled round to the westward. HMS Ark Royal kept her Fulmars up until RAF Beaufighters had arrived from Malta to take over.
The convoy was attacked again around 1900B/23. Four torpedo planes arrived from the eastward, flying low and and working round from ahead to the starboard side of the convoy. They approached in pairs in line abreast. They kept HMS Sikh (on the starboard bow of the screen) between them and their target until nearly the moment for attack, thereby hampering the AA fire from the other ships. They dropped their torpedoes from long range from a height of 50 feet and nearly hit HMS Hermione, sternmost ship in the starboard column. To avoid the attack each column of the convoy turned 90° outwards and all warships opened barrage fire from all guns that would bear. The barrage however fell short but it caused the Italians to drop their torpedoes early. Also one of the enemy was possibly shot down.
This attack scattered the convoy and it took some time to reform. At 1945B/23 about seven bombers appeared from ahead at a height of about 14000 feet to attack the convoy from the port side. The convoy altered 40° to port together and the escort opened up a controlled fire with some hesitation as the Italian aircraft looked a lot like Beaufighters. The bombing was extremely accurate. Several bombs fell near HMS Edinburgh which was leading the port column, and a near miss abreast a boiler room disabled HMS Firedrake which had been sweeping ahead of the convoy. She could no longer steam so Rear-Admiral Syfret ordered her back to Gibraltar in tow of HMS Eridge. They had an anxious passage, being shadowed by aircraft continuously during daylight hours, but were not again attacked. On the 25th HMS Firedrake managed to lit one boiler so the tow was slipped. Both destroyers entered Gibraltar harbour on the 27th.
Soon after leaving the Skerki Channel in the evening of the 23th the convoy hauled up to the north-east towards the coast of Sicily. This was to lessen the danger of mines. The Italians did not shadow the convoy after the attack at 1945 hours and missed this alteration of course which they clearly did not expect. Around 2100 hours, as it was getting dark, enemy aircraft were seen searching along its old line of advance. During the evening the convoy sighted flares several times about 20 miles to the south.
Continued passage to the east and enemy attacks, 24 July 1941
Between 0250 and 0315 hours the convoy was however attacked by the Italian MAS boats MAS 532 and MAS 533. The managed to torpedo and damaged the Sydney Star. HMAS Nestor went alongside and took off almost 500 soldiers. Sydney Star was however able to continue her passage as staggler escorted initially by HMAS Nestor. Admiral Syfret however sent back HMS Hermione. At 1000B/24 eight German dive bombers and two high level bombers attacked. Their bombs fell close the escorting ships. HMS Hermione shot down one dive bomber. The three ships arrived at Malta early in the afternoon.
The main body of the convoy meanwhile continued on its way unhindered after the attacks of the motor torpedo boats except for an attempt by three torpedo planes around 0700 hours. They dropped their torpedoes at a safe distance when fired on by the destroyers in the screen ahead. According to the orders Rear-Admiral Syfret was to leave the convoy now, if there was no threat from Italian surface forces, and go on to Malta with the cruisers and some of the destroyers. They were to land the passengers and stores, complete with fuel and return to Force H as soon as possible. The remaining destroyers were to accompany the transports to Malta. They too were to join Force H as soon as possible. Rear-Admiral Syfret felt easy about the surface danger as all Italian ships were reported in harbour the day before, but he was anxious about the threat to the convoy from the air. He decided to go ahead with the cruiser but leave all destroyers with the convoy so at 0745B/24, HMS Edinburgh, HMS Arethusa and HMS Manxman left the convoy and pressed ahead at high speed to Malta where they arrived at noon the same day. The transports and the destroyers arrived about four hours later. They had been attacked only once by a torpedo plane since the cruisers separated.
Return passage of the warships of force X to make rendez-vous with Force H.
In the evening HMS Edinburgh, HMS Arethusa, HMS Hermione and HMS Manxman sailed together followed by five destroyers; HMS Cossack, HMS Maori, HMS Sikh, HMAS Nestor, HMS Foxhound, later the same evening. The destroyers overtook the cruisers in the morning of the 25th. The sixth destroyer, HMS Farndale, had to be left at Malta due to defects (condenser problems). All ships made rendez-vous with Force H to the north-west of Galita Island at 0800B/25.
Movements of Force H after it parted from the convoy.
After parting with the convoy in the evening of the 23rd, Vice-Admiral Somerville had taken force H westward at 18 knots until the afternoon of the 24th going as far west as 03°30’E. He then turned back to meet Admiral Syfret, also sending from HMS Ark Royal six Swordfish aircraft which left her in position 37°42’N, 07°17’E at 1000B/25. After their junction Forces H and X made the best of way towards Gibraltar. Fighter patrols of HMS Ark Royal shot down a shadowing aircraft soon after the fleet had shaped course to the westward, losing a Fulmar in doing so. However another aircraft had meanwhile reported the fleet.
High level bombers appeared from the east and torpedo bombers from the north at 1100 hours. HMS Ark Royal at that moment had four fighters in the air and sent up six more. They prevented the bombing attack shooting down three aircraft out of eight at a cost of two Fulmars, while the ships watched the enemy jettison their bombs 15 miles away. The torpedo attack came to nothing too for the enemy gave up the attempt and retired while still several miles from the fleet. Two days later, on the 27th, the fleet reached Gibraltar.
The movements of the seven empty ships coming from Malta.
Six of the transports / tankers left Malta for Gibraltar in the morning of the 23rd, escorted by HMS Encounter. The seventh ship, tanker Svenor grounded while leaving harbour and was held up for some hours. At dusk, when a few miles from Pantelleria, the six ships devided into pairs according to their speed. HMS Encounter initially escorted the middle pair but joined the leading ships in the evening of the 24th when past the Galita Bank.
Italian aircraft, both high level bombers and torpedo planes, attacked all these ships on the 24th to the southward of Sardinia. They made their first attempt on the second pair of transports and HMS Encounter. Four torpedo planes attacked at 1230B/24 and four bombers at 1250B/24. No ships were hit though the bombs fell close. Next came the turn for the leading pair, which were attacked further westwards by two bombers that came singly at 1330B/24 and 1400B/24. The second plane nearly hit HMS Breconshire. Finally when the third pair of ships reached about the same position in the evening they were attacked by torpedo planes and the Hoegh Hood was damaged but she managed to arrive at Gibraltar only a few hours after her consort on the 27th. The last ship, the one that had been delayed at Malta, arrived on the 28th. (59)
2 Aug 1941
Convoy WS 10
This convoy assembled in the Clyde area on 2 August 1941 destined for the middle east area.
The convoy was made up of the following troop transports; Andes (25689 GRT, built 1939), Britannic (26943 GRT, built 1930), Cameronia (16297 GRT, built 1920), Highland Monarch (14139 GRT, built 1928), Indrapoera (Dutch, 10825 GRT, built 1925), Nea Hellas (16991 GRT, built 1922), Orcades (23456 GRT, built 1937), Rangitiki (16698 GRT, built 1928), Reina del Pacifico (17702 GRT, built 1931), Stirling Castle (25550 GRT, built 1936), Strathallan (23722 GRT, built 1938), Volendam (Dutch, 15434 GRT, built 1922), Warwick Castle (20107 GRT, built 1930), Windsor Castle (19141 GRT, built 1922) and the following transports; Diomed (10374 GRT, built 1922), Indian Prince (8587 GRT, built 1926), Manchester Port (7071 GRT, built 1935), Nigerstroom (Dutch, 4639 GRT, built 1939) and Phemius (7406 GRT, built 1921),
Escort was initially provided by the heavy cruiser HMS London (Capt. R.M. Servaes, CBE, RN) (2 – 10 August), armed merchant cruiser HMS Worcestershire (A/Capt.(Retd.) E.H. Hopkinson, RN) (2 – 6 August), the light cruiser HMS Cairo (A/Capt. I.R.H. Black, RN) (2 – 5 August), the destroyers HMS Winchelsea (Lt.Cdr. W.A.F. Hawkins, OBE, DSC, RN) (2 – 5 August), HMS Witch (Lt.Cdr. C.H. Holmes, RN) (2 – 5 August), HMS Whitehall (Lt.Cdr. A.B. Russell, RN) (2 – 5 August), HMS Broadway (Lt.Cdr. T. Taylor, RN) (2 – 6 August), HMS Gurkha (Cdr. C.N. Lentaigne, RN) (2 – 6 August), HMS Lance (Lt.Cdr. R.W.F. Northcott, RN) (2 – 6 August), HMS Legion (Cdr. R.F. Jessel, RN) (2 – 6 August), HrMs Isaac Sweers (Cdr. J. Houtsmuller, RNN) (2 – 6 August), ORP Piorun (Cdr. S. Hryniewiecki) (2 – 6 August) and HMS Jupiter (Lt.Cdr. N.V.J.T. Thew, RN) (2 August – 17 August).
On 5 August, around 2200 hours, HMS Cairo, HMS Winchelsea, HMS Witch and HMS Whitehall parted company with the convoy.
On 6 August, around 2300 hours, HMS Worcestershire, HMS Broadway, HMS Gurkha, HMS Lance, HMS Legion, HrMs Isaac Sweers and ORP Piorun parted company with the convoy. Shorty afterwards the troopships Warwick Castle and Windsor Castle collided. Due to this the Warwick Castle was detached and was escorted to Halifax, Nova Scotia by HMS Worcestershire. Windsor Castle dropped astern and was brought back to the convoy the next day by HMS Jupiter who had been despached to search for her.Jupiter
Very early on the 9th HMS Jupiter was detached to fuel at Ponta Delgada, Azores. HMS Jupiter re-joined the convoy around 0700 on the 10th.
Around noon on 10 August, HMS London, was relieved by the light cruiser HMS Edinburgh (Capt. H.W. Faulkner, RN, flying the flag of Rear-Admiral E.N. Syfret, RN) which had departed Gibraltar on the 8th. HMS Edinburgh remained with the convoy until it reached Freetown on the 17th.
When approaching Freetown A/S escorts joined the convoy. On 14 August 1941 two destroyers and a corvette joined, these were; HMS Velox (Lt.Cdr. E.G. Roper, DSC, RN), HMS Wrestler (Lt. E.L. Jones, DSC, RN) and HMS Bergamot (T/A/Lt.Cdr. R.P. Chapman, RNR). The next day the corvette HMS Cyclamen (Lt. H.N. Lawson, RNR) also joined.
On 21 August 1941 the convoy departed Freetown for South Africa. Escort was provided by the light cruiser HMS Edinburgh until 2 September 1941, when part of the convoy (Troopships Britannic, Indrapoera, Reina Del Pacifico, Striling Castle, Strathallan, Volendam, Windsor Castle and the transports Nigerstroom and Phemius) arrived at Capetown. HMS Edinburgh then went to Simonstown. On departure from Freetown A/S escort was provided until dawn on the 24th by the destroyer HMS Jupiter and the corvettes HMS Anchusa (Lt. J.E.L. Peters, RNR), HMS Clematis (Cdr. Y.M. Cleeves, DSO, DSC, RD, RNR), HMS Crocus (Lt.Cdr. E. Wheeler, RNR) and HMS Cyclamen (Lt. H.N. Lawson, RNR). The corvettes then returned to Freetown while HMS Jupiter proceed to St. Helena.
The light cruiser HMS Hawkins (Capt. H.P.K. Oram, RN) then took over the remainer of the convoy and took these towards Durban were they arrived on 5 September 1941. These were the troopships Andes, Cameronia, Highland Monarch, Nea Hellas, Rangitiki and the transports Diomed, Indian Price and Manchester Port.
On 6 September 1941 the part of the convoy (minus Reina del Pacifico) that had entered Capetown on 2 September departed from Capetown escorted by the armed merchant cruiser HMS Carnarvon Castle (Capt.(Retd.) H.N.M. Hardy, DSO, RN). On 8 September the Britannic split off and proceeded to Durban to embark troops that had been on the Cameronia. Britannic rejoined the next day escorted by Hawkins. The troop transport Aronda (9031 GRT, built 1941) was also with them and joined the convoy. After these ships had joined HMS Carnavon Castle then split off with the Indrapoera, Volendam, Nigerstroom and Phemius and took these ships to Durban.
The convoy (by now called WS 10B), now made up of the troopships Aronda, Britannic, Stirling Castle, Strathallan and Windsor Castle, and escorted by HMS Hawkins proceeded to Bombay where it arrived on 20 September 1941. En-route, in position 03.25’S, 51.12’E and on September 13th, HMS Hawkins had been relieved by the light cruiser HMS Emerald (Capt. F.C. Flynn, RN).
[Other ships that had been part of convoy WS 10 later proceeded to their destinations in other convoys.]
8 Aug 1941
HMS Edinburgh (Capt. H.W. Faulkner, RN), flying the flag of Rear-Admiral E.N. Syfret, RN) departed Gibraltar to join the escort of convoy WS 10.
[For more info on this convoy see the event ' convoy WS 10 ' for 2 August 1941.]
[No logs are available for HMS Edinburgh for the months of August, September, October and November 1941 so some datails might be missing.] (60)
11 Sep 1941
HMS Edinburgh (Capt. H.W. Faulkner, RN, flying the flag of Rear-Admiral E.N. Syfret, RN) departed Simonstown for Freetown. (22)
17 Sep 1941
HMS Edinburgh (Capt. H.W. Faulkner, RN, flying the flag of Rear-Admiral E.N. Syfret, RN) arrived at Freetown to fuel. She departed for Gibraltar later the same day. (61)
17 Sep 1941
Convoy WS 11X, Troop convoy from Liverpool / Clyde to Gibraltar.
On 16 September 1941 the ships Ajax (7797 GRT, built 1931), City of Lincoln (8039 GRT, built 1938) departed from Liverpool to make rendes-vous the following day off Orsay Island with the following ships that had departed the Clyde on the 17th; City of Calcutta (8063 GRT, built 1940), Clan Ferguson (7347 GRT, built 1938), Clan Macdonald (9653 GRT, built 1939), Dunedin Star (11168 GRT, built 1936), Imperial Star (12427 GRT, built 1934), Rowallan Castle (7801 GRT, built 1939), HMS Breconshire (9776 GRT, built 1939) (Capt.(ret.) C.A.G. Hutchison, RN), HMS Princess Beatrix (4136 GRT, built 1939) (Cdr.(ret.) T.B. Brunton, RN), HMS Queen Emma (4136 GRT, built 1939) (Capt.(ret.) G.L.D. Gibbs, DSO, RN), HMS Royal Scotsman (3288 GRT, built 1936) (T/Cdr. J.W. Peters, RNR), HMS Ulster Monarch (3791 GRT, built 1929) (T/Cdr. J. Wilson, RNR) and Leinster (4302 GRT, built 1937).
Most of the ships of this convoy were to form the convoy for operation Halberd from Gibraltar to Malta. The following ships made only the passage to Gibraltar with convoy WS 11X; HMS Princess Beatrix, HMS Queen Emma, HMS Royal Scotsman, HMS Ulster Monarch and Leinster.
Escort for this convoy was provided by; battleship HMS Prince of Wales (Capt. J.C. Leach, MVO, RN), light cruisers HMS Kenya (Capt. M.M. Denny, CB, RN), HMS Euryalus (Capt. E.W. Bush, DSO, DSC, RN), destroyers HMS Laforey (Capt. R.M.J. Hutton, DSO, RN), HMS Lightning (Cdr. R.G. Stewart, RN), HMS Oribi (Lt.Cdr. J.E.H. McBeath, DSO, RN), HMS Havelock (Cdr. E.H. Thomas, DSC, RN), HMS Harvester (Lt.Cdr. M. Thornton, DSC, RN), HMS Whitehall (Lt.Cdr. A.B. Russell, RN), HMS Witch (Lt.Cdr. C.H. Holmes, RN), HMS Blankney (Lt.Cdr. P.F. Powlett, DSC, RN), ORP Piorun (Cdr. E.J.S. Plawski), ORP Garland (Lt.Cdr. K.F. Namiesniowski, ORP) and HrMs Isaac Sweers (Cdr. J. Houtsmuller, RNethN).
In the evening of the 19th (2115 hours, B.S.T.) the destroyers HMS Havelock and HMS Harvester were detached from the convoy to escort the liner (troopship) Stratheden (23722 GRT, built 1937) all the way to Halifax. Until that moment the Stratheden had also been part of convoy WS 11X. The position in which these ships were detached was 50°57'N, 24°55'E.
On 21 September the convoy was joined by three destroyers coming from Gibraltar; HMS Zulu (Cdr. H.R. Graham, DSO, RN), HMS Lance (Lt.Cdr. R.W.F. Northcott, RN), HMS Gurkha (Cdr. C.N. Lentaigne, RN). These destroyers had sailed from Gibraltar on the 18th.
Also sailed from Gibraltar on the 18th was the aircraft carrier HMS Furious (Capt. A.G. Talbot, DSO, RN) escorted the destroyers HMS Foresight (Cdr. J.S.C. Salter, RN), HMS Forester (Lt.Cdr. E.B. Tancock, DSC and Bar, RN), HMS Fury (Lt.Cdr. T.C. Robinson, RN) and HMS Legion (Cdr. R.F. Jessel, RN) to provide cover for the convoy. Following this HMS Furious was then to proceed to Bermuda and finally to the US for a refit. The destroyers then made rendes-vous with the British battleship HMS Rodney (Capt. J.W. Rivett-Carnac, DSC, RN) coming from a refit in the United States. They then provided cover for the convoy joining it around 1200/21. Shortly after Rodney had joined the convoy HMS Prince of Wales left the convoy for Gibraltar escorted by HMS Laforey, HMS Lightning and HMS Oribi. They arrived at Gibraltar to fuel late on the 23th. They departed Gibraltar around 0400/24 and rejoined the convoy west of Gibraltar around 1200/24. Before HMS Prince of Wales rejoined the convoy HMS Rodney had departed the convoy and also headed for Gibraltar escorted by the destroyers ORP Piorun, ORP Garland and HrMs Isaac Sweers. HMS Rodney and her escorting destroyers arrived at Gibraltar at 0900/24. In the evening of the 24th, HMS Nelson sailed westwards escorted by the same destroyers that had brought HMS Rodney in giving the German and Italian spies across the Bay in Spanish Algeciras the impression that HMS Rodney had just relieved HMS Nelson as flagship of Force H. This diversion seemed to have had the desired effect. During the night HMS Nelson and her escorting destroyers reversed course and passed the Straits of Gibraltar to the eastward unseen after dark.
On the 20th the cruiser HMS Sheffield (Capt. A.W. Clarke, RN) and the destroyer HMS Lively (Lt.Cdr. W.F.E. Hussey, DSC, RN) also departed Gibraltar to provide cover for the convoy.
On the 21th the cruisers HMS Kenya and HMS Euryalus departed the convoy for Gibraltar where they both arrived at 2300/22. After fuelling they departed before daylight on the 23th to rejoin the convoy to the west of Gibraltar. At Gibraltar Rear-Admiral H.M. Burrough, CB, RN, had hoised his flag on board HMS Kenya.
On the 23th the destroyer HMS Cossack (Capt. E.L. Berthon, DSC, RN) and escort destroyers HMS Heythrop (Lt.Cdr R.S. Stafford, RN) and HMS Farndale (Cdr. S.H. Carlill, RN) bolstered the escort in the approaches to Gibraltar joining the convoy around 0800/24. Also on the 24th light cruiser HMS Edinburgh (Capt. H.W. Faulkner, RN, flying the flag of Rear-Admiral E.N. Syfret, RN) departed Gibraltar at 1230 hours to join the convoy.
Also on the 24th two groups of destroyers arrived at Gibraltar to refuel. The destroyers HMS Foresight, HMS Forester, HMS Gurkha and HMS Lance arrived at 1600 hours. The destroyers HMS Legion, HMS Lively and HMS Zulu arrived at 1800 hours.
See 25 September 1941 'Convoy operation Halberd' for the continuation of the events..
21 Sep 1941
HMS Edinburgh (Capt. H.W. Faulkner, RN, flying the flag of Rear-Admiral E.N. Syfret, RN) arrived at Gibraltar. (60)
24 Sep 1941
HMS Edinburgh (Capt. H.W. Faulkner, RN, flying the flag of Rear-Admiral E.N. Syfret, RN) departed Gibraltar to join convoy WS 11X.
[See the event convoy ' WS 11X ' for 17 September 1941 for more info on this convoy. (62)
25 Sep 1941
Operation Halberd Supply convoy to Malta.
Continuation of the events of 17 September 1941, convoy WS 11X.
Situation at 1800 hours on 24 September 1941.
At 1800B/24 the situation was as follows; Convoy WS 11X was to the west of Gibraltar escorted at that moment by the British battleship HMS Prince of Wales (Capt. J.C. Leach, MVO, RN, flying the flag of Vice-Admiral A.T.B. Curteis, CB, RN), the British light cruisers HMS Edinburgh (Capt. H.W. Faulkner, RN, flying the flag of Rear-Admiral E.N. Syfret, RN), HMS Kenya (Capt. M.M. Denny, CB, RN), HMS Euryalus (Capt. E.W. Bush, DSO, DSC, RN), HMS Sheffield (Capt. A.W. Clarke, RN), the British destroyers HMS Laforey (Capt. R.M.J. Hutton, DSO, RN), HMS Lightning (Cdr. R.G. Stewart, RN), HMS Oribi (Lt.Cdr. J.E.H. McBeath, DSO, RN), HMS Cossack (Capt. E.L. Berthon, DSC, RN), HMS Fury (Lt.Cdr. T.C. Robinson, RN), the British escort destroyers HMS Farndale (Cdr. S.H. Carlill, RN) and HMS Heythrop (Lt.Cdr R.S. Stafford, RN).
At Gibraltar were the British battleships HMS Nelson (Capt. T.H. Troubridge, RN, flying the flag of Vice-Admiral J.F. Somerville, KCB, DSO, RN), HMS Rodney (Capt. J.W. Rivett-Carnac, DSC, RN), the British aircraft carrier HMS Ark Royal (Capt. L.E.H. Maund, RN), the British light cruiser HMS Hermione (Capt. G.N. Oliver, RN), the British destroyers HMS Duncan (Lt.Cdr. A.N. Rowell, RN with Capt. D.(13) Capt. H.W. Williams, RN, on board), HMS Foresight (Cdr. J.S.C. Salter, RN), HMS Forester (Lt.Cdr. E.B. Tancock, DSC and Bar, RN), HMS Lively (Lt.Cdr. W.F.E. Hussey, DSC, RN), HMS Legion (Cdr. R.F. Jessel, RN), the Polish destroyers ORP Piorun (Kmdr.por. (Cdr.) E.J.S. Plawski), ORP Garland (Kmdr.por. (Cdr.) K.F. Namiesniowski) and the Dutch destroyer HrMs Isaac Sweers (Cdr. J. Houtsmuller, RNethN). Also at Gibraltar was the RFA oiler Brown Ranger (3417 GRT, built 1941) and the British corvette HMS Fleur de Lys (Lt.(Retd.) A. Collins, RNR).
Approaching Gibraltar from the west were the British destroyers HMS Zulu (Cdr. H.R. Graham, DSO, RN), HMS Gurkha (Cdr. C.N. Lentaigne, RN) and HMS Lance (Lt.Cdr. R.W.F. Northcott, RN).
Movement of forces on the night of 24/25 September.
At 1815 hours, HMS Nelson departed Gibraltar and after passing farewell messages to HMS Rodney she proceeded westwards screened by HrMs Isaac Sweers, ORP Piorun and ORP Garland. These ships reversed course at 2130 hours and proceeded eastwards.
Shortly after HMS Nelson and her three escorting destroyers had departed Gibraltar harbour HMS Gurkha, HMS Zulu and HMS Lance, wich had been sent ahead to fuel aft Gibraltar, entered harbour.
At 2030B/24 RFA Brown Ranger and her escort, corvette HMS Fleur de Lys departed Gibraltar to take up a position eastwards to fuel the destroyers that were to protect the Halberd convoy.
At 2300B/24 HMS Rodney, HMS Ark Royal, HMS Hermione escorted by HMS Duncan, HMS Foresight, HMS Forester, HMS Lively, HMS Zulu, HMS Gurkha, HMS Legion and HMS Lance departed from Gibraltar eastwards to simulate a normal sortie by 'Force H' and to rendezvous with the convoy to the eastward of Gibraltar at 0800B/25.
'Force Z', consisting of, HMS Princess Beatrix (4136 GRT, built 1939) (Cdr.(ret.) T.B. Brunton, RN), HMS Queen Emma (4136 GRT, built 1939) (Capt.(ret.) G.L.D. Gibbs, DSO, RN), HMS Royal Scotsman (3288 GRT, built 1936) (T/Cdr. J.W. Peters, RNR) (whose ultimate destination was Freetown), HMS Ulster Monarch (3791 GRT, built 1929) (T/Cdr. J. Wilson, RNR) and Leinster (4302 GRT, built 1937) escorted by the British corvettes HMS Jonquil (Lt.Cdr. R.E.H. Partington, RD, RNR), HMS Spiraea (T/Lt. L.C. Head, RNVR) and HMS Azalea (Lt. G.C. Geddes, RNR) had been stationed behind the main convoy at dusk was ordered to proceed into Gibraltar Bay. It was hoped that the presence of these ships in the Bay would lay suspicion in the event of the convoy having been sighted and reported while passing through the Straits.
The remainder of convoy WS 11X, made up of transport ships Ajax (7797 GRT, built 1931), City of Calcutta (8063 GRT, built 1940), City of Lincoln (8039 GRT, built 1938), Clan Ferguson (7347 GRT, built 1938), Clan Macdonald (9653 GRT, built 1939), Dunedin Star (11168 GRT, built 1936), Imperial Star (12427 GRT, built 1934), Rowallan Castle (7801 GRT, built 1939) and HMS Breconshire (9776 GRT, built 1939) (Capt.(ret.) C.A.G. Hutchison, RN), with the escort, organised in two groups one mile apart, and led by the Vice Admiral, 2nd in Command, Home Fleet in HMS Prince of Wales, and the Rear Admiral commanding 18th Cruiser Squadron in HMS Edinburgh respectively, passed south of Europa Point at 0130B/25. This disposition was adopted to reduce the frontage of the convoy during its passage through the Straits.
At 0730B/25 HMS Rodney, HMS Ark Royal and their screening destroyers were sighted from HMS Nelson at a range of about 10 nautical miles. Half an hour later the convoy and its escort was sighted.
The escorting force was now reorganised into two groups; Group 1: HMS Nelson, HMS Ark Royal, HMS Hermione, HMS Cossack, HMS Zulu, HMS Foresight, HMS Forester, HMS Laforey and HMS Lightning.
Group 2: HMS Prince of Wales, HMS Rodney, HMS Kenya, HMS Edinburgh, HMS Sheffield, HMS Euryalus, HMS Duncan, HMS Gurkha, HMS Legion, HMS Lance, HMS Lively, HMS Oribi, HrMs Iscaac Sweers, ORP Piorun, ORP Garland, HMS Fury, HMS Farndale and HMS Heytrop and the entire convoy.
Events of group 1 and group 2 during 25 September
At 1700B/25 (time zone -2) HMS Duncan obtained an Asdic contact in position 36°36'N, 01°58'W and attacked with a pattern of four depth charges (more were intended but the starboard thrower failed to fire. Another depth charge attack was carried out by HMS Grukha at 1716 hours. She dropped a pattern of fourteen depth charges. HMS Duncan attacked again at 1750 hours with a second depth charge pattern. Both destroyers then proceeded to rejoin the screen at 1758 hours. Both ships sighted bubbles rising to the surface possibly from a damaged submarine.
Meanwhile on the 25th all destroyers of group 2 were fuelled by RFA Brown Ranger but not without delay as Brown Rangers speed was slower then anticipated and she was therefore further to the west then anticipated. This resulted in that not all destroyers were back in position at dusk. HMS Oribi was unable to find group 2 during the night and joined up with group 1 until daylight of the 26th when she rejoined group 1.
Events of group 1 and group 2 during 26 September
At 0932B/26 lookouts on HMS Nelson spotted an Italian aircraft shadowing group 1 at a range of 10 miles. The aircraft was flying very low and had not been picked up by RDF. The fighters from HMS Ark Royal that were in the air failed to intercept this aircraft due to failure of the R/T equipment in the flight leaders aircraft. An enemy report from the aircraft was intercepted at 0935 hours. A re-broadcast of this signal by an Italian shore station was picked up 20 minutes later.
At 1300 hours Group 1 reversed course to close the distance to group 2 and HMS Hermione was stationed astern of HMS Ark Royal for RDF purposes and to give additional AA protection to the carrier.
At 1537 hours two aircraft were sighted low down to the eastward by HMS Zulu, HMS Nelson and HMS Hermione. These aircraft were at first thought to be Hudsons but turned out to be enemy when a signal they made was intercepted. By now it was too late to vector fighters towards them.
Movements of group 1 and group 2 and enemy air attacks during 27 September.
Around 0730B/27 group 1 and 2 joined. HMS Ark Royal was now protected by HMS Euryalus (ahead) and HMS Hermione (astern) as close escort. Four Fulmar fighters were flown off at 0800 hours. This number was increased to ten at 1000 hours and twelve at 1100 hours and finally to sixteen at 1200 hours when it was though most likely air attacks might develop due to the fact the the forcehad been shadowed and reported by enemy aircraft from at least 0810 hours.
At 1255 hours RDF picked up enemy aircraft formations closing in on the convoy, one from the north and one from the east, both 30 miles distant. Position was 37°48'N, 08°50'E. Fighters were vertored towards these formations and one enemy aircraft was shot down at 1300 hours. Six enemy torpedo bombers approached from the port bow and beam of the convoy. Two were shot down at 1302 hours, most likely by AA fire from HMS Rodney and HMS Prince of Wales. An unknown number of torpedoes were dropped by the other aircraft. No hits were obtained but HMS Lance was narrowly missed by two of these torpedoes. HrMs Isaac Sweers was missed with one torpedo by 30 yards and HMS Rodney by one torpedo by 100 yards. One of the attacking aircraft was shot down by the destroyers while another torpedo bomber meanwhile was shot down by the Fulmars from the Ark Royal. Finally at 1310 hours a Fulmar was accidentaly shot down by HMS Prince of Wales. The first attack was was now over.
At 1327B/27 RDF reported a group of aircraft splitting into two formations and approaching from the east. Destroyers on the starboard wing of the screen opened fire at 1329 hours when six or seven torpedo bombers (BR 20's) were seen approaching very low from the starboard bow and beam. Position was 37°49'N, 08°58'E.
Three of these aircraft pressed on through the barrage put up by the destroyers and made a most determined attack on HMS Nelson who was swinging to starboard to comb the tracks. On aircraft dropped its torpedo out 450 yards 20° on Nelson's starboard bow passing over the ship at a height of 200 feet. This aircraft was almost certainly shot down astern of HMS Nelson by HMS Sheffield and HMS Prince of Wales. The track of the torpedo was not seen until about 150 yards ahead of the ship and no avoiding action was possible and the torpedo hit HMS Nelson on the port bow 10 feet below the waterline. The speed of HMS Nelson was reduced to 18 knots.
The second aircraft of this formation missed HMS Nelson with its torpedo by about 100 yards while the third aircraft was claimed to have been shot down by HMS Laforey. It's W/T operator, the only one of the crew alive but wounded, was picked up by HMS Forester.
Three or four aircraft from this group attacked from the starboard quarted but without result.
One torpedo bomber was shot down by the Fulmars at 1336 hours. One of the Fulmars was now shot down by mistake by pompom fire from HMS Rodney but the crew was rescued by HMS Duncan.
At 1345 hours the third attack started. RDF reported a group coming in from the south-west. Ten or eleven S.79's split into two groups and were seen coming in low over the water and were taken under fire from the escorting ships on the starboard side of the convoy. Seven or eight of the attackers then retired to the south-west and disappeared but three others tried to work round the starboard bow of the convoy which then turned ay 60° to port. The three attackers were then driven off by gunfire from the destroyer screen and dropped their torpedoes at long range but one torpedo narrowly missed HMS Lightning. One of these aircraft was shot down by a Fulmar as it retired. Position of this attack was 37°50'N, 09°06'E.
At 1354 hours three of the aircraft that had initialy turned away returned from astern. Two of these retired again on being fired at but the third pressed on to attack HMS Ark Royal but it was shot down by AA fire from that ship and HMS Nelson before it had dropped it's torpedo.
At 1358 hours one aircraft, seen right ahead of HMS Nelson, dropped a torpedo outside the screen. HMS Cossack was able to avoid this torpedo by the HE of this torpedo being picked up by her Asdic set.
Attempt to intercept the Italian battlefleet
While the third air attack was still in progress at 1404 hours an emergency report was received from an aircraft operating from Malta that it had sighted two Italian battleships and eight destroyers in position 38°20'N, 10°40'E steering a course of 190° at 20 knots at 1340 hours. The position of HMS Nelson when this report was received was 37°46'N, 09°04'E so the enemy was only 70-75 miles away. At this time HMS Nelson, with it's gun armament unimpaired was thought to be capable of 18 knots or more. Admiral Somerville decided to proceed towards the enemy at best speed with HMS Nelson, HMS Prince of Wales, HMS Rodney and the destroyers HMS Duncan, HMS Gurkha, HMS Lance, HMS Lively, HrMs Isaac Sweers and ORP Garland, leaving HMS Kenya, HMS Edinburgh, HMS Sheffield and ten destroyers with the convoy. HMS Euryalus, HMS Hermione and the destoyers HMS Piorun and HMS Legion remained with the Ark Royal.
It was also decided to fly off two Swordfish aircraft from the Ark Royal to take over shadowing duties from the aircraft operating out of Malta and to arm and fly off air striking force as soon as possible.
Ark Royal launched the two Swordfish at 1448 hours. It was intended to have launched them earlier but the launch was delayed due to the main armamant of HMS Ark Royal being in action and the recovery of two Fulmar fighters which were short on fuel.
In the meantime, at 1425 hours, the aircraft that was in contact with the Italians now also reported four cruisers and eight destroyers 15 nautical miles west-south-west of the enemy battlefleet. They were steering the same course and speed.
Meanwhile, at 1417 hours, the battleships had been ordered to form on HMS Nelson who had increased speed and proceeded ahead of the convoy. However at 1433 hours it became necessary for HMS Nelson to reduce speed to avoid further flooding due to the damage sustained. The Vice Admiral, 2nd in Command, Home Fleet in HMS Prince of Wales was now ordered to proceed with his flagship, HMS Rodney, HMS Edinburgh, HMS Sheffield and six destroyers to close the enemy at best speed. HMS Nelson meanwhile took station astern of the convoy.
While these instructions were carried out a report was received that the enemy had reversed course to 360°. This was followed by a further report that the enemy was steering 060°. Also a report was received that the battleships were of the Littorio class and not Cavour's as was previously believed. It was now clear that the enemy tried to avoid contact. It was still hoped that a striking force from HMS Ark Royal would be able to inflict damage to the enemy and reduced his speed allowing our battleships to overtake him before dark.
At 1530 hours a Fulmar fighter which was short of fuel force landed on the water astern of the Ark Royal. The crew was picked up by ORP Piorun.
At 1540 hours, HMS Ark Royal launched her stiking force of twelve Swordfish and four Fulmars. These aircraft did not find the enemy force and all aircraft returned to HMS Ark Royal around 1900 hours.
Between 1620 and 1645 hours, Fulmars from the CAP drove off an air attack threatening from the port side of the convoy. Later a shadowing enemy aircraft was shot down by Fulmars.
At 1658 hours, the Vice Admiral, second in Command Home Fleet, was ordered to reverse course and rejoin the convoy which was done at 1851 hours. No further reports of the enemy had been received for almost two hours and even if the striking force from HMS Ark Royal was able to inflict damage on the enemy these could not be intercepted before dark.
Detachment of Force X and the convoy.
At 1855 hours, on reaching the Skerki Channel, the escort of the convoy was split up into two forces, Force A, made up of HMS Nelson, HMS Prince of Wales, HMS Rodney, HMS Ark Royal, HMS Duncan, HMS Gurkha, HMS Legion, HMS Lively, HMS Lance, HMS Fury, HrMs Isaac Sweers, ORP Piorun and ORP Garland split off from the convoy while Force X, made up of HMS Kenya, HMS Edinburg, HMS Sheffield, HMS Hermione, HMS Euryalus, HMS Cossack, HMS Zulu, HMS Foresight, HMS Forester, HMS Laforey, HMS Lightning, HMS Oribi, HMS Farndale and HMS Heythrop remained with the convoy.
Between 1915 and 1930 hours enemy aircraft twice approached the convoy but turned away after fire had been opened on them. They were probably CR.42 fighters.
Night T/B attack on Force X and the convoy and loss of the Imperial Star.
Between 2000 and 2040 hours four torpedo bomber attacks were made on the convoy and Force X from the port beam, two or three aircraft taking part in each attack. The first two attacks had no result for the Italians.
During the third attack the two rear ships in the port column of the convoy collided with each other, these were the Rowallan Castle and the City of Calcutta. No serious damage was sustained and both were able to proceed on their way.
During the fourth attack, at 2032 hours, in position 37°31'N, 10°46'E the Imperial Star was struck by a torpedo on her port side aft. HMS Oribi was also attacked and narrowly missed by a torpedo four minutes later. She was able to shoot down the aircraft that had dropped this torpedo with her pompom and oerlikons.
When the Imperial Star was torpedoed it is probable that the explosion blew away both propellers and her rudder. In addition no.6 hold and the after engine room were both flooded.
HMS Heythrop, the rear ship of the port screen, proceeded alongside, but did not attempt to take Imperial Star in tow as she did not consider she was a suitable vessel to do so.
About 2045 hours HMS Oribi was ordered by HMS Euryalus to go to the assistance of the Imperial Star. When Oribi closed Heythrop was already standing by, and while Heythtop took off the passengers of the Imperial Star, HMS Oribi proceeded alongside to receive a report of the damage. It was decided to attempt to tow her to Malta.
For two hours the most determined attemps were made by HMS Oribi to tow the Imperial Star to Malta and although a speed of 8 knots was obtained nothing could be done to prevent her steering in circles. At is thought that her damaged stern was now acting as rudder.
Eventually, at 0120B/28, HMS Oribi found herself being dragged stern first by her tow sheering off and she was forced to slip the tow. Oribi went alongside to consult again and it was reluctantly decided that there was no other choice then to scuttle the ship. Three depth charges were placed lashed together abreast a bulkhead and these were fired by a safety fuse.
HMS Oribi cast off 0340B/28 and the depth charges were fired eleven minutes later, starting a large fire aft. As this did not spread quickly, Oribi shelled Imperial Star with 4.7" S.A.P. shells. Oribi finally left her at 0452 hours. Imperial Star was by that time heavily on fire fore and aft and listing badly. Aircraft from Malta could not find the wreck of the Imperial Star so there is no doubt that she sank.
HMS Oribi then made off from the scene along the convoy route at 32 knots and came with them near Malta 1215B/28 having passed unmolested within 7 nautical miles from the Sicilian coast in daylight.
Passage of the convoy and Force X through the narrows.
In the meantime the convoy and Force X had proceeded through the narrows along the south coast of Sicily.
In the meantime. at 2030B/27, HMS Hermione had departed the convoy to carry out a bombardment of Pantellaria harbour. Having completed the bombardment HMS Hermione rejoined Force X at 0615B/28. At daylight HMS Farndale and HMS Heythrop were detached to fuel at Malta.
Although several formations of enemy aircraft were detected between dawn and the arrival of the convoy at Malta, the excellent protection given by shore based fighters from Malta prevented any attack from developing.
At 0800B/28 a report was received that no enemy surface forces were reported near the convoy. The cruisers HMS Kenya, HMS Sheffield, HMS Euryalus and HMS Hermione then proceeded ahead to Malta to fuel where they arrived at 1130 hours. The remainder of Force X and the entire convoy, with the exception of the Imperial Star, arrived later in the afternoon.
Movements of Force A during 28 September.
While Force X and the convoy continued on to Malta, Force A proceeded to the west at 14 knots, which was the best speed of HMS Nelson at that time.
At 0725B/28 HMS Ark Royal flew off one A/S patrol and three fighters. At 0812 hours one enemy shadower was seen but it escaped into a cloud.
At 1025 hours HMS Nelson sighted a Cant. 506 aircraft very low down and fighters were vectored in. After a chase to the south-east this aircraft was shot down near Cape de Fer, Algeria.
Shadowers were again reported at 1640 hours and again one hour later but due to a failure of the R/T transmitter in Ark Royal it was not possible to vector fighters in time to intercept. An enemy report made by Italian aircraft was intercepted at 1720 hours.
At 1942B/28 one of the destroyers of the screen, HMS Duncan, obtained an Asdic contact in position 37°30'N, 03°45'E. She carried out two depth charge attacks but with no apparent result. HMS Legion closed to co-operate but did not gain contact. Both ships left the area at 2012 hours to rejoin the screen.
At 2020 hours speed was reduced to 12 knots to reduce the strain on bulkheads and decks of HMS Nelson. At this time Nelson was about 8 feet down by the bows and it was estimated that 3500 tons of water had entered the ship.
At 2100B/28, HMS Prince of Wales, HMS Rodney, HMS Ark Royal, HMS Gurkha, HMS Lance, HMS Legion, HMS Lively, HMS Fury and HrMs Isaac Sweers were detached to proceed to the eastward and rendezvous with Force X. HMS Nelson, escorted by HMS Duncan, ORP Piorun and ORP Garland, continued on to Gibraltar.
At 0555B/29, in position 37°30'N, 06°25'E, HMS Prince of Wales obtained an RDF surface echo ahead, and an emergency turn of 40° to port was carried out with all ships at 0609 hours. Three minutes after this turn HMS Gurkha sighted a torpedo track approaching. It was too late to alter course to avoid. A second torpedo track followed a few seconds later. Both torpedoes appeared to pass underneath the ship. HMS Gurkha then turned to port in the direction from which the torpedoes had approached and HrMs Isaac Sweers also joined to hunt the submarine. No A/S contacts were obtained and no depth charges were dropped. HMS Gurkha and HrMs Isaac Sweers rejoined the screen at 0700B/29. The attacker was the Italian submarine Diaspro which managed to escape unharmed.
At 0810B/29 HMS Gurkha obtained an A/S contact in position 37°26'N, 07°14'E. At 0815 hours a pattern of fourteen depth charges was dropped. Six minutes later a heavy underwater explosion was heard. At 0841 hours HMS Gurkha was ordered to rejoin screen and the hunt was abandoned.
Movements of Force X during 28/29 September on the return trip from Malta.
In the meantime the ships that are part of Force X had all fuelled at Malta and at 1500B/28 the escort destroyers HMS Farndale and HMS Heythrop were sailed followed at 1615 hours by HMS Kenya, HMS Edinburgh and HMS Oribi. The remainder of Force X sailed at 1830 hours. HMS Farndale and HMS Heythrop joined Force A at 0835B/29. The remainder of Force X joined Force A at 1030B/29.
Movements of HMS Nelson and passage to Gibraltar.
In the meantime HMS Nelson and her three escorting destroyers were still proceeding to the west. They were joined by aircraft to provide additional A/S protection from 0730B/29 onwards.
At 1110B/29, ORP Piorun obtained a doubtful A/S contact and dropped one depth charge.
At 1909B/29, HMS Duncan also obtained A/S contact and dropped one depth charge.
At 1945B/29 the A/S screen was reinforced by the destroyer HMS Rockingham (Lt.Cdr. A.H.T. Johns, RN) coming from Gibraltar. Later in the evening four corvettes also joined for additional A/S protection of the damaged battleship, HMS Samphire (Lt.Cdr. F.T. Renny, DSC, RNR) joined at 2120B/29, HMS Jonquil (Lt.Cdr. R.E.H. Partington, RD, RNR) at 2140B/29, HMS Fleur de Lys at 2150B/29 and finally HMS Arbutus (T/Lt. A.L.W. Warren, DSC, RNR) at 2340B/29. Nelson's screen now consisted of four destroyers and four corvettes.
At 0130B/30 HMS Samphire and HMS Arbutus obtained an A/S contact and dropped depth charges without result, the contact was probably non-sub.
At 1200B/30 HMS Nelson entered Gibraltar Harbour.
Movements of Force A and Force X as of 1030 hours on 29 September.
Meanwhile after all ships of Force X had joined up with force A at 1030B/29 course was shaped to the westward, keeping 40 nautical miles clear of the African coast.
At 1645B/29, in position 37°26'N, 04°37'E, HMS Lively, sighted an object resembling a ship's lifeboat with mast at a range of 1000 yards. This was soon identified as the conning tower and periscope of a submarine momentarily breaking surface. Two torpedo tracks were sighted shortly afterwards. Lively immediately attacked with a pattern of fourteen depth charges at 1650 hours. HMS Legion, which was next to Lively in the destroyer screen, had already dropped a pattern of five depth charges about a minute and a half earlier. HMS Legion then joined up with HMS Lively to hunt this submarine.
At 1700 hours HMS Lively obtained a definate A/S contact and attacked with another pattern of fourteen depth charges five minutes later. After having dropped this pattern contact was regained at 1715 hours. Contact was however soon lost at and not regained. The hunt was abandoned at 1745 hours.
At 1930B/29, HMS Prince of Wales, HMS Kenya, HMS Sheffield, HMS Laforey, HMS Lightning, HMS Oribi, HMS Foresight, HMS Forester and HMS Fury parted company with the rest of the force and proceeded ahead to arrive at Gibraltar p.m. 30 September 1941. They arrived at Gibraltar at 1800B/30.
At 0928B/30, in position 37°10'N, 00°56'E, HMS Gurkha, obtained Asdic contact wich was confirmed as a submarine. She immediately attacked and fired a pattern if fourteen depth charges at 0935 hours. A black circular buoy with electric cable attached to it came to the surface after this attack. At 0945 hours a loud underwater explosion was heard and felt and oil started to come to the surface. Gurkha was unable to gain contact on the submarine from now on. HMS Legion who was by now assisting Gurkha in the hunt obtained contact and attacked with a fourteen depth charge pattern at 0955 hours. A second fourteen depth charge pattern was fired at 1009 hours. During Legion's second attack wreckage and oil came to the surface. Among the wreckage picked up was an Italian dictionary, a mattess, a pillow, numerous pieces of wood, some with bright screws and a piece of human scalp attached to a piece of wood by a splinter of metal. The interiors of the dictionary, the mattress and the pillow were dry. There was now no doubt that an Italian submarine was sunk by HMS Gurkha and HMS Legion.
All ships in this force entered Gibraltar harbour between 0700 and 0900 hours on 1 October.
Convoy MG 2, passage of three merchant vessels from Malta to Gibraltar.
At noon on the 26th the first out of three empty transports, the Melbourne Star (11076 GRT, built 1936), departed Malta for Gibraltar. At 1030B/27 the other two ships Port Chalmers (8535 GRT, built 1933) and City of Pretoria (8049 GRT, built 1937). These last two ships were escorted by the corvette HMS Gloxinia (Lt.Cdr. A.J.C. Pomeroy, RNVR) until 1930B/27. After an uneventful passage the Melbourne Star arrived at Gibraltar at 0700B/29. The Port Chalmers and City of Pretoria were spotted and reported by Italian aircraft at 1200B/27, shortly after leaving Malta. No enemy surface craft were seen until 2320B/27 when it was believed that an E-boat was sighted by the Port Chalmers which was following in the wake of the City of Pretoria. The Port Chalmers opened fire on the E-boats bow wave with it's 4" gun. The enemy then returned fire with a machine gun. After six rounds of 4" the enemy crossed the stern of the Port Chalmers and was not seen again. The City of Pretoria had not seen the enemy at all. The action had taken place about 15 nautical miles south-south-west of Pantelleria.
At 0535B/28 the Commodore of the convoy ordered he Port Chalmers to part company. Port Chalmers then proceeded at full speed, wearing French colours.
At 0915B/28 an Italian Cant. 506 seaplane approached from the direction of the French north African coast and circled the City of Pretoria. This aircraft then made off to the westward and gave the Port Chalmers the same attention. Both ships were wearing French colours and had taken care to keep all service personnel out of sight. Both ships were fully ready for action, but did not open fire as the aircraft took no offensive action.
At 1015B/28 the City of Pretoria was circled several times by a large three-engine seaplane, with distinct French markings, which approached from the direction of Bizerta.
At 1145B/28 the City of Pretoria sighted a twin-engined Italian seaplane stopped on the water, five nautical miles to the north. She lost sight of this aircraft at 1215 hours.
The Port Chalmers was circled by an Italian aircraft at 1555B/28. The aircraft did not attack.
At 1725B/28 the City of Pretoria was attacked by three Italian torpedo bombers. As the aircraft approached with obviously hostile intentions the British colours were hoised and fire was opened as soon as the leader came in range. By skilful handling all three torpedoes were avoided. A submarine periscope was then reported on the starboard quarter by two independent lookouts. Three smoke floats and a depth charge set to 150 feet were dropped and under the cover of the smoke the City of Pretoria turned away.
When the City of Pretoria was approaching Cape de Gata at 0200B/30 an unidentified vessel, possibly a submarine, was seen to be following. Two or three rapid shots, followed by a dull explosion, were heard. City of Pretoria made smoke and dropped smoke floats and then made close in Almeira Bay, into territorial waters, thus shaking off her pursuer.
The Port Chalmers arrived at Gibraltar at 0900B/30. City of Pretoria followed during the afternoon. (63)
2 Oct 1941
HMS Edinburgh (Capt. H.W. Faulkner, RN, flying the flag of Rear-Admiral E.N. Syfret, RN), HMS Cossack (Capt. E.L. Berthon, DSC and Bar, RN), HMS Zulu (Cdr. H.R. Graham, DSO, RN), ORP Piorun (Cdr. E.J.S. Plawski) and ORP Garland (Lt.Cdr. K.F. Namiesniowski, ORP) departed Gibraltar.
HMS Edinburgh, ORP Piorun and HMS Garland were to proceed to the U.K. escorting ships while en-route. On departure from Gibraltar they were escorting transports Leinster (British, 4302 GRT, built 1937) and City of Pretoria (British, 8049 GRT, built 1937). [No futher details available for the moment.]
HMS Cossack and HMS Zulu were detached (either on 3 or 4 October) while en-route to join HMS Argus to escort her to Gibraltar together with HMS Sikh. (64)
6 Oct 1941
HMS Edinburgh (Capt. H.W. Faulkner, RN, flying the flag of Rear-Admiral E.N. Syfret, RN), ORP Piorun (Cdr. E.J.S. Plawski) and ORP Garland (Lt.Cdr. K.F. Namiesniowski, ORP) which were escorting the transports Leinster (British, 4302 GRT, built 1937) and City of Pretoria (British, 8049 GRT, built 1937) were joined in position 48°16'N, 25°11'W by the troop transports Duchess of Bedford (20123 GRT, built 1928) and Sobieski (Polish, 11030 GRT, built 1939) and their escort, the armed merchant cruiser HMS Cheshire (Capt.(Retd.) J.M. Begg, RN) which were coming from Freetown.
They were joined on 6 October by two destroyers [thought to be HMS Verity (Cdr. R.H. Mills, RN) and HMS Witch (Lt.Cdr. C.H. Holmes, RN)] and on 7 October by one destroyer [though to be HMS Whitehall (Lt.Cdr. A.B. Russell, RN)]
In the morning of 10 October the convoy split into three parts which sailed to Clyde; Sobieski, escorted by HMS Edinburgh, ORP Piorun and ORP Garland arriving on the 10th. To Liverpool; Duchess of Bedford and Leinster escorted by HMS Cheshire, HMS Verity and HMS Witch arriving on the 11th. To Swansea, City of Pretoria also arriving on the 11th. HMS Whitehall had apparently been detached to Londonderry, arriving on the 10th.
10 Oct 1941
HMS Edinburgh (Capt. H.W. Faulkner, RN, flying the flag of Rear-Admiral E.N. Syfret, RN), ORP Piorun (Cdr. E.J.S. Plawski) and ORP Garland (Lt.Cdr. K.F. Namiesniowski, ORP) arrived at Greenock with the transport Sobieski (Polish, 11030 GRT, built 1939). (48)
16 Oct 1941
HMS Edinburgh (Capt. H.W. Faulkner, RN, flying the flag of Rear-Admiral E.N. Syfret, RN) departed Greenock for Scapa Flow. (48)
17 Oct 1941
HMS Edinburgh (Capt. H.W. Faulkner, RN, flying the flag of Rear-Admiral E.N. Syfret, RN) arrived at Scapa Flow.
[As no log is available for this period some details for this period might be missing.] (48)
21 Oct 1941
HMS Edinburgh (Capt. H.W. Faulkner, RN, flying the flag of Rear-Admiral E.N. Syfret, RN) conducted exercises at / off Scapa Flow. (65)
22 Oct 1941
HMS Edinburgh (Capt. H.W. Faulkner, RN, flying the flag of Rear-Admiral E.N. Syfret, RN) conducted exercises at / off Scapa Flow. (65)
23 Oct 1941
In the afternoon, HMS Edinburgh (Capt. H.W. Faulkner, RN, flying the flag of Rear-Admiral E.N. Syfret, RN) and HMS Sheffield (Capt. A.W. Clarke, RN), conducted an RIX (rangefinding and inclination) exercises off Scapa Flow. (66)
30 Oct 1941
Around 1230A/30, HMS Edinburgh (Capt. H.W. Faulkner, RN, flying the flag of Rear-Admiral E.N. Syfret, RN) and HMS Sheffield (Capt. A.W. Clarke, RN) departed Scapa Flow for an RIX (rangefinding and inclination) exercise off Scapa Flow.
On completion of the exercise HMS Edinburgh returned to Scapa Flow around 1650A/30 while HMS Sheffield proceeded on operations [See the event ' Minelaying operation SN 83 ' for 30 October 1941 for more info.] (66)
1 Nov 1941
Around 2030A/1, HMS Edinburgh (Capt. H.W. Faulkner, RN, flying the flag of Rear-Admiral E.N. Syfret, RN) and HMS Sheffield (Capt. A.W. Clarke, RN), departed Scapa Flow for Hvalfiord, Iceland. (67)
3 Nov 1941
Around 1300A/3, HMS Edinburgh (Capt. H.W. Faulkner, RN, flying the flag of Rear-Admiral E.N. Syfret, RN) and HMS Sheffield (Capt. A.W. Clarke, RN), arrived at Hvalfiord, Iceland. (67)
5 Nov 1941
Around 1745N/5, HMS Edinburgh (Capt. H.W. Faulkner, RN, flying the flag of Rear-Admiral E.N. Syfret, RN), HMS Sheffield (Capt. A.W. Clarke, RN) and HMS Suffolk (Capt. R.M. Ellis, DSO, RN) departed Hvalfiord to patrol in the Denmark Strait. They were however recalled before they arrived in their patrol areas and returned to Hvalfiord around 1015N/6. (68)
14 Nov 1941
HMS Edinburgh (Capt. H.W. Faulkner, RN, flying the flag of Rear-Admiral E.N. Syfret, RN) and HMS Suffolk (Capt. R.M. Ellis, DSO, RN) departed Hvalfiord to patrol in the Denmark Strait. (69)
18 Nov 1941
HMS Edinburgh (Capt. H.W. Faulkner, RN, flying the flag of Rear-Admiral E.N. Syfret, RN) returned to Havalfiord from patrol having been recalled on the 17th. (48)
20 Nov 1941
During 20-22 November 1941 exercises were carried out near Hvalfjord.
The heavy cruiser HMS Cumberland (Capt. G.H.E. Russell, RN), light cruiser HMS Edinburgh (Capt. H.W. Faulkner, RN, flying the flag of Rear-Admiral E.N. Syfret, RN) and the destroyers HMS Somali (Capt. D.K. Bain, RN), HMS Ashanti (Cdr. R.G. Onslow, RN), HMS Eskimo (Cdr. E.G. Le Geyt, RN), HMS Matabele (Cdr. A.C. Stanford, DSC, RN), HMS Punjabi (Cdr. S.A. Buss, MVO, RN), and HMS Tartar (Cdr. L.P. Skipwith, RN) departed Hvalfjord around 1200Z/20 for exercises.
The destroyers, minus HMS Eskimo returned to Hvalfjord around 0100Z/21.
Around 0915Z/21, the battleship HMS King George V (Capt. W.R. Patterson, CB, CVO, RN, flying the flag of A/Admiral J.C. Tovey, KCB, KBE, DSO, RN, C-in-C Home Fleet), aircraft carrier HMS Victorious (Capt. H.C. Bovell, CBE, RN) and the destroyers HMS Ashanti, HMS Matabele, HMS Punjabi, HMS Tartar, HMS Impulsive (Lt.Cdr. W.S. Thomas, RN), HMS Echo (Lt.Cdr. C.H.deB. Newby, RN) and HMS Escapade (Lt.Cdr. E.N.V. Currey, DSC, RN) departed Hvalfjord for exercises.
HMS Eskimo returned to Hvalfjord around 0925Z/21.
Around 1645Z/21, HMS Ashanti, HMS Matabele, HMS Punjabi and HMS Tartar returned to Hvalfjord followed at 1700Z/21 by HMS Victorious.
Around 0900Z/22, the battleship HMS Rodney (Capt. J.W. Rivett-Carnac, DSC, RN), heavy cruiser HMS Kent (Capt. A.E.M.B. Cunninghame-Graham, RN) and the destroyers HMS Somali, HMS Eskimo and HMS Oribi (Lt.Cdr. J.E.H. McBeath, DSO, RN) departed Hvalfjord.
Around 0915Z/22, the aircraft carrier HMS Victorious and the destroyers HMS Ashanti, HMS Matabele and HMS Tartar departed Hvalfjord.
Around 1630Z/22, HMS King George V, HMS Cumberland, HMS Edinburgh, HMS Impulsive, HMS Echo and HMS Escapade returned to Hvalfjord.'
Around 1700Z/22, HMS Victorious, HMS Ashanti, HMS Matabele and HMS Tartar returned to Hvalfjord.
Around 2200Z/22, HMS Rodney, HMS Somali, HMS Eskimo and HMS Oribi returned to Hvalfjord followed shortly afterwards by HMS Kent. (70)
27 Nov 1941
HMS Edinburgh (Capt. H.W. Faulkner, RN, flying the flag of Rear-Admiral E.N. Syfret, CB, RN) departed Hvalfiord to patrol in the Iceland - Faeroer gap. (48)
28 Nov 1941
HMS Edinburgh (Capt. H.W. Faulkner, RN, flying the flag of Rear-Admiral E.N. Syfret, CB, RN) is ordered to proceed to Scapa Flow. (48)
29 Nov 1941
HMS Edinburgh (Capt. H.W. Faulkner, RN, flying the flag of Rear-Admiral E.N. Syfret, CB, RN) arrived at Scapa Flow. (48)
8 Dec 1941
Convoys PQ 6.
This convoy departed Reykjavik on 8 December 1941. Two ships arrived at Murmansk on 20 December 1941 the other five were to proceed to Archangelsk but got stuck in ice on 23 December 1941 and had to remain near Molotovsk throughout the winter.
The convoy was made up of the following merchant vessels; Dekabrist (Russian, 7363 GRT, built 1903), El Oceano (Panamanian, 6767 GRT, built 1925), Elona (British (tanker), 6192 GRT, built 1936), Empire Mavis (British, 5704 GRT, built 1919), Explorer (British, 6235 GRT, built 1935), Mirlo (Norwegian (tanker), 7455 GRT, built 1922) and Mount Evans (Panamanian, 5598 GRT, built 1919).
On departure from Reykjavik the convoy was escorted by the auxiliary A/S trawlers HMS Cape Argona (T/Lt. R.G. Wallace, RNR) and HMS Hugh Walpole (T/Lt. P.O. Elliott, RNR).
The light cruiser HMS Edinburgh (Capt. H.W. Faulkner, RN, flying the flag of Rear-Admiral E.N. Syfret, CB, RN) and destroyers HMS Echo (Lt.Cdr. C.H.deB. Newby, RN) and HMS Escapade (Lt.Cdr. E.N.V. Currey, DSC, RN) departed Seidisfiord around 1630A/10. They joined the convoy around 1300A/12 in approximate position 69°40'N, 10°50'W. The A/S trawlers then parted company.
On 16 December 1941 the minesweepers HMS Hazard (Lt.Cdr. J.R.A. Seymour, RN) and HMS Speedy (Lt. J.G. Brookes, DSC, RN) departed Murmansk to make rendezvous with the convoy.
The next day these minesweepers encountered the German destroyers Z 23, Z 24, Z 25 and Z 27 which mistook them for German destroyers. In the gunfight HMS Speedy was damaged and had to return. HMS Leda (Lt.Cdr. A.D.H. Jay, RN) was then sent to take over her escort duties.
At 2315C/17, the British heavy cruiser HMS Kent (Capt. A.E.M.B. Cunninghame-Graham, RN) and the Russian destroyers Grozniy and Sokrushitelny departed the Kola Inlet to support the minesweepers but they did not encountered the German destroyers as they had already retired from the area. They returned to the Kola Inlet around 1300C/18.
The escorts and two of the convoys merchant vessels arrived at Murmansk on 20 December 1941. Five of the merchant vessels continued on with an icebreaker towards Archangelsk but got stuck in the ice during the remainder of the winter.
8 Dec 1941
Around 1830A/8, the light cruiser HMS Edinburgh (Capt. H.W. Faulkner, RN, flying the flag of Rear-Admiral E.N. Syfret, CB, RN) and destroyers the destroyers HMS Echo (Lt.Cdr. C.H.deB. Newby, RN) and HMS Escapade (Lt.Cdr. E.N.V. Currey, DSC, RN) departed Scapa Flow for Seidisfiord, Iceland where they arrived around 1115A/10.
After fuelling they departed around 1600A/10 to join convoy PQ 6.
[For more info on this convoy see the event ' Convoy PQ 6 ' for 8 December 1941.] (71)
25 Dec 1941
Rear-Admiral E.N. Syfret, CB, RN, struck his flag in HMS Edinburgh (Capt. H.W. Faulkner, RN). (72)
29 Dec 1941
Convoy QP 4.
This convoy departed Archangel, Russia on 29 December 1941. The convoy was dispersed on 9 January 1942.
The convoy was made up of the following merchant vessels; Briarwood (British, 4019 GRT, built 1930), Cape Corso (British, 3807 GRT, built 1929), Cape Race (British, 3807 GRT, built 1930), Cocle (Panamanian, 5630 GRT, built 1920), Dan-Y-Bryn (British, 5117 GRT, built 1940), El Capitan (Panamanian, 5255 GRT, built 1917), Eulima (British (tanker), 6207 GRT, built 1937), Mirlo (Norwegian (tanker), 7455 GRT, built 1922), San Ambrosio (British (tanker), 7410 GRT, built 1935), Sukhona (Russian, 3124 GRT, built 1918), Trehata (British, 4817 GRT, built 1928), Trekieve (British, 1919 GRT, built 1919) and Wanstead (British, 5486 GRT, built 1928).
The convoy was delayed by the heavy ice conditions and two of the merchant ships, the Eulima and San Ambrosio had to return to Archangelsk.
The convoy was escorted by them minesweepers HMS Bramble (Capt. J.H.F. Crombie, RN), HMS Hebe (Lt.Cdr. J.B.G. Temple, DSC, RN), HMS Leda (Lt.Cdr. A.D.H. Jay, RN), HMS Seagull (Lt.Cdr. C.H. Pollock, RN), HMS Speedy (Lt. J.G. Brookes, DSC, RN), the auxiliary A/S trawler HMS Stella Capella (Lt. W.L. Sadgrove, RANVR) and the M/S trawler HMS Bute (T/Lt. A.F.W. Boumphrey, RNVR).
The convoy eventually got out of the heavy ice and were joined on 5 January 1942 by the light cruiser HMS Edinburgh (Capt. H.W. Faulkner, RN) and the destroyers HMS Echo (Lt.Cdr. C.H.deB. Newby, RN) and HMS Escapade (Lt.Cdr. E.N.V. Currey, DSC, RN) coming from Murmansk. HMS Bramble and HMS Hebe then parted company to proceed to Murmansk.
The convoy was dispersed on 9 January 1942.
5 Jan 1942
HMS Edinburgh (Capt. H.W. Faulkner, RN) and destroyers the destroyers HMS Echo (Lt.Cdr. C.H.deB. Newby, RN) and HMS Escapade (Lt.Cdr. E.N.V. Currey, DSC, RN) departed Murmansk to join the escort of convoy QP 4.
[For more info on this convoy see the event ' Convoy QP 4 'for 29 December 1941.'] (73)
11 Jan 1942
HMS Edinburgh (Capt. H.W. Faulkner, RN) and destroyers the destroyers HMS Echo (Lt.Cdr. C.H.deB. Newby, RN) and HMS Escapade (Lt.Cdr. E.N.V. Currey, DSC, RN) arrived at Scapa Flow after convoy escort duty. (73)
13 Jan 1942
Rear-Admiral S.S. Bonham-Carter, CB, CVO, DSO, RN, hoisted his flag on board HMS Edinburgh (Capt. H.W. Faulkner, RN). (72)
14 Jan 1942
Rear-Admiral S.S. Bonham-Carter, CB, CVO, DSO, RN, transferred his flag from HMS Edinburgh (Capt. H.W. Faulkner, RN) to HMS Sheffield (Capt. A.W. Clarke, RN). (72)
15 Jan 1942
HMS Edinburgh (Capt. H.W. Faulkner, RN) proceeded from Scapa Flow from the Tyne where she is to refit. (72)
4 Mar 1942
With her refit completed, HMS Edinburgh (Capt. H.W. Faulkner, RN), proceeded from the Tyne to Rosyth. (74)
5 Mar 1942
HMS Edinburgh (Capt. H.W. Faulkner, RN) proceeded from Rosyth to Scapa Flow. (74)
8 Mar 1942
HMS Edinburgh (Capt. H.W. Faulkner, RN) departed Scapa Flow to patrol between Iceland and the Faeroer Islands. (72)
14 Mar 1942
HMS Edinburgh (Capt. H.W. Faulkner, RN) returned to Scapa Flow from patrol. (72)
15 Mar 1942
Rear-Admiral S.S. Bonham-Carter, CB, CVO, DSO, RN, hoisted his flag in HMS Edinburgh (Capt. H.W. Faulkner, RN). (72)
20 Mar 1942
HMS Edinburgh (Capt. H.W. Faulkner, RN, flying the flag of Rear-Admiral S.S. Bonham-Carter, CB, CVO, DSO, RN) conducted exercises at / off Scapa Flow. (75)
20 Mar 1942
Convoys PQ 13 and QP 9.
Convoy PQ 13 from Iceland to Northern Russia and Convoy QP 9 from Northern Russia to Iceland.
On 20 March 1942 convoy PQ 13 departed Reykjavik for Murmansk.
The convoy was made up of the following merchant vessels; Ballot (Panamanian, 6131 GRT, built 1922), Bateau (Panamanian, 4687 GRT, built 1926), Dunboyne (American, 3513 GRT, built 1920), Effingham (American, 6421 GRT, built 1919), El Estero (Panamanian, 4219 GRT, built 1920), Eldena (American, 6900 GRT, built 1919), Empire Cowper (British, 7164 GRT, built 1941), Empire Ranger (British, 7008 GRT, built 1942), Empire Starlight (British, 6850 GRT, built 1941), Gallant Fox (Panamanian, 5473 GRT, built 1918), Harpalion (British, 5486 GRT, built 1932), Induna (British, 5086 GRT, built 1925), Mana (Honduras, 3283 GRT, built 1920), Mormacmar (American, 5453 GRT, built 1920), New Westminster City (British, 4747 GRT, built 1929), Raceland (Panamanian, 4923 GRT, built 1910), River Afton (British, 5479 GRT, built 1935), Scottish American (British (tanker), 6999 GRT, built 1920) and Tobruk (Polish, 7048 GRT, built 1942).
The RFA oiler Oligarch (6897 GRT, built 1918) was also part of the convoy.
Close escort on departure from Reykjavik was provided by the escort destroyer HMS Lamerton (Lt.Cdr. C.R. Purse, DSC, RN) and the A/S trawlers HMS Blackfly (T/Lt. A.P. Hughes, RNR) and HMS Paynter (Lt. R.H. Nossiter, RANVR). Three M/S whalers were also with the convoy, these were: Silja (Skr. W. Rigby, RNR), Sulla (T/Skr. T. Meadows, RNR) and Sumba (T/Lt. W.E. Peters, RNR).
In the afternoon of 23 March convoy PQ 13 was joined by the destroyers HMS Eclipse (Lt.Cdr. E. Mack, DSC, RN) and HMS Fury (Lt.Cdr. C.H. Campbell, DSC and Bar, RN, SO close escort) which came from Seidisfjord.
At 2030/23, the light cruiser HMS Trinidad (Capt. L.S. Saunders, RN) made contact with the convoy to provide close cover. A strong south-westerly wind had accelerated the passage and the convoy was some 40 miles ahead of its sheduled position when it was sighted by HMS Trinidad. On reaching the miridian 5°W course was altered to the eastward in compliance with Admiralty instructions amending the route, on order to avoid a U-boat area.
At 0200/24, HMS Lamerton and the RFA oiler Oligargh parted company with the convoy. They wre to make rendezvous with destroyers that were with the Home Fleet which were to fuel from the tanker.
By noon on the 24th the convoy was in position 69°20'N, 00°20'E, making good almost 9 knots. So far so good.
That night, however, a gale sprang up from the north-east and by the forenoon of the 25th it was blowing force 8, with visibility varying up to 2 miles. For the next 36 hours the gale continued unabated. By dawn on the 27th the convoy was widely scattered, and not a single merchant ship was in sight from HMS Trinidad or either of the escorting destroyers.
Throughout the 27th short visibility and heavy weather made it difficult to find the scattered units of PQ 13. HMS Trinidad was searching the area about 100 miles south-west of Bear Island, where she was joined by HMS Nigeria (Capt. J.G.L. Dundas, CBE, RN, flying the flag of the Rear-Admiral H.M. Burrough, CB, DSO, RN), sighted none for them till the evening, when two ships were located. HMS Eclipse some 180 miles to the south-westward had one ship in company. HMS Fury spent most of the afternoon finding and fueling the whaler Sumba in sesponse to a urgent appeal received from the Sumba at 1127/27. This she completed at 2041/2, and then steered to rejoin the convoy, falling in with the merchant vessel Harpalion at 0710/28, with whom she remained in company.
By this time the weather was moderating and the situation was approximately as follows. The convoy was strung out over 150 miles. Furthest east was the merchant vessel Empire Ranger by herself, some 80 miles due north of North Cape at 0800/28. About 40 miles astern of her was a group of six merchant vessels and the armed whaler HMS Silja. 35 miles astern of this group was the Harpalion with HMS Fury. A further 65 miles to the west were six merchant vessels with HMS Eclipse, HMS Paynter and HMS Sumba in company. Four merchant vessels and an armed whaler were straggling (most likely HMS Sulla had already gone down by this time though).
HMS Trinidad had spent the night sweeping to the eastward along the convoy route, sighted the Empire Ranger at 0830/28. She then turned and swept back along the convoy's track, with the intention of concentrating with HMS Fury and HMS Eclipse, in view of the possibility of surface attack of which warning had been received from the Admiralty. The Harpalion and HMS Fury were sighted at 1125/28 and 20 minutes later, with HMS Fury in company course was again altered to the eastward. Meanwhile the convoy had been located by the enemy air reconnaissance.
The forenoon of the 28th March was clear and sunny, with occasional snow patches. At 1007/28, HMS Trinidad sighted a shadowing aircraft. which she engaged ineffectively at long range. The enemy wasted no time, within about an hour their bombers arrived on the scene. In the afternoon the German destroyers Z 24, Z 25 and Z 26 sailed from Kirkenes in search of the convoy.
Throughout the remainder of the day, air attacks were carried out at intervals. The eastern group of six merchant vessels with HMS Silja was dive bombed twice, the Panamanian merchant vessel Ballot being so shaken by near-misss that she dopped astern and started to abandon ship, though she subsquently reached port under her own steam.
At 1127/28, HMS Paynter was attacked.
At 1318/28, HMS Trinidad was narrowly missed by three bombs from an aircraft which dided out of a cloud. Between 1418 and 1430/28, HMS Trinidad was persistently dived bombed by Ju-88's but she sustained only some minor damage from near misses.
During the afternoon the merchant Raceland was sunk by aircraft and at about 1930/28 the Empire Ranger reported that she was sinking and abandoning ship in position 72°13'N, 32°10'E. The trawler Blackfly was sent to this position but she did not sighted any survivors.
During the hours of darkness during the night of 28/29 March, HMS Trinidad and HMS Fury cruised to the southward if 72°25'N, 30°00'E in order to cut off the enemy destroyers, should they attack either main group of the convoy. Course was altered to the east-north-east at 0200/29, in order to close the leading group of merchant ships and to locate the destroyers Sokrushitelny, Gremyashchiy and HMS Oribi (Cdr. J.E.H. McBeath, DSO, DSC, RN) which had sailed from the Kola Inlet to make rendezvous which was effected at 0422/29. Around the same time, HMS Trinidad, opened fire on a U-boat which then dived to safety. This was U-378. Course was then shaped to the westward to close the group of merchant vessels that were with HMS Eclipse. Shortly afterwards they passed wreckage from the merchant vessel Empire Ranger. Four lifeboats, well stocked with ample supplies, were examined by HMS Oribi. The absence of survivors indicated that some ship must have rescued them.
The convoy group that was with HMS Eclipse now numbered eight merchant vessels. HMS Paynter and HMS Sumba were also with this group when they were found at 0630/29 in position 72°29'N, 31°48'E. The two Russian destroyers and HMS Oribi were ordered to remain with this group.
HMS Trinidad and HMS Fury altered course at 0700/29 to 105° and proceeded at 20 knots to seek the eastern group, which by now had been reduced to four ships. One ship, as already mentioned, had straggled the day before as a result of air attacks while another, the Induna, with HMS Silja in tow as the whaler had run short of fuel, got caught in heavy ice during the night and did not get clear till the following afternoon.
Meanwhile the German destroyers Z 24, Z 25 and Z 26 (S.O.) had left Kirkeness at 1330/28 and shaped course to the northward. At 2145/28, being then in approximately 72°20'N, 32°50'E course was altered to the westward to sweep along the estimated route of the convoy, at 15 knots. The destroyers were spread three miles apart. An hour later they came across the Empire Ranger's boats and picked up her survivors.
Continuing to the westward, they sighted a straggler, the Bateau at 0035/29 in position 72°20'N, 30°40'E. Z 26 promptly sank her by torpedo and gunfire. The Germans remained in the vicinity for an hour, and then, apparently thinking they were too far to the north-west, at 0140/29 set course 140°, and swept to the south-eastwar at 25 knots till 0530/29, when the turned due north up the meridian 33°55'E.
At 0820/29, they were once more on the estimated convoy route in approximately 72°22'N, 34°00'E. They altered course to 270° at 17 knots, to sweep to the westwards. This course took them directly towards HMS Trinidad and HMS Fury. The weather, which had earlier been fine, with the sky almost free from cloud and the visibility extreme, was then deteriorating and the visibility rapidly shortening.
The visibility had falled to two miles when at 0843/29, Trinidad's radar picked up an echo bearing 079°, 6.5 miles. Two minutes later the bearing changed to 092°, 4.5 miles - apparently three ships -. Captain Saunders though that they might be ships of the convoy but that he was surprised that three wounld be in this position. At 0849/29 shapes were sighted in the mist, which were identified as three foreign destroyers on approximate course 330°. As this could not be the Russian destroyers as these were further to the west fire was opened at the leading destroyer at 0851/29.
The Germans replied at almost the same moment. By 0852/29 the leading destroyer, Z 26 had been frequently hit and was blazing amidships. Fire was then shifted by HMS Trinidad to the second enemy destroyer in line. Half a minute later the wheel was put hard to starboard as it seemed likely that torpedoes had been fired and indeed two were seen later passing up the port side while the ship was still turning. The action now ceased for the time being.
Z 26, severely damaged, made to the north-westward. The other two German destroyers, who had not sighted the enemy through the mist, turned to the north-eastward to avoid torpedoes (none had been fired by the British), thus becoming separated from their leader whom they failed to rejoin for an hour.
Meanwhile, HMS Trinidad with HMS Fury astern had steadied on course 360°. At the same time radar contact was regained with Z 26 bearing 358°, 7200 yards so speed was increased and course altered to port so as to close. At 0917/29, the outline of the destroyer ws sighted fine on the port bow. HMS Trinidad, opened fire from 2900 yards. The enemy endeavoured to avoid the salvoes which were falling all round her by a continuous and violent zigzag. She did not return the fire and was apparently unable to fire her torpedoes due to damage but she was able to steam.
At 0922/29, HMS Trinidad fired a torpedo at Z 26. Two others fired shortly afterwards failed to leave the tubes due to icing. Meanwhile Z 26 was suppering a beating until at 0923/29 a torpedo was seen breaking surface 200 yards on the Trinidad's port bow. The wheel was put hard to port but it was too late and the torpedo hit HMS Trinidad between 71 and 79 stations on the port side. The ship almost immediately liste 17° to port, speed dropped to 8 knots, all communication from the compass platform failed and steering had to be shifted to the after-steering position.
Z 26 made off to the south-westward and was soon lost to view, pursued by HMS Fury, which from her station astern of HMS Trinidad had hitherto not sighted the enemy. This course took thhem close north of the approaching convoy. Visibility was then about 6 cables. The destroyers of the escort were zigzagging furiously around in order to maintain a decent speed when HMS Eclipse sighted a warship (Z 26) bearing 20° just visible in the mist. One of the Russian destroyers opened fire, but the Eclipse, mistaking her for HMS Trinidad, refrained from doing so. At this moment, 0930/29, HMS Fury appeared out of the snow ahead at high speed and for some minutes chaos reigned in the destroyer screen. HMS Fury actually fired two salvoes at HMS Eclipse before recognition. HMS Fury then turned back to rejoin HMS Trinidad, and the Eclipse, hauled round to the westward at 15 knots to follow the ship which had passed the convoy a few minutes before. HMS Eclipse had not gone far when her radar picked up an echo distant two miles, which she closed keeping the bearing about 20° on the port bow. Slowly the range decreased. At 0950/29 a ship was dimly sighted through the snow half a mile off. She was again taken for HMS Trinidad, but when the range was down to 800 yards she was recognised as a German destroyer and promptly engaged. The luckless Z 26 quickly increased speed to get away.
There followed a running fight in a snowstorm, the German ship making smoke and altering away whenever HMS Eclipse worked up on his quarter and opened A-arcs. The damage previously inflicted by HMS Trinidad prevented the German ship from replying to the British fire except with occasional shots which did no harm. Conditions were very severe. Spray, which swept over guns and bridge, immediately froze on anything it touched. Gundecks were icy and gun wells full of water and ice. Use of binoulares by bridge and director personnel was almost impossible.
This went on for half an hour, till at 1020/29, having by then been hit six times by 4.7" guns shells the Z 26 came to a stop, her stern almost awash and listing to port. HMS Eclipse was just about to fire her remaining torpedo into the German destroyer, when suddenly Z 24 and Z 25 hove into sight about two miles on her disengaged beam. At the same time the snow stopped and visibility increased rapidly. The two German destroyers immediately opened fire so HMS Eclipse made off at high speed to the north-westward, eventually reaching cover in a snow squall at 1035/29, but not before she had been hit aft by two shells at 1028/29 and holed above the waterline forward by two others which burst close alongside. Her main aerials were also shot away. The Germans made no attempt to follow, but stood by the sinking Z 26, which capsized at 1057/29. After rescuing survivors, Z 24 and Z 25 set course to retire at high speed to Kirkeness, where they arrived in the evening of the same day.
HMS Eclipse meanwhile find herself in an unseaworthy condition, short of fuel, and with nine wounded in urgent need of attention. She accordingly shaped course independently for Murmansk where she arrived the next day with only 40 tons of fuel remaining.
HMS Trinidad, meanwhile, after the explosion of the torpedo (It was later found out to have been her own) had turned to the south-eastward and was steering 130° at 6 knots, when HMS Fury rejoined her. Speed was slowly increased as much as due regard for the strain on her bulkheads permitted. At about 1100/29 the group of merchant ships screened by the Russian destroyers was overhauled and HMS Oribi was ordered to join HMS Fury as A/S screen. Early in the afternoon the minesweeper HMS Harrier (Cdr. E.P. Hinton, MVO, DSO, RN) also joined the screen. (The minesweepers HMS Harrier, HMS Gossamer (Lt.Cdr. T.C. Crease, RN), HMS Hussar (Lt. R.C. Biggs, DSC, RN) and HMS Speedwell (Lt.Cdr. J.J. Youngs, OBE, RNR) had departed the Kola Inlet on 28 March to patrol along the last part of the convoy route.) During the forenoon the list of HMS Trinidad had been gradually reduced and by this time she was on an even keel and making good between 12 to 14 knots. Late that night, however, priming with salt water in the feed water compelled a reduction of speed to only 2 to 4 knots, and threathened to stop her altogether. At 2315/29, HMS Trinidad was in position 70°18'N, 34°55'E, some 70 miles from the entrance to the Kola Inlet. By 0200/30, speed could be increased to 7 knots.
By the early moring the wind, which had been freshening all night, was blowing hard from the northward, with a considerable sea. On the whole HMS Trinidad weathered it well, and she reached to Kola Inlet at 0930/30. Three hours later HMS Trindidad and HMS Fury anchored at Rosta.
During 29 March 1942 the various groups and stragglers pursued their way to the east unmolested, turning to the southward on reaching the 37th meridian. Short visibility and low cloud gave protection from air attack and they were not yet in the area chosen by the enemy for submarine attack.
The western group of eight ships was escorted by the two Russian destroyers and HMS Oribi, ater their fleeting glimpse of Z 26, passed clear to the southwar of the other two German destroyers while they were searching for their leader. The four ships of the eastern group by the time surface actions were over were about to alter course to the south.
The Induna and HMS Silja did not get clear of the ice untill 1500/29. They estimated they were in approximately 72°00'N, 38°00'E and shaped course direct for Murmansk. Five hours later the tow parted and HMS Silja disappeared in a squall. Efforts to find her proved unvailing and the Induna continued her voyage alone. At 0707/30 (0807/30, German time), she was torpedoed by U-376 and sank around 0840/30 after having been hit be a coupe de grâce shortly before.
The Effingham was torpedoed by the German submarine U-456. She did not sink and a coupe de grâce missed. U-456 then lost sight of the damaged merhant vessel but she was found shortly afterwards by U-435 and she was then hit and sunk by the third torpedo fired from this submarine.
By the night of 30 March all the surviving 14 ships had arrived in the Kola Inlet except one which arrived early on 1 April. Nineteen ships had left Reykjavik on 20 March, five had been lost on passage.
-----------------------------------------------------------------------------------------------------
On 21 March 1942 convoy QP 9 departed Murmansk for Reykjavik.
The convoy was made up of the following merchant vessels; Ashkhabad (Russian, 5284 GRT, built 1917), Barrwhin (British, 4998 GRT, built 1929), City of Flint (American, 4963 GRT, built 1920), Daldorch (British, 5571 GRT, built 1930), Earlston (British, 7195 GRT, built 1941), Empire Baffin (British, 6978 GRT, built 1941), Empire Byron (British, 6645 GRT, built 1942), Empire Magpie (British, 6517 GRT, built 1919), Hartlebury (British, 5082 GRT, built 1934), Kingswood (British, 5080 GRT, built 1929), Llandaff (British, 4825 GRT, built 1937), Lowther Castle (British, 5171 GRT, built 1937), Makawao (Hunduran, 3545 GRT, built 1921), Marylyn (British, 4555 GRT, built 1930), North King (Panamanian, 4608 GRT, built 1903), Pravda (Russian, 2513 GRT, built 1928), Shelon (Russian, 2310 GRT, built 1918), Stepan Khalturin (Russian, 2513 GRT, built 1921) and Trevorian (British, 4599 GRT, built 1920).
On departured from the Kola Inlet the convoy was escorted by the destroyers HMS Offa (Lt.Cdr. R.A. Ewing, RN), Gremyashchiy and the minesweepers HMS Britomart (Lt.Cdr. S.S. Stammwitz, RN), HMS Gossamer, HMS Harrier, HMS Hussar, HMS Niger (Cdr.(ret.) A.J. Cubison, DSC and Bar, RN), HMS Sharpshooter (Lt.Cdr. D. Lampen, RN) and HMS Speedwell.
The light cruiser HMS Kenya (Capt. M.M. Denny, RN) departed the Kola Inlet on 22 March to overtake the convoy which she joined later on the same day. She remained with the convoy until it reached 01°00'E and then she parted company to proceed to Scapa Flow arriving there at 1030/29.
On 23 March most of the convoy escorts parted company to return to the Kola Inlet. The convoy continued on escorted by HMS Offa, HMS Britomart and HMS Sharpshoorter (S.O.).
The convoy had an uneventful passage except for that HMS Sharpshooter rammed and sank the U-boat U-655 on 24 March.
The convoy arrived at Reykjavik on 3 April 1942.
-----------------------------------------------------------------------------------------------------
Cover for these convoys was provided by ships from the Home Fleet.
At 1000/22, the battleships HMS King George V (Capt. W.R. Patterson, CB, CVO, RN, flying the flag of Vice-Admiral A.T.B. Curteis, CB, RN, second in command Home Fleet), HMS Duke of York (Capt. C.H.J. Harcourt, CBE, RN), battlecruiser HMS Renown (Capt. C.S. Daniel, CBE, DSO, RN), aircraft carrier HMS Victorious (Capt. H.C. Bovell, CBE, RN) and the destroyers HMS Faulknor (Capt. A.K. Scott-Moncrieff, RN), HMS Ashanti (Cdr. R.G. Onslow, RN), HMS Eskimo (Cdr. E.G. Le Geyt, RN), HMS Punjabi (Lt.Cdr. J.M.G. Waldegrave, DSC, RN), HMS Onslow (Capt. H.T. Armstrong, DSC and Bar, RN) and the escort destoyers HMS Ledbury (Lt.Cdr. R.P. Hill, RN), HMS Middleton (Lt.Cdr. D.C. Kinloch, RN) and HMS Wheatland (Lt. R.deL. Brooke, RN) departed Scapa Flow to proceed to the east of Iceland before proceeding to a position from where to provide distant cover for the convoys. HMS Ashanti (Cdr. R.G. Onslow, RN) parted company at 1230/22 to return to Scapa Flow due to defects.
Around 2245/22, the heavy cruiser HMS Kent (Capt. A.E.M.B. Cunninghame-Graham, RN) and light cruiser HMS Edinburgh (Capt. H.W. Faulkner, RN, flying the flag of Rear-Admiral S.S. Bonham-Carter, CB, CVO, DSO, RN) departed Scapa Flow to overtake the ships that had sailed earlier.
At 1600/23, the destroyers HMS Inglefield (Capt. P. Todd, DSO, RN), HMS Icarus (Lt.Cdr. C.D. Maud, DSC and Bar, RN), HMS Echo (Lt.Cdr. N. Lanyon, RN), HMS Bedouin (Cdr. B.G. Scurfield, OBE, RN) and HMS Tartar (Cdr. R.T. White, DSO, RN) sailed from Seidisfiord, Iceland to relief the fleet destroyers that had sailed with the Home Fleet from Scapa Flow. The destroyers were exchanged at 2100/23. HMS Faulknor, HMS Eskimo, HMS Punjabi and HMS Onslow arrived at Seidisfiord to fuel at 2230/23.
At 0400/24, HMS Faulknor, HMS Onslow, HMS Eskimo and HMS Punjabi departed from Seidisfiord to rejoined the fleet. A fifth destroyer was now with them, this was HMS Marne (Lt.Cdr. H.N.A. Richardson, DSC, RN). They rejoined at 0800/24 after which the three escort were detached to Seidisfiord.
At 0530/25, HMS Tartar, when in position 66°14'N, 02°34'W was detached to return to Scapa Flow having sustained damage in the severe weather conditions. She arrived at Scapa Flow at 2000/26.
At 1400/27, the destroyers HMS Escapade (Lt.Cdr. E.N.V. Currey, DSC, RN) and HMS Foresight (Cdr. J.S.C. Salter, OBE, RN) sailed from Skaalefiord, Iceland to join the Home Fleet at 1800/27 in position 63°05'N, 04°20'W to augment the destroyer screen on the Home Fleet's return passage to Scapa Flow which, given the fact that no German heavy units were at sea, was now in the proces of being undertaken.
HMS King George V, HMS Duke of York, HMS Renown, HMS Victorious, HMS Kent, HMS Edinburgh, HMS Inglefield, HMS Faulknor, HMS Onslow, HMS Echo, HMS Escapade, HMS Foresight, HMS Icarus, HMS Bedouin, HMS Eskimo, HMS Punjabi and HMS Marne returned to Scapa Flow at 0800/28. (76)
22 Mar 1942
Around 0845A/22, HMS Kent (Capt. A.E.M.B. Cunninghame-Graham, RN) arrived at Scapa Flow from Hvalfjord.
Around 2245A/22, the heavy cruiser HMS Kent (Capt. A.E.M.B. Cunninghame-Graham, RN) and light cruiser HMS Edinburgh (Capt. H.W. Faulkner, RN, flying the flag of Rear-Admiral S.S. Bonham-Carter, CB, CVO, DSO, RN) departed Scapa Flow to overtake the Battleforce that had sailed earlier.
[For more information see the event ' Convoys PQ 13 and QP 9 ' for 20 March 1942.] (77)
28 Mar 1942
Around 0800A/28, HMS King George V (Capt. W.R. Patterson, CB, CVO, RN), HMS Duke of York (Capt. C.H.J. Harcourt, CBE, RN), HMS Renown (Capt. C.S. Daniel, CBE, DSO, RN), HMS Victorious (Capt. H.C. Bovell, CBE, RN), HMS Kent (Capt. A.E.M.B. Cunninghame-Graham, RN), HMS Edinburgh (Capt. H.W. Faulkner, RN, flying the flag of Rear-Admiral S.S. Bonham-Carter, CB, CVO, DSO, RN, HMS Inglefield (Capt. P. Todd, DSO, RN), HMS Faulknor (Capt. A.K. Scott-Moncrieff, RN), HMS Onslow (Capt. H.T. Armstrong, DSC and Bar, RN), HMS Echo (Lt.Cdr. N. Lanyon, RN), HMS Escapade (Lt.Cdr. E.N.V. Currey, DSC, RN), HMS Foresight (Cdr. J.S.C. Salter, OBE, RN), HMS Icarus (Lt.Cdr. C.D. Maud, DSC and Bar, RN), HMS Bedouin (Cdr. B.G. Scurfield, OBE, RN), HMS Eskimo (Cdr. E.G. Le Geyt, RN), HMS Punjabi (Lt.Cdr. J.M.G. Waldegrave, DSC, RN) and HMS Marne (Lt.Cdr. H.N.A. Richardson, DSC, RN) returned to Scapa Flow from operations.
The Second in Command Home Fleet, Vice-Admiral A.T.B. Curteis, CB, RN, then struck his flag in HMS King George V and hoisted it in HMS Duke of York.
HMS King George V and HMS Victorious (Capt. H.C. Bovell, CBE, RN) departed Scapa Flow for Rosyth around 2100A/28. They were escorted by the destroyers HMS Faulknor, HMS Echo (Lt.Cdr. N. Lanyon, RN), HMS Escapade (Lt.Cdr. E.N.V. Currey, DSC, RN), HMS Icarus (Lt.Cdr. C.D. Maud, DSC and Bar, RN) and HMS Eskimo (Cdr. E.G. Le Geyt, RN).
They arrived at Rosyth around noon on the 29th. (78)
1 Apr 1942
Around 0930A/1, HMS Edinburgh (Capt. H.W. Faulkner, RN, flying the flag of Rear-Admiral S.S. Bonham-Carter, CB, CVO, DSO, RN), HMS Gambia (Capt. M.J. Mansergh, CBE, RN) and HMS Frobisher (Capt. J.F.W. Mudford, RN) departed Scapa Flow to make rendezvous with the US Task Force 39 made up of the heavy cruisers USS Wichita (Capt. H.W. Hill, USN, flying the flag of Rear-Admiral R.C. Griffen, USN), USS Tuscaloosa (Capt. L.P. Johnson, USN) and the destroyers USS Lang (Lt.Cdr. E.A. Seay, USN), USS Sterett (T/Cdr. J.G. Coward, USN), USS Wilson (Lt.Cdr. R.G. Sturges, USN), USS Wainwright (Lt.Cdr. R.H. Gibbs, USN), USS Madison (Lt.Cdr. W.B. Ammon, USN) and USS Plunkett (Lt.Cdr. W.H. Standley, Jr., USN).
They made rendezvous on 3 April 1942 after which HMS Gambia and HMS Frobisher parted company to proceed to the Clyde.
HMS Edinburgh, USS Wichita, USS Tuscaloosa, Lang, Sterett, Wilson, Wainwright, Madison and Plunkett arrived at Scapa Flow on 4 April 1942. (72)
6 Apr 1942
The light cruiser HMS Edinburgh (Capt. H.W. Faulkner, RN, flying the flag of Rear-Admiral S.S. Bonham-Carter, CB, CVO, DSO, RN) and the destroyers HMS Foresight (Cdr. J.S.C. Salter, OBE, RN) and HMS Forester (Lt.Cdr. G.P. Huddart, RN) departed Scapa Flow for Seidisfiord, Iceland where they arrived on 9 April 1942. (72)
8 Apr 1942
Convoy operation to and from northern Russia, convoy's PQ 14 and QP 10.
Convoy PQ 14 from Reykjavik to the Kola Inlet and convoy QP 10 from the Kola Inlet to Reykjavik.
Timespan: 8 April to 21 April 1942.
8 April 1942.
On this day convoy PQ 14 of 25 merchant vessels departed Reykjavik, Iceland for the Kola Inlet in northern Russia. The convoy was made up of the following merchant vessels. RFA Aldersdale (British, Royal Fleet Auxiliary tanker, 8402 GRT, built 1937), Andre Marti (Russian, 2352 GRT, built 1918), Arcos (Russian, 2343 GRT, built 1918), Atheltemplar (British, tanker, 8992 GRT, built 1930), Botavon (British, 5848 GRT, built 1912), Briarwood (British, 4019 GRT, built 1930), British Corporal (British, 6972 GRT, built 1922), City of Joliet (American, 6167 GRT, built 1920), Dan-Y-Brin (British, 5117 GRT, built 1940), Empire Bard (British, 3114 GRT, built 1942), Empire Howard (British, 6985 GRT, built 1941), Exterminator (Panamanian, 6115 GRT, built 1924), Francis Scott Key (American, 7191 GRT, built 1941), Hegira (American, 7588 GRT, built 1919), Hopemount (British, 7434 GRT, built 1929), Ironclad (American, 5685 GRT, built 1919), Minotaur (American, 4554 GRT, built 1918), Mormacrio (American, 5940 GRT, built 1919), Pieter de Hoogh (Dutch, 7168 GRT, built 1941), Seattle Spirit (American, 5627 GRT, built 1919), Sukhona (Russian, 3124 GRT, built 1918), Trehata (British, 4817 GRT, built 1928), West Cheswald (American, 5711 GRT, built 1919), West Gotomska (American, 5728 GRT, built 1918) and Yaka (American, 5432 GRT, built 1920).
Close escort was initially (8 to 12 April) provided by the escort destroyer HMS Wilton (Lt. A.P. Northey, DSC, RN), the minesweepers HMS Hebe (Lt.Cdr. J.B.G. Temple, DSC, RN), HMS Speedy (Lt. J.G. Brookes, DSC, RN), the A/S trawlers HMS Lord Austin (T/Lt. O.B. Egjar, RNR), HMS Lord Middleton (T/Lt. R.H. Jameson, RNR), HMS Northern Wave (T/Lt. W.G. Pardoe-Matthews, RNR) and the A/P trawler Chiltern (Ch.Skr.(ret) P. Bevans, RNR).
9 April 1942.
A close cover force for convoy PQ 14 arrived at Seidisfiord, Iceland from Scapa Flow. It was made up of the light cruiser HMS Edinburgh (Capt. H.W. Faulkner, RN, flying the flag of Rear-Admiral S.S. Bonham-Carter, CB, CVO, DSO, RN) and the destroyers HMS Foresight (Cdr. J.S.C. Salter, OBE, RN) and HMS Forester (Lt.Cdr. G.P. Huddart, RN).
10 April 1942.
The close cover force for convoy PQ 14 departed Seidisfiord on this day, as stated before it was made up of the light cruiser HMS Edinburgh and the destroyers HMS Foresight and HMS Forester.
Also the close escort for convoy PQ 14 departed Seidisfjord, it was made up of the destroyers HMS Bulldog (Cdr. M. Richmond, OBE, RN), HMS Beagle (Cdr. R.C. Medley, RN), HMS Amazon (Lt.Cdr. N.E.G. Roper, RN), HMS Beverley (Lt.Cdr. J. Grant, RN), the corvettes HMS Campanula (Lt.Cdr. W. Hine, RNR), HMS Oxlip (Lt.Cdr.(Retd.) F.B. Collinson, RD, RNR), HMS Saxifage (T/A/Lt.Cdr. R.P. Chapman, RNR), HMS Snowflake (Lt. H.G. Chesterman, RNR) and the A/S trawler HMS Duncton (T/Lt. P.J.G. Christian, RNVR).
------------------------------------------------------------------------------------------------------
On this day convoy QP 10 of 16 merchant vessels departed the Kola Inlet in northern Russia for Reykjavik, Iceland. The convoy was made up of the following merchant vessels. Artigas (Panamanian, 5613 GRT, built 1920), Beaconstreet (British, 7467 GRT, built 1927), Belomorcanal (Russian, 2900 GRT, built 1936), Capulin (Panamanian, 4977 GRT, built 1920), Dnepprostroi (Russian, 4756 GRT, built 1919), El Coston (Panamanian, 7286 GRT, built 1924), El Occidente (Panamanian, 6008 GRT, built 1910), Empire Cowper (British, 7164 GRT, built 1941), Harpalion (British, 5486 GRT, built 1932), Kiev (Russian, 5823 GRT, built 1917), Mana (Honduras, 3283 GRT, built 1920), Navarino (British, 4841 GRT, built 1937), River Afton (British 5479 GRT, built 1935), Sevzaples (Russian, 3974 GRT, built 1932), Stone Street (Panamanian, 6131 GRT, built 1922) and Temple Arch (British, 5138 GRT, built 1940).
Close escort was provided by the British destroyers HMS Oribi (Cdr. J.E.H. McBeath, DSO, DSC, RN), HMS Punjabi (Lt.Cdr. J.M.G. Waldegrave, DSC, RN), HMS Marne (Lt.Cdr. H.N.A. Richardson, DSC, RN), HMS Fury (Lt.Cdr. C.H. Campbell, DSC and Bar, RN), HMS Eclipse (Lt.Cdr. E. Mack, DSC, RN), minesweeper HMS Speedwell (Lt.Cdr. J.J. Youngs, OBE, RNR), A/S trawlers HMS Blackfly (T/Lt. A.P. Hughes, RNR) and HMS Paynter (Lt. R.H. Nossiter, RANVR). The escort was strengthened local escort was provided from departure until 12 April (to longitude 30°'E) by the Russian destroyers Gremyashchiy, Sokrushitelny and the British minesweepers HMS Gossamer (Lt.Cdr. T.C. Crease, RN), HMS Harrier (Cdr. E.P. Hinton, DSO, RN) and HMS Hussar (Lt. R.C. Biggs, DSC, RN). Close cover for the convoy was provided by the light cruiser HMS Liverpool (Capt. W.R. Slayter, DSC, RN) which departed the Kola Inlet on the 11th.
------------------------------------------------------------------------------------------------------
Distant cover for both convoy's (PQ 14 and QP 10) was provided by ships from the Home Fleet; battleships HMS King George V (Capt. W.R. Patterson, CB, CVO, RN, flying the flag of A/Admiral J.C. Tovey, KCB, KBE, DSO, RN, C-in-C Home Fleet), HMS Duke of York (Capt. C.H.J. Harcourt, CBE, RN, flying the flag of Vice-Admiral A.T.B. Curteis, CB, RN, second in command Home Fleet), aircraft carrier HMS Victorious (Capt. H.C. Bovell, CBE, RN), heavy cruiser HMS Kent (Capt. A.E.M.B. Cunninghame-Graham, RN), light cruiser HMS Nigeria (Capt. J.G.L. Dundas, CBE, RN, flying the flag of Rear-Admiral H.M. Burrough, CB, RN) and the destroyers HMS Bedouin (Cdr. B.G. Scurfield, OBE, RN), HMS Eskimo (Cdr. E.G. Le Geyt, RN), HMS Somali (Capt. J.W.M. Eaton, DSO, DSC, RN), HMS Matchless (Lt.Cdr. J. Mowlam, RN), HMS Onslow (Capt. H.T. Armstrong, DSC and Bar, RN), HMS Offa (Lt.Cdr. R.A. Ewing, RN), HMS Faulknor (Capt. A.K. Scott-Moncrieff, RN), HMS Escapade (Lt.Cdr. E.N.V. Currey, DSC, RN) and the escort destroyers HMS Belvoir (Lt. J.F.D. Bush, DSC and Bar, RN), HMS Ledbury (Lt.Cdr. R.P. Hill, RN), HMS Middleton (Lt.Cdr. D.C. Kinloch, RN) and HMS Wheatland (Lt. R.deL. Brooke, RN). These ships departed Scapa Flow on the 12th except for the destroyers Bedouin, Eskimo, Somali and Matchless which left Scapa Flow on the 11th to fuel at Skaalefiord and then to join the Home Fleet at sea.
Also the heavy cruiser HMS Norfolk (Capt. E.G.H. Bellars, RN) departed Scapa Flow to patrol in an area about 130 nautical miles south-west of Bear Island from where she could support either convoy during this part of their passages.
11 April 1942.
From the initial close escort of convoy PQ 14, HMS Wilton, HMS Hebe, HMS Speedy and two of the A/S trawlers were damaged by ice and their Asdic gear was out of action as the convoy encountered thick ice during 11 and 12 April.
------------------------------------------------------------------------------------------------------
Convoy QP 10 was attacked by German aircraft (Ju 88 from III./KG.30) in position 71°01'N, 36°00'E. During this attack the merchant vessel Empire Cowper (cargo; chrome ore & pitprops) was sunk with the loss of nine of her crew.
As stated above the light cruiser HMS Liverpool departed the Kola Inlet to provide close cover for convoy QP 10 and the destroyers HMS Bedouin, HMS Eskimo, HMS Punjabi and HMS Matchless departed Scapa Flow to fuel at Skaalefiord in the Faroe Islands.
12 April 1942.
All ships from the close cover and close escort force that had departed Seidisfiord on the 10th joined convoy PQ 14. HMS Wilton and one of the A/S trawlers left the convoy and proceeded to Seidisfiord where they arrived the next day. Also the RFA tanker Aldersdale left the convoy.
------------------------------------------------------------------------------------------------------
As stated above ships from the Home Fleet departed Scapa Flow on this day to provide cover for convoy's PQ 14 and QP 10. Later this day the destroyers that had departed Scapa Flow yesterday and that had fuelled at Skaalefiord in the Faroe Islands joined the fleet at sea after which the destroyers HMS Faulknor, HMS Escapade, HMS Onslow and HMS Offa left the fleet to also fuel at Skaalefiord.
------------------------------------------------------------------------------------------------------
Also around 1645 hours this day the German submarine U-435 reported being shelled by three destroyers. This was however most likely HMS Liverpoo which reported firing on a surfaced submarine at exactly this time.
13 April 1942.
HMS Speedy, which was damaged by ice, parted company with convoy PQ 14 and proceeded to Reykjavik.
HMS Hebe, which was also damaged by ice, also parted company with convoy PQ 14 and proceeded to Akureyri, providing escort for tanker Aldersdale for part of the way.
------------------------------------------------------------------------------------------------------
In the morning, HMS Faulknor, HMS Escapade, HMS Onslow and HMS Offa, rejoined the Home Fleet at sea after fuelling at Skaalefiord in the Faroe Islands. The four 'Hunt-class' destroyers then parted company with the Home Fleet and HMS Belvoir, HMS Ledbury and HMS Middleton proceeded to Scapa Flow while HMS Wheatland was to make rendez-vous with the RFA oiler Aldersdale and escort her to Seidisfiord, Iceland.
------------------------------------------------------------------------------------------------------
German aircraft were heard homing U-boats on convoy QP 10 which resulted in two of them attacking the convoy shortly after midnight.
At 0059 hours the German submarine U-436 torpedoed and sank the Russian merchant Kiev (cargo; chrome ore and timber) which sank with the loss of six of her crew. The survivors were picked up by HMS Blackfly.
Then at 0129 hours the German submarine U-435 torpedoed and sank the Panamanian merchant El Occidente (cargo; chrome ore,but only as ballast). 20 of her crew crew lost their lives and 21 survivors were picked up by HMS Speedwell. Following this attack U-435 was depth charged by the destroyer HMS Oribi but she sustained no damage.
Then at 1127 hours, U-435 attacked a destroyer with one torpedo which missed. This apparently was HMS Eclipse which then counter attacked with depth charges which slightly damaged U-435.
At 1530 hours, U-435 came across the abandoned wreck of the British merchant vessel Harpalion. This ship had been heavily damaged by German Ju 88 aircraft and had been abanadoned. A reported scuttling attempt by the convoy escort must have failed. Three torpedoes were fired at the wreck of which the third torpedo struck aft. The vessel was seen to sink slowly by the stern after about 20 minutes.
14 April 1942. Convoy PQ 14 was now finally clear from the ice. Only nine merchant vessels were left that were able to continue the passage to north Russia. Six more stagglers were unaccounted for and eventually joined convoy QP 10 and returned to Iceland.
15 April 1942.
Convoy PQ 14 was detected by enemy aircraft and shadowed intermittently from then on. The enemy aircraft homed in U-boats on the convoy.
16 April 1942.
HMS Speedy and two A/S trawlers with nine merchant ships (stagglers) from convoy PQ 14 returned to Reykjavik.
HMS Hebe arrived at Akureyri from the escort of convoy PQ 14.
Also on this day the German submarine U-403 torpedoed and sank the ship of the convoy commodore of PQ 14, the British merchant Empire Howard in position 73°48'N, 21°50'E. Survivors from this ship were picked up by the A/S trawlers HMS Lord Middleton and Northern Wave.
------------------------------------------------------------------------------------------------------
Convoy QP 10 was again spotted by enemy and shadowed. HMS Kent left the Home Fleet and joined the close cover force for this convoy.
------------------------------------------------------------------------------------------------------
Also the escort destroyers HMS Ledbury, HMS Middleton, HMS Lamerton (Lt.Cdr. C.R. Purse, DSC, RN) and HMS Hursley (Lt. W.J.P. Church, DSC, RN) departed Scapa Flow to fuel at Skaalefiord before joining the Home Fleet at sea.
Four destroyers from the screen of the Home Fleet; HMS Faulknor, HMS Somali, HMS Bedouin and HMS Matchless also proceeded to Seidisfiord, Iceland to fuel.
17 April 1942.
What remained of convoy PQ 14 was joined by a eastern local escort made up of the Russian destroyers Gremyashchiy, Sokrushitelny and the British minesweepers Gossamer, Harrier, Hussar and HMS Niger (Cdr.(ret.) A.J. Cubison, DSC and Bar, RN).
------------------------------------------------------------------------------------------------------
The destroyer HMS Eclipse from the close escort of convoy QP 10 left to fuel at Seidisfiord.
------------------------------------------------------------------------------------------------------
HMS Norfolk left her patrol position to proceed to Hvalfiord, Iceland.
HMS Faulknor, HMS Somali, HMS Bedouin and HMS Matchless arrived at Seidisfiord to fuel. After doing so they left in the afternoon and rejoined the Home Fleet at sea later the same day.
Also HMS Ledbury, HMS Middleton, HMS Lamerton and HMS Hursley arrived at Skaalefiord where they fuelled and then departed to join the Home Fleet at sea.
18 April 1942.
HMS Eclipse arrived at Seidisfiord. After fuelling she departed for Scapa Flow in the afternoon.
HMS Ledbury, HMS Middleton, HMS Lamerton and HMS Hursley joined the Home Fleet at sea.
HMS Eskimo, HMS Offa and HMS Escapade then parted company with the Home Fleet to fuel at Skaalefiord where the arrived in the afternoon. After fuelling they departed for Scapa Flow later the same day.
The Home Fleet; battleships King George V, Duke of York, aircraft carrier HMS Victorious, light cruiser HMS Nigeria, destroyers HMS Punjabi, HMS Bedouin, HMS Matchless, HMS Faulknor, HMS Onslow and the escort destroyers HMS Middleton, HMS Ledbury, HMS Lamerton and HMS Hursley returned to Scapa Flow late in the evening.
------------------------------------------------------------------------------------------------------
The two cruisers from the close cover force for convoy QP 10 left this convoy in position 67°43'N, 12°56'W. HMS Kent set course for Scapa Flow, HMS Liverpool for Seidisfiord, Iceland to fuel there.
19 April 1942.
HMS Edinburgh, HMS Foresight and HMS Forester arrived in the Kola Inlet.
HMS Eskimo, HMS Offa and HMS Escapade arrived at Scapa Flow.
HMS Liverpool arrived at Seidisfiord to fuel. After doing so she departed for Scapa Flow in the afternoon.
20 April 1942.
HMS Kent arrived at Scapa Flow.
21 April 1942.
What remained of convoy PQ 14 arrived at Murmansk.
------------------------------------------------------------------------------------------------------
HMS Liverpool arrived at Scapa Flow.
------------------------------------------------------------------------------------------------------
Convoy QP 10, 11 ships and 6 ships from PQ 14, arrived at Reykjavik escorted by HMS Oribi, HMS Marne, HMS Punjabi and HMS Fury. (79)
26 Apr 1942
Convoys PQ 15 and QP 11 and the sinking of HMS Edinburgh and HMS Punjabi.
Convoy PQ 15 from Iceland to Northern Russia and Convoy QP 11 from Northern Russia to Iceland. Also includes an account on the sinking of HMS Edinburgh and HMS Punjabi.
On 26 April 1942 convoy PQ 15 departed Reykjavik for Murmansk where it arrived on 5 May 1942.
The convoy was made up of the following merchant vessels; Alcoa Cadet (American, 4823 GRT, built 1919), Alcoa Rambler (American, 5500 GRT, built 1919), Bayou Chico (American, 5401 GRT, built 1920), Botavon (British, 5858 GRT, built 1912), Cape Corso (British, 3807 GRT, built 1929), Cape Race (British, 3807 GRT, built 1930), Capira (Panamanian, 5625 GRT, built 1920), Deer Lodge (American, 6187 GRT, built 1919), Empire Bard (British, 3114 GRT, built 1942), Empire Morn (British, CAM ship, 7092 GRT, built 1941), Expositor (American, 4959 GRT, built 1919), Francis Scott Key (American, 7191 GRT, built 1941), Hegira (American, 7588 GRT, built 1919), Jutland (British, 6153 GRT, built 1928), Lancaster (American, 7516 GRT, built 1918), Mormacrey (American, 5946 GRT, built 1919), Mormacrio (American, 5940 GRT, built 1919), Paul Luckenbach (American, 6606 GRT, built 1913), Seattle Spirit (American, 5627 GRT, built 1919), Southgate (British, 4862 GRT, built 1926), Texas (American, 5638 GRT, built 1919) and Zebulon B. Vance (American, 7177 GRT, built 1942).
Two icebrakers were also part of the convoy, these were the Krassin (Russian, 4902 GRT, built 1917) and Montcalm (Canadian, 1432 GRT, built 1904, to be transferred to the Russians)
The RFA (Royal Fleet Auxiliary) tanker Grey Ranger (3313 GRT, built 1941) was also with the convoy.
On departure from Reykjavik the convoy was escorted by the minesweepers HMS Bramble (Capt. J.H.F. Crombie, RN), HMS Leda (Cdr. A.D.H. Jay, DSC, RN), HMS Seagull (Lt.Cdr. C.H. Pollock, RN) and the A/S trawlers HMS Cape Palliser (Lt. B.T. Wortley, RNR), HMS Northern Pride (T/Lt. A.R. Cornish, RNR), HMS Vizalma (T/Lt. J.R. Anglebeck, RNVR) and the A/P trawler Chiltern (Ch.Skr.(ret) P. Bevans, RNR).
Around 0300Z/28, ' Force Q ' a refuelling force for the convoy escorts, made up of the RFA (Royal Fleet Auxiliary) tanker Grey Ranger (3313 GRT, built 1941) departed Seidisfiord with her escort, the escort destroyer HMS Ledbury (Lt.Cdr. R.P. Hill, RN). With them were the AA ship HMS Ulster Queen (Capt.(Retd.) D.S. McGrath, RN) and the submarine HMS Sturgeon (Lt.Cdr. M.R.G. Wingfield, RN). They joined the convoy during the night of 28/29 April.
Around 0500Z/29, A close cover force made up of the light cruiser HMS Nigeria (Capt. J.G.L. Dundas, CBE, RN, flying the flag of Rear-Admiral H.M. Burrough, CB, RN), the destroyers HMS Somali (Capt. J.W.M. Eaton, DSO, DSC, RN), HMS Matchless (Lt.Cdr. J. Mowlam, RN), HMS Boadicea (Lt.Cdr. F.C. Brodrick, RN), HMS Venomous (Cdr. H.W. Falcon-Steward, RN), HNoMS St. Albans (Lt.Cdr. S.V. Storheill, RNorN) and the escort destroyer HMS Badsworth (Lt. G.T.S. Gray, DSC, RN) departed Seidisfiord to join the convoy which they did early on 30 April.
The heavy cruiser HMS London (Capt. R.M. Servaes, CBE, RN) also joined the convoy (close cover force), she had departed Scapa Flow around 1645B/28.
around 0635B/1, the submarine HMS Sturgeon parted company with the convoy to take up a patrol position in the Artic Sea. ' Force Q ', the refuelling force made up of the tanker Grey Ranger and escort destroyer HMS Ledbury also parted company with the convoy on 1 May.
Around 2220B/1, Six German Ju.88 torpedo bombers attacked the convoy but no hits were obtained. One of the attackers was shot down by AA fire.
During the night of 1/2 May, HMS London was detached to provide close cover for convoy QP 11.'
At 1000B/2, HMS Nigeria also parted company with the convoy to join convoy QP 11. The Admiralty had decided that there was no need for the cruisers to proceed further to the east as the enemy destroyers operating in Northern Norway had been sunk or damaged in action with the cover force of convoy QP 11 (see below).
At 2009B/2, HNoMS St. Albans and HMS Seagull attacked an A/S contact with depth charges in position 73°01'N, 17°32'E. The submarine was forced to the surface but turned out to be the Polish submarine ORP Jastrzab (Kpt.mar. (Lt.Cdr.) B. Romanowski). She was way out of position and in waters where German submarines were expected to be operating. No blame could possibly be taacked to HNoMS St. Albans and HMS Seagull. Five of the crew of the Polish submarine died while the others were picked up.
At 0120B/3, the convoy was again attacked by enemy torpedo bombers. Visibility was bad and the enemy planes were not sighted until it was too late. Also radar had not picked them up. The succeeded in sinking two merchant vessels, the Botavon (the ship of the Convoy Commodore) and the Cape Corso. A third merchant vessel, the Jutland was damaged and was abandoned by her crew. The drifting ship was shortly afterwards torpedoed and sunk by the German submarine U-251.
At 2230C/3, a final German air attack took place while the convoy was in position 73°00'N, 31°15'E. A bomb near missed the A/S trawler HMS Cape Palliser which sustained some slight damage. One German Ju.88 aircraft was shot down. Visibility deteriorated in the evening of the 4th and a south-easterly gale sprang up bringing heavy snow. This provided the convoy with excellent cover for the remainder of the passage. The convoy arrived in the Kola Inlet around 2100C/5.
-----------------------------------------------------------------------------------------------------
On 28 April 1942 convoy QP 11 departed Murmansk for Reykjavik where it arrived on 7 May 1942.
The convoy was made up of the following merchant vessels; Atheltemplar (British (tanker), 8992 GRT, built 1930), Ballot (Panamanian, 6131 GRT, built 1922), Briarwood (British, 4019 GRT, built 1930), Dan-Y-Bryn (British, 5117 GRT, built 1940), Dunboyne (American, 3515 GRT, built 1919), El Estero (Panamanian, 4219 GRT, built 1920), Eldena (American, 6900 GRT, built 1919), Gallant Fox (Panamanian, 5473 GRT, built 1918), Mormacmar (American, 5453 GRT, built 1920), Stone Street (Panamanian, 6131 GRT, built 1922), Trehata (British, 4817 GRT, built 1928), Tsiolkovsky (Russian, 2847 GRT, built 1935) and West Cheswald (American, 5711 GRT, built 1919).
On departure from Murmansk the convoy was escorted by the destroyers HMS Bulldog (Cdr. M. Richmond, OBE, DSO, RN), HMS Beagle (Cdr. R.C. Medley, RN), HMS Amazon (Lt.Cdr. N.E.G. Roper, RN), HMS Foresight (Cdr. J.S.C. Salter, OBE, RN), HMS Forester (Lt.Cdr. G.P. Huddart, RN), HMS Beverley (Lt.Cdr. J. Grant, RN), corvettes HMS Campanula (Lt.Cdr. W. Hine, RNR), HMS Oxlip (Lt.Cdr.(Retd.) F.B. Collinson, RD, RNR), HMS Saxifage (T/A/Lt.Cdr. R.P. Chapman, RNR), HMS Snowflake (Lt. H.G. Chesterman, RNR) and the A/S trawlers HMS Lord Middleton (T/Lt. R.H. Jameson, RNR) and HMS Northern Wave (T/Lt. W.G. Pardoe-Matthews, RNR). Cover was provided by the light cruiser HMS Edinburgh (Capt. H.W. Faulkner, RN, flying the flag of Rear-Admiral S.S. Bonham-Carter, CB, CVO, DSO, RN).
Besides these ships there was a local escort by the Russian destroyers Sokrushitelny and Gremyashchiy until at least 30°E and by the minesweepers HMS Gossamer (Lt.Cdr. T.C. Crease, RN), HMS Harrier (Cdr. E.P. Hinton, DSO, RN), HMS Hussar (Lt. R.C. Biggs, DSC, RN) and HMS Niger (Cdr.(ret.) A.J. Cubison, DSC and Bar, RN) until the evening of the 29th.
The convoy was sighted and reported by enemy aircraft and submarines on the 29th, but no attacks took place that day. The following afternoon (30 September), however, HMS Edinburgh, then zigzagging at high speed some 15 nautical miles ahead of the convoy, in approximate position 73°09'N, 32°45'E, was struck by two torpedoes from the German submarine U-456. Her stern was blown off and her steering gear was wrecked. She was able to steam at slow speed on two shafts. The explosion was seen from the convoy and the destroyers HMS Foresight and HMS Forester were detached to her assistance, followed shortly afterwards by the two Russian destroyers. Escorted by these destroyers HMS Edinburgh started in the 250 nautical mile return passage to Murmansk.
The presence of the destroyers prevented U-456 from finishing the cruiser off. She continued to shadown and report the Edinburgh's movements. These reported tempted the German Flag Officer, Northern Waters to sent three destroyers from Kirkenes to attack convoy QP 11 with its depleted escort and the destroyers Z 7 / Hermann Schoemann, Z 24 and Z 25 put to sea and steered to the north.
Convoy QP 11, meanwhile, continued its passage. At 0540/1, being then about 150 miles to the east-south-east of Bear Island it was unsuccesfully attacked by four torpedo aircraft. At the same time an enemy submarine was sighted and forced to dive by HMS Amazon. Frequent HF/DF bearings indicated that four enemy submarines were keeping pace with the convoy on different bearings, and at 0820/1, course was altered 40° to starboard (to 320°) in an endeavour to shake them off. Then ice was sighted in large quantities ahead. This was found to extend some 20 miles to the southward of the route, and course was again altered to the westward.
The forenoon passed without incident. The weather was moderate, wind north-north-east, force 3. Frequent snow squalls caused the visibility to vary between ten and two miles.
At 1345/1, the convoy was in course 275°, skirting heavy drift ice to starboard, when HMS Snowflake reported three radar contacts bearing 185°. At the some moment, HMS Beverley, screening on the port bow, reported enemy in sight, bearing 210°. The enemy proved to be three large destroyers. In the course of the next four hours they made five separate attempts to reach the convoy, each of which wass foiled by the aggressive tactics of the escorting destroyers desipite their great inferiority in gun power to the Germans.
On receipt of the Beverley's sighting report, Commander Richmond who was on the starboard bow of the convoy, moved across to the threatened flank and ordered the destroyers to concentrate on him. The convoy (with the corvettes and trawlers) at once carried out an emergency turn of 40° to starboard, the destroyers making smoke to cover it.
At 1400/1, HMS Bulldog turned towards the enemy on a south-westerly course, with the destroyers in line ahead in the order HMS Beagle, HMS Amazon and HMS Beverley. The Germans were at this time in line of bearing formation, about 10000 yards distant, heading towards the convoy. At 1407/1, both sides opened fire, the Germans turning together to starboard to open 'A' arcs, and the British destroyers to port to a similar course. Both sides fired torpedoes but none of them found its mark, but a track was seen to pass close astern of HMS Bulldog. After three minutes (1410/1), the Germans turned away asnd the British destroyers returned towards the convoy, making smoke. In this brief engagement HMS Amazon was hit. Her steering gear, telegraphs and one gun being put out of action, but she managed to keep control and was stationed at the rear of the line.
A quarter of an hour after this action ceased, the convoy suffered its only loss, when the Russian merchant vessel Tsiolkovsky, which was staggling from the convoy, was hit by torpedo and sink rapidly. The survivors were rescued by the Lord Middleton.
Commander Richmond, meanwhile, was keeping his destroyers between the convoy and the estimate position of the enemy. At 1433/1 they were again sighted, bearing 160° about 15000 yards off, and the second attack developed. The British destroyers again steered for them and at 1440/1 fire was opened at 12000 yards range. No hits were obtained by either side, but after five minutes the enemy turned away and the British once more retired on the convoy. By this time the convoy was well within the ice and ' in order to maintain touch the destroyers were led through lanes of open water as opportunity offered, bearing in mind that sufficient sea room to manoeuvre in action must be maintained. The presented a nice problem.'
About an hour elapsed before the enemy's next attempt. Then at 1558/1, he was sighted six miles away coming in from the eastward, bearing 115°. Commander Richmond repeated his tactics, and both sides opened fire at 1600/1. HMS Bulldog was straddled several times and slightly damaged, but after ten minutes the enemy turned away under smoke to the southward and the British again closed the convoy, by then spread out over a distance of some seven miles, as it picked its way through the heavy drift ice in single line formation.
Shortly before 1700/1 the Germans were again sighted, following a radar report from HMS Snowflake, this time bearing 146°, 20000 yards. HMS Bulldog led round towards them, fire was opened at 1658/1 and after seven minutes the enemy made smoke and turned away.
Half an hour later the Germans made their fifth and last attempt to break through. Fire was exchanged between 1736/1 and 1742/1, when they once more turned away. The British held on towards them for a few minutes till the rear destroyer disappeared into the smoke to the south-east. This was the last seen of them, shortly afterwards they were ordered to attack the damaged Edinburgh some 200 nautical miles to the eastward, and altered course accordingly. Commander Richmond of course could not know this, and for the next three hours he kept his force cruising between the supposed direction of the enemy and the convoy, while the latter was breaking its way through the ice. By 2155/1, the convoy was in open water and the destroyer resumed their screening stations.
The remainder of the passage was uneventful. Convoy PQ 15 was sighted proceeding to the eastward at 1000/2. QP 11 arrived at Reykjavik at 0700/7.
In the meantime, while convoy QP 11 was being subjected to the attacks by the German destroyers, the damaged HMS Edinburgh had been making the best of her way towards Murmansk. The first torpedo had hit the starboard side forward, causing considarable flooding. The second torpedo hit right aft and virtually blew her stern off. She had lost her rudder and the two inner shafts, but could steam at about 8 knots with the outer propellers.
HMS Foresight, HMS Forester, Sokrushitelny and Gremyashchiy arrived about an hour after she had been hit. An attempt by HMS Forester to take her in tow failed, with no stern and seven feet down by the bow, she came rapidly into the wind as soon as she gathered headway, and parted the tow. Further attempts to aid her were then delayed while the destroyers hunted a German submarine that was sighted on the surface four miles away.
During the night of 30 April / 1 May some progress at about three knots was made by the Edinburgh taking HMS Foresight in tow and using her to control the steering. At 0600/1, however, the Russian destroyers reported that they had to return to harbour for fuel and parted company. German submarines were known to be about and in these circumstances Rear-Admiral Bonham-Carter deemed it essential that both the remaining destroyers should be used for screeing. So HMS Foresight was cast off and HMS Edinburgh struggled on, steering as best she could with her engines. Left to her own devices, a persitent swing to port could only be countered by gathering sternway every few minutes and the speed of advance fell to two knots. Thus she proceeded for about 23 hours. That no enemy submarine succeeded in attacking during this anxious period is the measure of alterness of HMS Forester and HMS Foresight.
That afternoon the Bulldog's report of the German destroyer attacks came in. The probability of their shifting their attentions to HMS Edinburgh was at once realised and Rear-Admiral Bonham-Carter and he gave the following instructions; ' In event of attack by German destroyers, HMS Forester and HMS Foresight are to act independently, taking every opportunity to defeat the enemy without taking undue risks to themselves in defending HMS Edinburgh. HMS Edinburgh is to proceed wherever the wind permits, probably straight into the wind. If minesweepers are present they will also be told to act independently retiring under smoke screen as necessary. HMS Edinburgh had no RDF or Director working.'
At 1800/1, the Russian escort vessel Rubin joined and six hours later the minesweepers Gossamer, Harrier, Hussar and Niger arrived with a Russian tug. Disappointingly, the tug was not powerful enough to tow. Eventually at 0530/2, HMS Edinburgh was again making three knots under her own power and holding a fairly steady course of 150°. She was steered by the tug fine on the starboard bow and HMS Gossamer acting as a drogue on the port quarter. HMS Niger had been detached during the night to make rendezvous with the Russian destroyers which would return after fuelling. However they did sail long after they were expected to do so and HMS Niger rejoined at 1020/2. HMS Harrier, HMS Hussar, Rubin, HMS Foresight and HMS Forester patrolled around the damaged cruiser in a circle.
The wind was north-north-east, force three. As usual there were frequent snow squalls and the visibility varied from ten to two miles. Despite the fact that enemy submarines were known to be taking up positions to intercept, and the probability of destroyer attack there seemed to be a chance of making port. But it was not to be.
At 0627/3 gunfire from HMS Hussar, then on the starboard quarter, heralded the approach of the enemy, which proved to be the three destroyers. HMS Hussar was almost immediately straddled, and fell back on HMS Edinburgh.
There ensued a series of individual actions, ships engaging whenever visibility permitted. The Germans kept about seven miles to the north-north-east of HMS Edinburgh making full use of snow squalls and smoke to get within torpedo range, and it was seldom that more than one of them was in sight at the same time.
At the first alarm HMS Edinburgh cast off the tows and went on to her maximum speed - about eight knots. Unable to steer, she circled round to port, sometimes rapidly, sometimes on a wider curve, firing with 'B' turret whenever it could be directed from the bridge on to a fleeting target. The minesweepers remained near her, engaging the enemy with their one gun salvoes whenever they appeared and looking out for enemy submarines. HMS Foresight at once steered for the gunflashes at 24 knots while HMS Forester, which was two or three miles to the westward, went on to 30 knots and steered to join her.
First blood on either side was drawn by HMS Edinburgh, which opened fire on the Z 7 / Hermann Schoemann at 0636/2. Her first salvo fell within 100 yards. The German destroyer increased speed to 31 knots, made smike and turned away, but the second salvo scored a hit, which put both engines out of action and destroyed all control instruments. This fortunate hit had a marked effect on the events of the day. She came to a stop and remained virtually out of action, while from then onwards the efforts of her consorts were largely directed towards succouring and screening her.
Meanwhile HMS Foresight had sighted an enemy destroyer, Z 24, 10000 yards off, steering straight towards her, just as HMS Edinburgh opened fire at 0836/2. At 0640/2 the range was down to 8000 yards and Commander Salter opened fire on Z 24, altering course to the eastwards to open 'A' arcs. For the next eight minutes all three enemy destroyers were playing hide and seek in the snow and their own smoke screens. Targets were engaged as and when they came into vision, ranges varying between 6000 and 8000 yards.
HMS Forester was also fighting under much the same conditions, but shestood on to the northward when HMS Foresight turned to open her 'A' arcs. At 0650/1 she fired torpedoes. almost at the same moment she received three hits. One in No.1 boiler room brought her to a standstill. One put 'B' gun out of action and killed the Commanding Officer and one on 'X' gun shattered its breech mechanism. At 0653/2, torpedoes were seen passing underneath the ship in the direction of HMS Edinburgh which was then about five miles north-west of HMS Foresight which had just, at 0648/2, altered away from the enemy to the westward, in order to close HMS Edinburgh. Seeing HMS Forester stopped and on fire, Commander Salter steered to her assistance. HMS Forester with her sole remaining gun and her 1st Lieutenant now in Command, was engaging the stationary Z 7 / Hermann Schoemann some three miles to the northward, and shifted to the other destroyers whenever they appeared from the snow. HMS Foresight had closed to within half a mile by 0700/2, and then turned to an easterly course, so as not to foul the Forester's range, and engaged on of the destroyers which had been firing on her.
Just at this time, 0702/2, HMS Edinburgh was torpedoed. The torpedoes were seen breaking surface as they approached. These was nothing she could do to avoid them but it looked as if her eccentric gyrations would take her clear. However her 'luck' was out. One torpedo, which was running deep, struck her port side amidships at a point practically opposite one of the former hits. She immediately listed to port and gradually came to a standstill. The ship was 'open from side to side'. It was clear that she might break in two and sink at any moment, and Rear-Admiral Bonham-Carter ordered HMS Gossamer alongside to take off the wounded and passanger. HMS Edinburgh nevertheless continued to engage the enemy whenever they appeared. Her shooting was described by the Z 24 as 'extra-ordinarily good' and twice deterred her from going to the assistance of the Z 7 / Hermann Schoemann. However the list was increasing and when it reached 17° her guns would no longer bear. The Rear-Admiral then directed Captain Faulkner to abandon ship.
Meanwhile HMS Foresight after engaging her opponent for five minutes again turned to the westward and seeing HMS Forester being heavily straddled, passed between her and the enemy, drawing their fire. At 0714/2, Commander Salter, altered course to close the range, and a few minutes later fired a salvo of torpedoes (which missed) at the Z 7 / Herman Schoemann. Just afterwards he came under a heavy concentration of fire from Z 24 and Z 25 at 4000 yards range. He increased to full speed and tried to get away under smoke, but received four hits, one of them in No.3 boiler, which brought the ship to a standstill at 0724/2 in welter of steam and smoke with only one gun still in action.
The Edinburgh, Foresight and Forester were thus all stopped with their gun power much reduced. There seemed nothing to prevent the two comparatively undamaged German destroyers from sinking each of them separately and afterwards dealing with the slow, lightly armed minesweepers at their leisure. But though they made repeated attacks on the destroyers with heavy but fortunate inaccurate fire, they did not press home their advantage. Their main concern was with the Hermann Schoemann. Already thee attempts by the Z 24 to go alongside and take off her ship's company had been foiled by British gunfire, and they let the opportunity pass.
Ten minutes after HMS Foresight stopped, HMS Forester managed to get underway (0735/2). At the same time Z 24 and Z 25 again opened fire on her but they soon disappeared into smoke, emerging a few minutes later to concentrate on HMS Foresight. This gave HMS Forester an opportunity to repay the debt she owned for the respite HMS Foresight had afforded her earlier in the day, and, zigzagging between her and the enemy, she covered her with a heavy efficient smoke screen. This was the close of the action. Shortly afterwards Z 24 finally managed to get alongside Z 7 / Hermann Schoemann and took off about 200 survivors. The latter - already in a sinking condition - was then scuttled, and the Z 24 and Z 25 (which had received a hit in her wireless room) withdrew at high speed to the north-west and were lost to view by the British around 0820/2.
Meanwhile HMS Foresight had effected temporary repairs and by 0815/2 was proceeding slowly on the port engine. HMS Edinburgh had been abandoned by 0800/15, HMS Gossamer taking about 440 men and HMS Harrier, in which Rear-Admiral Bonham-Carter hoisted his flag, about 350. Meanwhile HMS Hussar was screening them and laying a smoke screen. Attempts by HMS Harrier to sink the cruiser by gunfire and depth charges failed so HMS Foresight was ordered to finish her off with her last remaining torpedo. This she did and all ships then shaped course for the Kola Inlet where they arrived without further incident the next day.
-----------------------------------------------------------------------------------------------------
To provide distant cover for these convoys a heavy cover force was deployed which departed Scapa Flow around 2200/28 and was made up of the battleships HMS King George V (Capt. W.R. Patterson, CB, CVO, RN, flying the flag of A/Admiral J.C. Tovey, KCB, KBE, DSO, RN, C-in-C Home Fleet), USS Washington (Capt. H.H.J. Benson, USN, flying the flag of Rear-Admiral R.C. Griffen, USN), aircraft carrier HMS Victorious (Capt. H.C. Bovell, CBE, RN), heavy cruisers USS Wichita (Capt. H.W. Hill, USN), USS Tuscaloosa (Capt. L.P. Johnson, USN), light cruiser HMS Kenya (Capt. A.S. Russell, RN), destroyers HMS Inglefield (Capt. P. Todd, DSO, RN), USS Wilson (Lt.Cdr. R.G. Sturges, USN), USS Wainwright (Lt.Cdr. R.H. Gibbs, USN), USS Madison (T/Cdr. W.B. Ammon, USN), USS Plunkett (Lt.Cdr. W.H. Standley, Jr., USN) and the escort destroyers HMS Belvoir (Lt. J.F.D. Bush, DSC and Bar, RN), HMS Hursley (Lt. W.J.P. Church, DSC, RN), HMS Lamerton (Lt.Cdr. C.R. Purse, DSC, RN) and HMS Middleton (Lt.Cdr. D.C. Kinloch, RN).
At 0600/30, they were joined by the destroyers HMS Martin (Cdr. C.R.P. Thomson, RN), HMS Marne (Lt.Cdr. H.N.A. Richardson, DSC, RN), HMS Oribi (Cdr. J.E.H. McBeath, DSO, DSC, RN) and HMS Punjabi (Lt.Cdr. J.M.G. Waldegrave, DSC, RN) which came from Seidisfiord. HMS Inglefield, USS Wilson, USS Wainwright, USS Madison and USS Plunkett then proceeded to Seidisfiord to refuel.
They rejoined the fleet in the afternoon. Another destroyer, HMS Eskimo (Cdr. E.G. Le Geyt, RN), had come with them. The four escort destroyers were then detached to return to Scapa Flow.
At 1550/1, in very bad visibility, HMS Punjabi ended up in front of HMS King George V which could not avoid a collision and cut HMS Punjabi in half. The aft part sank immediately and there was no time to set the ready depth charges to safe which as a result exploded also causing damage to HMS King George V. The front part of HMS Punjabi took 40 minutes to sink during which time HMS Martin and HMS Marne managed to take off 5 officers and 201 ratings.
As a result of the damage to HMS King George V, the battleship HMS Duke of York (Capt. C.H.J. Harcourt, CBE, RN, flying the flag of Vice-Admiral A.T.B. Curteis, CB, RN, second in command Home Fleet) departed from Hvalfiord, around 2045/1, to take her place in the cover force. HMS Duke of York was escorted by the destroyers HMS Faulknor (Capt. A.K. Scott-Moncrieff, RN) and HMS Escapade (Lt.Cdr. E.N.V. Currey, DSC, RN). They made rendezvous with the cover force around 2330/2 after which HMS King George V parted company at 0006/3 and proceeded to Seidisfiord escorted by HMS Martin, HMS Marne and HMS Oribi. They arrived at Seidisfjord around 1100/3. HMS Martin, HMS Marne and HMS Oribi then rejoined the fleet, having also fuelled at Seidisfiord, around 0610/4.
At 1800/4, USS Washington, HMS Wichita, USS Tuscaloosa, USS Wilson, USS Wainwright, USS Madison and USS Plunkett were detached to Hvalfiord where they arrived around 0815/6.
Around 2100/5, HMS Duke of York, HMS Victorious, HMS Kenya, HMS Inglefield, HMS Faulknor, HMS Escapade, HMS Eskimo, HMS Martin, HMS Marne and HMS Oribi arrived at Scapa Flow. (80)
1981
HMS Edinburgh was known to have been carrying gold on her last voyage.
The gold was part of Russia's war payments to the U.S and the U.K. most of that gold was recovered in 1981 by salvage company Jessop Marine.
Media links
|

Sources
- ADM 53/108460
- ADM 53/108461
- ADM 53/107729 + ADM 53/108461 + ADM 53/110179
- ADM 53/108461 + ADM 53/109921
- ADM 53/108462
- ADM 53/109418
- ADM 53/108463
- ADM 53/108464
- ADM 53/108464 + ADM 53/108897
- ADM 199/367 + ADM 199/393
- ADM 53/110666
- ADM 53/108464 + ADM 53/110666
- ADM 53/112122 + ADM 53/112291
- ADM 173/16642
- ADM 53/112122
- ADM 53/111408 + ADM 53/112122
- ADM 53/111408 + ADM 53/112123
- ADM 199/373
- ADM 53/112123
- ADM 53/112124
- ADM 53/112125
- ADM 199/2553
- ADM 199/385
- ADM 53/385 + ADM 199/2553
- ADM 199/2553 + ADM 53/112972
- ADM 199/1136
- ADM 53/112013
- ADM 53/112130
- ADM 53/112671
- ADM 53/122130 + ADM 53/112867 + ADM 199/361 + ADM 199/376
- ADM 53/114198 + ADM 199/411 + ADM 234/560 + ADM 234/561
- ADM 53/114620
- ADM 53/114198 + ADM 53/114620
- ADM 53/114198
- ADM 53/114198 + ADM 53/114793
- ADM 53/114198 + ADM 199/396 + ADM 199/399 + ADM 199/409
- ADM 53/113709 + ADM 53/114199 + ADM 53/114794
- ADM 53/113709 + ADM 53/114199
- ADM 53/ + ADM 53 + ADM 53/ + ADM 199/396 + ADM 199/399 + ADM 199/411 + ADM 234/560+ ADM 234/561
- ADM 199/396 + ADM 199/399
- ADM 199/396 + ADM 199/399 + ADM 199/411 + ADM 234/650 + ADM 234/651
- ADM 53/114200
- ADM 53/114263
- ADM 53/114200 + ADM 199/396 + ADM 199/399
- ADM 199/658 + ADM 199/745 + ADM 199/1143
- ADM 199/1138
- ADM 53/114201
- ADM 199/396
- File 2.12.03.6387 (Dutch Archives, The Hague, Netherlands)
- ADM 53/113712 + ADM 53/114202 + ADM 53/114491 + ADM 53/114624 + ADM 199/650 + ADM 199/651
- ADM 53/113712 + ADM 53/114202 + ADM 53/114624 + ADM 199/396 + ADM 199/399
- ADM 53/114202
- ADM 53/113605 + ADM 53/114202 + ADM 53/114304 + ADM 199/196
- ADM 53/114202 + ADM 199/396
- ADM 234/322
- ADM 53/114203 + ADM 199/396
- ADM 53/114203
- ADM 199/657
- ADM 53/114626 + ADM 234/335
- ADM 199/2553 + ADM 199/1810
- ADM 199/2553 + ADM 199/395
- ADM 199/1810
- ADM 199/831
- ADM 199/661
- ADM 53/114893
- ADM 53/105059
- ADM 53/105060
- ADM 53/115060 + ADM 53/115105 + ADM 199/396
- ADM 53/115105 + ADM 199/396 + ADM 199/409
- ADM 53/113999 + ADM 53/114486 + ADM 53/114510 + ADM 53/115032 + ADM 53/115159
- ADM 53/114205
- ADM 199/427
- ADM 199/427 + ADM 199/429 + ADM 199/2553
- ADM 199/427 + ADM 199/2553
- ADM 53/116735
- ADM 234/369
- ADM 53/116109 + ADM 199/644
- ADM 53/116133 + ADM 53/116735
- ADM 199/427 + ADM 234/369
- ADM 234/359
ADM numbers indicate documents at the British National Archives at Kew, London.
As an Amazon Associate uboat.net earns a commission from qualifying purchases.