
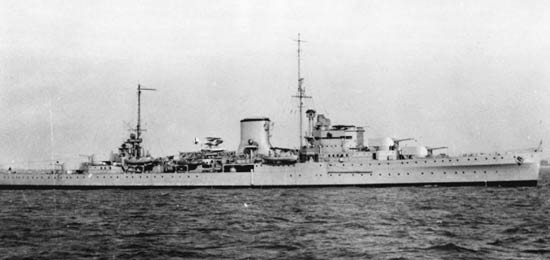
| Navy | The Royal Navy |
| Type | Light cruiser |
| Class | Leander |
| Pennant | 20 |
| Built by | Portsmouth Dockyard (Portsmouth, U.K.): Parsons |
| Ordered | 2 Mar 1931 |
| Laid down | 24 Sep 1931 |
| Launched | 31 Jan 1933 |
| Commissioned | 23 Feb 1934 |
| Lost | 19 Dec 1941 |
| Loss position | 33° 15'N, 13° 30'E |
| History | On 18 December 1941, following the First Battle if the Syrte, ' Force K ', consisting of light cruisers HMS Neptune (Capt. Rory Chambers O'Conor, RN), HMS Aurora, HMS Penelope with destroyers HMS Kandahar, HMS Havock, HMS Lance and Lively, sortied from Malta in the hope of intercepting the Italian convoy known to be heading for Tripoli. At a point about 20 nautical miles East of Tripoli, ' Force K ' entered an Italian minefield and as a result HMS Neptune and HMS Kandahar were sunk and HMS Aurora and HMS Penelope were damaged. For a full account of what happened during the night of 19/20 December 1941 see below. |
Commands listed for HMS Neptune (20)
Please note that we're still working on this section
and that we only list Commanding Officers for the duration of the Second World War.
| Commander | From | To | |
| 1 | Capt. John Anthony Vere Morse, DSO, RN | 20 Jul 1937 | 25 May 1940 |
| 2 | Capt. Rory Chambers O'Conor, RN | 25 May 1940 | 19 Dec 1941 (+) |
You can help improve our commands section
Click here to Submit events/comments/updates for this vessel.
Please use this if you spot mistakes or want to improve this ships page.
Notable events involving Neptune include:
The page of HMS Neptune was last updated in January 2022.
HMS Neptune (Capt. R.C. O'Conor, RN) departed Durban for Simonstown. (1)
1 Sep 1939
HMS Neptune (Capt. J.A.V. Morse, DSO, RN, flying the flag of Vice-Admiral G.H. D'Oyly Lyon, CB, RN) arrived at Freetown from Simonstown.
The Vice-Admiral then struck his flag and transferred it to shore. (2)
3 Sep 1939
HMS Neptune (Capt. J.A.V. Morse, DSO, RN) departed Freetown for a patrol off the Cape Verde Islands. (3)
5 Sep 1939
At 1710A/5, HMS Neptune (Capt. J.A.V. Morse, DSO, RN) sighted the German merchant vessel Inn (2867 GRT, built 1929). The German vessel had been sighted earlier by Neptune's aircraft and course had then been set to intercept.
The vessel was sunk around 1835A/5 with gunfire in approximate position 24°50N, 22°05'W after the crew had been picked up. (4)
8 Sep 1939
HMS Neptune (Capt. J.A.V. Morse, DSO, RN) arrived at Dakar from patrol. (3)
10 Sep 1939
HMS Neptune (Capt. J.A.V. Morse, DSO, RN) departed Dakar for a patrol north and east of the Cape Verde Island. (3)
19 Sep 1939
HMS Neptune (Capt. J.A.V. Morse, DSO, RN) arrived at Freetown from patrol. (4)
20 Sep 1939
Convoy SLF 1.
This convoy departed Freetown on 20 September 1939 and arrived at Liverpool on 28 September 1939.
The convoy was made up of the merchant vessels; Clan Forbes (British, 7529 GRT, built 1938), Sultan Star (British, 12306 GRT, built 1930) and Windsor Castle (British, 19141 GRT, built 1922).
On departure from Freetown the convoy was escorted by the light cruiser HMS Neptune (Capt. J.A.V. Morse, DSO, RN). The cruiser detached from the convoy on 23 September. The convoy then proceeded unescorted arriving at Liverpool on 28 September. (3)
25 Sep 1939
HMS Neptune (Capt. J.A.V. Morse, DSO, RN) arrived at Freetown after escort duty. (4)
26 Sep 1939
Around 0300A/26, HMS Neptune (Capt. J.A.V. Morse, DSO, RN), departed Freetown to proceed to position 09°09'S, 16°03'W where at least four German merchant vessels were thought to make rendezvous with a submarine on 28 September. Information on this had been received from the British Naval Attache in Argentina.
Around 1730A/25, the destroyers HMS Hyperion (Cdr. H.St.L. Nicholson, RN) and HMS Hunter (Lt.Cdr. L. de Villiers, RN) had already departed Freetown to proceed to the same position.
The heavy cruiser HMS Cumberland (Capt. W.H.G. Fallowfield, RN) from the South America Division which was already on patrol was also ordered to close this position.
Around 1515A/27, HMS Neptune joined HMS Hyperion and HMS Hunter.
Around 0730A/28, HMS Cumberland was sighted. The four ships then began a systematic search of the area.
The area was searched until dusk on 29 September but nothing was sighted of the enemy and the ships set course to proceed to Freetown where the cruisers arrived around 0700A/2. The destroyers were short of fuel and could only proceed at a more economical speed and they arrived at Freetown around three hours later. (3)
1 Oct 1939
1 October 1939, an enemy raider reported in the South Atlantic and Indian Ocean. The chase of the German ‘pocket battleship’ Admiral Graf Spee
Movements of the German ‘pocket battleship’ Admiral Graf Spee 21 August 1939 – 13 December 1939.
Before the Second World War had started, on 21 August 1939, the German ‘pocked battleship’ Admiral Graf Spee departed Wilhelmshaven bound for the South Atlantic. On 1 September the Admiral Graf Spee was off the Canary Islands where she made rendes-vous with the supply ship Altmark and supplies were transferred.
On 11 September another rendes-vous was made with the Altmark in the South Atlantic. The Admiral Graf Spee had launched her Arado floatplane to scout in the area as supplies were transferred. The aircraft spotted the British heavy cruiser HMS Cumberland (Capt. W.H.G. Fallowfield, RN). The German ships then immediately parted company and cleared the area at high speed. Two days later, on the 13th, the ships again met and fueling was completed. The Admiral Graf Spee was still under orders to remain unseen.
On 20 September 1939 the Admiral Graf Spee and Altmark met again to fuel. On the 26th the Admiral Graf Spee was ordered to start raiding the British trade lanes. She then proceeded towards the Pernambuco area.
On 30 September 1939 the Admiral Graf Spee found her first victim, the British merchant vessel Clement (5050 GRT, built 1934) that was en-route from New York, U.S.A. to Bahia, Brasil. She then sank the ship in position 09°05’S, 34°05’W. The Admiral Graf Spee then proceeded eastwards and found three more victims between 5 and 10 October. On the 5th she captured the British merchant Newton Beech (4644 GRT, built 1925) in position 09°35’S, 06°30’W. This ship was en-route from Capetown to the U.K. via Freetown. On the 7th she sank the British merchant Ashlea (4222 GRT, built 1929) in position 09°52’S, 03°28’W. This ship was en-route from Durban to Falmouth. The crew of the Ashlea was transferred to the Newton Beech. The next day both crew were transferred to the Admiral Graf Spee and the Newton Beech was scuttled. On 10 October the Admiral Graf Spee captured the British merchant Huntsman (8196 GRT, built 1921) in position 08°30’S, 05°15’W. This ship was en-route from Calcutta to the U.K. On 15 October 1939 the Admiral Graf Spee met the Altmark again to receive supplies and fuel. On the 17th the crew of the Huntsman was transferred to the Altmark and the ship was scuttled in approximate position 16°S, 17°W. The next day the crews of the Newton Beech and Ashlea were also transferred to the Altmark and the German ships then parted company.
On 22 October 1939, the Admiral Graf Spee sank her next victim, the British merchant Trevanion (5299 GRT, built 1937) which was en-route from Port Pirie (Australia) to Swansea. This ship was sunk in position 19°40’S, 04°02’E. On 28 October 1939, near Tristan da Cunha, the Admiral Graf Spee once more refuelled from the Altmark. The Admiral Graf Spee then set course for the Indian Ocean.
On 15 November 1939 she sank the small British tanker Africa Shell (706 GRT, built 1939) in position 24°45’S, 35°00’E. This ship was in ballast and en-route from Quelimane (Portugese East Africa now called Mozambique) to Lourenco Marques (now Maputo, also in Portugese East Africa / Mozambique). Next day the Admiral Graf Spee stopped the Dutch merchant Mapia (7188 GRT, built 1923) but had to let her go as she was a neutral ship. The Admiral Graf Spee then set course to return to the South Atlantic where she met once more with the Altmark on 27 November 1939 and the next day she fuelled from her about 300 miles from Tristan da Cunha.
On 2 December 1939, the Admiral Graf Spee sank her largest victim, the British merchant Doric Star (10086 GRT, built 1921),in position 19°15’S, 05°05’E. This ship was en-route from Auckland, New Zealand to the U.K. The next morning the Admiral Graf Spee sank the British merchant Tairoa (7983 GRT, built 1920) in position 19°40’S, 04°02’E. This ship was en-route from Brisbane, Australia to London. On 6 December 1939 the Admiral Graf Spee refuelled once more from the Altmark. She then set course to the River Plate area where the British merchant traffic was the thickest. She was to sink more ships there and disrupt British shipping movements in that area before returning to Germany.
On 7 December 1939 the Admiral Graf Spee sank what was to be her last victim, the British merchant Streonshalh (3895 GRT, built 1928) in position 25°01’S, 27°50’W. This ship was en-route from Montevideo to Freetown and then onwards to the U.K.
Then in the morning of 13 December 1939, her smoke was sighted by three cruisers from the South America Division. More on this in the article ‘The Battle of the River Plate, 13 December 1939’.
British Dispositions in the South Atlantic / South America area
Shortly before the outbreak of the war the South America Division of the America and West Indies Station was transferred to the newly formed South Atlantic Station. The South America Division at that moment consisted of the heavy cruiser HMS Exeter (Capt. F.S. Bell, RN, flying the flag of Commodore H.H. Harwood, OBE, RN) and the light cruiser HMS Ajax (Capt. C.H.L. Woodhouse, RN). In late August 1939 HMS Exeter was at Devonport with her crew on foreign leave when she was recalled to South American waters. On 25 August 1939 she sailed from Devonport. HMS Exeter arrived at Freetown on 1 September 1939. Commodore Harwood then met the Commander-in-Chief South Atlantic Station, Vice-Admiral G. D’Oyly Lyon, CB, RN. Later the same day HMS Exeter sailed for Rio de Janeiro.
Meanwhile four destroyers from the 4th Destroyer Division, Mediterranean Fleet, the HMS Hotspur (Cdr. H.F.H. Layman, RN), HMS Havock (Lt.Cdr. R.E. Courage, RN), HMS Hyperion (Cdr. H.St.L. Nicholson, RN) and HMS Hunter (Lt.Cdr. L. de Villiers, RN) had left Gibraltar on 31 August 1939 for Freetown.
HMS Ajax was already on station off the coast of South America. Shortly after noon on 3 September she intercepted the German merchant vessel Olinda (4576 GRT, built 1927) in position 34°58’S, 53°32’W. This ship was en-route from Montivideo to Germany. As HMS Ajax had no prize crew available the ship was sunk by gunfire a few hours later. In the afternoon of the next day, the 4th, HMS Ajax intercepted another German ship, the Carl Fritzen (6594 GRT, built 1920) in position 33°22’S, 48°50’W. This ship was en-route from Rotterdam to Buenos Aires. This ship was also sunk with gunfire.
On 5 September two of the destroyers from the 4th Destroyer Division, HMS Hotspur and HMS Havock departed Freetown to join the South America Division. They were ordered to examine Trinidade Island on the way. On 8 September 1939 the heavy cruiser HMS Cumberland (Capt. W.H.G. Fallowfield, RN) departed Freetown to join the South America Division as well. This cruiser came from the Home Fleet and had arrived at Freetown on the 7th.
On 7 September 1939, HMS Exeter entered Rio de Janeiro where Commodore Harwood had a meeting with the Brazilian Secretary-General of Foreign Affairs and H.M. Ambassadors to Brazil and Argentine. HMS Exeter departed Rio de Janeiro the next day. Later that day Commodore Harwood was informed by the Admiralty that the German merchant ships General Artigas (11343 GRT, built 1923), Gloria (5896 GRT, built 1917) and Monte Pascoal (13870 GRT, built 1931) were assembling off the Patagonian coast. He decided to move both HMS Exeter and HMS Ajax south, and ordered the Ajax to meet him at 0800/9. They actually made rendezvous at 0700 hours. The Commodore considered it possible that the German merchant ships might embark German reservists and raid the Falkland Islands therefore he decided to sent HMS Ajax there. HMS Exeter proceeded to the Plate area to cover that important area.
On the evening of the 10th, Commodore Harwood was informed that the transportation of German reservists by the three German merchant ships was very unlikely but as it appeared probable that the German ships were converting themselves into armed raiders the Commodore decided to start short distance convoys from the Santos-Rio and Plate areas. He therefore ordered HMS Cumberland to refuel at Rio de Janeiro on her arrival there and to organize and run ‘out’ convoys in that area with HMS Havock as A/S escort. The convoys were to leave at dawn and be protected against submarines and surface raiders until dusk. The ships were then to be dispersed so that they would be far apart by dawn the next day. At the same time the Commodore ordered HMS Hotspur to join him in the Plate area after refuelling at Rio de Janeiro, so that similar convoys could be started from Montevideo. If one of the German ‘pocket battleships’ was to arrive of South America, HMS Cumberland was to abandon the convoy sheme and join HMS Exeter in the Plate area. Also on the 10th, Commodore Harwood was informed by the Admiralty that the German merchant Montevideo (6075 GRT, built 1936) was leaving Rio Grande do Sul for Florianopolis but decided not to intercept her as this would divert HMS Exeter 500 nautical miles from the Plate area.
On the night of 12 September 1939 the Commodore was informed by the British Naval Attaché, Buenos Aires, that a concentration of German reservists was taking place in southern Argentina with the Falklands as a possible objective. He therefore ordered HMS Ajax to remain in the Falklands till the situation cleared, and the Commodore then proceeded south of the Plate area to be closer to the Falklands himself and yet remain in easy reach of the Plate area. During the next few days HMS Exeter intercepted several British and neutral vessels.
In view of a report that the German merchant vessels Porto Alegré (6105 GRT, built 1936) and Monte Olivia (13750 GRT, built 1925) were leaving Santos on 15 September 1939 Commodore Harwood decided to start the short distance convoys from Montevideo as soon as possible. HMS Cumberland had meanwhile arranged a twelve-hour convoy system from Santos. Ships from Rio de Janeiro for Freetown would sail at dawn on odd numbered days, and ships for the south on even numbered days with HMS Havock as anti-submarine escort and HMS Cumberland in distant support. HMS Cumberland left Rio de Janeiro on 16 September and during the next eight days sighted 15 British and neutral ships while on patrol.
On 17 September 1939, HMS Hotspur joined HMS Exeter in the Plate area. HMS Exeter then made a visit to Montevideo and resumed her patrol off the Plate area on the 20th. Fuelling was done from the oiler RFA Olwen (6470 GRT, built 1917, Master B. Tunnard) in the mouth of the River Plate. Soon after leaving Montevideo on 20 September Commodore Harwood learned from the British Naval Attaché, Buenos Aires, that the local German authorities were endeavoring to inform German ships at sea that the British merchant Lafonia (1872 GRT, built 1911) was on her way to the Falklands with British reservists for the Falkland Islands defence force. It was also reported that on 17 September an unknown warship had passed Punta Arenas eastwards. In view of these reports and of other pointing out that German merchant ships in southern waters were being outfitted as armed raiders the Commodore ordered HMS Hotsput to escort the Laofona to Port Stanley. As the volume of trade in the Plate area was greater than in the Rio de Janeiro – Santos area, HMS Havock was ordered to proceed southwards to the Plate area.
The first local convoy outward from Montevideo sailed on 22 September 1939. It consisted of the British merchant ships Sussex (11062 GRT, built 1937), Roxby (4252 GRT, built 1923), El Ciervo (5841 GRT, built 1923) in addition to the earlier mentioned Lafonia, and was escorted by HMS Hotspur. HMS Exeter met this convoy during the forenoon and covered it throughout the day. At dusk the merchant ships were dispersed on prearranged courses while HMS Exeter remained within supporting distance and HMS Hotspur escorted the Lafonia to Port Stanley.
On 24 September 1939, Vice-Admiral Lyon (C-in-C, South Atlantic) and Commodore Harwood learned from the Naval Attaché, Buenos Aires, that ‘according to a reliable source’ arrangements had been made for a number of German ships and a submarine to meet near Ascension on 28 September 1939. HMS Cumberland was ordered to proceed there and HMS Ajax was ordered to leave the Falklands and take up her place in the Rio de Janeiro area. HMS Neptune (Capt. J.A.V. Morse, DSO, RN) was also ordered to proceed to the area off Ascension with the destroyers HMS Hyperion and HMS Hunter which departed Freetown on the 25th. No German ships were however encountered off Ascension and all ships then proceeded to Freetown where they arrived on 2 October 1939 with HMS Cumberland low on fuel.
While HMS Cumberland left the station to search for the German ships, HMS Exeter and HMS Ajax were sweeping of the Plate and Rio de Janeiro – Santos area respectively. On 27 September 1939, HMS Havock escorted a convoy made up of the British merchants Miguel de Larrinaga (5231 GRT, built 1924), Pilar de Larringa (7352 GRT, built 1918) and Sarthe (5271 GRT, built 1920) out of the Plate area. The next day another convoy, made up of the British merchants Adellen (7984 GRT, built 1930), Cressdene (4270 GRT, built 1936), Holmbury (4566 GRT, built 1925), Lord Byron (4118 GRT, built 1934), Ramillies (4553 GRT, built 1927) and Waynegate (4260 GRT, built 1931) left the Plate area escorted by HMS Havock and with cover from HMS Exeter.
At daylight on 29 September 1939 HMS Ajax was off Rio de Janeiro ready to escort ships sailing northward. She sighted none until the early afternoon when she met the Almeda Star (12848 GRT, built 1926) and a few hours later the tanker San Ubaldo (5999 GRT, built 1921). That night several neutral steamers were sighted off Rio de Janeiro and the next day the British La Pampa (4149 GRT, built 1938) was met and escorted during daylight on her way to Santos. So far on the work of the South American Division during September 1939. The ships assigned to Commodore Harwood had been busy patrolling and escorting ships near the focal areas.
A surface raider reported, 1 October 1939.
When a report that the British merchant Clement had been sunk on 30 September 1939 by a surface raider off Pernambuco was received by the Admiralty in the afternoon of October 1st, the C-in-C, South Atlantic was informed that he should retain the 4th Destroyer Division and that his command would be reinforced by the cruisers HMS Norfolk (Capt. A.G.B. Wilson, DSO, RN), HMS Capetown (Capt. T.H. Back, RN), HMS Effingham (Capt. J.M. Howson, RN), HMS Emerald (Capt. A.W.S. Agar, VC, DSO, RN) and HMS Enterprise (Capt. H.J. Egerton, RN). Also the battleships HMS Resolution (Capt. C.H. Knox-Little, RN), HMS Revenge (Capt. E.R. Archer, RN) and the aircraft carrier HMS Hermes (Capt. F.E.P. Hutton, RN) were to proceed to either Jamaica or Freetown. These dispositions however never materialised being superseded on 5 October 1939 by a more general policy (the institution of hunting groups) which cancelled them.
The institution of hunting groups, 5 October 1939.
On 5 October 1939 the Admiralty formed five hunting groups in the Atlantic and Indian Ocean of sufficient strength to destroy any ‘pocket battleship’ or Hipper-class cruiser. These were; Force F; area: North America and West Indies. HMS Berwick (Capt. I.M. Palmer, DSC, RN), HMS York (Capt. R.H. Portal, DSC, RN), Force G; area: S.E. coast of South America. HMS Cumberland, HMS Exeter Force H; area: Cape of Good Hope, South Africa. HMS Sussex (Capt. A.R. Hammick, RN), HMS Shropshire (Capt. A.W.LaT. Bisset, RN), Force I; area: Ceylon. HMS Cornwall (Capt. C.F. Hamill, RN), HMS Dorsetshire (Capt. B.S.C. Martin, RN), HMS Eagle (Capt. A.R.M. Bridge, RN), Force K; area: Pernambuco, Brazil. HMS Renown (Capt. C.E.B. Simeon, RN), HMS Ark Royal (Capt. A.J. Power, RN), Force L; area: Brest, France. Dunkerque (Capt. J.L. Nagadelle, replaced by Capt. M.J.M. Seguin on 16 October), Bearn (Capt. M.M.A. Lafargue, replaced by Capt. Y.E. Aubert on 7 October), Georges Leygues (Capt. R.L. Perot), Gloire (Capt. F.H.R. de Belot), Montcalm (Capt. P.J. Ronarc’h), Force M; area: Dakar, Senegal. Dupleix (Capt. L.L.M. Hameury), Foch (Capt. J. Mathieu), and Force N; area: West Indies. Strasbourg (Capt. J.F.E. Bouxin), HMS Hermes.
The institution of the hunting groups were not the only measures taken. The battleships HMS Resolution, HMS Revenge and the light cruisers HMS Emerald and HMS Enterprise were ordered to proceed to Halifax, Nova Scotia to escort homeward bound convoys. Light cruiser HMS Effingham was to join them later. The battleship HMS Ramillies (Capt. H.T. Baillie-Grohman, DSO, RN) left Gibraltar on 5 October for the same duty but was recalled the next day when the battleship HMS Malaya (Capt. I.B.B. Tower, DSC, RN) and the aircraft carrier HMS Glorious (Capt. G. D’Oyly-Hughes, DSO and Bar, DSC, RN) were ordered to leave the Mediterranean and proceed to the Indian Ocean where they formed an addition hunting group, Force J which was to operate in the Socotra area off the entrance to the Gulf of Aden.
Now back to the South Atlantic, on 9 October 1939 the C-in-C, South Atlantic had informed the Admiralty and Commodore Harwood that he intended to co-ordinate the movements of ‘Force G’, ‘Force H’ and ‘Force K’. As this would entail long periods of wireless silence in ‘Force G’ he proposed that Commodore Harwood should transfer his flag to HMS Ajax, leaving Capt. Fallowfield of HMS Cumberland in command of Force G. The Admiralty approved of this. Commodore Harwood stated that it was his intention to transfer his flag from HMS Exeter to HMS Ajax in the River Plate area on 27 October. He also stated that the endurance of HMS Exeter was only half the endurance of HMS Cumberland and that this would prove problematic when they were to operate together and he proposed that the Exeter would be relieved by another 10000 ton cruiser but for the moment no suitable cruiser was available to relieve her.
On 12 October 1939 the first of the hunting forces arrived on their station when HMS Renown and HMS Ark Royal reached Freetown that morning coming from the U.K. They were soon followed by three more destroyers of the H-class coming from the Mediterranean; HMS Hardy (Capt. B.A. Warburton-Lee, RN), HMS Hasty (Lt.Cdr. L.R.K. Tyrwhitt, RN) and HMS Hostile (Cdr. J.P. Wright, RN). On 13 October 1939 the cruisers HMS Sussex and HMS Shropshire arrived at Simonstown from the Mediterranean and one day later HMS Hermes arrived at Dakar from Plymouth.
The South America Division during the first half of October 1939.
When the news of an enemy raider in the South Atlantic reached the C-in-C at Freetown on 1 October 1939 he immediately suspended sailings from Pernambuco and Natal and he ordered HMS Havock and HMS Hotspur to escort British ships clear of the area. But next morning he cancelled these dispositions and ordered Commodore Harwood to concentrate HMS Exeter, HMS Ajax and the two destroyers off Rio de Janeiro. By this time, however, the raider was far away from the South American coast. On 3 October 1939 the Commodore signalled the C-in-C that he intened to concentrate the Exeter and Ajax off Rio and have the Hotspur to cover the Rio – Santos area and keep the Havock off the Plate but upon receiving the orders from the C-in-C to concentrate he ordered to destroyers to join the cruisers after fuelling but not later then 0800 hours on 4 October. Reports that the enemy raider was not a ‘pocket battleship’ however kept coming in and the Commodore decided that he could not leave the heavy traffic in the Plate area without some form of protection and he ordered HMS Havock to return there but when a report coming in from Bahia, Brazil confirmed that the Clement had been sunk by the ‘pocket battleship’ Admiral Scheer the Commodore once more ordered HMS Havock to join him. In the end HMS Ajax joined HMS Exeter at 1700/3, HMS Hotspur at 0500/4 and finally HMS Havock at 1300/4.
The Commodore was also informed by the Admiralty that the New Zealand cruiser HMS Achilles (New Zealand Division) (Capt. W.E. Parry, RN) would join his station coming from the west coast of South America. HMS Cumberland left Freetown at 1900/3 to join the Commodore in the Rio de Janeiro area as well.
Commodore Harwood’s policy against enemy raiders and a new raider report coming on on 5 October 1939.
Commodore Harwood had decided to keep his forces concentrated and as no new raider reports had come in to patrol the Rio de Janeiro area in accordance with the C-in-C, South Atlantic’s order. If he met a ‘pocket battleship’ he intended to shadow it until dusk. He would then close and attack in the dark hours. If, on the other hand, he made contact at night, his destroyers would at once close the enemy’s beam and attack her with torpedoes.
On 5 October 1939, the British merchant Martand (7967 GRT, built 1939) informed HMS Cumberland that a German armed raider had attacked an unknown ship, this unknown ship was in fact the Newton Beech that was attacked about 900 nautical miles away. This information was not acted upon by the Commanding Officer of the Cumberland. The Captain of the Cumberland assumed the raider report would have been intercepted by other ships and passed on to the C-in-C, South Atlantic. He considered it was important to keep radio silence and decided against breaking it. The Admiralty however later was of the opinion that the report should have been passed on to the Commander-in-Chief.
By 5 October 1939, the Exeter, Ajax, Havock and Hotspur were concentrated in the Rio de Janeiro area ready to engage the raider if she came south from the Pernambuco area. HMS Achilles was on her way round Cape Horn.
When HMS Ajax visited Rio de Janeiro on 7 October 1939, Commodore Harwood directed her to suggest to the Consular Shipping Advisers there, and at Santos, that, owning to the small volume of shipping leaving these ports, the local convoy systems, which had been instituted on 22 September against armed merchant raiders, should be suspended, and Allied merchant ships be routed independently.
The Commodore intended to meet HMS Cumberland at 1700/8, but at 1600/7 he received a message from the Consular Shipping Adviser at Rio de Janeiro in which he desired an escort for a 13 knot convoy that was to sail at 0430/8 and that had received much local publicity. The Commodore thought that this publicity might draw the enemy raider to the area and he therefore took his entire force back towards Rio de Janeiro and sent HMS Hotspur ahead to make contact with the convoy, while keeping his other ships in support. The convoy consisted of the British merchants Highland Chieftain (14131 GRT, built 1929), Nariva (8723 GRT, built 1920) and the French merchant Alsina (8404 GRT, built 1922).
Meanwhile the Commodore had directed HMS Cumberland to meet him at dawn on October 9th. When the convoy was dispersed at 1800/8 the Exeter and Ajax steered to meet her while the Havock was detached to fuel at Rio de Janeiro. At 2200/8 HMS Ajax was detached. HMS Cumberland made rendezvous with HMS Exeter at 0500/9. They were ordered by the C-in-C, South Atlantic to make a sweep northwards but this could not be carried out as HMS Exeter was short of fuel. The Commodore therefore decided to make a sweep southwards towards the Plate area where HMS Exeter could refuel. He also decided to keep HMS Hotspur with the two cruisers as long as possible.
On 12 October 1939, Rio Grande do Sul reported that the German merchant Rio Grande (6062 GRT, built 1939) was about to sail. The Commodore at once ordered HMS Cumberland to proceed there and intercept. She arrived off Rio Grande do Sul at 1600/13 but on finding it all quiet in the harbour she shaped course for the Plate area at nightfall. Meanwhile the Commodore had ordered HMS Hotspur to fuel at Montevideo when HMS Havock left that port early on the 14th.
about this time RFA Olwen informed the Commodore the the German merchant Bahia Laura (8611 GRT, built 1918) was leaving Montevideo at 1000 next morning and might protest if HMS Havock sailed the same day. Instead, therefore, of entering Montevideo HMS Hotspur at once fueled from the Olwen and then remained out on patrol. The Bahia Laura however, showed no signs of leaving and at 0800/14, HMS Havock put to sea. At 1200 hours HMS Hotspur entered Montevideo. Later that day HMS Exeter and HMS Cumberland fueled from the Olwen in San Borombon Bay at the southern entrance to the Plate estuary. At 1430 hours they were joined by HMS Havock. Commodore Harwood then ordered her to patrol off Montevideo to watch the Bahia Laura. When HMS Exeter finished fueling she immediately put to sea. HMS Cumberland rejoined him next morning at 0700 hours. HMS Havock was then ordered to join the cruisers. On 16 October the commodore learned that the Bahia Laura had sailed at 1015 hours the previous day. By the time the signal reached him the German ship was far out at sea well past his patrol line. But as the whole area was enveloped in dense fog the Commodore decided against trying to catch her.
The South America Division during the second half of October 1939.
Meanwhile Commodore Harwood had informed the Commander-in-Chief, South Atlantic on 13 October that as HMS Exeter required certain minor repairs he proposed to proceed to the Falklands on the17th and then return to the Plate area on the 27th. The Commander-in-Chief replied that he preferred that HMS Exeter would stay in the Plate area till the Commodore would transfer his Broad Pendant to HMS Ajax on the 27th. As HMS Achilles was due in the Plate area on this day also, she and HMS Cumberland could then operate as ‘Force G’ during the Exeter’s absence. This would mean that there would be no cruiser in the Rio de Janeiro area until HMS Exeter would return from her repairs at the Falklands. The Commodore therefore ordered HMS Havock to sail on 21 October for a four day patrol in the Rio – Santos Area, where HMS Hotspur, which could remain at sea until 2 November, would relieve her. From that date until the relief of HMS Achilles there would be no warship in this area. The Commodore therefore asked the Commander-in-Chief to allow ‘Force G’ to operate in that area from 2 to 10 November. When HMS Hotspur joined the Exeter and Cumberland from Montevideo on 17 October the Commodore ordered her to patrol off Rio Grande do Sul to intercept the German ships Rio Grande and Montevideo if they would come out, and sent HMS Havock to patrol inshore with orders to anchor the night clear of the shipping route.
This proved to be the last duty of these two destroyers with the South America Division. On 20 October the Admiralty ordered their transfer to the West Indies. Three days later the Commodore sent them into Buenos Aires to refuel, and as the distance to Trinidad, 4000 miles, was at the limit of their endurance, also obtained permission to refuel them at Pernambuco. They both left Buenos Aires on the 25th and, bidding the Commodore farewell, proceeded northwards. They sailed from Pernambuco on 1 November but on the 3rd HMS Havock was diverted to Freetown with engine trouble. The two remaining destroyers of the 4th Division, HMS Hyperion and HMS Hunter, had left Freetown with convoy SL 6 on 23 October. Off Daker their escort duty was taken over by the French light cruiser Duguay-Trouin (Capt. J.M.C. Trolley de Prevaux). The destroyers then fueled at Dakar on the 27th and sailed for Trinidad early on the 28th.
Meanwhile HMS Cumberland had entered Montevideo at 0800/26. At 0900/26 HMS Achilles joined HMS Exeter in the Plate area and after fueling from RFA Olwen sailed to meet HMS Cumberland off Lobos the next day and then patrol with her as ‘Force G’ in the Rio – Santos area. The Olwen was now nearly out of fuel and filled up HMS Ajax ,which had arrived from the Rio area on the 26th, with her remaining fuel minus 500 tons for her passage to Trinidad. In the morning of 27 October, Commodore Harwood transferred his Broad Pendant to HMS Ajax and HMS Exeter then parted company to proceed to the Falklands for repairs.
Meanwhile the newly formed ‘Force H’ and ‘Force K’ were busy on the other side of the South Atlantic. ‘Force H’, made up of HMS Sussex and HMS Shropshire had reached the Cape on 13 October. As HMS Cumberland had not passed on the report of the Martland, no news on the raider had reached the Admiralty or the Commander-in-Chief since October 1st. On 14 October ‘Force H’ sailed to search for her along the Cape – Freetown route as far as the latitude of St. Helena. That day ’Force K’ (HMS Ark Royal and HMS Renown) left Freetown with HMS Neptune, HMS Hardy, HMS Hero (Cdr. C.F. Tower, MVO, RN) and HMS Hereward (Lt.Cdr. C.W. Greening, RN) to search westwards towards St. Paul Rocks, the direction of their sweep being determined by the complete lack of any further raider information.
Finally a raider report on 22 October 1939, Sweeps by ‘Force H’ and ‘Force K’.
The three weeks old ‘mystery’ of the raiders whereabouts was partially solved on 22 October when the British merchant vessel Llanstephan Castle (11293 GRT, built 1914) intercepted a message from an unknown ship ‘Gunned in 16°S, 04°03’E’ at 1400 G.M.T. There was however no immediate confirmation of her report and the Commander-in-Chief ordered ‘Force H’ to sail after dark on the 27th to sail for the latitude of St. Helena. At noon on 31 October this Force was in 15°S, 02°51’E, the north-eastern limit of it’s patrol, when a Walrus aircraft failed to return to HMS Sussex from a reconnaissance flight. It was never found, though the two cruisers spend over three days searching for it. Being short of fuel they then returned to the Cape by the same route they had used outwards.
Sweep by ‘Force K’, 28 October – 6 November 1939.
To cover the northern end of the route from St. Helena onward, HMS Neptune and the destroyers HMS Hardy, HMS Hasty, HMS Hero and HMS Hereward had left Freetown on 28 October. HMS Neptune was to sweep independently from position 03°20’S, 01°10’W and then through 14°30’S, 16°50’W back to Freetown. On 30 October a report from Dakar stated that the German merchant Togo (5042 GRT, built 1938) had left the Congo on 26 October, that the German merchant Pionier (3254 GRT, built 1934) had sailed from Fernando Po (now called Bioko Island) on 28 October and that five German ships had left Lobito (Angola) the same day. When the Vice-Admiral, Aircraft Carriers, received this information her detached HMS Hardy and HMS Hasty to sweep north-westward for the Pioneer, while ‘Force K’ and the remaining two destroyers searched for her to the south-westward. Both searches were unsuccessful. Meanwhile a message from Lobito had stated that the five German ships that were stated to have left the harbour were still there. On 5 November the German merchant vessel Uhenfels (7603 GRT, built 1931), that had left Laurenco Marques (now called Maputo, Mozambique) on 16 October was sighted by an aircraft from HMS Ark Royal. Only energetic action from HMS Hereward saved her from being scuttled in position 06°02’N, 17°25’W. She was brought into Freetown on 7 November by HMS Herward, a few hours behind ‘Force K’.
’Force H’ and ‘Force G’, first half of November 1939.
The first half of November was relatively quiet on both sides of the South Atlantic At the start of the month ‘Force H’ and ‘Force K’ were still on the shipping lane between Sierra Leone and the Cape. On 3 November 1939 the Admiralty informed the Commander-in-Chief, South Atlantic that all German capital ships and cruisers were apparently in home waters. It appeared therefore that the pocket battleship, which was still thought to be the Admiral Scheer, had returned home and that the raider reported by the Llangstephan Castle on 22 October was nothing but an armed merchantman. Here was a good opportunity for resting the hunting groups and on 4 November the Admiralty issued orders that ‘Force G’ and ‘Force H’ should exchange areas. This exchange would not only give ‘Force G’ an opportunity of resting and refitting at the Cape, but would also provide Commodore Harwood with the hunting group of long endurance that he desired.
The Commander-in-Chief had planned that ‘Force H’ which had returned to the Cape on 7 November would then sweep towards Durban, arriving there on 16 November. However on the 11th they were ordered to sail for patrol in the Atlantic and on the evening of the 17th, while west of St. Helena, exchange patrol areas with ‘Force G’. The exchange of areas however did not take place as ‘Force G’ was delayed due to HMS Exeter being damaged while casting off from the oiler in heavy seas. Before the exchange now could take place it was cancelled.
South America Division, first half of November 1939.
After hoisting Commodore Harwood’s Broad on 27 October the HMS Ajax had swept the Plate focal area. When the Commodore received the signal of the Commander-in-Chief on the 5th regarding the changeover over patrol areas between ‘Force G’ and ‘Force H’, he ordered HMS Cumberland to proceed to the Plate at 20 knots to refuel. About this time a message reached him from Buenos Aires that the Argentinian Foreign Minister had drawn attention to cases of fueling in the Plate by HMS Exeter and HMS Ajax. Although the Argentinian Government had no apparent intention of raising the issue he decided to cut down the fuellings in the inshore waters of the Plate as much as possible. He therefore cancelled the fuelling of HMS Exeter, due to take place on 7 November from the oiler RFA Olynthus (6888 GRT, built 1918, Master L.N. Hill), which had relieved RFA Olwen. He ordered HMS Cumberland to fuel at Buenos Aires on 9 November. HMS Exeter which had arrived at the Falklands on 31 October for repairs, sailed again on 4 November to meet up with HMS Cumberland off the Plate on 10 November, but the Commodore ordered her to enter Mar del Plata for a 24-hour visit on the 9th. As this gave her some time at hand, he ordered her to cover the Plate while HMS Ajax visited Buenos Aires from 6 to 8 November during which the Commodore discussed the question of fuelling his ships in the River Plate Estuary with the Argentine naval authorities. During his visit to Buenos Aires, the Commodore discussed the matter of fuelling his ships of English Bank with the Argentinian Minister of Marine and his Chief of Naval Staff they both suggested that he should use San Borombon Bay which was most acceptable. He had in fact been using it for some time.
When HMS Ajax left Buenos Aires on 8 November she patrolled the Plate area. HMS Exeter arrived at Mar del Plata the next day but fuel could not be obtained there. She was ordered to fuel from RFA Olynthus in San Borombon Bay on the 10th and then meet up with HMS Cumberland off Lobos Island at 0600/11. On the 10th HMS Ajax also fueled from RFA Olynthus as did HMS Exeter after her while HMS Ajax was at anchor close by. However weather quickly deteriorated and the Olynthus was forced to cast off, damaging the Exeter in doing so. Besides that she was still 600 tons short of fuel. As she could not reach the Cape without a full supply the sailing of ‘Force G’ to exchange areas with ‘Force H’ was delayed. The Exeter finally finished fuelling on the 13th and sailed with HMS Cumberland for Simonstown. Before the exchange of areas could be effected, however, a raider was reported in the Indian Ocean and the order was cancelled.
Another raider report, 16 November 1939.
On 16 November 1939 the Naval Officer-in-Charge, Simonstown, reported that the small British tanker Africa Shell ( GRT, built ) had been sunk off Lourenco Marques the previous day by a raider identified as a pocket battleship. After the usual conflicting reports from eye-widnesses during the next few days, however, it was doubtful how many raiders there were or whether they were pocket battleships or heavy cruisers.
The presence of an enemy heavy ship in the Mozambique Channel called for new dispositions. When the raider report reached the Admiralty on 17 November they immediately cancelled the exchange of areas between ‘Force G’ an ‘Force H’. ‘Force H’ was ordered to return to the Cape and ‘Force G’ was ordered to return to the east coast of South America. They also ordered the dispatch of ‘Force K’ towards the Cape with instructions to go on to Diego Suarez in Madagascar. That morning a report reached the Commander-in-Chief, South Atlantic that the German merchant vessels Windhuk (16662 GRT, built 1937) and Adolph Woermann (8577 GRT, built 1922) had left Lobito. He at once ordered ‘Force H’, which was at that moment west of St. Helena in the approximate latitute of Lobito to spend three days searching for them.
Next day, 18 November 1939, ‘Force K’ left Freetown together with HMS Neptune, HMS Hardy, HMS Hero and HMS Hostile to sweep west of St. Helena through position 16°30’S, 10°W and thence on to Diego Suarez. The destroyers parted company at 2300/18 to search for the German ships. On 20 November 1939, the Commander-in-Chief ordered ‘Force H’ to return to the Cape of nothing of the German merchant vessels had been sighted. HMS Sussex and HMS Shropshire did so on 23 November.
The Adolph Woermann had not escaped. Early on 21 November 1939, the British merchant Waimarama (12843 GRT, built 1938) reported her in position 12°24’S, 03°31’W. At 1127/21, ‘Force K’ (HMS Ark Royal and HMS Renown) was in position 05°55’S, 12°26’W, altered course to close, and HMS Neptune, which was still with them, went ahead at high speed. Shortly after 0800/22 she made contact with the Adolf Woermann in position 10°37’S, 05°11’W and went alongside. Despite efforts to save her the German vessel was scuttled and when HMS Neptune returned to Freetown on 25 November 1939 she had 162 German survivors on board.
’Force H’ and ‘Force K’, second half of November 1939.
As the search for the Adolf Woermann had taken ‘Force K’ nearly 200 miles to the eastward, the Vice-Admiral, Aircraft Carriers decided to proceed to the Cape by the route east of St. Helena to save fuel. In hindsight this might have saved Altmark for being intercepted as she was waiting for the Admiral Graf Spee in the area ‘Force K’ would have otherwise passed through. On 23 November 1939, the Commander-in-Chief, South Atlantic, ordered ‘Force H’ to sail from the Cape the next day and patrol the ‘diverse routes’ as far as 33°E until 28 November.
At the northern end of the South Atlantic station HMS Neptune, HMS Hardy, HMS Hero, HMS Hostile, HMS Hasty and the submarine HMS Clyde (Cdr. W.E. Banks, RN) had established a patrol between 22 and 25 November 1939 to intercept escaping German merchant ships or raiders. No ships were however sighted and they were recalled to Freetown on 30 November.
In the meantime the Admiralty had ordered, ‘Force H’ and ‘Force K’ to conducted a combined patrol on the meridian of 20°E. The two forces met early on 1 December. The plan, according to the Commander-in-Chief, appeared to be a good one in theory but was found unsuitable in practice that on account of local weather conditions. These permitted flying off aircraft from HMS Ark Royal only once in five or six days, so that the patrol could not be extended far enough to the south to intercept a raider bent on evasion. In fact, only once, on 2 December weather was suitable for flying off aircraft.
South America Division, second half of November 1939.
After HMS Cumberland and HMS Exeter (‘Force G’) had sailed from San Borombon Bay for Simonstown on 13 November 1939, HMS Ajax patrolled the Plate area and escorted the French Massilia ( GRT, built ) that was bound for Europe from Buenos Aeres with French reservists. After parting from the Massilia she closed Rio Grande do Sul and ascertained that the German merchant vessels Rio Grande and Montevideo were still there. For the next two days she patrolled the normal peace time shipping routes.
When the Admiralty cancelled the exchange of ereas between ‘Force G’ and ‘Force H’ on 17 November, Commodore Harwood sent ‘Force G’ to cover Rio de Janeiro. He ordered HMS Achilles to fuel off the Olynthus in the Plate area on 22 November and then relieve ‘Force G’ in the Rio area as HMS Exeter would need to refuel in the Plate area again on 26 November. HMS Cumberland was to remain with the Exeter to keep ‘Force G’ together so she could refuel from the Olynthus as well. They were then to patrol the Plate area so that HMS Ajax could visit the Falklands.
On 18 November the Commodore was informed that the German merchant Ussukuma ( GRT, built ) might sail from Bahia Blanca for Montevideo at any time. He at once ordered the Olynthus to watch for her between Manos and Cape San Antonio and took the Ajax south to the same vicinity.
On 22 November 1939 HMS Achilles heard the German merchant Lahn (8498 GRT, built 1927) calling Cerrito by wireless, and when HMS Ajax arrived half an hour later a search was carried out. It was insuccessful for both cruisers but both the Lahn and another German merchant the Tacoma (8268 GRT, built 1930) reached Montevideo safely during the forenoon.
HMS Ajax and HMS Achilles then both fuelled from the Olynthus at San Borombon Bay during the next afternoon. The Achilles the sailed for the Rio de Janeiro area. She had orders to move up to Pernambuco and show herself off Cabadello and Bahia as a number of German ships in Pernambuco were reported ready to sail to Cabadello to load cotton for Germany. She was to return at once to the Rio area if any raiders were reported in the South Atlantic.
HMS Ajax left the Plate area on 25 November 1939 and sent up a seaplane to reconnoitre Bahia Blanca. The Ussukuma showed no signs of sailing so HMS Ajax proceeded to the Falklands, arriving there on the 27th. By this time HMS Cumberland and HMS Exeter were in urgent need of refits after long periods at sea, and Commodore Harwood ordered the Exeter to proceed to the Falklands forthwith. She arrived at Port Stanley on 29 November 1939 and her defects were immediately taken in hand as far as local resources permitted.
8 December 1939 was the twenty-fifth anniversary of the Battle of the Falklands, and thinking the enemy might attempt to avenge the defeat, the Commodore ordered HMS Cumberland to patrol off the Falklands as of 7 December for two days after which she too was to enter Port Stanley for rest and refit.
French Forces at Dakar in November 1939.
During November them most important event at Dakar, where the French were maintaining a number of more or less regular patrols, was the reorganisation of ‘Force X’. On 1 November 1939 the large destroyer L’Audacieux (Cdr. L.M. Clatin) sailed from Dakar to the westward to 26°W and thence south-west to search for the German merchant Togo. She returned to Dakar on 4 November having sighted nothing. That day the French light cruiser Duguay-Trouin sailed to sweep round the Cape Verde Islands and then on to St. Paul Rocks. She returned to Dakar on 10 November. The old ‘Force X’, the Strasbourg (Capt. J.F.E. Bouxin), Algerie (Capt. L.H.M. Nouvel de la Fleche) and Dupleix (Capt. L.L.M. Hameury) sailed on 7 November to sweep west of the Cape Verde Islands. It returned to Dakar on 13 November 1939. Meanwhile French submarines based at Casablanca were maintaining a continuous patrol round the Canary Islands between 25°N and 30°N.
On 18 November a new ‘Force X’ was formed, now made up of the Dupleix and her sister ship Foch (Capt. J. Mathieu) and the British aircraft carrier HMS Hermes. On 21 November the Strasbourg, Algerie and the destroyers Le Terrible (Cdr. A.E.R. Bonneau) and Le Fantasque (Capt. P.A.B. Still) left Dakar to return to France. The next day the new ‘Force X’ sailed with the destroyers Milan (Cdr. M.A.H. Favier) and Cassard (Cdr. R.A.A. Braxmeyer) to cruiser towards 08°N, 30°W. That day L’Audacieux departed Dakar with a convoy for Casablanca.
On 25 November, the Duguay-Trouin sailed to patrol the parallel of 19°N, between 25° and 30°W. Two days later the British submarine HMS Severn (Lt.Cdr. B.W. Taylor, RN) docked at Dakar. On the 30th the Dupleix and Foch returned from patrol being followed the next day by HMS Hermes and her escorts Milan and Cassard.
Dispositions of South Atlantic Forces at the beginning of December 1939.
At the beginning of December 1939, HMS Ark Royal, still flying the flag of Vice-Admiral Aircraft Carriers, and HMS Renown (‘Force K’), were patrolling the meridian of 20°E, south of the Cape together with HMS Sussex and HMS Shropshire (‘Force H’) to intercept the raider reported in the Mozambique Channel on 15 November 1939.
In the north the light cruiser HMS Neptune with the destroyers HMS Hardy, HMS Hero, HMS Hostile and HMS Hasty and the submarine HMS Clyde were returning to Freetown after patrolling between there and Cape San Roque for escaping German merchant ships or raiders. The French cruiers Dupleix and Foch and the British carrier HMS Hermes (‘Force X’) and their two escorting destroyers Milan and Cassard were approaching Dakar. The French cruiser Duguay-Trouin was patrolling the parallel of 19°N, between 25° and 30°W. The British submarine Severn was refitting at Dakar. Across the South Atlantic, Commodore Harwood, in HMS Ajax was at Port Stanley as was HMS Exeter. HMS Cumberland was patrolling of the Plate area and HMS Achilles was off Rio de Janeiro.
Forces ‘H’ and ‘K’, 1 – 13 December 1939.
No further reports have been received of the raider which had sunk the Africa Shell off Laurenco Marques on 15 November and it seemed clear that she had either gone further into the Indian Ocean or doubled back into the South Atlantic by going well south of the Cape. On 2 December 1939 the Admiralty ordered ‘Force K’ and ‘Force H’ to their patrol line south of the Cape after refueling, and the Commander-in-Chief, South Atlantic at once ordered them to proceed for the Cape ports to fuel. That day a reconnaissance aircraft of the South African Air Force reported a suspicious ship south of Cape Point at noon. HMS Sussex intercepted her but her crew set her on fire. She proved to be the German merchant Watussi (9521 GRT, built 1928). She was eventually be HMS Renown. Her survivors were taken on board HMS Sussex and were landed at Simonstown.
No news of the missing raider had been coming in since 16 November but then the mistery shrouding her whereabouts was again partially solved. At 1530/2 a raidar signal ‘R.R.R., 19°15’S, 05°05’E, gunned battleship) reached the Commander-in-Chief, South Atlantic. It came from the British merchant Doric Star. As this signal placed the raider in the South Atlantic he immediately ordered to abandon the patrol south of the Cape and ordered ‘Force H’ to cover the trade routes between the Cape and the latitude of St. Helena at 20 knots on completion of fuelling. As it was too late for ‘Force K’ to reach the Freetown-Pernambuco area in time to intercept the rainder if she was to proceed to the North Atlantic he proposed the Admiralty that ‘Force K’, after fuelling should sweep direct from the Cape to position 20°S, 15°W. This was changed at the request of the Vice-Admiral, Aircraft Carriers to place his force in a more central position for proceeding to Freetown, to the Falklands or to Rio de Janeiro. At 1030/3 a report reached the Commander-in-Chief that the pocket battleship Admiral Scheer had been in 21°20’S, 03°10’E at 0500 hours, clearly indicating that the raider was moving westwards, clear of the Cape-Sierra Leone trade route. ‘Force H’ left Simonstown at 1700 that afternoon and ‘Force K’ sailed from Capetown at 0915/4.
The Commander-in-Chief estimated that if the enemy was proceeding northwards to the North Atlantic she would cross the Freetown-Pernambuco line between 9 and 10 December. He therefore arranged that ‘Force X’ should take HMS Neptune and her destroyers under her orders and patrol the parallel of 3°N between 31° and 38°W from 10 to 13 December. ‘Force K’ would meet HMS Neptune and the destroyers on the 14th and then return with them to Freetown to refuel. The destroyers of the 3rd Division of the 2nd Destroyer Flotilla (HMS Hardy, HMS Hostile and HMS Hero) left Freetown on 6 December with the oiler RFA Cherryleaf (5896 GRT, built 1917). They had orders to meet the Dupleix, Foch, HMS Hermes and their escorting destroyers Milan and Cassard and HMS Neptune in position 03°N, 31°W on 10 December. On 7 December ‘Force X’ left Dakar for the rendez-vous. That day the submarine HMS Clyde left Freetown to patrol between 03°N, 23°W and 03°N, 28°W and thence to 05°15’N, 23°W between 9 (PM) and 13 (AM) December.
On the evening of 8 December 1939 the German merchant ship Adolf Leonhardt (2989 GRT, built 1925) sailed from Lobito for South America. ‘Force H’ which was by then between St. Helena and the west coast of Africa, was at once ordered to intercept her. The Walrus from HMS Shropshire made contact at 0952 hours next morning and alighted alongside in position 13°S, 11°44’E. At 1250 hours HMS Shropshire arrived at that position but the German ship was scuttled by her crew and could not be saved. ‘Force H’ then returned to the Cape to refuel where they arrived on 14 December.
At 0800/11 the submarine HMS Severn left Freetown for Port Stanley. She was to protect the whaling industry in South Georgio and was to intercept hostile raiders or supply ships. The cruiser HMS Dorsetshire, which arrived at Simonstown from Colombo on the 9th to finally relieve HMS Exeter in the South America Division left Simonstown on 13 December for Port Stanley. She was to call at Tristan da Cunha on the way. On that day, 13 December 1939, was fought the action between the British South America Division and the German pocket battleship Admiral Graf Spee, known as the Battle of the River Plate.
The South America Division, 1 to 13 December 1939.
At the beginning of December 1939, HMS Ajax and HMS Exeter were at Port Stanley in the Falkland Islands. HMS Cumberland was off the River Plate and HMS Achilles was patrolling the Rio de Janeiro area. On 2 December HMS Ajax left Port Stanley for the Plate area. That evening the Commodore learned that the Doric Star had been sunk by a raider to the south-east of St. Helena. Two days later the Commander-in-Chief, South Atlantic informed him that HMS Dorsetshire would arrive at Port Stanley on 23 December to relieve HMS Exeter which was then to proceed to Simonstown for a much needed refit.
Early on 5 December the British Naval Attaché at Buenos Aires reported that the German merchant Ussukuma had left Bahia Blanca at 1900 hours the previous evening. The Commodore immediately ordered HMS Cumberland which was on the way south to the Falkland Islands to search for her. Meanwhile HMS Ajax turned south and closed the Argentinian coast in case the Ussukuma, which was known to be short of fuel, should attempt to reach Montevideo inside territorial waters. At 1910/5, HMS Ajax sighted her smoke to the north-north-east but the Germans managed to scuttle their ship and despite the efforts to save her she sank during the night. At 0615/6, HMS Cumberland came up and embarked the German survivors and made off for the Falklands. HMS Ajax then refuelled at San Borombon Bay from the Olynthus.
About the same time the Brazilian authorities asked that HMS Achilles should not refuel in any Brazilian port at an interval less then three months. The Commodore, therefore, ordered her to return south and refuel at Montevideo on 8 December. HMS Achilles then joined HMS Ajax at 1000/10 in position 35°11’S, 51°13’W, 230 miles west of English Bank. At 0600/12 they were joined by HMS Exeter in position 36°54’S, 53°39’W.
Ever since the beginning of the war Commodore Harwood’s cruisers had worked off the east coast of South America either single or in pairs. The concentration of these three cruisers off the River Plate on 12 December 1939 was, however, no mere matter of chance.
Concentration of British Force in the River Plate area, 12 December 1939.
When a pocket battleship was located in position 19°15’S, 05°05’E on 2 December by the sinking of the Doris Star, her position was over 3000 miles from any of the South America focal areas. The Commodore however recognised that her next objective might be the valuable shipping off the east coast of South America. He estimated that at a cruising speed of 15 knots the enemy could reach the Rio area on 12 December the Plate area on 13 December and the Falklands on 14 December. As the Plate area was by far the most important of these three focal areas he decided to concentrate all his available ships off the Plate on 12 December.
The three cruisers then proceeded together towards position 32°N, 47°W. That evening the Commodore informed the Captains of his cruisers that it was intention that if they met a pocket battleship to attack immediately, by day or by night. By they they would act as two units, the light cruisers were to operate together and HMS Exeter was to operate diverged to permit flank marking. By night the ships were to remain in company in open order.
At 0614/13 HMS Ajax sighted smoke bearing 324° in position 34°28’S, 49°05’W and Commodore Harwood then ordered HMS Exeter to investigate it.
What then followed can be read in the article ‘The battle of the River Plate, 13 December 1939’ which can be found on the pages of HMS Ajax, HMS Exeter and HMS Achilles. (5)
7 Oct 1939
Convoy SL 4.
This convoy departed Freetown on 7 October 1939 and arrived in U.K. waters on 26 October 1939 though some of the merchant vessels had been detached in the Bay of Biscay to proceed to French ports.
The convoy was made up of the following merchant vessels; Burdwan (British, 6069 GRT, built 1928), Clan Farquhar (British, 7958 GRT, built 1918), Clan MacNeil (British, 6111 GRT, built 1922), Godfrey B. Holt (British, 3585 GRT, built 1929), Groix (French, 9975 GRT, built 1922), Hardwicke Grange (British, 9005 GRT, built 1921), Lafian (British, 4876 GRT, built 1937), Lagosian (British, 5412 GRT, built 1930), Marcella (British, 4592 GRT, built 1928), Myrmidon (British, 6278 GRT, built 1930), Myrtlebank (British, 5150 GRT, built 1925), Natia (British, 8715 GRT, built 1920), Oakdene (British, 4255 GRT, built 1935), Rodney Star (British, 11803 GRT, built 1927), Sangara (British, 4174 GRT, built 1939), Settler (British, 6202 GRT, built 1939), Shillong (British, 5529 GRT, built 1939), Takoradian (British, 5452 GRT, built 1937) and Welsh Trader (British, 4974 GRT, built 1938).
On departure from Freetown the convoy was escorted by the light cruiser HMS Neptune (Capt. J.A.V. Morse, DSO, RN). She was detached from the convoy around 1920A/10 in approximate position 15°20'N, 19°54'E.
The destroyers HMS Hyperion (Cdr. H.St.L. Nicholson, RN) and HMS Hunter (Lt.Cdr. L. de Villiers, RN) were with the convoy briefly on 9 October 1939 between 0730A/9 and 1300A/9.
Around 0900A/23 the destroyers HMS Mackay (Cdr. G.H. Stokes, RN) and HMS Vimy (Lt.Cdr. I.T. Clark, RN) joined the convoy. The destroyers HMS Venetia (Cdr. G.R. Pilcher, RN) and HMS Vesper (Lt.Cdr. W.F.E. Hussey, DSC, RN) had joined the convoy about an hour earlier in approximate position 47°45'N, 13°30'W.
Around 0830A/24 the convoy split into an east coast section which proceeded towards the Irish Sea escorted by HMS Mackay and HMS Vimy. The west coast section proceeded towards the Channel escorted by HMS Venetia and HMS Vesper.
Around 0730A/25, HMS Venetia and HMS Vesper were relieved by the destroyer HMS Wivern (Lt.Cdr. W. Evershed, RN). (6)
12 Oct 1939
HMS Neptune (Capt. J.A.V. Morse, DSO, RN) arrived at Freetown after convoy escort duty. (7)
14 Oct 1939
The battlecruiser HMS Renown (Capt. C.E.B. Simeon, RN), aircraft carrier HMS Ark Royal (Capt. A.J. Power, RN, flying the flag of Vice-Admiral L.V. Wells, CB, DSO, RN), light cruiser HMS Neptune (Capt. J.A.V. Morse, DSO, RN) and the destroyers HMS Hardy (Capt. B.A. Warburton-Lee, RN), HMS Hero (Cdr. C.F. Tower, MVO, RN) and HMS Hereward (Lt.Cdr. C.W. Greening, RN) departed Freetown to patrol towards the St. Paul's Rocks. (8)
23 Oct 1939
HMS Renown (Capt. C.E.B. Simeon, RN), HMS Ark Royal (Capt. A.J. Power, RN, flying the flag of Vice-Admiral L.V. Wells, CB, DSO, RN), HMS Neptune (Capt. J.A.V. Morse, DSO, RN), HMS Hardy (Capt. B.A. Warburton-Lee, RN), HMS Hero (Cdr. C.F. Tower, MVO, RN) and HMS Hereward (Lt.Cdr. C.W. Greening, RN) returned to Freetown from patrol. (8)
28 Oct 1939
The battlecruiser HMS Renown (Capt. C.E.B. Simeon, RN), aircraft carrier HMS Ark Royal (Capt. A.J. Power, RN, flying the flag of Vice-Admiral L.V. Wells, CB, DSO, RN), light cruiser HMS Neptune (Capt. J.A.V. Morse, DSO, RN) and the destroyers HMS Hardy (Capt. B.A. Warburton-Lee, RN), HMS Hasty (Lt.Cdr. L.R.K. Tyrwhitt, RN), HMS Hero (Cdr. C.F. Tower, MVO, RN), HMS Hereward (Lt.Cdr. C.W. Greening, RN) and HMS Hostile (Cdr. J.P. Wright, RN) departed Freetown for a patrol towards Ascension.
HMS Neptune soon parted company to patrol independently towards position 03°20'S, 01°10'W and then towards 14°30'S, 16°50'W and then return to Freetown. (8)
6 Nov 1939
HMS Neptune (Capt. J.A.V. Morse, DSO, RN) returned to Freetown from patrol. (9)
6 Nov 1939
HMS Renown (Capt. C.E.B. Simeon, RN), HMS Ark Royal (Capt. A.J. Power, RN, flying the flag of Vice-Admiral L.V. Wells, CB, DSO, RN), HMS Hero (Cdr. C.F. Tower, MVO, RN), and HMS Hostile (Cdr. J.P. Wright, RN) arrived at Freetown from patrol.
HMS Neptune (Capt. J.A.V. Morse, DSO, RN) returned at the same time from independent patrol, apparently having joined the Renown force shortly before arrival. (10)
11 Nov 1939
HMS Neptune (Capt. J.A.V. Morse, DSO, RN) departed Freetown to proceed to a rendezvous position west of the Canary Islands. (11)
15 Nov 1939
Around 0630A/15, light cruiser HMS Neptune (Capt. J.A.V. Morse, DSO, RN) made rendezvous west of the Canary Islands in approximate position 28°00'N, 20°50'W with the light cruiser HMS Capetown (Capt. T.H. Back, RN) which is escorting the submarine depot ship HMS Maidstone (A/Capt. E.H. Longsdon, RN) which is on passage from Gibraltar to Freetown. HMS Neptune then took over the escort duties from HMS Capetown. (12)
17 Nov 1939
HMS Neptune (Capt. J.A.V. Morse, DSO, RN) and HMS Maidstone (A/Capt. E.H. Longsdon, RN) arrived at Dakar.
HMS Neptune then immediately left again for Freetown. (9)
18 Nov 1939
HMS Neptune (Capt. J.A.V. Morse, DSO, RN) arrived at Freetown. (9)
18 Nov 1939
The battlecruiser HMS Renown (Capt. C.E.B. Simeon, RN), aircraft carrier HMS Ark Royal (Capt. A.J. Power, RN, flying the flag of Vice-Admiral L.V. Wells, CB, DSO, RN), light cruiser HMS Neptune (Capt. J.A.V. Morse, DSO, RN) and the destroyers HMS Hardy (Capt. B.A. Warburton-Lee, RN), HMS Hasty (Lt.Cdr. L.R.K. Tyrwhitt, RN), HMS Hero (Cdr. C.F. Tower, MVO, RN) and HMS Hostile (Cdr. J.P. Wright, RN) departed Freetown for Diego Suarez, Madagascar. (8)
20 Nov 1939
Around 2200Z/20, HMS Hardy (Capt. B.A. Warburton-Lee, RN), HMS Hasty (Lt.Cdr. L.R.K. Tyrwhitt, RN), HMS Hero (Cdr. C.F. Tower, MVO, RN) and HMS Hostile (Cdr. J.P. Wright, RN) parted company with HMS Renown (Capt. C.E.B. Simeon, RN), HMS Ark Royal (Capt. A.J. Power, RN, flying the flag of Vice-Admiral L.V. Wells, CB, DSO, RN) and HMS Neptune (Capt. J.A.V. Morse, DSO, RN).
The destroyers were to form part of a patrol line and conduct a search for German merchant vessels.
In order to intercept escaping German merchant ships or raiders a patrol line was to be established after parting company with force K by HMS Neptune and the destroyers as well as the submarine HMS Clyde (Cdr. W.E. Banks, RN).
The line was joining Freetown and Cape San Roque (in Brazil) and ships were to take up positions as follows; 1)The destroyers from dawn on 23 November, 230 mile length bearing 240° from position 04°00'N, 20°00'W. 2)HMS Clyde from the morning of 22 November, 150 miles bearing 060° from position 05°00'N, 20°00'W. 3)HMS Neptune was to sail from Freetown on 25 November, as she first had to land her German prisoners taken on 22 November, to prolong the patrol line for a further 300 miles 240° from the destroyers section. The RFA tanker Cheffyleaf (5896 GRT, built 1917) was to proceed up and down the line to provide fuel for the ships involved in the search.
To support these ships the aircraft carrier HMS Hermes (Capt. F.E.P. Hutton, RN), the French heavy cruisers Dupleix (Capt. L.L.M. Hameury), Foch (Capt. J. Mathieu) and the large destroyers Cassard (Cdr. R.A.A. Braxmeyer) and Milan (Cdr. M.A.H. Favier) (Force X) departed Dakar on 22 November. They were to patrol parallel to the British line 130 miles north-north-west of it and between 21°00'W and 28°00'W between 24 and 28 November. (10)
21 Nov 1939
HMS Neptune (Capt. J.A.V. Morse, DSO, RN) parted company with HMS Renown (Capt. C.E.B. Simeon, RN) and HMS Ark Royal (Capt. A.J. Power, RN, flying the flag of Vice-Admiral L.V. Wells, CB, DSO, RN) around noon to proceed ahead at high speed to the position where the German merchant vessel Adolph Woermann (8577 GRT, built 1922) had been reported by the British merchant vessel Waimarama (12843 GRT, built 1938).
After the German ship had been intercepted the following day, ' Force K ' set course to proceed to the Cape area via the east of St. Helena to conserve fuel. It had originally been intended to proceed to the West of St. Helena and to search the area for the German supply vessel Altmark. (8)
22 Nov 1939
The German passenger ship Adolph Woermann (8577 GRT, built 1922) is intercepted in the South Atlantic about 530 nautical miles east-south-east of Ascension in position 10°39S, 05°44W by the British light cruiser HMS Neptune (Capt. J.A.V. Morse, DSO, RN). However before the German ship can be captured she is scuttled by her own crew.
The German ship was found to be beyond salvage and after taking crew and passengers prisoners she was sunk with gunfire.
HMS Neptune then set course for Freetown.
25 Nov 1939
HMS Neptune (Capt. J.A.V. Morse, DSO, RN) arrived at Freetown from patrol. She then landed the German prisoners and fuelled.
She departed for patrol later the same day. [See for 20 November 1939, for more info where she was to patrol.] (9)
29 Nov 1939
During the night of 29/30 November 1939, HMS Neptune (Capt. J.A.V. Morse, DSO, RN), fuelled from the RFA tanker Cherryleaf (5896 GRT, built 1917). (9)
3 Dec 1939
HMS Neptune (Capt. J.A.V. Morse, DSO, RN) returned to Freetown from patrol. She departed again later the same day to proceed to Dakar to change both her Seafox aircraft which had become unservicable for other ones and also to renew some boiler brickwork. (13)
4 Dec 1939
HMS Neptune (Capt. J.A.V. Morse, DSO, RN) arrived at Dakar. (14)
7 Dec 1939
The aircraft carrier HMS Hermes (Capt. F.E.P. Hutton, RN), heavy cruisers Foch (Capt. J. Mathieu), Dupleix (Capt. L.L.M. Hameury), light cruiser HMS Neptune (Capt. J.A.V. Morse, DSO, RN) and the destroyers Milan (Cdr. M.A.H. Favier) and Cassard (Cdr. R.A.A. Braxmeyer) departed Dakar for patrol in the mid-Atlantic.
Around 1115N/10, the destroyers HMS Hardy (Capt. B.A. Warburton-Lee, RN), HMS Hero (Cdr. C.F. Tower, MVO, RN) and HMS Hostile (Cdr. J.P. Wright, RN) joined.
Around 1300N/13, HMS Neptune, HMS Hardy, HMS Hero and HMS Hostile parted company.
On 16 December 1939, HMS Hermes, Foch, Dupleix, Milan and Cassard returned to Dakar. (15)
17 Dec 1939
HMS Neptune (Capt. J.A.V. Morse, DSO, RN) arrived at Rio de Janeiro from patrol. (13)
17 Dec 1939
In the morning, ' Force K ', HMS Renown (Capt. C.E.B. Simeon, RN) and HMS Ark Royal (Capt. A.J. Power, RN, flying the flag of Vice-Admiral L.V. Wells, CB, DSO, RN), arrived at Rio de Janeiro.
HMS Ark Royal completed fuelling at 1800 hours and immediately left for the Plate area followed around 0600/18 by HMS Renown.
HMS Neptune (Capt. J.A.V. Morse, DSO, RN) arrived in the afternoon, she departed Rio de Janeiro to join ' Force K ' after fuelling at 1230/18. Her fuelling had only commenced at 0500/18. (8)
18 Dec 1939
HMS Neptune (Capt. J.A.V. Morse, DSO, RN) departed Rio de Janeiro for patrol to search for the German supply vessel Altmark and then to proceed to Freetown. (13)
26 Dec 1939
HMS Neptune (Capt. J.A.V. Morse, DSO, RN) arrived at Freetown from patrol. (14)
3 Jan 1940
HMS Ark Royal (Capt. A.J. Power, RN, flying the flag of Vice-Admiral L.V. Wells, CB, DSO, RN), HMS Neptune (Capt. J.A.V. Morse, DSO, RN), HMS Hardy (Capt. B.A. Warburton-Lee, RN) and HMS Hostile (Cdr. J.P. Wright, RN) departed Freetown for Dakar. (16)
5 Jan 1940
HMS Ark Royal (Capt. A.J. Power, RN, flying the flag of Vice-Admiral L.V. Wells, CB, DSO, RN), HMS Neptune (Capt. J.A.V. Morse, DSO, RN), HMS Hardy (Capt. B.A. Warburton-Lee, RN) and HMS Hostile (Cdr. J.P. Wright, RN) arrived at Dakar from Freetown. (16)
8 Jan 1940
Around 0930A/8, HMS Ark Royal (Capt. A.J. Power, RN, flying the flag of Vice-Admiral L.V. Wells, CB, DSO, RN), HMS Neptune (Capt. J.A.V. Morse, DSO, RN), HMS Hardy (Capt. B.A. Warburton-Lee, RN) and HMS Hostile (Cdr. J.P. Wright, RN) departed Dakar. They were joined around 1600A/8 by HMS Dainty (Cdr. F.M. Walton, RN) which had departed Gibraltar on 4 January. (17)
9 Jan 1940
HMS Ark Royal (Capt. A.J. Power, RN, flying the flag of Vice-Admiral L.V. Wells, CB, DSO, RN), HMS Neptune (Capt. J.A.V. Morse, DSO, RN), HMS Hardy (Capt. B.A. Warburton-Lee, RN), HMS Hostile (Cdr. J.P. Wright, RN) and HMS Dainty (Cdr. F.M. Walton, RN) were joined by HMS Renown (Capt. C.E.B. Simeon, RN), HMS Hasty (Lt.Cdr. L.R.K. Tyrwhitt, RN) and HMS Hero (Cdr. C.F. Tower, MVO, RN).
HMS Hardy, HMS Hostile and HMS Dainty then parted company and set course for Freetown.
The other ships proceeded on patrol. (18)
11 Jan 1940
HMS Hasty (Lt.Cdr. L.R.K. Tyrwhitt, RN) and HMS Hero (Cdr. C.F. Tower, MVO, RN) parted company with HMS Renown (Capt. C.E.B. Simeon, RN), HMS Ark Royal (Capt. A.J. Power, RN, flying the flag of Vice-Admiral L.V. Wells, CB, DSO, RN) and HMS Neptune (Capt. J.A.V. Morse, DSO, RN). (19)
12 Jan 1940
HMS Hasty (Lt.Cdr. L.R.K. Tyrwhitt, RN) and HMS Hero (Cdr. C.F. Tower, MVO, RN) rejoined HMS Renown (Capt. C.E.B. Simeon, RN), HMS Ark Royal (Capt. A.J. Power, RN, flying the flag of Vice-Admiral L.V. Wells, CB, DSO, RN) and HMS Neptune (Capt. J.A.V. Morse, DSO, RN) near Ascension Island. The destroyers had fuelled there from the RFA tanker Cherryleaf (5896 GRT, built 1917). (19)
15 Jan 1940
HMS Renown (Capt. C.E.B. Simeon, RN), HMS Ark Royal (Capt. A.J. Power, RN, flying the flag of Vice-Admiral L.V. Wells, CB, DSO, RN), HMS Neptune (Capt. J.A.V. Morse, DSO, RN), HMS Hasty (Lt.Cdr. L.R.K. Tyrwhitt, RN) and HMS Hero (Cdr. C.F. Tower, MVO, RN) made rendezvous with HMS Ajax (Capt. C.H.L. Woodhouse, CB, RN).
Also on this day HMS Neptune fuelled from from the RFA tanker Cherryleaf (5896 GRT, built 1917).
In the evening the destroyers carried out dummy torpedo attacks on HMS Neptune. Apparently HMS Neptune and the destroyers were not in company with the capital ships and HMS Ajax.
They apparently rejoined these ships the following morning. Presumably after the exercises had been completed. (20)
16 Jan 1940
In the afternoon, HMS Neptune (Capt. J.A.V. Morse, DSO, RN), parted company with HMS Renown (Capt. C.E.B. Simeon, RN), HMS Ark Royal (Capt. A.J. Power, RN, flying the flag of Vice-Admiral L.V. Wells, CB, DSO, RN), HMS Ajax (Capt. C.H.L. Woodhouse, CB, RN), HMS Hasty (Lt.Cdr. L.R.K. Tyrwhitt, RN) and HMS Hero (Cdr. C.F. Tower, MVO, RN).
HMS Neptune then proceeded on patrol independently. (21)
19 Jan 1940
HMS Neptune (Capt. J.A.V. Morse, DSO, RN) intercepted and stopped the Portugese passenger/cargo vessel Quanza (6657 GRT, built 1929). Two German passengers were removed and the Portugese ship was then allowed to continue her voyage. (22)
20 Jan 1940
HMS Neptune (Capt. J.A.V. Morse, DSO, RN) arrived at Freetown from patrol. (23)
25 Jan 1940
HMS Neptune (Capt. J.A.V. Morse, DSO, RN) departed Freetown to make rendezvous with the repair ship HMS Resource (Capt.(Retd.) D.B. O’Connell, RN) which was coming from Gibraltar and then escort the repair ship to Freetown. (22)
27 Jan 1940
Around 0800A/27, HMS Neptune (Capt. J.A.V. Morse, DSO, RN) made rendezvous with the repair ship HMS Resource (Capt.(Retd.) D.B. O’Connell, RN) and her escort, the French destroyer La Railleuse (Lt.Cdr. J.E.C. Hourcade). The French destroyer then proceeded to Dakar where she arrived later the same day. (22)
29 Jan 1940
HMS Neptune (Capt. J.A.V. Morse, DSO, RN) and HMS Resource (Capt.(Retd.) D.B. O’Connell, RN) arrived at Freetown. (24)
4 Feb 1940
HMS Neptune (Capt. J.A.V. Morse, DSO, RN) departed Freetown for Bathurst where she was to unload 100 tons of rice. (25)
6 Feb 1940
HMS Neptune (Capt. J.A.V. Morse, DSO, RN) arrived at Bathurst where she unloaded the rice and then proceeded to Dakar later the same day. (26)
8 Feb 1940
HMS Neptune (Capt. J.A.V. Morse, DSO, RN) is docked at Dakar. (26)
14 Feb 1940
HMS Neptune (Capt. J.A.V. Morse, DSO, RN) is undocked. (26)
16 Feb 1940
HMS Neptune (Capt. J.A.V. Morse, DSO, RN) departed Dakar for Freetown. (26)
18 Feb 1940
HMS Neptune (Capt. J.A.V. Morse, DSO, RN) arrived at Freetown from Dakar. (26)
22 Feb 1940
HMS Neptune (Capt. J.A.V. Morse, DSO, RN) departed Freetown to patrol in the Mid-Atlantic. (25)
2 Mar 1940
HMS Neptune (Capt. J.A.V. Morse, DSO, RN) returned to Freetown from patrol. (27)
4 Mar 1940
HMS Neptune (Capt. J.A.V. Morse, DSO, RN) conducted exercises off Freetown. (28)
5 Mar 1940
HMS Neptune (Capt. J.A.V. Morse, DSO, RN) departed Freetown for Simonstown. She was to pass through position 16°00'S, 06°00'W while en-route. (27)
13 Mar 1940
HMS Neptune (Capt. J.A.V. Morse, DSO, RN) arrived at Simonstown. (28)
8 Apr 1940
HMS Neptune (Capt. J.A.V. Morse, DSO, RN) departed Simonstown for Freetown. She was escorting the whale factory ships Southern Princess (British, 12156 GRT, built 1915) and Terje Viken (British, 20638 GRT, built 1936) as well as ten whale catchers which were with the factory ships. (29)
18 Apr 1940
HMS Neptune (Capt. J.A.V. Morse, DSO, RN) arrived at Freetown. She had parted company with the whale factory ships and the whale catchers around 0800A/16 in position 07°30'S, 03°30'W. She had been ordered to proceed to Freetown as she was to proceed to the Mediterranean.
The heavy cruiser HMS Shropshire. (Capt. J.H. Edelsten, RN), which had departed Capetown on 13 April joined the whale factory ships and their catchers the following day to escort them to Freetown. (30)
18 Apr 1940
The destroyer HMS Defender (Lt.Cdr. St.J.R.J. Tyrwhitt, RN) departed Freetown for Gibraltar.
Later this day the light cruiser HMS Neptune (Capt. J.A.V. Morse, DSO, RN) also departed Freetown for Gibraltar.
Destroyer HMS Decoy (Cdr. E.G. McGregor, RN) departed Dakar on the 19th to make rendez-vous with the other ships later on the 19th near Dakar after which they were to proceed to Gibraltar in company. (8)
23 Apr 1940
HMS Neptune (Capt. J.A.V. Morse, DSO, RN), HMS Decoy (Cdr. E.G. McGregor, RN) and HMS Defender (Lt.Cdr. St.J.R.J. Tyrwhitt, RN) arrived at Gibraltar from Freetown / Dakar.
HMS Decoy then departed Gibraltar for Malta but she was recalled shortly after sailing. (8)
24 Apr 1940
HMS Neptune (Capt. J.A.V. Morse, DSO, RN) and HMS Orion (Capt. G.R.B. Back, RN) departed Gibraltar for Malta. (31)
26 Apr 1940
HMS Neptune (Capt. J.A.V. Morse, DSO, RN) and HMS Orion (Capt. G.R.B. Back, RN) arrived at Malta from Gibraltar. (31)
30 Apr 1940
HMS Neptune (Capt. J.A.V. Morse, DSO, RN) conducted gunnery exercises at Malta.
Later in the day, after she had returned to Malta she embarked A/Adm. A.B. Cunningham, KCB, DSO and 2 Bar, RN, C-in-C Mediterranean Fleet) and departed for Bizerta in the evening. (32)
1 May 1940
HMS Neptune (Capt. J.A.V. Morse, DSO, RN) arrived at Bizerta where A/Adm. Cunningham departed the ship for a conference with the French.
He returned after a few hours and HMS Neptune departed for Malta later in the day. (33)
2 May 1940
HMS Neptune (Capt. J.A.V. Morse, DSO, RN) returned to Malta. (33)
4 May 1940
HMS Neptune (Capt. J.A.V. Morse, DSO, RN) departed Malta for Alexandria. (33)
5 May 1940
HMS Neptune (Capt. J.A.V. Morse, DSO, RN) arrived at Alexandria where A/Adm. A.B. Cunningham, KCB, DSO and 2 Bar, RN, C-in-C Mediterranean Fleet departed the ship. (33)
12 May 1940
While on patrol off Alexandria, the aircraft of HMS Neptune (Capt. J.A.V. Morse, DSO, RN) had to make a forced landing. HMAS Stuart (Cdr. H.M.L. Waller, RAN) proceeded at full speed to take off the crew. She was able to take the stricken aircraft in tow and towed it back to Alexandria. (34)
14 May 1940
The heavy cruisers Duquesne (Capt. G.E. Besineau), Tourville (Capt. A.J.A. Marloy), light cruisers HMS Neptune (Capt. J.A.V. Morse, DSO, RN), HMS Orion (Capt. G.R.B. Back, RN, flying the flag of Vice-Admiral J.C. Tovey, CB, DSO, RN), HMS Delhi (Capt. A.S. Russell, RN), HMS Dragon (Capt. R.G. Bowes-Lyon, MVO, RN), destroyers HMAS Stuart (Cdr. H.M.L. Waller, RAN), HMAS Vampire (Lt.Cdr. J.A. Walsh, RAN, HMAS Vendetta (Lt. R. Rhoades RAN), HMAS Voyager (Lt.Cdr. J.C. Morrow, RAN), HMS Tigre (Capt. M. De La Forest Divonne), Lynx (Cdr. A.M. De Gouyon Matignon de Pontourade) and Forbin (Lt.Cdr. R.C.M. Chartellier) conducted exercises off Alexandria. (35)
15 May 1940
Fleet exercises were carried out of Alexandria in which the following warships are thought to have participated; battleships HMS Warspite (Capt. D.B. Fisher, OBE, RN, flying the flag of A/Admiral Sir A.B. Cunningham, KCB, DSO and 2 Bars, RN), HMS Royal Sovereign (Capt. H.B. Jacomb, RN), heavy cruisers Duquesne (Capt. G.E. Besineau), Tourville (Capt. A.J.A. Marloy), light cruisers HMS Neptune (Capt. J.A.V. Morse, DSO, RN), HMS Orion (Capt. G.R.B. Back, RN, flying the flag of Vice-Admiral J.C. Tovey, CB, DSO, RN), HMS Delhi (Capt. A.S. Russell, RN), HMS Dragon (Capt. R.G. Bowes-Lyon, MVO, RN), Duguay Trouin (Capt. J.M.C. Trolley de Prevaux), destroyers HMAS Stuart (Cdr. H.M.L. Waller, RAN), HMAS Vampire (Lt.Cdr. J.A. Walsh, RAN, HMAS Vendetta (Lt. R. Rhoades RAN), HMAS Voyager (Lt.Cdr. J.C. Morrow, RAN), HMAS Waterhen (Lt.Cdr. J.H. Swain, RN), HMS Tigre (Capt. M. De La Forest Divonne), Lynx (Cdr. A.M. De Gouyon Matignon de Pontourade) and Forbin (Lt.Cdr. R.C.M. Chartellier).
Some of these ships remained out on exercises during the night of 15/16 May.
[It is possible that more ships participated in these exercises but much information is not available.]
21 May 1940
HMS Neptune (Capt. J.A.V. Morse, DSO, RN) and HMS Orion (Capt. G.R.B. Back, RN, flying the flag of Vice-Admiral J.C. Tovey, CB, DSO, RN) conducted exercises off Alexandria. (36)
30 May 1940
During 30/31 May, HMS Neptune (Capt. R.C. O'Conor, RN) and HMS Orion (Capt. G.R.B. Back, RN, flying the flag of Vice-Admiral J.C. Tovey, CB, DSO, RN) conducted exercises off Alexandria. These included night exercises.
Destroyers were also out exercising, the destroyers involved appears to have been the following [it is possible not all these destroyers participated in these exercises and also some destroyer which did participate might not be listed]; HMS Nubian (Cdr. R.W. Ravenhill, RN), HMS Mohawk (Cdr. J.W.M. Eaton, RN), HMS Juno (Cdr. W.E. Wilson, RN), HMS Imperial (Lt.Cdr. C.A.deW. Kitcat, RN), HMS Ilex (Lt.Cdr. P.L. Saumarez, DSC, RN), HMS Hyperion (Cdr. H.St.L. Nicholson, RN), HMS Hostile (Cdr. J.P. Wright, DSO, RN), HMS Hero (Cdr. H.W. Biggs, RN), HMS Hereward (Lt.Cdr. C.W. Greening, RN), HMS Hasty, (Lt.Cdr. L.R.K. Tyrwhitt, RN), HMS Decoy (Cdr. E.G. McGregor, DSO, RN), HMAS Stuart (Cdr. H.M.L. Waller, RAN), HMAS Waterhen (Lt.Cdr. J.H. Swain, RN), HMAS Voyager (Lt.Cdr. J.C. Morrow, RAN) and HMAS Vampire (Lt.Cdr. J.A. Walsh, RAN). (37)
3 Jun 1940
Fleet exercises were carried out of Alexandria in which the following warships are thought to have participated; battleships HMS Royal Sovereign (Capt. H.B. Jacomb, RN, flying the flag of Rear-Admiral H.D. Pridham-Whippell, CB, CVO, RN), HMS Malaya (Capt. Sir A.F.E. Palliser, DSC, RN), Lorraine (Capt. L.M.L. Rey), aircraft carrier HMS Eagle (Capt. A.R.M. Bridge, RN), light cruisers HMS Orion (Capt. G.R.B. Back, RN, flying the flag of Vice Admiral J.C. Tovey, CB, DSO, RN), HMS Neptune (Capt. R.C. O'Conor, RN), HMAS Sydney (Capt. J.A. Collins, RAN), HMS Gloucester (Capt. F.R. Garside, CBE, RN), destroyers HMAS Stuart (Cdr. H.M.L. Waller, RAN), HMAS Vampire (Lt.Cdr. J.A. Walsh, RAN), HMAS Voyager (Lt.Cdr. J.C. Morrow, RAN), HMS Decoy (Cdr. E.G. McGregor, DSO, RN), HMS Havock (Lt.Cdr. R.E. Courage, DSO, RN), HMS Hereward (Lt.Cdr. C.W. Greening, RN), HMS Hostile (Cdr. J.P. Wright, DSO, RN), HMS Janus (Cdr. J.A.W. Tothill, RN), HMS Juno (Cdr. W.E. Wilson, RN), HMS Mohawk (Cdr. J.W.M. Eaton, RN) and HMS Nubian (Cdr. R.W. Ravenhill, RN).
Most of these ships remained out on exercises during the night of 3/4 June.
[It is possible that more ships participated in these exercises but not much information is available.]
6 Jun 1940
The 7th Cruiser Squardon, made up of HMS Orion (Capt. G.R.B. Back, RN, flying the flag of Vice Admiral J.C. Tovey, CB, DSO, RN), HMS Neptune (Capt. R.C. O'Conor, RN), HMS Gloucester (Capt. F.R. Garside, CBE, RN) and HMAS Sydney (Capt. J.A. Collins, RAN) conducted exercises off Alexandria. (38)
11 Jun 1940
Operations in the Eastern Mediterranean, 11 to 15 June 1940.
Around 0100B/11, Cruisers of the 7th Cruiser Squadron; (HMS Orion (Capt. G.R.B. Back, RN, flying the flag of Vice Admiral J.C. Tovey, CB, DSO, RN), HMS Neptune (Capt. R.C. O'Conor, RN), HMS Gloucester (Capt. F.R. Garside, CBE, RN), HMS Liverpool (Capt. P.A. Read, RN) and HMAS Sydney (Capt. J.A. Collins, RAN) departed Alexandria.
Around 0230B/11, other ships of the Mediterranean Fleet departed Alexandria; battleships HMS Warspite (Capt. D.B. Fisher, OBE, RN flying the flag of A/Admiral Sir A.B. Cunningham, KCB, DSO and 2 Bars, RN), HMS Malaya (Capt. Sir A.F.E. Palliser, DSC, RN) and aircraft carrier HMS Eagle (Capt. A.R.M. Bridge, RN). They were escorted by the destroyers HMAS Stuart (Cdr. H.M.L. Waller, RAN), HMAS Vampire (Lt.Cdr. J.A. Walsh, RAN), HMAS Voyager (Cdr. J.C. Morrow, RAN), HMS Hasty, (Lt.Cdr. L.R.K. Tyrwhitt, RN), HMS Ilex (Lt.Cdr. P.L. Saumarez, DSC, RN), HMS Janus (Cdr. J.A.W. Tothill, RN), HMS Juno (Cdr. W.E. Wilson, RN) and HMS Nubian (Cdr. R.W. Ravenhill, RN).
The destroyers HMS Dainty (Cdr. M.S. Thomas, RN) and HMS Diamond (Lt.Cdr. P.A. Cartwright, RN) had already departed Malta on the 10th to join the Fleet at sea.
The Fleet was joined at 0845B/11, by HMS Caledon (Capt. C.P. Clarke, RN) which had departed Port Said at 2355B/10. Around 1330B/11, HMS Calypso (Capt. H.A. Rowley, RN) also joined the fleet having departed Port Said on 9 June for patrol in the Kithera Channel. Also in the afternoon destroyer HMS Mohawk (Cdr. J.W.M. Eaton, RN) joined coming from Alexandria.
In the evening, around 1845B/11, the destroyers HMS Havock (Lt.Cdr. R.E. Courage, DSO, RN), HMS Hereward (Lt.Cdr. C.W. Greening, RN), HMS Hero (Cdr. H.W. Biggs, RN), HMS Hostile (Cdr. J.P. Wright, DSO, RN), HMS Hyperion (Cdr. H.St.L. Nicholson, RN) and HMS Imperial (Lt.Cdr. C.A.deW. Kitcat, RN) also joined. These destroyers (minus HMS Hereward) had been on an A/S hunt to the west of Alexandria during 10/11 June 1940. A little over an hour later the three Australian destroyers then left the Fleet for Alexandria where they arrived on the 12th.
Around 2015B/11, HMS Caledon, HMS Calypso and HMS Dainty split off from the fleet for a sweep to the south of Crete. During this sweep HMS Calypso was torpedoed by the Italian submarine Bagnolini around 0300B/12. She sank at 0334B/12. HMS Caledon and HMS Dainty then picked up the survivors and landed them on the 13th at Alexandria.
During the night of 11/12 June 1940, HMS Orion and HMAS Sydney made a sweep of Benghazi but had no contact with the enemy. At the same time HMS Gloucester and HMS Liverpool made a sweep of Tobruk. They shelled the harbour and coast defence ship San Giorgio inside it. Also they engaged three Italian auxiliary gunboats; Palmaiola, Riccardo Grazioli Lante and Giovanni Berta. The last one was sunk during the engagement.
All British ships returned to Alexandria on 14/15 June except for HMS Diamond which returned to Malta. [The date she arrived there is currently not known to us.] (39)
21 Jun 1940
Operation MD 3
Bombardment of Bardia, 21 June 1940.
An Allied force sailed on 20 June 1940 to carry out operation MD 3, the object was to destroy military objectives at Bardia and to destroy enemy submarines.
At 0800B/20, the destroyers HMS Hyperion (Cdr. H.St.L. Nicolson, RN), HMS Havock (Lt.Cdr. R.E. Courage, DSO, RN), HMS Hereward (Lt.Cdr. C.W. Greening, RN), HMS Hero (Cdr. H.W. Biggs, RN) and HMS Hostile (Cdr. J.P. Wright, DSO, RN), sailed to carry out an A/S sweep along the North African coast as far as the longitude of Tobruk, reaching this position at 0400B/21 and to return to Alexandria at 1830B/21.
A second force, made up of the French battleship Lorraine (Capt. L.M.L. Rey), the British light cruisers HMS Orion (Capt. G.R.B. Back, RN, flying the flag of Vice-Admiral J.C. Tovey, CB, DSO, RN), HMS Neptune (Capt. R.C. O’Coner, RN), the Australian light cruiser HMAS Sydney (Capt. J.A. Collins, RAN) and the destroyers HMAS Stuart (Cdr. H.M.L. Waller, RAN), HMS Decoy (Cdr. E.G. McGregor, RN), HMS Dainty (Cdr. M.S. Thomas, RN) and HMS Hasty (Lt.Cdr. L.R.K. Thyrwitt, RN) departed Alexandria at 1130/20 to conduct a bombardment of Bardia, Libya.
After this force had sailed, information was received from air reconnaissance that there were three enemy cruisers, three destroyers, two submarines and ten other ships over 40 feet long and eleven smaller vessels at Tobruk. It was therefore decided to provide cover for the destroyers of the A/S sweep. Another force left Alexandria at 1730B/20 with orders to be in a position 40 nautical miles north of Tobruk at 0600B/21 and if no enemy forces were encountered to return to Alexandria by 2000B/21. This force was made up of the French cruisers Suffren (Capt. R.J.M. Dillard) and Duguay Trouin (Capt. J.M.C. Trolley de Prevaux). They were escorted by the British destroyers HMS Nubian (Cdr. R.W. Ravenhill), HMS Ilex (Lt.Cdr. P.L. Saumarez, DSC, RN) and HMS Imperial (Lt.Cdr. C.A.deW. Kitkat, RN).
The actual bombardment.
The bombarding squadron arrived off the coast at 0500B/21, a few minutes before sunrise. As he could not avoid the disadvantage of the dawn light, Vice-Admiral J.C. Tovey, CB, DSO, RN had decided to make the last 20 nautical miles or so of his approach at that time, and to attack while the sun was still low enough to dazzle the Italian gunners on the shore. The ships spread as their instructions prescribed, and stood to the south-westward towards Bardia in the order HMS Orion, Lorraine, HMS Neptune and HMAS Sydney with two destroyers on the outer bow of each wing ship, HMAS Stuart and HMS Decoy to port and HMS Dainty and HMS Hasty to starboard.
At 0548 hours, HMS Orion opened fire, followed immediately by the other big ships except HMAS Sydney, which joined in about five minutes later, by which time the squadron had altered course to 145 degrees. The destroyers also started firing after the turn. At 0610 hours the squadron withdrew to the north-westward.
HMS Orion started by ranging on the lighthouse on Point Bluff at about 13500 yards range, it stood close to the position of the Italian coast defence battery, and at that time was the ony object in the target area that could be seen clearly to the haze. After turning to the south-westerly course at 0550 hours, she fired on the battery position itself until it was clear that the battery was not replying. Then at 0600 hours, she shifted to her second target area, the Wadi Jefran. Shooting was difficult as communication with her spotter aircraft could not be established.
The Lorraine attacked various targets in the left half of the area assigned to HMS Neptune, the town of Bardia, with her 13.4” guns, and perhaps silenced an anti-aircraft battery in that area with her 5.5” guns.
HMS Neptune ranged on the barracks in the left half of the town. As soon as she began firing for effect, however, the smoke of the explosions prevented her aircraft from observing, so she fired a few salvoes blind, which, with the Lorraine’s fire in the same quarter, raised cloud of dust that hid all that part of the target area. Accordingly HMS Neptune shifted her fire right, by steps, to attack an anti-aircraft battery in the northern half of that area and on regaining communication with her spotter aircraft during this sweep, she fired seventeen 4-gun salvoes with its help and the battery ceased fire.
HMAS Sydney fired at one target throughout, the camp in the centre of her area, starting a fire in one corner and probably causing losses amongst troops that were seen to leave the camp during the shoot. Smoke and dust obscured the target, so that she only saw half her shell burst. An unfortunate attack by fighter aircraft from the R.A.F. drove the spotter aircraft for HMAS Sydney out of action after her second salvo.
As for the destroyers, HMAS Stuart and HMS Decoy, now ahead of the line fired into the area of HMS Neptune at the wireless masts and the barracks respectively from a range of about 12000 yards. Smoke and dust made spotting difficult, and HMS Decoy fired only four salvoes in consequence. On the other hand HMAS Stuart could distinguish her shell bursts from those of HMS Neptune and the ones from the Lorraine so she continued firing until the smoke at last made spotting impossible.
HMS Dainty and HMS Hasty were astern of HMAS Sydney. The former attacked a house near the artillery headquarters, and believed she set it on fire. She also fired at the wireless masts. The main range for her shoot was about 14000 yards. Like the other destroyers she found her fall of shot hard to distinguish from that of the bigger ships. HMS Hasty fired on the wireless station, probably the same building as one of targets of the Lorraine. HMS Hasty then shifted her fire to a party of troops coming from the camp in the area HMAS Sydney was firing on. She could not see her fall of shot when firing at these troops.
Rounds expended in the shore bombardment was as follows; HMS Orion 118 rounds of 6”, Lorraine 53 rounds of 13.4” and 37 rounds of 5.5”, HMS Neptune 134 rounds of 6”, HMAS Sydney 148 rounds of 6”, HMAS Stuart 39 rounds of 4.7”, HMS Decoy 12 rounds of 4.7”, HMS Dainty 56 rounds of 4.7” and HMS Hasty 47 rounds of 4.7”.
All ships returned to Alexandria later on the 21st.
Results
The Commander-in-Chief, Mediterranean Fleet, called this bombardment ‘ a useful minor operation, in which the damage caused fully justified the ammunition expended ‘. So far as could be judged from air reconnaissance / photographs and from what the ships could see at the time, the squadron destroyed some ammunition and other storehouses in the Wadi Jefran, blew up an anti-aircraft battery’s ammunition dump, and damaged or set fire to barracks and other government buildings in and near the town.
The Italians did not reply to the fire, indeed the squadron could see no coast-defence guns in position. The only opposition came from anti-aircraft guns, which fired a few rounds at the spotting aircraft without effect. (40)
22 Jun 1940
Operation BQ
Bombardment of Augusta, Sicily and raid to the south of the Strait of Messina.
Composition of forces taking part.
Force A: Battleship HMS Warspite (Capt. D.B. Fisher, OBE, RN, flying the flag of the C-in-C, Mediterranean Fleet, A/Admiral Sir A.B. Cunningham, KCB, DSO and 2 Bars, RN), light cruisers HMS Neptune (Capt. R.C. O'Conor, RN), HMAS Sydney (Capt. J.A. Collins, RAN), destroyers HMS Nubian (Cdr. R.W. Ravenhill, RN), HMS Mohawk (Cdr. J.W.M. Eaton, RN), HMS Dainty (Cdr. M.S. Thomas, RN), HMS Defender (Lt.Cdr. St.J.R.J. Tyrwhitt, RN) and HMS Decoy (Cdr. E.G. McGregor, DSO, RN).
Force B: Light cruisers HMS Orion (Capt. G.R.B. Back, RN, flying the flag of Vice Admiral J.C. Tovey, CB, DSO, RN), HMS Liverpool (Capt. P.A. Read, RN), HMS Gloucester (Capt. F.R. Garside, CBE, RN) destroyers HMS Juno (Cdr. W.E. Wilson, RN) and HMS Janus (Cdr. J.A.W. Tothill, RN).
Force C: Battleships HMS Royal Sovereign (Capt. H.B. Jacomb, RN, flying the flag of Rear-Admiral H.D. Pridham-Whippell, CB, CVO, RN), HMS Ramillies (Capt. H.T. Baillie-Grohman, OBE, DSO, RN), aircraft carrier HMS Eagle (Capt. A.R.M. Bridge, RN), destroyers HMS Hyperion (Cdr. H.St.L. Nicholson, RN), HMS Hasty, (Lt.Cdr. L.R.K. Tyrwhitt, RN), HMS Havock (Lt.Cdr. R.E. Courage, DSO, RN), HMS Hereward (Lt.Cdr. C.W. Greening, RN), HMS Hero (Cdr. H.W. Biggs, RN), HMS Hostile (Cdr. J.P. Wright, DSO, RN), HMS Ilex (Lt.Cdr. P.L. Saumarez, DSC, RN), HMS Imperial (Lt.Cdr. C.A.deW. Kitcat, RN).
Force D: French heavy cruisers Duquesne (Capt. G.E. Besineau, flying the flag of Vice-Admiral R.E. Godfroy), Suffren (Capt. R.J.M. Dillard), light cruiser Duguay Trouin (Capt. J.M.C. Trolley de Prevaux), destroyers HMAS Stuart (Cdr. H.M.L. Waller, RAN) and HMAS Vampire (Lt.Cdr. J.A. Walsh, RAN).
Sailing of the forces and the cancellation of the operation.
At 1700B/22 HMS Eagle from Force C sailed with all the destroyers assigned to that force. They were followed at 2000 hours by the two R-class battleships assigned to that force.
At 2130B/22 Force B sailed.
At 2200B/22 Force A sailed.
At 2153 hours a signal was received from the Admiralty ordering the cancellation of the operation due to the French armistice. Following this signal the sailing of Force D was cancelled. Force A returned to the harbour immediately. Forces B and C were ordered to return to harbour on the morning of the next day. Orders were also issued to the Vice-Admiral Malta to not sail a convoy to Alexandria as had been intended under the cover of the operation. (41)
27 Jun 1940
Operation MA 3, convoy’s from Malta and convoy AS 1 from the Dardanelles.
Convoy AS 1 from the Aegean (mostly from the Dardanelles) to Port Said.
This convoy was made up of the following ships:
From the Dardanelles: British merchants: Deebank (5060 GRT, built 1929), Destro (3553 GRT, built 1920), Eastlea (4267 GRT, 1924), Egyptian Prince (3490 GRT, 1922), Palermo (2797 GRT, built 1938), Volo (1587 GRT, built 1938) and the tug Brittania towing the small river tanker Danube Shell II (704 GRT, built 1934).
From Kalamata: British merchant Destro (3553 GRT, built 1920).
From Izmir: British merchant African Prince (4653 GRT, built 1939).
The Dutch merchant Ganymedes (2682 GRT, built 1917) also joined the convoy. Her port of origin is currently unknown to us.
These ships were escorted by the British light cruisers HMS Caledon (Capt. C.P. Clarke, RN), HMS Capetown (Capt. T.H. Back, RN, senior officer of the escort) and the destroyers HMS Nubian (Cdr. R.W. Ravenhill, RN), HMS Mohawk (Cdr. J.W.M. Eaton, RN), HMAS Vampire (Lt.Cdr. J.A. Walsh, RAN) and ORP Garland (Kpt. mar. (Lt.Cdr.) A. Doroszkowski). These ships had sailed from Port Said (HMS Capetown, HMS Nubian, HMS Mohawk. These ships had sailed late in the afternoon of the 26th.) and Alexandria (HMS Caledon, HMAS Vampire and ORP Garland. These ships had sailed in the evening of the 26th).
The escort joined up with the convoy late in the morning of 28 June 1940 and then proceeded towards Port Said where it arrived on 3 July 1940. In the afternoon of 29 June 1940, when near the Doro Channel, the convoy had been bombed by Italian aircraft but no damage had been sustained. The next day, when between Gavdo Island and Crete the convoy was attacked again by the Italian air force but again no damage was sustained. Following the first air attack HMS Orion, HMS Neptune and HMAS Sydney proceeded to the convoy to provide additional protection. They were near the convoy when it was attacked for the second time and were attacked themselves by eight enemy aircraft. Heavy bombs fell close to the Orion and Neptune but no actual hits were sustained although Neptune suffered some splinter damage to her aircraft and some superficial damage to the superstructure as well. The aircraft was jettisoned due to the danger of fire. Three of her crew were injured. The three cruisers left the convoy at 0900/1. When they arrived at Alexandria in the second half of 1 July 1940, HMAS Sydney landed 44 survivors from the Espero.
Operation MA 3
On 27 June 1940, five destroyers, (Force C), HMS Decoy (Cdr. E.G. McGregor, DSO, RN), HMS Dainty (Cdr. M.S. Thomas, RN), HMS Defender (Lt.Cdr. St.J.R.J. Tyrwhitt, RN), HMS Ilex (Lt.Cdr. P.L. Saumarez, DSC, RN) and HMAS Voyager (Lt.Cdr. J.C. Morrow, RAN) departed Alexandria at 0600B/27 to carry out an A/S hunt off the Anti-Kithera channel on 28 June leaving that area at 2200B/28 to arrive at Malta at 1800B/29 to provide escort for two groups of merchants ships that were to proceed from Malta to Alexandria. They were to sail at 2100B/29 with a 13 knot convoy and a 9 knot convoy. The convoy’s were to arrive at Alexandria on 2 July and 4 July respectively. The fast convoy was to be escorted by HMS Dainty, HMS Ilex and one destroyer from Malta, HMS Diamond (Lt.Cdr. P.A. Cartwright, RN). The slow convoy was to be escorted by the other destroyers, HMS Decoy, HMS Defender and HMAS Voyager. In the end the sailing of both these convoy's was cancelled.
Also on 27 June 1940, at 1100 hours, to provide cover for the convoy’s from a position about 60 nautical miles north of their track. They were to return to Alexandria at 1800/3. Force B, made up of the battleships HMS Royal Sovereign (Capt. H.B. Jacomb, RN, flying the flag of Rear-Admiral H.D. Pridham-Whippell, CB, CVO, RN), HMS Ramillies (Capt. H.T. Baillie-Grohman, OBE, DSO, RN), aircraft carrier HMS Eagle (Capt. A.R.M. Bridge, RN) and the destroyers HMS Hyperion (Cdr. H.St.L. Nicholson, RN), HMS Hasty, (Lt.Cdr. L.R.K. Tyrwhitt, RN), HMS Havock (Lt.Cdr. R.E. Courage, DSO, RN), HMS Hereward (Lt.Cdr. C.W. Greening, RN), HMS Hero (Cdr. H.W. Biggs, RN), HMS Juno (Cdr. W.E. Wilson, RN) and HMS Janus (Cdr. J.A.W. Tothill, RN) were to leave Alexandria at 1230B/28. They were to cruise to the north-west of position 35°N, 22°E from 2000B/29 until the convoy had passed.
The 7th Cruiser Squadron (Force A), made up of (1st Division) HMS Orion (Capt. G.R.B. Back, RN, flying the flag of Vice Admiral J.C. Tovey, CB, DSO, RN), HMS Neptune (Capt. R.C. O'Conor, RN), HMAS Sydney (Capt. J.A. Collins, RAN), (2nd Divsion) HMS Gloucester (Capt. F.R. Garside, CBE, RN) and HMS Liverpool (Capt. P.A. Read, RN). These had departed Alexandria also at 1100B/27 to provide close cover for the convoy’s coming from Malta.
On 28 June air reconnaissance reported three Italian destroyers about 75 nautical miles west-south-west of Cape Matapan and the 7th Cruiser Squadron set a course to intercept which they successfully did at 1830 hours. In a long range action one of the Italian destroyers, the Espero was sunk by HMAS Sydney. She attacked the British cruisers so that the other two destroyers had a chance to escape in which the succeeded. During the action HMS Liverpool was hit by a 4.7" shell which cut the degaussing wire. After this action it was decided the next to postpone the sailing of the convoy’s and to send HMS Gloucester and HMS Liverpool to Port Said (Bitter Lakes) to complete with ammunition. The remaining forces were ordered to cover convoy AS 1 coming from the Aegean. As said above the other three cruisers of the 7th Cruiser Squadron returned to Alexandria on 1 July. HMS Royal Sovereign, HMS Ramillies, HMS Eagle and their escorting destroyers returned to Alexandria around 1000B/2.
The A/S sweep by the five destroyers also proved very successful as they sank three Italian submarines. On the 27th the Console Generale Liuzzi by HMS Decoy, HMS Defender and HMS Ilex and on the 29th HMS Decoy, HMS Dainty, Defender, HMS Ilex and HMAS Voyager carried out depth charge attacks on three Italian submarines. They sank the Uebi Scebelli and damaged the Salpa. The Capitano Tarantini managed to escape. Following the sinking of the Uebi Scebelli, HMAS Voyager picked up secret Italian documents and she was ordered to proceed with these documents to Alexandria where she arrived in the second half of 30 June 1940. The destroyers HMAS Stuart (Capt. H.M.L. Waller, RAN) and HMS Hostile (Cdr. J.P. Wright, DSO, RN) proceeded to sea from Alexandria P.M. on the 29th to join the hunt for other Italian submarines of which the patrol positions were mentioned in these secret documents. On completion of their A/S hunt they joined convoy AS 1. HMS Dainty had picked up 10 officers and 72 ratings from the Liuzzi and Uebi Scebelli. The destroyers, minus HMAS Voyager continued their A/S sweep until 2000B/30 but no further enemy submarines were encountered. HMAS Voyager, which had besides survivors, also recovered secret enemy documents from the water, had parted company around 1810B/30 to take these to Alexandria.
Convoy AS 1 arrived at Port Said on 2 July 1940. It's (close) escorts arrived at Alexandria also on 2 July 1940. (41)
7 Jul 1940
Operation MA 5 and the resulting battle of Punta Stilo on 9 July 1940.
The passage of convoys MF 1 (fast) and MS 1 (slow) from Malta to Alexandria with evacuees and fleet stores.
After the cancellation of Operation MA 3 a new plan to pass the convoys from Malta to Alexandria was made.
The Mediterranean Fleet, less HMS Ramillies and the 3rd Cruiser Squadron (HMS Caledon and HMS Capetown) departed Alexandria on 7 July 1940 to carry out operation MA 5, the object being to cover convoys MF 1 (fast) and MS 1 (slow) from Malta to Alexandria with evacuees and fleet stores.
The composition of these convoys were as follows:
Convoy MF 1, the fast convoy: This convoy departed Malta on 9 July 1940 and arrived at Alexandria on 11 July 1940 and was made up of the Egyptian merchant El Nil (7775 GRT, built 1916), British merchants Knight of Malta (1553 GRT, built 1929), Rodi (3220 GRT, built 1928, former Italian).
Convoy MS 1, the slow convoy: This convoy departed Malta on 10 July 1940 and arrived at Alexandria on 14 July 1940 and was made up of the British merchant ships Kirkland (1361 GRT, built 1934), Misirah (6836 GRT, built 1919), Tweed (2697 GRT, built 1926), Zealand (2726 GRT, built 1930) and the Norwegian merchant Novasli (3194 GRT, built 1920).
Cover for these convoys was provided by ships of the Mediterranean Fleet which was divided into three groups:
Force A: Light cruisers HMS Orion (Capt. G.R.B. Back, RN, flying the flag of Vice Admiral J.C. Tovey, CB, DSO, RN), HMS Neptune (Capt. R.C. O'Conor, RN), HMS Gloucester (Capt. F.R. Garside, CBE, RN), HMS Liverpool (Capt. P.A. Read, RN) and HMAS Sydney (Capt. J.A. Collins, RAN) and the destroyer HMAS Stuart (Capt. H.M.L. Waller, RAN).
Force B: Battleship HMS Warspite (Capt. D.B. Fisher, OBE, RN flying the flag of A/Admiral Sir A.B. Cunningham, KCB, DSO and 2 Bars, RN), destroyers HMS Nubian (Cdr. R.W. Ravenhill, RN), HMS Mohawk (Cdr. J.W.M. Eaton, RN), HMS Hero (Cdr. H.W. Biggs, RN), HMS Hereward (Lt.Cdr. C.W. Greening, RN) and HMS Decoy (Cdr. E.G. McGregor, DSO, RN).
Force C: Battleships HMS Royal Sovereign (Capt. H.B. Jacomb, RN, flying the flag of Rear-Admiral H.D. Pridham-Whippell, CB, CVO, RN), HMS Malaya (Capt. Sir A.F.E. Palliser, DSC, RN), aircraft carrier HMS Eagle (Capt. A.R.M. Bridge, RN), destroyers HMS Hyperion (Cdr. H.St.L. Nicholson, RN), HMS Hasty, (Lt.Cdr. L.R.K. Tyrwhitt, RN), HMS Hostile (Cdr. J.P. Wright, DSO, RN), HMS Ilex (Lt.Cdr. P.L. Saumarez, DSC, RN), HMS Imperial (Lt.Cdr. C.A.deW. Kitcat, RN), HMS Dainty (Cdr. M.S. Thomas, RN), HMS Defender (Cdr. St.J.R.J. Tyrwhitt, RN), HMS Janus (Cdr. J.A.W. Tothill, RN), HMS Juno (Cdr. W.E. Wilson, RN), HMAS Vampire (Lt.Cdr. J.A. Walsh, RAN) and HMAS Voyager (Cdr. J.C. Morrow, RAN).
8 July 1940.
All forces were clear of the harbour by midnight during the night of 7/8 July 1940. All forces were to make rendez-vous in position 36°30’N, 17°40’E at 1400B/10. HMS Liverpool, who was en-route from Port Said to Alexandria with spare 6" ammunition from the East Indies station, arrived at Alexandria at 0202 hours. She then quickly unloaded some of the 6" ammuntion and topped off with fuel. She departed Alexandria at 0520 hours to join her force at sea. HMS Imperial had to return to Alexandria with defects.
Shortly before midnight, at 2359 hours, HMS Hasty reported that she sighted a surfaced submarine at a range of 1000 yards. A full pattern depth charge attack was made an the submarine was thought to have been sunk. One hour later when about to rejoin Force C she carried out another attack on a confirmed contact. It was consided that this attack caused damage to another Italian submarine.
At 0807B/8 a report was received from the submarine HMS Phoenix (Lt.Cdr. G.H. Nowell, RN) that she had sighted two enemy battleships escorted by four destroyers in position 35°23’N, 17°45’E, steering 180° at 0515B/8. It was suspected that this force was covering an important enemy convoy. The Vice-Admiral, Malta, was ordered to arrange air reconnaissance to the eastward and to the Rear-Admiral, Alexandria to arrange for a flying boat to shadow this force. Two enemy submarines were sighted by A/S patrols from HMS Eagle.
The Italians were aware of the Mediterranean Fleet being at sea as the Fleet had been reported by the Italian submarine Beilul. This resulted in air attacks on the Fleet during the 8th.
Damage was done to HMS Gloucester which was hit on the compass platform causing seven officers to be killed and three wounded. Amongst the officers killed was the ships Captain. Besides the officers eleven ratings were killed and six were wounded.
At 1510B/8 a flying boat reported a force of three battleships, six cruisers and seven destroyers in position 33°18’N, 19°45’E, steering 340°. At 1610 hours it was reported that this force had changed course to 070°. The flying boat that reported this force had to return to base at 1715 hours but no relief was available to continue shadowing. The Commander-in-Chief therefore, in the absence of further information, decided to continue the course of the Fleet to the north-westward in order to get between the enemy and his base. A mean line of advance of 310° at 20 knots was therefore maintained during the night.
9 July 1940.
There were no incidents during the night and at 0600 hours the Fleet was concentrated in position 36°55’N, 20°30’E. An air search by aircraft from HMS Eagle was commenced at dawn between 180° and 300°. Meanwhile a mean line of advance of 300° at 16 knots was maintained by the Fleet.
The first enemy report was received from a flying boat from Malta who reported two battleships, four cruisers and ten destroyers at 0732 hours in position 37°00’N, 17°00’E, steering 330° and subsequent reports showed that there was a further large force of cruisers and destroyers in the vicinity.
A second search by aircraft from HMS Eagle covered these positions and by 1130 hours it was considered that the enemy’s position was sufficiently well established to launch the air striking force. At this time the enemy fleet was approximately 90 miles to the westward of our forces. Unfortunately, touch with the enemy fleet was lost by the shadowing aircraft at this time and shortly afterwards it appears that the enemy turned to the southward. The striking force therefore failed to locate the enemy battlefleet, but carried out an attack on some cruisers at about 1330 hours without result.
Touch was regained with the enemy battleships at 1340 hours by a relief shadower from HMS Eagle and by a flying boat. The air striking force was flown of again at 1539 hours shortly after action was joined and they are believed to have scored one hit on a cruiser. All aircraft from HMS Eagle returned. In the meanwhile reports from shadowing aircraft show that the enemy force consisted of two battleships of the Cavour-class, twelve cruisers and twenty destroyers, and that they appeared to be keeping close to the coast of Calabria.
At 1400 hours the British Fleet as in position 38°02’N, 18°40’E. The 7th Cruiser Squadron was 8 nautical miles ahead of HMS Warspite, with HMS Royal Sovereign, HMS Eagle and HMS Malaya 10 nautical miles astern. Destroyers were screening these ships. The mean line of advance the Fleet was 270° the speed being limited by that of HMS Royal Sovereign. The Commander-in-Chief was obliged to use HMS Warspite as a battle cruiser to keep ahead of the battle Squadron, in order to support the cruisers, who being so few and lacking 8” ships, were very weak compared to the enemy’s cruiser force.
At 1510 hours the enemy, consisting of six 8” cruisers and a number of destroyers, was sighted steering about 020°. HMS Eagle and the 19th division (HMAS Stuart, HMAS Vampire and HMAS Voyager) were now detached from the 1st Battle Squadron and the damaged HMS Gloucester was ordered to join them. At 1514 hours HMS Neptune sighted the enemy battlefleet bearing 260° from HMS Warspite The ensuing action can best be described in five phases.
Phase 1.
A short action with enemy 8” and 6” cruisers in which our own cruisers were out ranged and came under a very heavy fire. HMS Warspite intervened and engaged successively two 8” and two 6” cruisers at long range, which after a few salvos turned away. One hit might have been obtained on a 8” cruiser.
Phase 2.
After a short lull, during which HMS Warspite fell back on HMS Malaya who was now proceeding ahead of HMS Royal Sovereign. HMS Warspite and HMS Malaya then engaged two battleships of the Cavour-class at 1553 hours. HMS Warspite was straddled at 26000 yards and she herself scored a hit on one of the enemy battleships (the Guilio Cesare). The enemy then turned away making smoke. HMS Malaya was outranged and by now HMS Royal Sovereign was now well astern and never got into action. The 7th Cruiser Squadron continued their action with the enemy cruisers, who appeared to be working round to the north with the intention of engaging HMS Eagle. They were driven off with the assistance of a few salvoes from HMS Warspite.
Phase 3.
Enemy destroyers moved out to attack, but half heartedly, and made a large volumes of smoke which soon obscured the larger targets. Destroyers were now ordered to counter attack the enemy destroyers, in which they were assisted by the 7th Cruiser Squadron, but before the range could be closed sufficiently to do damage to them the enemy retired behind their extensive smoke screen.
Phase 4.
The British fleet chased up the smoke but, appreciating that to pass through it would be playing the enemy’s game, and suspecting that enemy submarines might be in the vicinity, the Commander-in-Chief worked round to the northward and windward of the screen. When clear, all enemy forces were out of sight and air attacks had started. The British fleet was now (1652 hours) only 45 miles from the coast of Calabria and continued on a westerly course until within 25 miles of the Punta Stilo lighthouse.
Phase 5.
A succession of heavy bombing attacks were carried out between 1640 and 1912 hours. At least nine distinct bombing attacks were made and it is estimated that probably some 100 aircraft took part. Many attacks were made on HMS Eagle, but the fleet suffered no damage. Between 1640 and 1740 hours the fleet made good a course of 270° and from 1740 hours of 220°, this latter course being selected in the hope that the enemy would renew the fight. At 1830 hours it became clear that the enemy could not be intercepted before reaching Messina and course was altered to the south-eastward to open the land, turning back at 2115 hours to 220° for a position south of Malta.
During the action one of the aircraft from HMS Warspite was damaged by gun blast of her own gunfire and had to be jettisoned. The other aircraft was catapulted for action observation. After this mission was completed the aircraft landed at Malta. During the night there were no incidents.
10 July 1940.
At 0800 hours, the fleet was in position 35°24’N, 15°27’E, steering west, and remained cruising to the southward of Malta throughout the day while destroyers were sent there to refuel. The following fuelling programme was carried out. At 0530 hours the following destroyers arrived at Malta; HMAS Stuart, HMS Dainty, HMS Defender, HMS Hyperion, HMS Hostile, HMS Hasty, HMS Ilex and HMS Juno. After they had fuelled they sailed again at 1115 hours and rejoined the fleet at 1525 hours.
HMS Hero, HMS Hereward, HMS Decoy, HMAS Vampire and HMAS Voyager were then sent in, the last three to sail with convoy MS 1 after fuelling.
At 2030 hours, HMS Royal Sovereign with HMS Nubian, HMS Mohawk and HMS Janus were detached to refuel and to rejoin the fleet before noon the next day.
HMS Gloucester and HMAS Stuart were detached to join convoy MF 1, which had been sailed from Malta at 2300B/9 escorted by HMS Jervis (Capt. P.J. Mack, DSO, RN), HMS Diamond (Lt.Cdr. P.A. Cartwright, RN) and HMAS Vendetta (Lt.Cdr. R. Rhoades RAN).
In the morning an air raid took place at Malta at 0855 hours. Three or four of the attackers were shot down. Destroyers that were fuelling at Malta were not hit.
Flying boat reconnaissance of Augusta had located three cruisers and eight destroyers in harbour and at 1850 hours a strike force was flown off from HMS Eagle to carry out a dust attack. Unfortunately the enemy forces left harbour before the attack force arrived. One flight however located a Navigatori class destroyer in a small bay to the northward, which was sunk, this was the Leone Pancaldo which was later raised and repaired. The other flight did not drop their torpedoes. All aircraft landed safely at Malta.
At 2100 hours the position of the fleet was 35°28’N, 14°30’E, steering 180°. There were no incidents during the night.
In view of the heavy bombing attacks experienced during the last three days, the Commander-in-Chief has requested the Air Officer Commander-in-Chief, Middle East, to do anything possible to occupy the Italian air forces during the passage of the fleet and the convoys to Alexandria.
11 July 1940.
At 0130 hours, the fleet altered course to 000° to be in position 35°10’N, 15°00’E at 0800 hours. HMS Royal Sovereign with HMS Hero, HMS Hereward, HMS Nubian, HMS Mohawk and HMS Janus rejoined from Malta at this time, and HMS Eagle landed on her striking force from Malta.
At 0900 hours the Commander-in-Chief in HMS Warspite, screened by HMS Nubian, HMS Mohawk, HMS Juno and HMAS Vampire, proceeded ahead to return to Alexandria at 19 knots. The Rear-Admiral, First Battle Squadron, in HMS Royal Sovereign , with HMS Malaya and HMS Eagle and the remaining destroyers, proceeded on a mean line of advance of 80° at 12 knots to cover the passage of the convoys. The 7th Cruiser Squadron had already been detached at 2000B/10 to search to the eastward in the wake of convoy MF 1.
The fleet was again subjected to heavy bombing attacks. Between 1248 and 1815 hours, five attacks were made on HMS Warspite and her escorting destroyers. A total of 66 bombs were counted. Between 1112 and 1834 hours, twelve attacks were carried out on forces in company with Rear-Admiral First Battle Squadron, a total of about 120 bombs were dropped. No damage was sustained. It was noted that the fleet was shadowed by aircraft who homed in attacking aircraft.
At 1200 hours, HMAS Vampire was sighted. She reported that her Gunner had been badly wounded in an air attack made on convoy MS 1 at 1015 hours. The officer was transferred to HMS Mohawk for treatment but died aboard that ship later the same day.
At 2100 hours, HMS Warspite was in position 34°22’N, 19°17’E steering 110°.
12 July 1940.
There had been no incidents during the night. Course was altered to 070° at 0200 hours and to 100° at 0630 hours. Course was altered from time to time during the day to throw off shadowers and attacking aircraft.
At 0700 hours, Vice-Admiral (D) with the 7th Cruiser Squadron rejoined the Commander-in-Chief. Vice-Admiral (D) in HMS Orion, together with HMS Neptune was detached to join convoy MF 1.
The following bombing attacks took place during the day; Between 0850 and 1550 hours, seventeen attacks were made on HMS Warspite. About 160 bombs were dropped but none hit although there were several near misses. On the First Battle Squadron and HMS Eagle between 1110 and 1804 hours, three attacks were made, 25 bombs were dropped but none hit.
13 July 1940.
HMS Warspite, HMS Orion, HMS Neptune, HMS Liverpool, HMAS Sydney, HMS Nubian, HMS Mohawk, HMS Juno and HMAS Vampire arrived at Alexandria around 0600 hours. Convoy MF 1 and it’s escort (HMS Jervis, HMS Diamond and HMAS Vendetta) arrived during the forenoon. HMS Gloucester had detached from the convoy around 0400 hours and had already arrived at Alexandria around 0800 hours. This convoy had been unmolested during it’s passage from Malta to Alexandria.
HMS Ramillies (Capt. H.T. Baillie-Grohman, OBE, DSO, RN) then departed Alexandria to join the escort of convoy MS 1 escorted by HMS Diamond, HMS Havock (Lt.Cdr. R.E. Courage, DSO, RN), HMS Imperial and HMAS Vendetta. The two cruisers from the 3rd Cruiser Squadron, HMS Caledon (Capt. C.P. Clarke, RN) and HMS Capetown (Capt. T.H. Back, RN), had already left Alexandria on the 12th to join the escort of convoy MS 1.
14 July 1940.
The 1st Battle Squadron, HMS Eagle and their escorting destroyers arrived at Alexandria in the forenoon. They reported very heavy bombing attacks of the Libyan coast. Three enemy aircraft were reported shot down by fighters from HMS Eagle while a fourth was thought to be heavily damaged.
15 July 1940.
Convoy MS 1, HMS Ramillies, HMS Caledon, HMS Capetown, HMS Diamond, HMS Havock, HMS Imperial, HMAS Vendetta, HMS Decoy, HMAS Vampire and HMAS Voyager arrived at Alexandria before noon.
Italian forces involved in the battle of Punta Stilo.
On 6 July 1940 an important Italian troop convoy departed Naples for Benghazi, Libya. This convoy was made up of the troopship Esperia (11398 GRT, built 1920) and the transports Calitea (4013 GRT, built 1933), Marco Foscarini (6338 GRT, built 1940), Vettor Pisani (6339 GRT, built 1939). Escort was provided by the torpedo boats Orsa, Pegaso, Procione and Orione. The next day this convoy was joined by the transport Francesco Barbaro (6343 GRT, built 1940) that came from Catania and was escorted by the torpedo boats Giuseppe Cesare Abba and Rosolino Pilo. Cover for this convoy was provided by the light cruisers Giovanni Delle Bande Nere and Bartolomeo Colleoni and the destroyers Maestrale, Libeccio, Grecale and Scirocco.
This cover force was joined on 7 July by the heavy cruiser Pola and the destroyers Lanciere, Carabinieri, Corazziere and Ascari which came from Augusta.
From Messina came the heavy cruisers Zara, Fiume, Gorizia and the destroyers Vittorio Alfieri, Giosuè Carducci, Vincenzo Gioberti and Alfredo Oriani.
From Messina (these ships departed shortly after the other ships) came also the heavy cruisers Bolzano and Trento and the destroyers Artigliere, Camicia Nera, Aviere and Geniere.
From Palermo came the light cruisers Eugenio di Savoia, Emanuelle Filiberto Duca D’Aosta, Muzio Attendolo and Raimondo Montecuccoli with the destroyers Granatiere, Fuceliere, Bersagliere and Alpino.
From Taranto came the battleships Gulio Cesare (flagship) and Conte di Cavour with the dstroyers Freccia, Saetta, Dardo and Strale.
Also from Taranto came the light cruisers Giuseppe Garibaldi and Luigi di Savoia Duca Degli Abruzzi with the destroyers Folgore, Fulmine, Baleno and Lampo.
And finally, also from Taranto, came the light cruisers Armando Diaz, Luigi Cadorna, Alberto di Giussano, Alberico di Barbiano and the destroyers Antonio Pigafetta, Nicolò Zeno, Nicoloso Da Recco, Emanuele Pessagno and Antoniotto Usodimare. Later the destroyers Ugolino Vivaldi, Antonio Da Noli and Leone Pancaldo were sent out as reinforements.
The destroyers Stale, Dardo and Antonio da Noli developed mechanical problems and had to return to port for repairs.
During the battle with the Mediterranean Fleet the following ships sustained damage; Battleship Gulio Cesare was hit by a heavy shell from HMS Warspite, heavy cruiser Bolzano sustained three medium shell hits. As stated earlier the destroyer Leone Pancaldo was sunk off Augusta by aircraft from HMS Eagle but was later raised and repaired.
The Italian convoy meanwhile had arrived at Benghazi without losses on 8 July. (41)
19 Jul 1940
Action of Cape Spada, 19 July 1940.
Plan for operations against enemy submarines and shipping in the Aegean.
On 18 July 1940, four destroyers departed Alexandria for an anti-submarine hunt towards the Kaso Strait and then along the north coast of Crete. These destroyers were; HMS Hyperion (Cdr. H.St.L. Nicolson, DSO, RN), HMS Hasty (Lt.Cdr. L.R.K. Tyrwhitt, RN), HMS Hero (Cdr. H.W. Biggs, DSO, RN) and HMS Ilex (Lt.Cdr. P.L. Saumarez, DSC, RN).
The same day the Australian light cruiser HMAS Sydney (Capt. J.A. Collins, RAN) departed Alexandria with the destroyer HMS Havock (Cdr. R.E. Courage, DSO, DSC, RN) for an anti-shipping raid into the Gulf of Athens.
Two more destroyers left Alexandria for Port Said, these were HMS Hereward (Lt.Cdr. C.W. Greening, RN) and HMS Imperial (Lt.Cdr. C.A.deW. Kitcat, RN). They were to escort a convoy towards the Aegean and then to bring back a convoy from the Aegean to Egypt.
Proceeding of the sweeping forces up to the time of the sighting of two enemy cruisers, 18 – 19 July 1940.
The destroyers which were to perform the A/S sweep sailed from Alexandria at 0015/18 carrying out an A/S sweep towards the Kaso Strait. After passing through the Strait at 2130 hours they kept well over towards the Cretan shore to avoid being sighted from Kaso Island. They then steered towards the westward at 18 knots between Ovo Island and the Cretan mainland. At 0600C/19 course was altered to 240° to pass through the Anti-Kithera Channel. At 0722 hours two Italian cruisers were sighted ahead by HMS Hero.
Meanwhile HMAS Sydney and HMS Havock had sailed from Alexandria at 0430/18. After passing through the Kaso Strait at 2345 hours they steered 295° at 18 knots. At 0733C/19 they were in position 010°, Cape Spada, 40 nautical miles when HMAS Sydney received the enemy report from HMS Hyperion of two enemy cruisers steering 160°, bearing 255°, distant 10 nautical miles. HMS Hyperion gave her position as 340°, Agria Grabusa lighthouse, 3 nautical miles. Acting on this information, Captain Collins of HMAS Sydney altered course at 0736 hours to 240° to close the destroyers.
When an amplifying report from HMS Hyperion gave her course as 060°, and the enemy course as 360°, HMAS Sydney altered course to 190° and commenced to work up to full speed. At 0800 hours another alteration of course was made to 150°. Shortly afterwards signals were received from the Commander-in-Chief directing the destroyers to join up with HMAS Sydney and the latter to support them.
When Commander Nicolson continued from time to time to inform HMAS Sydney of his movements of his division and of the enemy, Captain Collins preserved W/T silence to avoid disclosing the presence of HMAS Sydney. In this he was entirely successful. Further alterations of course by HMAS Sydney were; at 0815 hours to 160°, at 0820 hours to 120°.
At 0826 hours the enemy cruisers were sighted. They were steering 090°, bearing 188°, range 23000 yards. They were about 20° before the starboard beam.
Until 0722 hours the destroyer division had been spread in line abreast 1.5 nautical miles apart, carrying out an A/S sweep at 18 knots. After sighting the enemy Commander Nicholson turned his division to starboard together to course 060°, and, in accordance with previous instructions, the destroyers concentrated in sub-divisions on the Hyperion.
It was estimated that HMAS Sydney at 0900 hours would be in a position 010°, Cape Spada, 55 nautical miles, and while steering towards this position Commander Nicholson endeavoured to work round to the northward. At 0725 hours, when speed was increased to 25 knots, the enemy was seen to have altered course to 360°.
Destroyer engagement with the enemy cruisers.
At 0726C/19 one of the enemy cruisers opened fire on HMS Hyperion and HMS Ilex an the latter returned fire. With their engines working up fast the speed of the destroyers was increased to 31 knots by 0735 hours. HMS Hyperion now opened fire with her after guns at maximum range, but ceased firing very soon as all her shots fell short. The enemy’s shooting was erratic, probably because he was firing against the sun. His salvoes fell short.
Although the range was opening rapidly, the enemy instead of heading in chase of the destroyers held on their course due north. Possibly he was uncertain of the strength of the force opposing him, but whatever the reason his neglect to close lost him a favourable chance of utilising his superior gun power. At 0738 hours the enemy bore 270°, range was 11 nautical miles, and HMS Hyperion at 0740 hours, ordered her division to cease firing as the enemy was out of range. Five minutes later the enemy also ceased fire.
At 0747 hours, the enemy, who bore 270°, range 14 nautical miles, was still steering north. With the object of gaining ground and of identifying the class of the enemy cruisers, the destroyer division altered course to 360°. At 0753 hours, when the enemy turned to close, course was altered back to 060°. The Commander-in-Chief’s signal to join HMAS Sydney was received by HMS Hyperion at 0800 hours, and four minutes later course was altered to 030°, with the enemy then bearing 265°, range 17 nautical miles. The enemy’s course at that moment was 090°. These positions were signaled to HMAS Sydney at 0805 hours, and course was altered to 060° one minute later. At about this time a Greek steamer was sighted ahead but it wisely turned north quickly.
Still trying to work to the northward, the destroyer’s course was altered to 040° at 0814 hours and to 030° at 0821 hours. The enemy re-opened fire at 0825 hours, but again his shooting was very short and erratic. After five minutes the enemy ceased fire and was then seen to be altering course to the southward.
HMAS Sydney and HMS Havock sighted by the destroyer division.
At 0819C/19 gun flashes were seen away on the port beam of HMS Hyperion and a minute later the destroyers enjoyed the welcome sight of HMAS Sydney and HMS Havock bearing 290°, range 10 nautical miles. Commander Nicolson immediately altered course, first to 020° and at 0832 hours to 240°. Finally at 0835 hours he formed the division in line ahead and altered course to 260°. The enemy cruisers, now 17400 yards distant, were steaming fast to the southward, making heavy black smoke. At 0838 hours, the destroyer division, now steering 170°, opened fire in divisional concentration at extreme range on the left hand cruiser but the enemy was drawing out of range and the destroyers ceased fire at 0843 hours as their salvoes were falling short.
At 0844 hours, HMAS Sydney ordered the destroyers to ‘close and attack the enemy with torpedoes’. Course was altered together to 215°, and the Hyperion signalling the division to form on a line bearing 350°, at 0846 hours fired a ranging salvo. One minute later the enemy altered course to starboard.
HMAS Sydney engaged enemy cruisers.
The action now had become a stern chase, whose main interest lies in the movements of HMAS Sydney from the moment of her sighting the enemy. Her unexpected arrival together with HMS Havock seems to have taken the Italians completely by surprise. They were then engaged with the destroyers on the other side, and, in fact, their first impression was that they had to deal with two Allied cruisers.
At 0829 hours, when HMAS Sydney opened fire on the leading enemy cruiser at a range of 20000 yards. The fall of her salvoes were the first intimation of her presence to the enemy. The destroyer division was at that time still out of sight.
When the enemy recovered from their surprise at 0832 hours, he returned a concentrated fire on the Sydney, while the latter continued on a south-easterly course to intercept the destroyer division at and at the same time to close the enemy. The enemy salvoes fell short at first, then over, with an occasional straddle. At 0835 hours, the Sydney’s fire appeared to be effective, and the enemy was seen to be turning away. When the destroyer division was sighted at 0838 hours, steering south, about 6 nautical miles off, HMS Havock hauled over to join the other destroyers. Captain Collins signalled the destroyer division to attack with torpedoes, but a further alteration off course by the enemy, to the south-westward at 0840 hours prevented any possibility of a torpedo attack. HMAS Sydney turned to course 215° in pursuit of the now rapidly retreating enemy, and an alteration which brought her on the beam of the destroyers, who, at 0846 hours, were practically in line abreast in close order chasing at full speed.
In the early stages of the action there was some difficulty of identifying the class of the enemy cruisers but by now they had been identified as being of the ‘Bande Nere’ class. In fact they were the Giovanni delle Bande Nere herself and the Bartolomeo Colleoni which had left Tripoli on 17 July for Leros.
Chase of the enemy cruisers.
About 0846C/19 the Sydney’s original target was so obscured by smoke that fire was shifted to the rear cruiser (the Colleoni), which was engaged by ‘A’ and ‘B’ turrets on bearing 203° at a range of 18000 yards. The destroyer division at 0848 hours also renewed its fire at extreme range for a couple of minutes.
At 0851 hours, as the enemy altered course to port, the Sydney made a similar movement, which had the effect of opening her ‘A’ arcs. The enemy, making vast quantities of smoke, next altered course at 0853 hours to starboard. The purpose of these manoeuvres are not clear. Perhaps they were trying to throw of the pursuit to the eastward under the cover of smoke. If so it failed, for the Sydney, observing the enemy steading on course 230° at 0856 hours, resumed the chase in a south-westerly direction.
For a minute, at 0901 hours, the Sydney checked fire while she shifted target again to the leading cruiser (Bande Nere). When this ship at 0908 hours again became obscured by smoke fire was shifted back to the rear cruiser (Colleoni) then bearing 210° at a range of 18500 yards. At 0915 hours, HMAS Sydney altered course 30° to starboard to open her ‘A’ arcs, and it was soon evident that her fire had considerable effect. With the range down to 17500 yards at 0919 hours the Sydney also came under an accurate fire, receiving her only hit at 0921 hours. This projectile, bursting on the foremost funnel, blew a hole about 3 feet square in the casings, causing minor damage to three boats and some fittings but only one slight casualty.
The Bartolomeo Colleoni disabled.
The range now began to close rapidly, and at 0923C/19 the Colleoni was seen to be stopped, apparently out of action, in position 250° , Cape Spada, 5 nautical miles. According to the evidence of prisoners, she was brought to by a shot in the engine or boiler room. All her lights went out and the electrical machinery ceased functioning, including the turret power hoists and steering gear. The Colleoni was now left to her fate by the Bande Nere, which, after making a tentative turn towards made off at high speed, and, steering 205°, rounded Agria Grabusa Island at a distance of about a mile.
During the 40 minutes chase described above, the destroyer division, at 32 knots, had made every effort to reduce the range, altering course as necessary from time to time. At 0909 hours, fire was renewed for a minute to test the range, and at 0911 hours the division formed on a line of bearing 350° . At 0918 hours, the range of the rear cruiser (Colleoni) was down to 17000 yards and closing rapidly. Course was altered to 240° at 0923 hours and fire opened in a divisional concentration on the Colleoni from 14500 yards. At 0928 hours the Colleoni was seen to be stopped and silent. For some minutes she had been hit repeatedly. Her whole bridge structure was soon in flames.
The Bartolomeo Colleoni torpedoed.
The Hyperion and the Ilex prepared to attack with torpedoes and the Hero was ordered by Commander Nicholson to take charge of the other two destroyers. At 0935C/19, HMS Hyperion fired four and HMS Ilex two torpedoes from a range of 1400 yards. One torpedo from the Ilex hit the Colleoni forward, blowing away about 100 feet of her bows and her aircraft. The Hyperion’s torpedoes, however, owning to too great a spread, passed two ahead and two astern of the Colleoni and ran on to explode on the shore of Agria Grabusa Island.
According to survivors accounts, the men of the Colleoni started to jump overboard as soon as the ship stopped, and many of them were in the sea before to torpedo from the Ilex struck the ship. She had suffered many casualties forward, round the bridge and on the upper deck. Her Captain (Captain U. Navaro) was seriously wounded and died from his wounds at Alexandria on 23 July 1940. The Italians were much impressed by the rate and accuracy of the gunfire from the Allied ships and their tactical superiority.
During the chase the destroyers were never within satisfactory range, the last distance being 14000 yards until after the Colleoni started to drop back. The shooting from HMAS Sydney as seen from HMS Hyperion had been excellent except for a short spell when a large spread was noted.
When Captain Collins, at 0933 hours, ordered Commander Nicholson to torpedo the Colleoni the range was 7500 yards. The Colleoni was then on fire amidships, and a heavy explosion was seen to occur forward. Captain Collins signaled to HMS Hyperion to leave one destroyer to deal with the disabled enemy and to resume the chase of the other cruiser in which HMAS Sydney, HMS Hero and HMS Hasty were pressing on at full speed.
Sinking of the Bartolomeo Colleoni.
At 0952C/19 the Hyperion closed in and, observing the Colleoni more or less abandoned but not sinking or too heavily on fire, Commander Nicholson’s first intention, as he passed down her starboard side, was to go alongside and salve everything possible. Barely two minutes elapsed, however, before a large fire, breaking out in the forward superstructure, was followed by an explosion which blew the whole bridge away in a cloud of smoke. The Hyperion then fired another torpedo at short range, which hit the doomed ship amidships. At 0959 hours the Colleoni heeled over and sank bottom up, in position 029° , Agria Grabusa lighthouse, 4.6 nautical miles. HMS Hyperion and HMS Ilex immediately began to rescue survivors in which they were soon joined by HMS Havock.
Chase of the Giovanni delle Bande Nere.
At 0945C/19 the Bande Nere, after passing between the island of Pondiko Nisi and the Cretan mainlan, bore 192° at a range of 20000 yards. As on board the Sydney ammunition in the ‘A’ and ‘B’ turrets was running low she had to check fire. The Bande Nere however, continued firing from her after guns but the shots consistently fell 300 yards away on the Sydney’s quarter. Captain Collins at 0955 hours repeated his signal to the destroyers to finish off the Colleoni and three minutes later he re-opened fire on the Bande Nere from 20000 yards. With the range increasing and the visibility of the target and fall of shot becoming more and more indistinct HMAS Sydney checked fire again at 1011 hours. The haze combined with the enemy’s smoke now rendered spotting conditions impossible. The result from a final couple of salvoes at 1022 hours from 21000 yards could not be observed. By that time the Sydney had remaining only four rounds per gun in ‘A’ turret and only one round per gun in ‘B’ turret. Shortly afterwards the Bande Nere, now 11 nautical miles off, was completely lost from sight in the haze. She was last seen to do 32 knots on course 200°.
HMS Hero and HMS Hasty had continued the chase at 31 knots, firing ranging salvoes at intervals, which all fell short. At 1028 hours, HMS Hero informed HMAS Sydney that she was unable to close the enemy and broke off the chase. She formed, with HMS Hasty a close screen on HMAS Sydney. When last seen from the destroyers at 1044 hours, the Bande Nere bore 177°, 15 nautical miles. At 1037 hours, HMAS Sydney finally abandoned the chase and altered course for Alexandria, reducing speed to 25 knots to allow HMS Hyperion and HMS Ilex to come up.
Rescue of the survivors from the Bartolomeo Colleoni.
At 1024C/19, leaving HMS Havock to continue picking up survivors of the Colleoni, HMS Hyperion and HMS Ilex had proceeded at high speed to join HMAS Sydney. HMS Ilex had 230 prisoners on board of which about 30 were seriously wounded and 3 subsequently died the same night.
HMS Havock, as mentioned earlier, had been ahead of HMAS Sydney, but had proceeded to join the other destroyers when the action commenced. Taking up station on the starboard wing when she got within range at 0911 hours and joined in with the concentration fire. The shooting, even at longer range, appeared to be effective, several hits being observed.
HMS Havock then joined HMS Hyperion and HMS Ilex and closed in on the Colleoni after that ship had come to a halt.
When the HMS Hyperion and HMS Ilex left the scene of the sinking HMS Havock carried on rescuing the survivors. By 1237 hours she had picked up some 260 survivors. Six Italian bombers were then seen approaching from the southward. HMS Havock was forced to abandon her humane task and left the scene at full speed for Alexandria.
HMS Havock damaged in air attack.
At 1245C/19 the enemy aircraft attacked in two formations of three aircraft each but without success. At 1455 hours nine more aircraft attacked in flights of three, the second flight scoring a near miss which penetrated and flooded no.2 boiler room. These attacks, which were made from levels between 3000 and 4000 feet were countered with effective gunfire, which in two instances broke up the formations. Two ratings in the boiler room received minor injuries. The bomb that caused the damage appeared to be 250lb, which burst 6 feet under water, about 10 feet from the ships side. After loosing way for about 5 minutes, the Havock picked up speed again and proceeded at 24 knots.
On receiving the Havock’s signals around 1500 hours, reporting her damage, HMAS Sydney turned back to support her. HMS Hero and HMS Hasty were ordered to continue to Alexandria. Shorty afterwards a heavy bombing attack was made on HMAS Sydney but without success. Realising the possible danger of submarine attack, Captain Collins, ordered HMS Hyperion and HMS Ilex to join him. At 1540 hours, HMS Havock was sighted and HMAS Sydney took station one nautical mile astern of her.
Meanwhile HMS Hyperion and HMS Ilex were proceeding towards Alexandria being unable to make rendez-vous. When the report of HMS Havock was received stating that she was damaged in an air attack, Commander Nicholson turned back and at 1840 hours they made rendez-vous with the Sydney and Havock. One more air attack was made between 1845 and 1848 hours but no damage was done.
At 2100 hours, HMAS Sydney parted company to join the 7th Cruiser Squadron. The destroyers continued on towards Alexandria where they arrived at 0845C/20.
Fleet movements 19-20 July 1940.
Acting on the possibility that other enemy forces might be at sea, the Commander-in-Chief, immediately after he received information that enemy ships had been sighted off Cape Spada, took the following measures; Air reconnaissance by flying boats of 201 Group was to be sent out to search for the Bande Nere. The movements of Convoy Aegean North 2 were postponed and the ships which had sailed from Port Said were ordered to return. An oiler convoy from Alexandria to Port Said was ordered to proceed unescorted. The Fleet was ordered to proceed to sea.
At 0915C/19, HMS Orion (Capt. G.R.B. Back, RN, flying the flag of Vice Admiral J.C. Tovey, CB, DSO, RN) with HMS Neptune (Capt. R.C. O'Conor, RN) put to sea to sweep to the north-westward.
At 1100C/19, HMS Warspite (Capt. D.B. Fisher, OBE, RN, flying the flag of A/Admiral Sir A.B. Cunningham, KCB, DSO and 2 Bars, RN) with a destroyer screen (these appeared to have been HMS Jervis (Capt. P.J. Mack, DSO, RN), HMS Mohawk (Cdr. J.W.M. Eaton, RN) and HMAS Stuart (Capt. H.M.L. Waller, RAN)) sailed for a sweep in the same direction.
At 1230C/19, HMS Malaya (Capt. Sir A.F.E. Palliser, DSC, RN), HMS Ramillies (Capt. H.T. Baillie-Grohman, OBE, DSO, RN), HMS Eagle (Capt. A.R.M. Bridge, RN), HMS Liverpool (Capt. P.A. Read, RN) and a destroyer screen (seems to be made up of HMS Nubian (Cdr. R.W. Ravenhill, RN), HMS Janus (Cdr. J.A.W. Tothill, RN), HMS Diamond (Lt.Cdr. P.A. Cartwright, RN), HMS Hereward, HMS Imperial, HMAS Vendetta (Lt.Cdr. R. Rhoades RAN) and HMAS Voyager (Cdr. J.C. Morrow, RAN)) sailed for a sweep to the westward.
From the Sydney’s last enemy report at 1016C/19, indicating that the Bande Nere was steaming south-westwards at high speed it was evident that she could reach Tobruk without being intercepted if she was making for that port. HMS Eagle was therefore ordered to prepare a striking force to attack Tobruk harbour and 201 Group was requested to make a dusk reconnaissance. HMS Liverpool was detached to join HMAS Sydney as additional escort for the damaged HMS Havock. HMS Liverpool joined HMAS Sydney at 0500C/20.
As there was no further information of the Bande Nere during the afternoon, the Commander-in-Chief decided that at 2100 hours all forces should return to Alexandria. The aircraft from HMS Warspite which was catapulted at 1700C/19 to make a search of the Tobruk area made a forced lading to the eastward of that port. The destroyer HMS Jervis was detached to search the area for the missing aircraft but failed to find it. Search for the aircraft continued on the 20th by aircraft from 201 Group but again they failed to find the missing aircraft. An Italian report on 25 July 1940 stated that the crew had been rescued.
Aircraft of No. 55 and 211 Squadrons carried out bombing attacks on shipping in Tobruk harbour and claimed several hits. At 0240C/20 six aircraft from No. 844 Squadron FAA from HMS Eagle made a successful moonlight torpedo attack on shipping at Tobruk, encountering heavy barrage fire from all sides of the harbour, which damaged three aircraft, seriously wounded one observer and slightly wounded a pilot. Hits were claimed on three ships, and a sheet of flame from an oiler indicated that she was carrying petrol. During this attack the Italian destroyers Nembo and Ostro were sunk as was the merchant vessel Sereno (2333 GRT, built 1918).
The Fleet returned to Alexandria on the morning of the 20th where all ships cheered HMAS Sydney and the destroyers when they entered harbour. The total number of Italian prisoners disembarked was 545 officers and men from a complement of the Bartolomeo Colleoni of about 630 officers and men. The Bande Nere eventually returned to Tripoli and was reported there on 26 July. (42)
21 Jul 1940
Convoy operations AN 2 and AS 2
Convoys to and from the Aegean.
On 21 July 1940 six merchant vessels departed Port Said and two departed Alexandria. The next day they merged into convoy AN 2 at sea. [we currently do not know the names of these merchant vessels.] The six merchant ships coming from Port Said had been escorted by the destroyers HMS Dainty (Cdr. M.S. Thomas, RN) and HMS Defender (Cdr. St.J.R.J. Tyrwhitt, RN). The two merchant ships coming from Alexandria were escorted by the light cruisers HMS Liverpool (Capt. A.D. Read, RN) (she departed Alexandria shortly after midnight, 0030C/22), HMS Capetown (Capt. T.H. Back, RN) and the destroyers HMAS Stuart (Capt. H.M.L. Waller, RAN) and HMS Diamond (Lt.Cdr. P.A. Cartwright, RN). After the rendez-vous the convoy proceeded northwards to the Aegean. While in the Aegean the ships were to disperse and proceed independently towards their destinations covered by the escorting warships.
Distant cover for this convoy was provided by the battleship HMS Ramillies (Capt. H.T. Baillie-Grohman, OBE, DSO, RN) escorted by the destroyers HMS Hyperion (Cdr. H.St.L. Nicolson, DSO, RN), HMS Hereward (Lt.Cdr. C.W. Greening, RN), HMS Ilex (Lt.Cdr. P.L. Saumarez, DSC, RN) and HMS Imperial (Lt.Cdr. C.A.deW. Kitcat, RN). This force departed Alexandria at 0400C/23 and returned in the afternoon of the 26th.
A diversion was also created by having the light cruiser HMS Orion (Capt. G.R.B. Back, RN, flying the flag of Vice Admiral J.C. Tovey, CB, DSO, RN) escorted by the destroyers HMAS Vampire (Lt.Cdr. J.A. Walsh, RAN) and HMAS Vendetta (Lt.Cdr. R. Rhoades, RAN) appear of Castellorizio island on 23 July 1940. They had sailed from Alexandria at 0001C/24. HMS Orion then proceeded to Haifa while the destroyers proceeded to Port Said.
The escorting warships from convoy AN 2 were then to escort a convoy coming from the Aegean (AS 2) southwards. This convoy was formed off the Dardanelles on 27 July 1940 and was escorted in the Aegean by HMS Capetown, HMAS Stuart and HMS Defender. The next day the convoy was joined by HMS Liverpool, HMS Dainty and HMS Diamond and passed through the Kaso Strait.
Distant cover for this convoy was provided by the battleships HMS Warspite (Capt. D.B. Fisher, OBE, RN, flying the flag of A/Admiral Sir A.B. Cunningham, KCB, DSO and 2 Bars, RN), HMS Malaya (Capt. A.F.E. Palliser, DSC, RN, flying the flag of Rear-Admiral H.D. Pridham-Whippell, CB, CVO, RN), HMS Ramillies, aircraft carrier HMS Eagle (Capt. A.R.M. Bridge, RN), light cruisers HMS Neptune (Capt. R.C. O'Conor, RN), HMAS Sydney (Capt. J.A. Collins, CB, RAN) and the destroyers HMS Jervis (Capt. P.J. Mack, DSO, RN), HMS Juno (Cdr. W.E. Wilson, RN), HMS Nubian (Cdr. R.W. Ravenhill, RN), HMS Mohawk (Cdr. J.W.M. Eaton, RN), HMS Hyperion, HMS Hero (Cdr. H.W. Biggs, RN), HMS Hereward, HMS Ilex, HMS Imperial and HMS Decoy (Cdr. E.G. McGregor, RN) which departed Alexandria at 0330C/27.
Again a diversion was created by having the light cruiser HMS Orion escorted by the destroyers HMAS Vampire and HMAS Vendetta appear of Castellorizio island but this time the ocean boarding vessels HMS Chakla (Cdr. L.C. Bach, RD, RNR) and HMS Fiona (Cdr. A.H.H. Griffiths, RD, RNR) were added to the force so that it appeared that troops were going to be landed on the island in the evening of the 27th. The destroyers and the ocean boarding vessels departed at 0700C/27 and then made rendez-vous with HMS Orion which came from Haifa.
HMS Warspite escorted by HMS Hyperion, HMS Ilex and HMS Imperial returned to Alexandria at 2000C/29. In the approaches to Alexandria the destroyer screen was reinforced by the destroyers HMS Hostile (Lt.Cdr. A.F. Burnell-Nugent, DSC, RN) and HMS Janus (Cdr. J.A.W. Tothill, RN).
HMS Capetown, HMS Dainty and HMS Diamond which went with the convoy to Port Said where they arrived on 31 July 1940. The following merchant ships made up the convoy; British cargo ships Bantria (2407 GRT, built 1928) and Sardinian Price (3491 GRT, built 1922), Norwegian cargo ship Bruse Jarl (1890 GRT, built 1923) and the Greek cargo ship Perseus (5178 GRT, built 1918).
During this operation the cruisers HMS Neptune and HMAS Sydney made a anti-shipping raid in the Gulf of Athens sinking the small Greek tanker Ermioni (436 GRT, built 1902) which was transporting fuel for the Italians in the Dodecanese. They had separated from the fleet to intercept this ship on the 27th.
During 27 to 29 July 1940 the Allied ships were attacked several times by the Italian air force but no hits were obtained except a dud bomb hit on HMS Liverpool on the 29th causing one crewmember to be killed and two to be wounded.
HMS Malaya, HMS Ramillies, HMS Eagle, HMS Liverpool, HMS Jervis, HMAS Stuart, HMS Defender, HMS Hereward, Hero, HMS Juno, HMS Mohawk and HMS Nubian arrived at Alexandria P.M. on 30 July. (41)
31 Jul 1940
Operation Hurry
Transfer of twelve Hurricane fighters and two Skua aircraft to Malta, air attack on Cagliari, minelaying in Cagliari Bay by Force H and diversion in the Eastern Mediterranean by the Mediterranean Fleet.
Operations of Force H.
Around 0800A/31, Force H, consisting of the battlecruiser HMS Hood (Capt. I.G. Glennie, RN, flying the flag of Vice-Admiral J.F. Somerville, KCB, DSO, RN), battleships HMS Valiant (Capt. H.B. Rawlings, OBE, RN), HMS Resolution (Capt. O. Bevir, RN), aircraft carriers HMS Ark Royal (Capt. C.S. Holland, RN, flying the flag of Vice-Admiral L.V. Wells, CB, DSO, RN), HMS Argus (Capt. H.C. Bovell, RN), light cruisers HMS Arethusa (Capt. Q.D. Graham, RN), HMS Enterprise (Capt. J.C.A. Annesley, DSO, RN) and escorted by the destroyers HMS Faulknor (Capt. A.F. de Salis, RN), HMS Foresight (Lt.Cdr. G.T. Lambert, RN), HMS Forester (Lt.Cdr. E.B. Tancock, RN), HMS Foxhound (Lt.Cdr. G.H. Peters, RN), HMS Hotspur (Cdr. H.F.H Layman, DSO, RN), HMS Gallant (Lt.Cdr. C.P.F. Brown, RN), HMS Greyhound (Cdr. W.R. Marshall A'Deane, DSC, RN), HMS Encounter (Lt.Cdr. E.V.St.J. Morgan, RN), HMS Escapade (Cdr. H.R. Graham, RN) and HMS Velox (Cdr.(Retd.) J.C. Colvill, RN) sailed from Gibraltar.
Passage eastward was uneventful until at 1749A/1 when eight Italian aircraft were seen coming in to attack in position 37°34'N, 04°10'E. The aircraft turned away before they reached a favourable attack position. A few minutes later a second wave of nine aircraft was seen coming in but this attack was also not pressed home with determination and no hits were obtained. Some 80 bombs in all were dropped and only a few near misses were obtained on HMS Ark Royal and HMS Forester.
At 2045A/1 the attack force for Cagliari was detached. This force was made up of HMS Hood, HMS Ark Royal, HMS Enterprise, HMS Faulknor, HMS Foresight, HMS Forester and HMS Foxhound. They proceeded at 20 knots towards position 38.30’N, 07.00’E where the striking force from HMS Ark Royal was to be flown off.
The remaining ships of Force H also proceeded eastwards to fly off the aircraft for Malta from HMS Argus at dawn. The position where the aircraft were to be launched depended on the latest weather reports coming in from Malta.
At 2130A/1, HMS Enterprise, was detached by the attack force to create a diversion and intercept a Vichy-French ship en-route from Algiers to Marseilles.
At 0200A/2, HMS Ark Royal and the destroyers proceeded ahead and aircraft were launched at 0230 hours. Twelve aircraft were launched, nine carried bombs and three carried mines. One of the aircraft crashed on taking off. Due to a misunderstanding the crew was not picked up and was lost.
In the air attacks direct hits were reported four hangars, two of which were reported to burn fiercely. At least four aircraft which were parked in the open were reported to have been destroyed in addition to those in the hangars. Many aerodrome buildings were destroyed or damaged. Three mines were laid inside Cagliari harbour. One Swordfish aircraft made a forced landing on an Italian airfield and the crew was made prisoner of war.
After flying of the air striking force the group of which HMS Ark Royal was part turned to the southward to rejoin the other ships of Force H which had in the meantime also proceeded eastwards and adjusted speed to be in position 37.40’N, 07.20’E at 0445A/2. Two flights of one Skua and six Hurricane’s each were launched from HMS Argus at 0515A/2 and 0600A/2. The two groups of ships from Force H sighted each other at 0520A/2 and then made rendez-vous which was affected at 0815A/2. All aircraft launched by HMS Argus reached Malta but one of the Hurricane’s crashed on lading.
At 0930A/3, HMS Arethusa, was detached to search for the Vichy French ship HMS Enterprise was also searching for. They both failed to intercept this ship. HMS Enterprise was to the north of Minorca and was in supporting distance from Force H and was therefore ordered to proceed to Gibraltar passing west of the Baleares. HMS Arethusa rejoined force H before dark on the 3rd.
HMS Ark Royal, escorted by HMS Hotspur, HMS Encounter and HMS Escapade, were detached as to arrive at Gibraltar before dark on the 3rd. The remainder of Force H arrived at Gibraltar around dawn on the 4th.
Diversions by the Mediterranean Fleet in the eastern Mediterranean. Operation MA 9.
Around 0600C/31, light cruisers HMS Orion (Capt. G.R.B. Back, RN, flying the flag of Vice Admiral J.C. Tovey, CB, DSO, RN), HMS Neptune (Capt. R.C. O'Conor, RN), HMAS Sydney (Capt. J.A. Collins, CB, RAN) and destroyers HMS Nubian (Cdr. R.W. Ravenhill, RN), HMS Juno (Cdr. W.E. Wilson, RN) and ORP Garland (Kpt. mar. (Lt.Cdr.) A. Doroszkowski) departed Alexandria for an anti-shipping raid / contraband control in the Gulf of Athens area. They were to pass through the Kaso Strait and arrived off the Doro Channel at dawn on 1 August. They then exercises contraband control during the day in the Gulf of Athens area retiring to the westward between Cape Malea and Agria Grabusa at dusk. After dark they returned to the Aegean to exercise contraband control on 2 August. They returned to Alexandria in the evening of 2 August 1940.
A cover force went to sea around 1420 hours, this force was made up of the battleships HMS Royal Sovereign (Capt. H.B. Jacomb, RN), HMS Malaya (Capt. A.F.E. Palliser, DSC, RN, flying the flag of Rear-Admiral H.D. Pridham-Whippell, CB, CVO, RN), aircraft carrier HMS Eagle (Capt. A.R.M. Bridge, RN). They were escorted by the destroyers HMS Jervis (Capt. P.J. Mack, DSO, RN), HMS Hasty (Lt.Cdr. L.R.K. Tyrwhitt, RN), HMS Hero (Cdr. H.W. Biggs, DSO, RN), HMS Hereward (Lt.Cdr. C.W. Greening, RN), HMS Hostile (Lt.Cdr. A.F. Burnell-Nugent, DSC, RN), HMS Ilex (Lt.Cdr. P.L. Saumarez, DSC, RN) and HMS Imperial (Lt.Cdr. C.A.deW. Kitcat, RN) and HMAS Vendetta (Lt.Cdr. R. Rhoades, RAN). They carried out exercises and then proceeded westwards towards Gavdos Island to the south of Crete. Due to engine problems in HMS Malaya the cover force returned to Alexandria late on the the morning of August 1st. (43)
12 Aug 1940
Operation MD 6.
Anti-shipping and anti-submarine sweep in the Eastern Mediterranean.
Around 0600C/12, ' Force A ', made up of the destroyers HMS Nubian (Cdr. R.W. Ravenhill, RN), HMS Mohawk (Cdr. J.W.M. Eaton, RN), HMS Imperial (Lt.Cdr. C.A.deW. Kitcat, RN) and HMS Hostile (Lt.Cdr. A.F. Burnell-Nugent, DSC, RN) departed Alexandria.
' Force A ' was ordered to proceed towards Malta. After dark on 12 August they were to alter course to reach the African coast in the vicinity of Bardia at 2200C/12. Thence to sweep westward along the coast at high speed, then to leave the coast so as to be 70 miles clear by daylight on 13 August and rendezvous with ' Force B ' in position ' K ' (36°00'N, 21°00'E) at 1300C/13. To be detached from ' Force B ' in time to pass through position 205° Gavdo Island 5 miles at 2200C/13, and carry out an A/S sweep along the line 205° Gavdo Island until 0400/14, thence to rendezvous with ' Force B ' as ordered by the Senior Officer.
Around 0700C/12, ' Force A ' was followed by ' Force B ' which was made up of the light cruisers HMS Neptune (Capt. R.C. O'Conor, RN) and HMAS Sydney (Capt. J.A. Collins, CB, RAN).
The were to rendezvous with ' Force A ' in position K as stated above. After detaching Force A on the 13th, ' Force B ' was to pass between Cape Malea and Agria Grabusa about dusk on the 13th to conduct an anti-shipping sweep along the north coast of Crete through the Kaso Strait to rendezvous with ' Force A ' as convenient and then return to Alexandria.
The ships sighted nothing until 1505C/14 hours when a torpedo was seen by HMS Nubian. Position of the attack was 32°06'N, 28°31'E. HMS Nubian and HMS Hostile then remained in the area to conduct an A/S search. The other four ships arrived at Alexandria around 1930C/14.
HMS Nubian and HMS Hostile did not made contact with the attacker and arrived at Alexandria around 0610C/15.
The attacker was the Italian submarine Pietro Micca which reported seeing two destroyers. She had fired one torpedo from a stern tube from 800 yards at the leading destroyer at 1358B/14 (Rome time !) in position 31°59'N, 28°32'E. After 40 seconds a violent explosion was heard thought to have been a hit but in fact the torpedo missed.
The Allied ships returned to Alexandria in the early evening of the 14th. (41)
15 Aug 1940
HMS Neptune (Capt. R.C. O'Conor, RN) departed Alexandria for Aden. (44)
16 Aug 1940
HMS Neptune (Capt. R.C. O'Conor, RN) passed the Suez Canal southbound. After a short stop at Suez she departed for Aden in the evening. (44)
19 Aug 1940
HMS Neptune (Capt. R.C. O'Conor, RN) arrived at Aden. (44)
21 Aug 1940
HMS Neptune (Capt. R.C. O'Conor, RN) departed Aden for Mombasa. (44)
26 Aug 1940
HMS Neptune (Capt. R.C. O'Conor, RN) arrived at Mombasa from Aden. (44)
27 Aug 1940
HMS Neptune (Capt. R.C. O'Conor, RN) departed Mombasa for Durban. (44)
31 Aug 1940
HMS Neptune (Capt. R.C. O'Conor, RN) arrived at Durban from Mombasa. (44)
5 Sep 1940
HMS Neptune (Capt. R.C. O'Conor, RN) departed Durban to examine anchorages in southern Madagascar to search for enemy raiders and supply vessels. (45)
11 Sep 1940
HMS Neptune (Capt. R.C. O'Conor, RN) arrived at Mauritius from patrol. After fuelling she departed again for patrol later the same day. A German raider was operating in the Indian Ocean and several cruisers and auxiliary cruisers were detailed to try to hunt it down. HMS Neptune was ordered to proceed to position 25°00'S, 70°00'E. (44)
15 Sep 1940
HMS Neptune (Capt. R.C. O'Conor, RN) is ordered to leave patrol so as to arrive at Durban with 15% fuel remaining. (46)
19 Sep 1940
HMS Neptune (Capt. R.C. O'Conor, RN) is ordered fuel at either Mauritius or Durban, whatever was nearer. (46)
22 Sep 1940
HMS Neptune (Capt. R.C. O'Conor, RN) arrived at Mauritius from patrol.
After fuelling she departed for Durban later the same day. (47)
27 Sep 1940
HMS Neptune (Capt. R.C. O'Conor, RN) arrived at Durban from Mauritius. (1)
2 Oct 1940
HMS Neptune (Capt. R.C. O'Conor, RN) arrived at Simonstown from Durban. (48)
7 Oct 1940
HMS Neptune (Capt. R.C. O'Conor, RN) departed Simonstown to patrol the area of the Southern Ocean Islands including Kerguelen. (49)
26 Oct 1940
HMS Neptune (Capt. R.C. O'Conor, RN) arrived at Mauritius from patrol. No sign of the enemy had been seen except on several places on Kerguelen where recent enemy activity was suspected. (49)
28 Oct 1940
HMS Neptune (Capt. R.C. O'Conor, RN) departed Mauritius for Simonstown later changed to Capetown. (48)
2 Nov 1940
HMS Neptune (Capt. R.C. O'Conor, RN) arrived at Capetown from Mauritius. (50)
7 Nov 1940
HMS Neptune (Capt. R.C. O'Conor, RN) departed Capetown for Freetown. (51)
13 Nov 1940
HMS Neptune (Capt. R.C. O'Conor, RN) is ordered to proceed to Lagos instead of Freetown. (51)
15 Nov 1940
HMS Neptune (Capt. R.C. O'Conor, RN) arrived at Lagos.
The same day Vice-Admiral J.H.D. Cunningham, CB, MVO, RN, the Vice-Admiral commanding 1st Cruiser Squadron struck his flag in HMS Devonshire (Capt. R.D. Oliver, DSC, RN) and hoisted it the following morning (16th) in HMS Neptune. (51)
19 Nov 1940
HMS Neptune (Capt. R.C. O'Conor, RN, flying the flag of Vice-Admiral J.H.D. Cunningham, CB, MVO, RN, the Vice-Admiral commanding 1st Cruiser Squadron) departed Lagos for Duala. (51)
20 Nov 1940
HMS Neptune (Capt. R.C. O'Conor, RN, flying the flag of Vice-Admiral J.H.D. Cunningham, CB, MVO, RN, the Vice-Admiral commanding 1st Cruiser Squadron) arrived at Duala. (51)
21 Nov 1940
HMS Neptune (Capt. R.C. O'Conor, RN, flying the flag of Vice-Admiral J.H.D. Cunningham, CB, MVO, RN, the Vice-Admiral commanding 1st Cruiser Squadron) proceeded from Duala to Victoria.
She departed for Porte Noire later the same day. (50)
23 Nov 1940
HMS Neptune (Capt. R.C. O'Conor, RN, flying the flag of Vice-Admiral J.H.D. Cunningham, CB, MVO, RN, the Vice-Admiral commanding 1st Cruiser Squadron) arrived at Porte Noire. She departed for a rendezvous with HMS Delhi (Capt. A.S. Russell, RN) in position 01°20'N, 06°30'E at 1000A/26. (50)
26 Nov 1940
HMS Neptune (Capt. R.C. O'Conor, RN, flying the flag of Vice-Admiral J.H.D. Cunningham, CB, MVO, RN, the Vice-Admiral commanding 1st Cruiser Squadron) and HMS Delhi (Capt. A.S. Russell, RN) made rendezvous around 1000A/26 in approximate position 01°20'N, 06°30'E. (52)
27 Nov 1940
HMS Neptune (Capt. R.C. O'Conor, RN, flying the flag of Vice-Admiral J.H.D. Cunningham, CB, MVO, RN, the Vice-Admiral commanding 1st Cruiser Squadron) arrived at Lagos. (50)
2 Dec 1940
HMS Neptune (Capt. R.C. O'Conor, RN, flying the flag of Vice-Admiral J.H.D. Cunningham, CB, MVO, RN, the Vice-Admiral commanding 1st Cruiser Squadron) and HMS Milford (Capt.(Retd.) S.K. Smyth, RN) departed Lagos to patrol off the Cameroons. (53)
4 Dec 1940
HMS Neptune (Capt. R.C. O'Conor, RN, flying the flag of Vice-Admiral J.H.D. Cunningham, CB, MVO, RN, the Vice-Admiral commanding 1st Cruiser Squadron) arrived at Manoka. (54)
5 Dec 1940
HMS Neptune (Capt. R.C. O'Conor, RN, flying the flag of Vice-Admiral J.H.D. Cunningham, CB, MVO, RN, the Vice-Admiral commanding 1st Cruiser Squadron) proceeded from Manoka to Victoria.
She departed Victoria for Port Gentil later the same day. (54)
7 Dec 1940
HMS Neptune (Capt. R.C. O'Conor, RN, flying the flag of Vice-Admiral J.H.D. Cunningham, CB, MVO, RN, the Vice-Admiral commanding 1st Cruiser Squadron) arrived at Port Gentil.
She departed for Lagos later the same day. (54)
10 Dec 1940
HMS Neptune (Capt. R.C. O'Conor, RN, flying the flag of Vice-Admiral J.H.D. Cunningham, CB, MVO, RN, the Vice-Admiral commanding 1st Cruiser Squadron) and HMS Delhi (Capt. A.S. Russell, RN) made rendezvous around 0900A/10 in approximate position 02°40'N, 06°00'E. (55)
11 Dec 1940
HMS Neptune (Capt. R.C. O'Conor, RN, flying the flag of Vice-Admiral J.H.D. Cunningham, CB, MVO, RN, the Vice-Admiral commanding 1st Cruiser Squadron) arrived at Lagos. (54)
14 Dec 1940
HMS Neptune (Capt. R.C. O'Conor, RN, flying the flag of Vice-Admiral J.H.D. Cunningham, CB, MVO, RN, the Vice-Admiral commanding 1st Cruiser Squadron) departed Lagos for Freetown. (54)
17 Dec 1940
HMS Neptune (Capt. R.C. O'Conor, RN, flying the flag of Vice-Admiral J.H.D. Cunningham, CB, MVO, RN, the Vice-Admiral commanding ' Force M ') arrived at Freetown from Lagos. (54)
18 Dec 1940
HMS Dorsetshire (Capt. B.C.S. Martin, RN) arrived at Freetown from Simonstown. After fuelling, she and the light cruiser HMS Neptune (Capt. R.C. O'Conor, RN, flying the flag of Vice-Admiral J.H.D. Cunningham, CB, MVO, RN, the Vice-Admiral commanding ' Force M ') departed Freetown to patrol together in the mid-Atlantic near position 08°00'N, 21°00'W and then north and north-eastward to search for the German pocket battleship Admiral Scheer. (56)
26 Dec 1940
HMS Neptune (Capt. R.C. O'Conor, RN, flying the flag of Vice-Admiral J.H.D. Cunningham, CB, MVO, RN, the Vice-Admiral commanding ' Force M ') and HMS Dorsetshire (Capt. B.C.S. Martin, RN) arrived at Freetown from their anti-raider patrol in the mid-Atlantic. (57)
28 Dec 1940
Vice-Admiral J.H.D. Cunningham, CB, MVO, RN, the Vice-Admiral commanding ' Force M ' struck his flag in HMS Neptune (Capt. R.C. O'Conor, RN).
HMS Neptune then departed Freetown to provide cover for HMS Delhi (Capt. A.S. Russell, RN) which is escorting the troopships Cap des Palmes (French, 3082 GRT, built 1935) and Touareg (French, 5135 GRT, built 1924) from Cameroon to Freetown. (53)
6 Jan 1941
Around 0830N/6, the aircraft carrier HMS Furious (Capt. A.G. Talbot, DSO, RN), light cruiser HMS Delhi (Capt. A.S. Russell, RN) and the destroyers HMS Isis (Cdr. C.S.B. Swinley, DSC, RN) and HMS Encounter (Lt.Cdr. E.V.St.J. Morgan, RN) departed Freetown for Takoradi.
The light cruiser HMS Neptune (Capt. R.C. O'Conor, RN) was to join later at sea. (58)
7 Jan 1941
HMS Neptune (Capt. R.C. O'Conor, RN) arrived at Lagos after convoy cover duty.
The convoy had arrived at Freetown on 3 January but HMS Neptune had parted company a few hours before and did not enter Freetown.
HMS Neptune departed Lagos later the same day for the Takoradi area. (59)
8 Jan 1941
Around 1000Z/8, the light cruiser HMS Neptune (Capt. R.C. O'Conor, RN) joined the aircraft carrier HMS Furious (Capt. A.G. Talbot, DSO, RN), light cruiser HMS Delhi (Capt. A.S. Russell, RN) and the destroyers HMS Isis (Cdr. C.S.B. Swinley, DSC, RN) and HMS Encounter (Lt.Cdr. E.V.St.J. Morgan, RN) in approximate position 04°30'N, 01°00'W.
During the period 8 to 10 January, HMS Furious conducted flying operations near Takoradi in which 39 Hurricanes and 9 Fulmars were flown off which were to proceed overland towards Egypt.
Durning these flying operations the other ships provided cover and A/S escort.
HMS Delhi, with RAF personnel on board, parted company around 1220Z/10 to proceed to Lagos where she arrived aroud 0915A/11.
In the afternoon of January 10th, both HMS Encounter and HMS Isis fuelled from HMS Neptune after which the four remaining ships set course to proceed to Freetown where they arrived around 1430N/12. (60)
16 Jan 1941
The aircraft carrier HMS Furious (Capt. A.G. Talbot, DSO, RN), light cruiser HMS Neptune (Capt. R.C. O'Conor, RN) and the destroyers HMS Isis (Cdr. C.S.B. Swinley, DSC, RN) and HMS Encounter (Lt.Cdr. E.V.St.J. Morgan, RN) departed Freetown to proceed to arrive at 2000A/23 in position 45°00'N, 19°00'W.
The destroyers were to be detached to Gibraltar in position 17°00'N, 26°30'W which the force was to proceed through.
However on the 18th it became apparent that HMS Furious and HMS Neptune had not enough fuel to proceed direct to the U.K. and that all four ships would proceed to Gibraltar.
In the afternoon and early evening HMS Isis and HMS Encounter fuelled from HMS Neptune.
Around 1700Z/21, the destroyers HMS Duncan (A/Capt. A.D.B. James, RN), HMS Fearless (Cdr. A.F. Pugsley, RN) and HMS Fury (Lt.Cdr. T.C. Robinson, RN) joined.
They were all to arrive at Gibraltar on 22 January but they could not enter the harbour due to the bad weather conditions.
They finally arrived at Gibraltar around 0930A/23. (61)
27 Jan 1941
Around 1830A/27, HMS Sheffield (Capt. C.A.A. Larcom, RN) and HMS Neptune (Capt. R.C. O'Conor, RN) departed Gibraltar to provide cover for convoys west of Gibraltar.
Around 1900A/28, HMS Neptune was detached to return to Gibraltar where she arrived around 0900A/29.
HMS Sheffield returned to Gibraltar around 1130A/30. (62)
29 Jan 1941
Around 2100A/29, the aircraft carrier HMS Furious (Capt. A.G. Talbot, DSO, RN) and light cruiser HMS Neptune (Capt. R.C. O'Conor, RN) departed Gibraltar for the U.K. No destroyer escort was available to escort them out of Gibraltar. (63)
3 Feb 1941
Around 1010Z/3, the aircraft carrier HMS Furious (Capt. A.G. Talbot, DSO, RN) and light cruiser HMS Neptune (Capt. R.C. O'Conor, RN) on passage from Gibraltar for the U.K. were joined by the destroyers HMCS Ottawa (Cdr. E.R. Mainguy, RCN), HMCS Restigouche (Cdr. H.N. Lay, OBE, RN), HMCS St. Laurent (Lt. H.S. Rayner, RCN) and HMCS Skeena (Lt.Cdr. J.C. Hibbard, RCN). Shortly afterwards the destroyer HMS Jackal (Cdr. C.L. Firth, MVO, RN) also joined.
At 2212Z/3, starshell and a seafire was sighted. Four minutes later HMCS Ottawa and HMCS St. Laurent were detached to investigate.
At 1205Z/4, HMCS Skeena reported ' man overboard ' and the ship back turned to search.
Around 1915Z/4, HMS Neptune parted company with HMS Furious and the remaining destroyers and set course for Scapa Flow where she arrived around 1800A/5.
HMS Furious arrived in the Clyde also around 1800A/5. She was then taken in hand for engine repairs while also loading up with aircraft for the upcoming mission. (64)
8 Feb 1941
HMS Neptune (Capt. R.C. O'Conor, RN) departed Scapa Flow for Sheerness. (65)
9 Feb 1941
HMS Neptune (Capt. R.C. O'Conor, RN) arrived at Sheerness from Scapa Flow. (65)
12 Feb 1941
Following de-ammunitioning, HMS Neptune (Capt. R.C. O'Conor, RN), proceeded from Sheerness to the Chatham Dockyard where she was taken in hand for refit. (65)
15 Feb 1941
HMS Neptune (Capt. R.C. O'Conor, RN) is docked in No.9 dock at the Chatham Dockyard. (65)
16 Feb 1941
HMS Neptune (Capt. R.C. O'Conor, RN), was in No.9 dry dock at the Chatham Dockyard, when a bomb exploded on a compressor house about 150 yards away on the dock side to Port of the ship. Only some minor superficial damage was caused by splinters to the superstructure and side plating of the ship.
25 Mar 1941
HMS Neptune (Capt. R.C. O'Conor, RN) is undocked. (66)
6 May 1941
With her refit completed, HMS Neptune (Capt. R.C. O'Conor, RN), proceeded from the Chatham Dockyard to Sheerness. (67)
9 May 1941
HMS Neptune (Capt. R.C. O'Conor, RN) departed Sheerness for Scapa Flow. (67)
10 May 1941
HMS Neptune (Capt. R.C. O'Conor, RN) arrived at Scapa Flow to commence a work-up period. (67)
14 May 1941
HMS Neptune (Capt. R.C. O'Conor, RN) conducted DG trials at Scapa Flow. These were followed by gunnery and torpedo firing exercises. (67)
16 May 1941
HMS Prince of Wales (Capt. J.C. Leach, MVO, RN) departed Scapa Flow for exercises. She was escorted by the destroyer HMS Bedouin (Cdr. J.A. McCoy, DSO, RN), HMS Eskimo (Lt.Cdr. E.G. Le Geyt, RN) and HMAS Nestor (Cdr. C.B. Alers-Hankey, DSC, RN). The exercises included a full calibre 5.25" shoot at the cruiser HMS Neptune (Capt. R.C. O'Conor, RN) which was also out conducting gunnery exercises herself during the afternoon and early evening.
Early the next day the screening destroyers HMS Bedouin and HMS Eskimo were relieved by HMS Walpole (Lt.Cdr. J.H. Eaden, DSC, RN) and HMS Achates (Lt.Cdr. Viscount Jocelyn, RN). (68)
18 May 1941
Chase and sinking of the German battleship Bismarck, 18 to 27 May 1941.
Part I.
Departure of the Bismarck from the Baltic.
At 2130B/18 the German battleship Bismarck and the German heavy cruiser Prinz Eugen departed Gotenhafen for an anti-shipping raid in the North Atlantic. The following morning they were joined off Cape Arkona by the German destroyers Z 16 / Friedrich Eckhold and Z 23. They then proceeded through the Great Belt. The four ships were joined by a third destroyer, Z 10 / Hans Lody shortly before midnight on 19 May.
First reports of Bismarck and British dispositions 20-21 May 1941.
On 20 May 1941 two large warships with a strong escort were seen at 1500 hours northward out of the Kattegat. This information originated from the Swedish cruiser Gotland which had passed the Germans off the Swedish coast in the morning. The Naval Attaché at Stockholm received the news at 2100/20 and forwarded it to the Admiralty. At 0900/21 the Bismarck and her consorts entered Kors Fjord, near Bergen, Norway and anchored in nearby fiords. A reconnaissance aircraft flying over Bergen at 1330/21 reported having seen two Hipper class heavy cruisers there. One of these ships was later identified on a photograph as being the Bismarck. This intelligence went out at once to the Home Fleet.
The ships of the Home Fleet were at this time widely dispersed on convoy duties, patrols, etc. Some of the units were ranging as far as Gibraltar and Freetown. The Commander-in-Chief, A/Admiral Sir John Tovey, was at Scapa Flow in his flagship, HMS King George V (Capt. W.R. Patterson, CVO, RN). With him were her newly commissioned sister ship HMS Prince of Wales (Capt. J.C. Leach, MVO, RN), the battlecruiser HMS Hood (Capt. R. Kerr, CBE, RN, with Vice-Admiral L.E. Holland, CB, RN, onboard), the aircraft carrier HMS Victorious (Capt. H.C. Bovell, RN), the light cruisers HMS Galatea (Capt. E.W.B. Sim, RN, flying the flag of Rear-Admiral K.T.B. Curteis, CB, RN), HMS Aurora (Capt. W.G. Agnew, RN), HMS Kenya (Capt. M.M. Denny, CB, RN), HMS Neptune (Capt. R.C. O'Conor, RN) and the destroyers HMS Achates (Lt.Cdr. Viscount Jocelyn, RN), HMS Active (Lt.Cdr. M.W. Tomkinson, RN), HMS Antelope (Lt.Cdr. R.B.N. Hicks, DSO, RN), HMS Anthony (Lt.Cdr. J.M. Hodges, RN), HMS Echo (Lt.Cdr. C.H.deB. Newby, RN), HMS Electra (Cdr. C.W. May, RN), HMS Icarus (Lt.Cdr. C.D. Maud, DSO, RN), HMS Punjabi (Cdr. S.A. Buss, MVO, RN) and HMAS Nestor (Cdr. A.S. Rosenthal, RAN). HMS Victorious was under orders to escort troop convoy WS 8B from the Clyde to the Middle East. HMS Neptune was working up for service with the Mediterranean Fleet and was to escort convoy WS 8X from the Clyde to the Middle East on completion. She did not sail to operate against the Bismarck having only just began her post-refit work-up programme.
Rear-Admiral W.F. Wake-Walker (commanding the first Cruiser Squadron), with the heavy cruisers HMS Norfolk (Capt. A.J.L. Phillips, RN) (flag) and HMS Suffolk (Capt. R.M. Ellis, RN) was on patrol in the Denmark Straight. The light cruisers HMS Manchester (Capt. H.A. Packer, RN) and HMS Birmingham (Capt. A.C.G. Madden, RN) were patrolling between Iceland and the Faeroes. The battlecruiser HMS Repulse (Capt. W.G. Tennant, CB, MVO, RN) was at the Clyde to escort troop convoy WS 8B.
Action taken by the Commander-in-Chief, Home Fleet
Admiral Tovey took the following action when he received the news the Bismarck had been spotted at Bergen. Vice-Admiral Holland with the Hood, Prince of Wales, Achates, Antelope, Anthony, Echo, Electra and Icarus was ordered to cover Rear Admiral Wake-Walker's cruisers in the Denmark Straight. His force departed Scapa Flow around 0100/22.
HMS Arethusa (Capt. A.C. Chapman, RN), which was taking the Vice-Admiral, Orkneys and Shetlands, to Reykjavik on a visit of inspection, was ordered to remain at Hvalfiord and placed at Rear-Admiral Wake-Walkers disposal. HMS Manchester and HMS Birmingham were ordered to top off with fuel at Skaalefiord and them to resume their patrol. The other ships that remained at Scapa Flow were brought to short notice for steam.
The Free French submarine FFS Minerve (Lt. P.M. Sonneville), which was on patrol off south-west Norway was ordered to proceed to position 61°53'N, 03°15'E and HMS P 31 (Lt. J.B.de B. Kershaw, RN) was ordered to proceed to position 62°08'N, 05°08'E which is to the west of Stadtlandet.
The sailing of HMS Repulse and HMS Victorious with troop convoy WS 8B was cancelled and the ships were placed at the disposal of Admiral Tovey.
A reconnaissance aircraft flying over Bergen reported that the German ships were gone. This information reached Admiral Tovey at 2000/22. HMS Suffolk which had been fuelling at Hvalfiord was ordered to rejoin HMS Norfolk in the Denmark Strait. HMS Arethusa was ordered to join HMS Manchester and HMS Birmingham to form a patrol line between Iceland and the Faeroes. Vice-Admiral Holland, on his way to Iceland was told to cover the patrols in Denmark Strait north of 62°N. Admiral Tovey would cover the patrols south of 62°N.
Commander-in-Chief leaves Scapa Flow on 22 May 1941
The King George V, with Admiral Tovey on board, departed Scapa Flow at 2245/22. With the King George V sailed, HMS Victorious, HMS Galatea, HMS Aurora, HMS Kenya, HMS Hermione (Capt. G.N. Oliver, RN), HMS Windsor (Lt.Cdr. J.M.G. Waldegrave, DSC, RN), HMS Active, HMS Inglefield (Capt. P. Todd, DSO, RN), HMS Intrepid (Cdr. R.C. Gordon, DSO, RN), HMS Punjabi, HMS Lance (Lt.Cdr. R.W.F. Northcott, RN) and HMAS Nestor. HMS Lance however had to return to Scapa Flow due to defects.
At A.M. 23 May they were joined off the Butt of Lewis by HMS Repulse escorted by HMS Legion (Cdr. R.F. Jessel, RN), HMCS Assiniboine (A/Lt.Cdr. J.H. Stubbs, RCN) and HMCS Saguenay (Lt. P.E. Haddon, RCN) coming from the Clyde area which they departed on 22 May.
The Commander-in-Chief was 230 miles north-west of the Butt of Lewis in approximate position 60°20'N, 12°30'W when at 2032/23 a signal came in from HMS Norfolk that she had sighted the Bismarck in the Denmark Strait.
HMS Suffolk and HMS Norfolk made contact with the Bismarck in the Denmark Strait on 23 May 1941.
At 1922/23 HMS Suffolk sighted the Bismarck and Prinz Eugen in position 67°06'N, 24°50'W. They were proceeding to the south-west skirting the edge of the ice in Denmark Strait. HMS Suffolk immediately sent out an enemy report and made for the mist to the south-east. HMS Norfolk then commenced closing and sighted the enemy at 2030 hours. They were only some six nautical miles off and the Bismarck opened fire. HMS Norfolk immediately turned away, was not hit and also sent out an enemy report.
Although HMS Suffolk had sighted the enemy first and also sent the first contact report this was not received by the Commander-in-Chief. The enemy was 600 miles away to the north-westward.
Vice-Admiral Holland had picked up the signal from the Suffolk. He was at that moment about 300 nautical miles away. Course was changed to intercept and speed was increased by his force to 27 knots.
Dispositions, 23 May 1941.
At the Admiralty, when the Norfolk's signal came in, one of the first considerations was to safeguard the convoys at sea. At this time there were eleven crossing the North-Atlantic, six homeward and five outward bound. The most important convoy was troop convoy WS 8B of five ships which had left the Clyde the previous day for the Middle East. She was at this moment escorted by the heavy cruiser HMS Exeter (Capt. O.L. Gordon, MVO, RN), light cruiser (AA cruiser) HMS Cairo (A/Capt. I.R.H. Black, RN) and the destroyers HMS Cossack (Capt. P.L. Vian, DSO, RN), HMS Maori (Cdr. G.H. Stokes, DSC, RN), HMS Zulu (Cdr. H.R. Graham, DSO, RN), ORP Piorun (Kmdr.por. (Cdr.) E.J.S. Plawski), HMCS Ottawa (Cdr. E.R. Mainguy, RCN), HMCS Restigouche (Cdr. H.N. Lay, RCN) and the escort destroyer HMS Eridge (Lt.Cdr. W.F.N. Gregory-Smith, RN). HMS Repulse was also intended to have sailed with this convoy but she had joined the Commander-in-Chief instead.
Force H was sailed around 0200/24 from Gibraltar to protect this important convoy on the passage southwards. Force H was made up of the battlecruiser HMS Renown (Capt Sir R.R. McGrigor, RN), aircraft carrier HMS Ark Royal (Capt. L.E.H. Maund, RN), light cruiser HMS Sheffield (Capt. C.A.A. Larcom, RN) and the destroyers HMS Faulknor (Capt. A.F. de Salis, RN), HMS Foresight (Cdr. J.S.C. Salter, RN), HMS Forester (Lt.Cdr. E.B. Tancock, RN), HMS Foxhound (Cdr. G.H. Peters, DSC, RN), HMS Fury (Lt.Cdr. T.C. Robinson, RN) and HMS Hesperus (Lt.Cdr. A.A. Tait, RN).
HMS Norfolk and HMS Suffolk shadowing Bismarck 23 / 24 May 1941.
During the night of 23 / 24 May 1941 HMS Norfolk and HMS Suffolk hung on to the enemy, The Norfolk on their port quarter, Suffolk on their starboard quarter. All through the night they sent signals with updates on the position, course and speed of the enemy. At 0516 hours HMS Norfolk sighted smoke on her port bow and soon HMS Hood and HMS Prince of Wales came in sight.
HMS Hood and HMS Prince of Wales 23 / 24 May 1941.
At 2054/23 the four remaining escorting destroyers were ordered to follow at best speed in the heavy seas if they were unable to keep up with the capital ships which were proceeding at 27 knots. Two destroyers, HMS Antelope and HMS Anthony had been ordered to proceed to Iceland to refuel at 1400/23. The destroyers all managed to keep up for now and at 2318 hours they were ordered to form a screen ahead of both capital ships. At 0008/24 speed was reduced to 25 knots and course was altered to due north at 0017 hours. It was expected that contact with the enemy would be made at any time after 0140/24. It was just now that the cruisers lost contact with the enemy in a snowstorm and for some time no reports were coming in. At 0031 hours the Vice-Admiral signalled to the Prince of Wales that if the enemy was not in sight by 0210 hours he would probably alter course to 180° until the cruisers regained touch. He also signalled that he intended to engage the Bismarck with both capital ships and leave the Prinz Eugen to Norfolk and Suffolk.
The Prince of Wales' Walrus aircraft was ready for catapulting and it was intended to fly it off, but visibility deteriorated and in the end it was defuelled and stowed away at 0140 hours. A signal was then passed to the destroyers that when the capital ships would turn to the south they were to continue northwards searching for the enemy. Course was altered to 200° at 0203/24. As there was now little chance of engaging the enemy before daylight the crews were allowed to rest.
At 0247/24 HMS Suffolk regained touch with the enemy and by 0300 hours reports were coming in again. At 0353 hours HMS Hood increased speed to 28 knots and at 0400/24 the enemy was estimated to be 20 nautical miles to the north-west. By 0430 hours visibility had increased to 12 nautical miles. At 0440 hours orders were given to refuel the Walrus of HMS Prince of Wales but due to delays due to water in the fuel it was not ready when the action began and it was damaged by splinters and eventuelly jettisoned into the sea.
At 0535/24 hours a vessel was seen looming on the horizon to the north-west, it was the Bismarck. She was some 17 nautical miles away bearing 330°. Prinz Eugen was ahead of her but this was not immediately realised and as the silhoutte of the German ships was almost similar the leading ship was most likely thought to be the Bismarck on board HMS Hood.
Battle of the Denmark Strait, action with the Bismarck and Prinz Eugen. Loss of HMS Hood.
At 0537/24 HMS Hood and HMS Prince of Wales were turned together 40° to starboard towards the enemy. At 0549 hours course was altered to 300° and the left hand ship was designated as the target. This was a mistake as this was the Prinz Eugen and not the Bismarck. This was changed to the Bismarck just before fire was opened at 0552 hours. At 0554 hours the Bismarck and Prinz Eugen also opened fire. In the meantime Prince of Wales had also opened fire at 0053 hours. Her first salvo was over. The sixth salvo was a straddle. The Norfolk and Suffolk were too far astern of the enemy to take part in the action.
At 0555 hours Hood and Prince of Wales turned two points to port. This opened up Prince of Wales' A arcs as her ninth salvo was fired.
Shortly before 0605 hours Hood signalled that another turn of two points to port had to be executed. Bismarck had just fired her fifth salvo when the Hood was rent in two by a huge explosion rising apparently between the after funnel and the mainmast. The fore part began to sink seperately, bows up, whilst the after part remained shrouded in a pall of smoke. Three or four minutes later, the Hood had vanished between the waves leaving a vast cloud of smoke drifting away to the leeward. She sank in position 63°20'N, 31°50'W (the wreck was found in 2001 in approximate position 63°22'N, 32°17'W, the exact position has not been released to the public.)
The Prince of Wales altered course to starboard to avoid the wreckage of the Hood. The Bismarck now shifted fire from her main and secondary armament to her. Range was now 18000 yards. Within a very short time she was hit by four 15" and three 6" shells. At 0602 hours a large projectile wrecked the bridge, killing or wounding most of the personnel and about the same time the ship was holed underwater aft. It was decided temporarily to discontinue the action and at 0613 hours HMS Prince of Wales turned away behind a smoke screen. The after turret continued to fire but it soon malfunctioned and was out of action until 0825 hours. When the Prince of Wales ceased firing the range was 14500 yards. She had fired 18 salvos from the main armament and five from the secondary. The Bismarck made no attempt to follow or continue the action. She had also not escaped unscatched and had sustained two severe hits.
Such was the end of the brief engagement. The loss by an unlucky hit of HMS Hood with Vice-Admiral Holland, Captain Kerr and almost her entire ships company was a grievous blow, but a great concentration of forces was gathering behind the Commander-in-Chief, and Admiral Somerville with Force H was speeding towards him from the south.
The chase
When the Hood blew up, HMS Norfolk was 15 nautical miles to the northward coming up at 28 knots. By 0630/24 she was approaching HMS Prince of Wales and Rear-Admiral Wake-Walker, signalling his intention to keep in touch, told her to follow at best speed. The destroyers that had been with HMS Hood and HMS Prince of Wales were still to the northward. They were ordered to search for survivors but only HMS Electra found three. The Prince of Wales reported that she could do 27 knots and she was told to open out to 10 nautical miles on a bearing of 110° so that HMS Norfolk could fall back on her if she was attacked. Far off the Prinz Eugen could be seen working out to starboard of the Bismarck while the chase continued to the southward.
At 0757 hours, HMS Suffolk reported that the Bismarck had reduced speed and that she appeared to be damaged. Shortly afterwards a Sunderland that had taken off from Iceland reported that the Bismarck was leaving behind a broad track of oil. The Commander-in-Chief with HMS King George V was still a long way off, about 360 nautical miles to the eastward, and Rear-Admiral Wake-Walker on the bridge of HMS Norfolk had to make an important decision, was he to renew the action with the help of the Prince of Wales or was he to make it his business to ensure that the enemy could be intercepted and brought to action by the Commander-in-Chief. A dominant consideration in the matter was the state of the Prince of Wales. Her bridge had been wrecked, she had 400 tons of water in her stern compartments and two of her guns were unserverable and she could go no more then 27 knots. She had only been commissioned recently and barely a week had passed since Captain Leach had reported her ready for service. Her turrets were of a new and an untried model, liable for 'teething' problems and evidently suffering from them, for at the end of the morning her salvoes were falling short and wide. It was doubted if she was a match for the Bismarck in her current state and it was on these grounds that Rear-Admiral Wake-Walker decided that he would confine himself to shadowing and that he would not attempt to force on an action. Soon after 1100/24 visibility decreased and the Bismarck was lost out of sight in mist and rain.
Measures taken by the Admiralty, 24 May 1941.
After the loss of HMS Hood the following measures were taken by the Admiralty. To watch for an attempt by the enemy to return to Germany, HMS Manchester, HMS Birmingham and HMS Arethusa had been ordered at 0120/24 to patrol off the north-east point of Iceland. They were told to proceed to this location with all despatch.
HMS Rodney (Capt. F.H.G. Dalrymple-Hamilton, RN), which with four destroyers was escorting the troopship Britannic (26943 GRT, built 1930) westward, was ordered at 1022/24 to steer west on a closing course and if the Britannic could not keep up she was to leave her with one of the destroyers. Rodney was about 550 nautical miles south-east of the Bismarck. At 1200/24 she left the Britannic in position 55°15'N, 22°25'W and left HMS Eskimo (Lt.Cdr. E.G. Le Geyt, RN) with her. HMS Rodney then proceeded with HMS Somali (Capt. C. Caslon, RN), HMS Tartar (Cdr. L.P. Skipwith, RN) and HMS Mashona (Cdr. W.H. Selby, RN) westwards on a closing course.
Two other capital ships were in the Atlantic; HMS Ramillies (Capt. A.D. Read, RN) and HMS Revenge (Capt. E.R. Archer, RN). The Ramillies was escorting convoy HX 127 from Halifax and was some 900 nautical miles south of the Bismarck. She was ordered at 1144/24 to place herself to the westward of the enemy and leaving her convoy at 1212/24 in position 46°25'N, 35°24'W, she set course to the north. HMS Revenge was ordered to leave Halifax and close the enemy.
Light cruiser HMS Edinburgh (Capt. C.M. Blackman, DSO, RN) was patrolling in the Atlantic between 44°N and 46°N for German merchant shipping and was ordered at 1250/24 to close the enemy and take on relief shadower. At 1430/24 she reported her position as 44°17'N, 23°56'W and she was proceeding on course 320° at 25 knots.
Rear-Admiral Wake-Walker was ordered to continue shadowing even if he ran short of fuel so to bring the Commander-in-Chief into action.
The Bismack turns due south at 1320 hours on 24 May 1941.
In the low state of visibility, HMS Norfolk and HMS Suffolk had to be constantly on the alert against the enemy falling back and attacking them. At 1320/24 the Bismarck and Prinz Eugen altered course to the south and reduced speed. HMS Norfolk sighted them through the rain at a range of only 8 nautical miles. Norfolk had to quickly turn away under the cover of a smoke screen.
It was at 1530/24 when HMS Norfolk received a signal made by the Commander-in-Chief at 0800/24 from which it was estimated that the Commander-in-Chief would be near the enemy at 0100/25. This was later changed to 0900/25.
At 1545/24, Rear-Admiral Wake-Walker was asked by the Admiralty to answer four questions; 1) State the remaining percentage of the Bismarck's fighting efficiency. 2) What amout of ammunition had the Bismarck expended. 3) What are the reasons for the frequent alterations of course by the Bismarck. 4) What are your intentions as regards to the Prince of Wales' re-engaging the Bismarck.
The answers by Rear-Admiral Wake-Walker were as follows. 1) Uncertain but high. 2) About 100 rounds. 3) Unaccountable except as an effort to shake off HMS Norfolk and HMS Suffolk. 4) Consider it wisely for HMS Prince of Wales to not re-engage the Bismarck until other capital ships are in contact, unless interception failed. Doubtful if she has the speed to force an action.
The afternoon drew on towards evening. Still the Bismarck and Prinz Eugen held on to the south while the Norfolk, Suffolk and Prince of Wales were still keeping her in sight.
At 1711/24 in order to delay the enemy if possible, by attacking him from astern, the Prince of Wales was stationed ahead of the Norfolk. The enemy was not in sight from the Norfolk at that time, but the Suffolk was still in contact.
At 1841/24 the Bismarck opened fire on the Suffolk. Her salvoes fell short, but one or two shorts came near enough to cause some minor damage to her hull plating aft. HMS Suffolk replied with nine broadsides before turning away behind a smoke screen.
On seeing the Suffolk being attacked, HMS Norfolk turned towards and she and HMS Prince of Wales opened fire, the latter firing 12 salvoes. By 1856 hours the action was over. Two of the guns on the Prince of Wales malfuntioned again. After the action the cruisers started to zig-zag due to fear for German submarines.
British dispositions at 1800 hours on 24 May 1941.
From the Admiralty at 2025/24, there went out a signal summarising the situation at 1800/24. The position, course and speed of the Bismarck was given as 59°10'N, 36°00'W, 180°, 24 knots with HMS Norfolk, HMS Suffolk and HMS Prince of Wales still in touch. The Commander-in-Chiefs estimated position at 1800/24 was 58°N, 30°W, with HMS King George V and HMS Repulse. HMS Victorious was with the 2nd Cruiser Squadron (HMS Galatea, HMS Aurora, HMS Kenya). They had parted company with the Commander-in-Chief at 1509/24. Heavy cruiser HMS London (Capt. R.M. Servaes, CBE, RN) was in position 42°45'N, 20°10'W and had been ordered to leave her convoy and close the enemy. HMS Ramillies was in estimated position 45°45'N, 35°40'W. She had been ordered to place herself to the west of the enemy. HMS Manchester, HMS Birmingham and HMS Arethusa were returning from their position off the north-east of Iceland to refuel. HMS Revenge had left Halifax and was closing convoy HX 128. HMS Edinburgh was in approximate position 45°15'N, 25°10'W. She had been ordered to close and take over stand by shadower.
Evening of 24 May 1941.
At 2031/24 HMS Norfolk received a signal sent by the Commander-in-Chief at 1455/24 stating that aircraft from HMS Victorious might make an attack at 2200/24 and Rear-Admiral Wake-Walker now waited for an air attack which he expected at 2300 hours. By that time Bismarck had been lost from sight but at 2330/24 HMS Norfolk briefly sighted her at a distance of 13 nautical miles. At 2343/24 aircraft from HMS Victorious were seen approaching. They circled round HMS Prince of Wales and HMS Norfolk and the latter was able to direct them to the enemy. At 0009/25 heavy anti-aircraft gunfire was seen and the Bismarck was just visible as the aircraft attacked.
HMS Victorious and the 2nd Cruiser Squadron detached by the Commander-in-Chief.
At 1440/24 the Commander-in-Chief ordered the 2nd Cruiser Squadron (HMS Galatea, HMS Aurora, HMS Kenya, HMS Hermione) and HMS Victorious to a position within 100 nautical miles from Bismarck and to launch a torpedo bombing attack and maintain contact as long as possible. The object of the torpedo bombing attack was to slow the enemy down. On board the Victorious were only 12 Swordfish torpedo bombers and 6 Fulmar fighters. Victorious was only recently commissioned and her crew was still rather green. She had on board a large consignment of crated Hurricane fighters for Malta which were to be delivered to Gibraltar.
At 2208/24 HMS Victorious commenced launching 9 Swordfish in position 58°58'N, 33°17'E. Two minutes later al were on their way to find the Bismarck. The Squadron was led by Lt.Cdr.(A) E. Esmonde, RN.
HMS Victorious aircraft attack the Bismarck.
When the Swordfish took off from HMS Victorious the Bismarck was estimated to be in position 57°09'N, 36°44'W and was steering 180°, speed 24 knots. At 2330/24 they sighted the Bismarck but contact was lost in the bad weater. Shortly afterwards the Swordfish sighted HMS Prince of Wales, HMS Norfolk and HMS Suffolk. HMS Norfolk guided them to the enemy which was 14 nautical miles on her starboard bow. At 2350 hours a vessel was detected ahead and the squadron broke cloud to deliver an attack. To their surprise they found themselves over a United States Coastguard cutter. The Bismarck was 6 nautical miles to the southward and on sighting the aircraft opened up a heavy barrage fire. Lt.Cdr. Esmonde pressed home his attack, 8 of the Swordfish were able to attack, the other had lost contact in the clouds.
The 8 planes attacked with 18" torpedoes, fitted with Duplex pistols set for 31 feet. At midnight three Swordfish attacked simultaneously on the port beam. Three others made a longer approach low down attacking on the port bow a minute later. One took a longer course, attacking on the port quarter. One went round and attacked on the starboard bow a couple of minutes after midnight. At least one hit was claimed on the starboard side abreast the bridge. The Germans however state that no hit was scored but that the violent maneuvering of the ship to avoid the attack, together with the heavy firing by the Bismarck caused the leak in no.2 boiler room to open up. No.2 boiler room was already partially flooded and now had to be abandoned.
All Swordfish from the striking had returned to HMS Victorious by 0201/25. Two Fulmars launched at 2300/24 for shadowing failed to find their ship in the darkness due to the failure of Victorious' homing beacon. Their crews were in the end picked up from the chilly water.
HMS Norfolk and HMS Suffolk loose contact at 0306/25.
While the aircraft from HMS Victorious were making their attack, HMS Norfolk sighted a ship to the south-west and gave the order to open fire. HMS Prince of Wales was able to identify it in time as an American coast guard cutter, but in the movements prepartory to opening fire HMS Norfolk lost touch with the enemy for a time and it was not until 0116/25 that she suddenly sighted the Bismarck only 8 nautical miles away. There followed a brief exchange of fire. HMS Norfolk and HMS Prince of Wales turned to port to bring their guns to bear and the latter was ordered to engage. It was then 0130/25. The Prince of Wales fired two salvoes at 20000 yards by radar. The Bismarck answered with two salvoes which fell a long way short. The light was failing and the enemy was again lost to sight. HMS Suffolk, which had to most reliable RDF set was told to act independently so as to keep in touch.
Around 0306/25 the Suffolk lost touch with the Bismarck. At 0552/25 Rear-Admiral Wake-Walker asked if HMS Victorious could launch aircraft for a search at dawn.
Search measures, 25 May 1941.
With the disappearance of the Bismarck at 0306/25 the first phase of the pursuit ended. The Commander-in-Chief, in HMS King George V with HMS Repulse in company was then about 115 nautical miles to the south-east. At 0616/25, Rear-Admiral Wake-Walker signalled that it was most probable that Bismarck and Prinz Eugen made a 90° turn to the west or turned back and 'cut away' to the eastward astern of the cruisers. Suffolk was already searching to the south-west and Norfolk was waiting for daylight to do the same. Prince of Wales was ordered to join the King George V and Repulse.
Force H was still on a course to intercept the Bismarck while steaming on at 24 knots. The Rear-Admiral commanding the 2nd Cruiser Squadron in HMS Galatea had altered course at 0558/25 to 180° for the position where the enemy was last seen and the Victorious was getting 8 aircraft ready to fly off at 0730/25 for a search to the eastward. This plan however was altered on orders being recieved from the Commander-in-Chief to take the cruisers and Victorious and carry out a search to the north-west of the Bismarck's last reported position. Five Fulmars had already been up during the night, two of them had not returned to the ship. The search therefore had to be undertaken by Swordfish, the only aircraft available. At 0810/25, seven Swordfish were flown off from position 56°18'N, 36°28'W to search between 280° and 040° up to 100 nautical miles. The search was supplemented by Victorious herself as well as the cruisers from the 2nd Cruiser Squadron (Galatea, Aurora, Kenya and Hermione) which were spread some miles apart.
DF position of the Bismarck of 0852/25.
HMS King George V was still proceeding to the south-west when at 1030/25 the Commander-in-Chief recieved a signal from the Admiralty that the Bismarck's position had been obtained by DF (direction finding) and that it indicated that the Bismarck was on a course for the North Sea by the Faeroes-Iceland passage. To counter this move by the enemy the Commander-in-Chief turned round at 1047/25 and made for the Faeroes-Iceland passage at 27 knots. HMS Repulse was no longer in company with HMS King George V, she had been detached at 0906/25 for Newfoundland to refuel. Suffolk also turned to the eastward to search, her search to the south-west had been fruitless. The search by HMS Victorious, her aircraft and the 2nd Cruiser Squadron to the north-west also had no result. Six Swordfish were landed on by 1107/25, one failed to return. HMS Galatea, HMS Aurora and HMS Kenya now turned towards the DF position of the Bismarck to search in that direction. HMS Hermione had to be detached to Hvalfiord, Iceland to refuel as she was by now down to 40%. The other cruisers slowed down to 20 knots to economise their remaining fuel supply wich was also getting low. At this moment HMS King George V had about 60% remaining.
Events during 25 May 1941.
At 1100/25, HMS King George V, HMS Suffolk and HMS Prince of Wales were proceeding to the north-east in the direction of the enemy's DF signal. HMS Rodney was in position 52°34'N, 29°23'W some 280 nautical miles to the south-eastward on the route towards the Bay of Biscay. On receiving the Commander-in-Chiefs signal of 1047/25 she too proceeded to the north-east.
Meanwhile to Admiralty had come to the conclusion that the Bismarck most likely was making for Brest, France. This was signalled to the Commander-in-Chief at 1023/25 to proceed together with Force H and the 1st Cruiser Squadron on that assumption.
In the absence however of definite reports it was difficult to be certain of the position of the enemy. The DF bearings in the morning had not been very definite. At 1100/25, HMS Renown (Force H), was in position 41°30'N, 17°10'W was ordered to act on the assumption the enemy was making for Brest, France. She shaped course accordingly and prepared a comprehensive sheme of air search. At 1108/25, HMS Rodney, was told to act on the assumption that the enemy was making for the Bay of Biscay. At 1244/25 the Flag Officer Submarines ordered six submarines to take up intercepting positions about 120 nautical miles west of Brest. The submarines involved were HMS Sealion (Cdr. B. Bryant, DSC, RN), HMS Seawolf (Lt. P.L. Field, RN), HMS Sturgeon (Lt.Cdr. D. St. Clair-Ford, RN) from the 5th Submarine Flottilla at Portsmouth, HMS Pandora (Lt.Cdr. J.W. Linton, DSC, RN), which was on passage to the U.K. from the Mediterranean to refit, HMS Tigris (Lt.Cdr. H.F. Bone, DSO, DSC, RN), from the 3rd Submarine Flottilla at Holy Loch and HMS H 44 (Lt. W.N.R. Knox, DSC, RN), a training boat from the 7th Submarine Flotilla at Rothesay which happened to be at Holyhead. Seawolf, Sturgeon and Tigris were already on patrol in the Bay of Biscay, Sealion departed Portsmouth on the 25th as did H 44 but she sailed from Holyhead. Pandora was on passage to the U.K. to refit and was diverted.
At 1320/25 a good DF fix located an enemy unit within a 50 mile radius from position 55°15'N, 32°00'W. This was sent by the Admiralty to the Commander-in-Chief at 1419/25 and it was received at 1530/25. It was only in the evening that it was finally clear to all involved that Bismarck was indeed making for a French port. Air searches had failed to find her during the day. (69)
18 May 1941
Chase and sinking of the German battleship Bismarck, 18 to 27 May 1941.
Part II.
26 May 1941.
By now the question of fuel was becoming acute. For four days ships had been steaming at high speeds and the Commander-in-Chief was faced with the reality of fuel limits. HMS Repulse had already left for Newfoundland, HMS Prince of Wales had by now been sent to Iceland to refuel. HMS Victorious and HMS Suffolk had been forced to reduce speed to economise their fuel.
Coastal Command started air searches along the route towards the Bay of Biscay by long range Catalina flying boats. Lack of fuel was effecting the destroyer screens of the capital ships. There was no screen available for HMS Victorious. The 4th Destroyer Flotilla, escorting troop convoy WS 8B, was ordered at 0159/26 to join the Commander-in-Chief in HMS King George V and HMS Rodney as was HMS Jupiter (Lt.Cdr. N.V.J.P. Thew, RN) which sailed from Londonderry. Leaving the convoy the 4th D.F. proceeded to the north-east. Force H in the meantime was also approaching the immediate area of operations. These forces were to play an important part in the final stages of the chase of the Bismarck.
Force H, 26 May 1941.
HMS Renown, HMS Ark Royal and HMS Sheffield were having a rough passage north in heavy seas, high wind, rain and mist. Their escorting destroyers had already turned back towards Gibraltar at 0900/25. At dawn on the 26th there was half a gale blowing from the north-west. At 0716/26 HMS Ark Royal launched a security patrol in position 48°26'N, 19°13'W to search to the north and to the west just in case the Scharnhorst and Gneisenau had departed Brest to come to the aid of the Bismarck. At 0835/26 there followed an A/S patrol of ten Swordfish. All planes had returned by 0930. None had seen anything.
Bismarck sighted at 1030/26.
It was at 1030/26 that one of the long range Catalina's of the Coastal Command sighted the Bismarck in position 49°30'N, 21°55'W. It was received in HMS King George V at 1043 hours and in HMS Renown in 1038 hours. It placed the enemy well to the westward of the Renown. It was confirmed within the hour when two Swordfish from the Ark Royal which reported the Bismarck in position 49°19'N, 20°52'W some 25 miles east of the position given by the Catalina. The Commander-in-Chief was at that moment about 130 miles to the north of the Bismarck but it was soon clear that the Bismarck had too great a lead to permit her being overtaken unless her speed could be reduced. Nor was the question one merely of distance and speed. The Bismarck was approaching a friendly coast and could run her fuel tanks nearly dry and was sure of air protection, while the British ships would have a long journey back to base in the face of air and submarine attack. HMS Renown was ahead of the Bismarck but it was important that she did not engage the Bismarck unless the latter was already heavily engaged by the better armoured HMS King George V and HMS Rodney.
When the Catalina found the Bismarck at 1030 hours, the 4th Destroyer Flotilla was steering east to join the Commander-in-Chief. They seem to have crossed astern of the enemy's track about 0800/26. The Catalina's report reached Capt. Vian in HMS Cossack at 1054/26 and 'knowing that the Commander-in-Chief would order him to intercept the enemy' Capt. Vian altered course to the south-east.
First attack by aircraft from the Ark Royal.
At 1315/26 HMS Sheffield was detached to the southward with orders to close and shadow the enemy, who was estimated to be 40 nautical miles south-west of the Renown. The visual signal ordering this movement was not repeated to HMS Ark Royal, an omission which had serious consequenses for the aircraft that were to take off did not know that HMS Sheffield had parted company.
At 1450/26 HMS Ark Royal launched a striking force of 14 Swordfish aircraft with the orders to proceed to the south and attack the Bismarck with torpedoes. Weather and cloud conditions were bad and a radar contact was obtained on a ship some 20 nautical miles from the estimated position of the enemy that had been given to the leader shortly before takeoff. At 1550 hours they broke through the clouds and fired 11 torpedoes. Unfortunately the supposed enemy was HMS Sheffield which managed to avoid all torpedoes. The Bismarck at that time was some 15 nautical miles to the southward. The striking force then returned an all aircraft had landed on by 1720/26.
At 1740/26, HMS Sheffield, sighted the Bismarck in position 48°30'N, 17°20'W and took station about 10 nautical miles astern and commenced shadowing the enemy.
Ark Royal's second attack, 2047/26.
The first striking force on its way back sighted the 4th Destroyer Flotilla 20 nautical miles west of Force H. As soon as the aircraft from the first strike had landed they were refuelled and rearmed as fast as possible. Take off started at 1910/26, a total of 15 Swordfish were launched. Reports coming in from HMS Sheffield placed the Bismarck at 167°, 38 nautical miles from the Ark Royal. The striking force was ordered to contact HMS Sheffield who was told to use DF to guide them in.
At 1955/26 HMS Sheffield was sighted but soon lost in the bad weather conditions. She was found again at 2035 hours, she guided the Swordfish in and directed them by visual signal on the enemy bearing 110°, 12 nautical miles. The force took departure for the target in subflights in line astern at 2040/26.
At 2047/26 no.1 subflight of three Swordfish dived through the clouds and sighted the Bismarck 4 nautical miles off to the south-east. One Swordfish of no.3 subflight was with them. Approaching again just inside the cloud they made their final dive at 2053/26 on the port beam under a very intense and accurate fire from the enemy. They dropped four torpedoes of which one was seen to hit. No.2 subflight, made up of two Swordfish, lost touch with no.1 subflight in the clouds, climed to 9000 feet, then dived on a bearing obtained by radar and then attacked from the starboard beam, again under heavy and intense fire. They dropped two torpedoes for one possible hit. The third plane of this subflight had lost touch with the other two and had returned to HMS Sheffield to obtained another range and bearing to the enemy. It then flew ahead of the enemy and carried out a determined attack from his port bow under heavy fire and obtained a torpedo hit on the port side amidships.
Subflight no.4 followed subflight no.3 into the clouds but got iced up at 6600 feet. It then dived through the clouds and was joined by no.2 aircraft from subflight no.3. The Bismarck was then sighted engaging subflight no.2 to starboard. The four aircraft then went into the clouds and cicled the German battleships stern and then dived out of the clouds again and attack simultaneously from the port side firing four torpedoes. All however missed the Bismarck. They came under a very heavy and fierce fire from the enemy and one of the aircraft was heavily damaged, the pilot and air gunner being wounded.
The two aircraft of subflight no.5 lost contact with the other subflights and then with each other in the cloud. They climbed to 7000 feet where ice began to form. When coming out of the cloud at 1000 feet aircraft 4K sighted the Bismarck down wind, she then went back into the cloud under fire from the enemy. She saw a torpedo hit on the enemy's starboard side, reached a position on the starboard bow, withdrew to 5 miles, then came in just above the sea and just outside 1000 yards fired a torpedo which did not hit. The second plane of this flight lost his leader diving through the cloud, found himself on the starboard quarter and after two attempts to attack under heavy fire was forced to jettison his torpedo.
Of the two Swordfish of subflight no.6 one attacked the Bismarck on the starboard beam and dropped his torpedo at 2000 yards without success. The second plane lost the enemy, returned to the Sheffield for a new range and bearing and after searching at sea level attacked on the starboard beam but was driven off by intense fire. The attack was over by 2125/26. Thirteen torpedoes had been fired and it was thought two hits and one probable hit had been obtained. Two torpedoes were jettisoned. The severe nature and full effect of the damage done was at first not fully realised. Actually the Bismarck had received a deadly blow. The last of the shadowing aircraft to return had seen her make two complete circles. One torpedo had struck her on the port side amidships doing little damage but th other torpedo that hit was on the starboard quarter damaging her propellors, wrecking her steering gear and jambing her rudders, it was this torpedo hit that sealed her fate.
HMS Sheffield was still shadowing astern when at 2140/26 the Bismarck turned to port and fired six accurate salvoes of 15". None actually hit Sheffield but a near miss killed three men and seriously injured two. HMS Sheffield turned away and while doing so she sighted HMS Cossack and the other destroyers from the 4th DF approaching from the westward. She then gave them the approximate position of the Bismarck. At 2155/26, HMS Sheffield lost touch with the Bismarck. The destroyers continued to shadow and eventually attack. Meanwhile HMS Renown and HMS Ark Royal shaped course for the southward to keep the road clear for the Commander-in-Chief in HMS King George V and for HMS Rodney. Also in the Ark Royal aircraft were being got ready for an attack on the Bismarck at dawn.
Bismarck, 26 May 1941.
The Bismarck could no longer steer after the torpedo hit aft. The steering motor room was flooded up to the main deck and the rudders were jambed. Divers went down to the steering room and managed to centre one rudder but the other remained immovable. She was by this time urgently in need of fuel. It was hoped by the Germans that while she was nearing the French coast strong forces of aircraft and submarines would come to her assistance.
At 2242/26, Bismarck sighted the British destroyers. A heavy fire was opened on them. Their appearence greatly complicated the situation. Before their arrival however, Admiral Lütjens seems to have made up his mind as one hour earlier he had signalled to Berlin 'ship out of control. We shall fight to the last shell. Long live the Führer.'
The fourth Destroyer Flotilla makes contact, 26 May 1941.
Just as the sun was setting, Captain Vian (D.4) in HMS Cossack with HMS Maori, HMS Sikh, HMS Zulu and the Polish destroyer ORP Piorun arrived on the scene.
Shortly after 1900/26 HMS Renown and HMS Ark Royal were sighted to the northward. Ark Royal was just about to fly off the second striking force. The destroyers continued on the the south-east. At 2152/26 HMS Sheffield was sighted and from her Captain Vian obtained the approximate position of the enemy.
The destroyers were spread 2.5 nautical miles apart on a line bearing 250° - 070° in the order from north-east to south-west, Piorun, Maori, Cossack, Sikh, Zulu. During the latter stages of the approach speed was reduced and the flotilla manoeuvred so as to avoid making a high speed end-on contact.
At 2238/26, ORP Piorun on the port wing reported the Bismarck 9 nautical miles distant, bearing 145° and steering to the south-eastward.
Destroyers shadowing, late on 26 May 1941.
At the time the Piorun reported being in contact with the Bismarck the destroyers were steering 120°. All were at once ordered to take up shadowing positions. Four minutes later the Bismarck opened a heavy fire with her main and secondary armaments on the Piorun and Maori. Two attempts were made by these ships to work round to the northward of the enemy but they were silhouetted against the north-western horizon making them easy to spot. The Bismarck's fire was unpleasantly accurate, through neither destroyer was actually hit. The Commanding Officer of the Maori then decided to work round to the southward and altered course accordingly.
The Piorun closed the range and herself opened fire from 13500 yards but after firing three salvoes, she was straddled by a salvo which fell about 20 yards from the ships side. She then ceased fire and turned away to port while making smoke. During this engagement she lost touch with the other destroyers and later also with the Bismarck. She remained under fire for about one hour but was not hit. She worked round to the north-east of the Bismarck but eventually lost touch with her prey at 2355/26.
The other destroyers, meanwhile, had been working round to the southward of the enemy to take up shadowing positions to the eastward of him. Soon after the initial contact it was evident the the Bismarck's speed had been so seriously reduced that interception by the battlefleet was certain, provided that contact could be held. In these circumstances Captain Vian defined his object at firstly, to deliver the enemy to the Commander-in-Chief at the time he desired, and secondly, to sink or immoblise her with torpedoes during the night but not with to great a risk for the destroyers. Accordingly at 2248/26 as signal was made to all ordering them to shadow and this operation was carried out through the night, though torpedo attacks were carried out later under the cover of darkness.
As darkness came on, the weather deteriorated and heavy rain squalls became frequent. Visibility varied between 2.5 nautical miles and half a mile but the Bismarck, presumably using radar, frequently opened up accurate fire outside these ranges.
About half an hour after sunset, the destroyers were ordered at 2324/26 to take up stations prepartory to carrying out a synchronised torpedo attack. This was subsequently cancelled on account of the adverse weather conditions and they were ordered to attack independently as opportunity offered. At about 2300 hours the Bismarck altered course to the north-westward.
At this time HMS Zulu was in touch with her and kept her under observation from the southward. At 2342 hours the Bismarck opened fire on HMS Cossack, then about 4 miles to the south-south-west and shot away her aerials. The Cossack turned away under the cover of smoke, shortly afterwards resuming her course to the eastward.
A few minutes later, at 2350 hours, HMS Zulu came under heavy fire from the Bismarck's 15" guns. The first three salvoes straddled wounding an officer and two ratings. Drastic avoiding action was taken as a result of which Zulu lost touch. HMS Sikh, however, who had lost sight of the enemy half an hour previously, had observed her firing at HMS Cossack and now succeeded in shadowing from astern until 0020/27 when the enemy made a large alteration to port and commenced firing at her. HMS Sikh altered course to port, intending to fire torpedoes, but the view of the Torpedo Control Officer was obscured by shell splashes and Sikh then withdrew to the southward.
Destroyer night torpedo attacks, 26/27 May 1941.
HMS Zulu, after her escape at 2345/26, had steered to the northward and at 0030/27 fell in with HMS Cossack. Shortly afterwards she sighted ORP Piorun. On receipt of a signal from Captain Vian, timed 0040/27, to take any opporunity to fire torpedoes, HMS Zulu altered course to the westward,and at 0100/27 sighted the Bismarck steering 340°.
Positions of the destroyers was now as follows; to the north-eastward of the enemy, HMS Cossack was working round to the north and west. HMS Maori, since losing touch, had been making to the westward. She was now to the south-west of the Bismarck. HMS Sikh was some distance to the southward, not having received any information regarding the position of the Bismarck since 0025/27. HMS Zulu was astern of the enemy and in contact. Range was only 5000 yards. Bismarck finally spotted Zulu and at once opened fire with her main and secondary armament and straddled Zulu. She fired four torpedoes at 0121/27 but no hits were observed and they are believed to have missed ahead. Zulu then ran out to the northward in order to be clear of the other destroyers. Shortly afterwards they widnessed a successful attack by HMS Maori.
HMS Maori had seen the Bismarck opening fire on the Zulu at 0107/27. Maori then closed to 4000 yards on Bismarck's port quarter apparently undetected. When abeam of the enemy, who then appeared to be altering course to starboard Maori fired a star shell to see what he was about. Two minutes later, at 0137/27, two torpedoes were fired and course was altered towards the Bismarck with the intention of attacking again from her starboard bow once the enemy had steadied on her new course. Whilst Maori was turning a torpedo hit was observed on the enemy. A bright glow illuminated the waterline of the enemy battleship from stem to stern. Shortly afterwards there appeared between the bridge and the stem a glare that might have been a second hit. The enemy immediately opened up a very heavy fire with both main and secondairy armaments and quick firing guns. As the Maori was being straddled, she turned away, and increased to full speed. Shots continued to fall on both sides of the ship until the range had been opened up to 10000 yards. Maori was not actually hit. Meanwhile HMS Cossack had been creeping up from the north-eastward and at 0140/27, only three minutes after Maori had fired two torpedoes, Cossack launched three torpedoes from 6000 yards. Bismarck stood out plainly, silhoutted by the broadsides she was firing at the Maori. One torpedo was seen to hit. Flames blazed on the forecastle of the Bismarck after this hit but they were quickly extinguished. Probably as a consequence of the torpedo hits the Bismarck stopped dead in the water, this was reported by HMS Zulu at 0148/27. After about one hour the Bismarck got underway again. On receipt of this report, HMS Sikh, who was closing the scene of the action from the southward, made an attack. Four torpedoes were fired at 0218/27 at the stopped battleship. It is believed that one hit was obtained. After this attack Sikh remained in radar contact with the enemy until 0359/27 when contact was lost.
Around 0240/27 the Bismarck was underway again, proceeding very slowly to the north-westward. At 0335/27, HMS Cossack made another attack firing her last remaining torpedo from a range of 4000 yards. It missed. HMS Cossack then came under a heavy fire. She withdrew to the northward under the cover of smoke, altering to a westerly course shortly afterwards.
At 0400/27 all destroyers had lost touch with the enemy. HMS Cossack was then to the north-west and HMS Sikh, HMS Zulu and HMS Maori were between the south-west and south-east of the Bismarck. All destroyers now endeavoured to regain contact.
Touch with the enemy was not regained until shortly before 0600 hours. By that time ORP Piorun, which was running short of fuel, had been ordered to proceed to Plymouth.
Destroyers shadowing, morning twilight, 27 May 1941, final attack.
Touch was regained by HMS Maori at 0550/27 when she sighted the Bismarck zigzagging slowly on a base course of 340° at about 7 knots. Maori commenced shadowing until daylight. At 0625 hours, HMS Sikh was also in contact when the Bismarck emerged from a rain squal 7000 yards on her starboard bow. By then it was nearly full daylight but to the surprise of the crew of the Sikh she got away with it without being fired at.
Shortly before sunrise a final torpedo attack was carried out by HMS Maori, which fired two torpedoes at 0656/27 from 9000 yards. Both missed. The Bismarck opened fire and straddled Maori which escaped at 28 knots.
At daylight the destroyers were stationed in four sectors from which they were able to keep the enemy under continuous observation until the arrival of the Battle Fleet at 0845 hours.
Force H, 26/27 May 1941.
While the destroyers were shadowing the Bismarck, the pursuing forces were drawing steadily closer. To the north was the Commander-in-Chief with the King George V and the Rodney with the Norfolk closing on them. In the south HMS Dorsetshire (Capt. B.C.S. Martin, RN) was coming up, while Force H was waiting for the dawn. When Captain Vian's destroyers got in touch at 2251/26 the Renown and Ark Royal were north-west of the enemy. It was not possible to attack with aircraft during the night but all preparations were made to attack at dawn with 12 Swordfish. Course was shaped to the northward and then to the west for a time and at 0115/27 Force H turned south. Shortly afterwards instructions were received from the Commander-in-Chief to keep not less then 20 miles to the southward of the Bismarck so as to leave a clear approach for the Battle Fleet. Force H accordingly continued to the southward during the night. Bursts of starshell and gunfire could be seen during the night while the destroyers attacked. At 0509/27 an aircraft was flown off from HMS Ark Royal to act as a spotter for HMS King George V but it failed to find the Bismarck in the bad weather. The striking of force of 12 Swordfish was ready but due to the bad weather to strike was cancelled.
At 0810/27, HMS Maori was sighted. She reported the Bismarck 11 miles to the north of her. The made the enemy 17 miles to the north of HMS Renown so course was shaped to the south-west. At 0915/27 heavy gunfire could be heard and the striking force was flown off. They found the Bismarck at 1016/27. By then the battle was almost over, her guns were silenced and she was on fire. They saw her sink. At 1115/27 they had all landed back on HMS Ark Royal. A German Heinkel aircraft dropped a couple of bombs near HMS Ark Royal when they were landing on.
HMS Norfolk, 26/27 May 1941.
When the Catalina report (1030/26) came in, HMS Norfolk altered course to the south-west and increased speed to 27 knots. At 2130/26 the Bismarck was still some 160 nautical miles to the southward and speed was increased to 30 knots. At 2228/26 the report on the torpedo hit by the aircraft from Ark Royal came in and the Norfolk turned to the southward, continuing to close the enemy. At 0753/27 Norfolk sighted the Bismarck. She did not open fire and was lost to sight after ten minutes. At 0821/27, HMS King George V, was sighted to the westward, 12 nautical miles away. The position of the enemy was passed to the Commander-in-Chief. The action opened at 0847/27 at which time HMS Norfolk was then some 10 nautical miles from the Commander-in-Chief and due north of the Bismarck. HMS Norfolk had seen the beginning and was now to see the end.
HMS Dorsetshire, 26/27 May 1941.
On 26 May 1941, HMS Dorsetshire, was with convoy SL 74 proceeding from Freetown to the U.K. When she received the sighting report from the Catalina at 1056/26 she was some 360 nautical miles to the south of the Bismarck. She then left the protection of the convoy to the Armed Merchant Cruiser HMS Bulolo (Capt.(Retd.) R.L. Hamer, RN) and set course for the northward to take up the possible task of shadowing. By 2343/26 it became clear from reports that the Bismarck was making no ground to the eastward and that at 0230/27 she appeared to be laying stopped. Due to the heavy seas HMS Dorsetshire was forced to reduce speed to 25 knots and later even to 20 knots. At 0833/27 a destroyer was sighted ahead at a range of 8 nautical miles, it was HMS Cossack which reported the enemy at a range of 6 nautical miles. At 0850/27 the flashes of the Bismarck's guns could be seen to the westward. HMS Dorsetshire arrived at the scene of the action in the nick of time.
HMS King George V and HMS Rodney, 26/27 May 1941.
During 26 May 1941 the Commander-in-Chief in HMS King George V had been making hard to the south-east at 25 knots. He had been joined by HMS Rodney at 1806/26. They were then some 90 nautical miles north of the Bismarck. Fuel was a matter of grave anxiety. At noon on the 26th, HMS King George V, had only 32% remaining and HMS Rodney reported that she had to return at 0800/27. Speed had to be reduced on this account to 22 knots at 1705/26. In these circumstances it was no longer possible to hope to intercept the enemy, and the Commander-in-Chief decided that unless the enemy's speed had been reduced by 2400/26, he must turn at that hour. The only hope lay in the Bismarck being slowed up by the Swordfish attacking from HMS Ark Royal. A report came in that the striking force had left. Then at 2132/26, HMS Sheffield, reported that the enemy was steering 340° followed by 000° four minutes later. These reports indicated that the Bismarck was not able to hold her course and that her steering gear must have been damaged. It might still be possible to intercept her.
The Commander-in-Chief turned to the south at once hoping to make contact from the eastward in the failing light. Due to the bad weather conditions and visibility the Commander-in-Chief decided to haul off the the eastward and northward and then work round to engage from the westward at dawn. He turned eastward at 2306/26. During the night reports from Captain Vian's destroyers came in confirming the northerly course of the Bismarck. At 0236/27 the Commander-in-Chief ordered Captain Vian that the destroyers were to fire star-shell every half hour, but frequent rain squalls prevented these from being seen and they tended to attrack the enemy's fire. The Bismarck was still a formidable opponent for at 0353/27 Captain Vian reported that during the last hour she had done 8 nautical miles and that she was still capable of heavy and accurate fire. The Commander-in-Chief decided not to make a dawn approach but to wait until daylight while approaching from the west taking advantage of wind, sea and light. At 0529/27 HMS Rodney reported sighting HMS Norfolk to the eastward by DF. It was light at 0600 hours. At 0820 hours HMS Norfolk was sighted on the port bow of HMS King George V. She signalled 'enemy 130°, 16 nautical miles'. At 0843/27 looming on the starboard bow there emerges out of a rain squall the dark grey blot of a large ship. 'Enemy in sight'.
Bismarck 26/27 May 1941.
The Bismarck after altering course to the north-west had been labouring along with a jambed rudder, steering an erratic course at 8 knots. During the night the attacking destroyers were met with heavy and accurate salvoes. Sixteen torpedoes were fired at her. Early in the morning a glare of star-shell burst over her, lighting her up. Three torpedoes followed from a destroyer on the port bow (HMS Maori) of which one hit on the port side amidships. Three minutes later three more came from the starboard side (these were fired by HMS Cossack) of which one hit on the starboard bow. The damage that was sustained from these torpedo hits is not known. The Bismarck lay stopped for over one hour. At 0140/27 a message was received that a large number of Junkers bombers were coming to her aid as were U-boats but the Bismarck was beyond their help besides that the aircraft did not find her. One U-boat (U-556, which was out of torpedoes) on its way back from the Atlantic joined her and was within sight during the night. Another (U-74) arrived at 0600/27 but had been damaged in a depth charge attack and could do nothing as well. In the Bismarck the crew was exhausted and men were falling asleep at their posts. It was under these conditions that at 0840/27 two British battleships were seen to approach from the westward.
Situation before the action, 27 May 1941.
A north-westerly gale was blowing when dawn broke with a good light and clear horizon to the north-eastward. Reports received during the night indicated that, despite reduced speed and damaged rudders, Bismarck's armament was functioning effectively. Given the weather conditions the Commander-in-Chief decided to approach on a west-north-westerly bearing and, if the enemy continued his northerly course, to deploy to the southward on opposite course at a range of about 15000 yards. Further action was to be dictated by events.
Between 0600 and 0700 hours a series of enemy reports from HMS Maori which was herself located by DF bearings. This enabled HMS King George V to plot her position relatively to the Bismarck which had apparently settled down on a course of 330° at 10 knots. At 0708/27, HMS Rodney, was ordered to keep station 010° from the flagship. HMS Norfolk came in sight to the eastward at 0820/27 and provided a visual link between the Commander-in-Chief and the enemy. After the line of approach had been adjusted by two alterations of course, the Bismarck was sighted at 0843/27 bearing 118°, range about 25000 yards. Both British battleships was then steering 110° almost directly towards the enemy in line abreast formation, 8 cables apart.
Commencement of action 0847/27.
HMS Rodney opened fire at 0847/27, her first salvo sending a column of water 150 feet into the air. HMS King George V opened fire one minute later. Bismarck opened fire at 0850 hours after turning to open up A arcs. The first German salvo was short. The third and fourth salvoes straddled and nearly hit, but the Rodney manoeuvered succesfully to avoid them and the nearest fell 20 yards short. At 0854/27, HMS Norfolk joined in, but the target was not clearly visible and she opened fire without obtaining a range.
Observers state that the German gunnery was accurate at first, but commenced to deteriorate after 8 to 10 salvoes. The first hit on the Bismarck was believed to be scored by the Rodney at 0854 hours with her third salvo. Both British battleships made small alterations of course away from the enemy shortly after opening fire, the King George V to increase her distance from the Rodney and the latter to open her A arcs. From then onwards they manoeuvered independently although HMS Rodney conformed to the Flagship's general movements. The Bismarck's secondary armament came into action during this phase. HMS Rodney opened fire with her secondary armament at 0858 hours.
Run to the southward.
HMS King George V deployed to the southward at 0859/27 when the Bismarck was 16000 yards distant. HMS Rodney, 2.5 nautical miles to the northward, followed suit a minute or two later. Cordite smoke was hanging badly with the following wind and spotting was most difficult. Considerable smoke interference was therefore experienced on the southerly course which was partly overcome by radar. The Bismarck had transferred her fire to the King George V shortly after the turn but except for an occasional splash the latter hardly knew that she was under fire. At 0902/27, HMS Rodney saw a 16” shell hit the Bismarck on the upper deck forward, apparently putting the forward turrets out of action. At 0904 hours, HMS Dorsetshire joined in the firing from the eastwards from a range of 20000 yards but observation of the target was difficult and she had to check fire from 0913 to 0920 hours. Between 0910 and 0915 hours the range in King George V was more or less steady at 12000 yards.
The fate of the Bismarck was decided during this phase of the action although she did not sink until later. Around 0912 hours, the Bismarck was hit on her forward control position. During the run to the south HMS Rodney fired six torpedoes from 11000 yards and HMS Norfolk four from 16000 yards. No hits were obtained. The King George V’s secondary battery came into action at 0905 hours but this increased the smoke interference and was accordingly ordered to cease fire after two or three minutes.
Run to the northward.
At 0916/27 the Bismarck’s bearing was drawing rapidly aft and HMS Rodney turned 16 points to close and head her off. The King George V followed a minute or so later and both ships re-opened fire at ranges from 8600 and 12000 yards respectively. The Bismarck shifted her target to the Rodney about this time. A near miss damaged the sluice of her starboard torpedo tube. Most of the enemy’s guns had however been silenced at this time. Only one turret from her main armament was firing at this time as was part of her secondary armament. A fire was blazing amidships and she had a heavy list to port. During the run to the north HMS Rodney obtained a very favourable position on the Bismarck’s bow from which she poured in a heavy fire from close range. She also fired two torpedoes from 7500 yards but no hits were obtained.
HMS King George V’s position, further to leeward, was less favourable. Her view was obscured by smoke and splashes surrounding the target and her radar had temporarily broken down. Mechanical failures in the 14” turrets constituted, however, a more serious handicap at this stage. ‘A’, ‘X’ and ‘Y’ turrets were out of action for 30, 7 and a unspecified short period, respectively. This resulted in reduction of firepower of 80% for 7 minutes and 40% for 23 minutes which might have had serious effects under less favourable conditions. There were also several defects of individual guns in addition to those effecting the turrets.
At 0925/27, HMS King George V, altered outwards to 150° and reduced speed to avoid getting too far ahead of the Bismarck. She closed in again at 1005 hours, fired several salvoes from a range of only 3000 yards and then resumed her northerly course. Meanwhile HMS Rodney was zigzagging across the Bismarck’s line of advance at a range of about 4000 yards firing her main and secondary armaments. She also fired four torpedoes, one of which is thought to have hit. By 1015 hours the Bismarck was no more than a wreck. All her guns were silenced, her mast had been blown away, she was a black ruin, pouring high into the air a great cloud of smoke and flame. Men were seen jumping overboard at this time and the Captain of the King George V later remarked had he known it he would have ceased fire.
End of the action.
The Commander-in-Chief was confident that the enemy could never get back to harbour, and as both battleships were running short of fuel and as further gunfire was unlikely to hasten the Bismarck’s end, the Commander-in-Chief signalled the King George V and Rodney to steer 027° at 1015/27 in order to break off the action and return to base. At 1036/27 the Commander-in-Chief ordered HMS Dorsetshire to use her torpedoes, if she had any, on the enemy. In the meantime HMS Norfolk had been closing the target but due to the movements of the King George V and Rodney, had not fired her torpedoes until 1010 hours when she fired four torpedoes from 4000 yards and two possible hits were reported. The Dorsetshire was then approaching a mile or so to the southward, and anticipating the Commander-in-Chief’s signal at 1025 hours fired two torpedoes from 3600 yards into the enemy’s starboard side. She then steamed round the Bismarck’s bow and at 1036 hours fired another torpedo but now into her port side from 2600 yards. This was the final blow, the Bismarck heeled over quickly to port and commenced to sink by the stern. The hull turned over keel up and disappeared beneath the waves at 1040/27.
The Dorsetshire then closed and signalled to one of HMS Ark Royal’s aircraft to carry out a close A/S patrol while she was to pick up survivors assisted by HMS Maori. After 110 men had been picked up by both ships from the water both ships got underway again as a submarine was suspected to be in the area.
Damage to the Bismarck.
Survivors have told the story of terrible damage inflicted on her. The fore turrets seem to have been knocked out at 0902 hours. The fore control position was knocked out around 0912 hours. The after control position followed about 0915 hours. The after turrets were at that moment still in action. Then the aftermost gun turret was disabled by a direct hit on the left gun which burst sending a flash right through the turret. ‘C’ turret was the last one in action.
One survivor stated that around 0930 hours a shell penetrated the turbine room and another one entered a boiler room. A hit in the after dressing station killed all the medical staff and wounded that were in there at that moment. The upper deck was crowded with killed and wounded men and the seas surging in washed them overboard. Conditions below were even more terrible. Hatches and doors were jammed by concussion and blocked with wreckage. The air was thick with smoke and even more smoke was coming in from great holes in the upper deck. By 1000 hours all heavy guns were out of action and 10 minutes later the all secondary guns were also silent.
Commander-in-Chief returns.
As HMS King George V and HMS Rodney turned northwards they were joined by HMS Cossack, HMS Sikh and HMS Zulu at by 1600/28 more detroyers had joined the screen (HMS Maori, HMS Jupiter, HMS Somali, HMS Eskimo, HMS Punjabi, HMAS Nestor, HMS Inglefield, HMS Lance, HMS Vanquisher (Cdr. N.V. Dickinson, DSC, RN), HMCS St. Clair (Lt.Cdr. D.C. Wallace, RCNR), HMCS Columbia (Lt.Cdr. (Retd.) S.W. Davis, RN) and HMS Ripley (Lt.Cdr. J.A. Agnew, RN). Heavy air attacks were expected that day, but only four enemy aircraft appeared, one of which bombed the screen while another one jettisoned her bombs on being attacked by a Blenheim fighter. The destroyers HMS Mashona and HMS Tartar, 100 nautical miles to the southward, were not so furtunate. They were attacked in position 52°58’N, 11°36’W at 0955/28 by German aircraft. HMS Mashona was hit and sank at noon with the loss of 1 officer and 45 men. The Commander-in-Chief reached Loch Ewe at 1230/29. Vice-Admiral Somerville with Force H was on his way back to Gibraltar. HMS Renown, HMS Ark Royal, HMS Sheffield made rendezvous at 0800/29 with the destroyers HMS Faulknor (Capt. A.F. de Salis, RN), HMS Forester (Lt.Cdr. E.B. Tancock, DSC and Bar, RN), HMS Fury (Lt.Cdr. T.C. Robinson, RN) and HMS Wishart (Cdr. E.T. Cooper, RN). At 1605/29, HMS Forester and HMS Fury were detached to hunt a submarine further to the west. Force H, minus the two destroyers that had been detached, arrived at Gibraltar around 2030/29.
End of ‘Operation Rheinübung’.
The Bismarck’s consort, heavy cruiser Prinz Eugen, was not heard off until 4 June 1941 when aircraft reported her having arrived at Brest. After leaving the Bismarck at 1914/24, the Prinz Eugen’s primary need was to replenish her fuel stock. She set course for a rendez-vous with two tankers, the Spichern (9323 GRT, built 1935, former Norwegian Krossfonn) and the Esso Hamburg (9849 GRT, built 1939) which were position to the north-west of the Azores. All next day the German cruiser made her way southwards, and at 0906/26 , some 600 nautical miles west-north-west of the Azores she sighted the Spichern and refuelled. Two reconnaissance ships had also been ordered into this area, the Gonzenheim and the Kota Pinang. On the 28th Prinz Eugen fuelled from the Esso Hamburg. She then proceeded southwards to carry out cruiser warfare against independently routed ships in the area to the north and west of the Cape Verde Islands but an inspection of her engines the next day showed that an extensive overhaul was needed. Her Commanding Officer then decided to break off the action and course was set for Brest, France where she arrived at 2030/1 June.
A German reconnaissance ship, a supply vessel and two tankers were intercepted by Royal Navy warships and sunk by their own crew or sunk with gunfire. Also two tankers were captured. These were in chronological order; tanker Belchen (6367 GRT, built 1932, former Norwegian Sysla) by gunfire from HMS Kenya and HMS Aurora on 3 June 1941 in the Greenland area in approximate position 59°00'N, 47°00'W. On 4 June the tanker Esso Hamburg by HMS London and HMS Brilliant (Lt.Cdr. F.C. Brodrick, RN) in position 07°35'N, 31°25'W, tanker Gedania (8966 GRT, built 1920) was captured in the North Atlantic in position 43°38'N, 28°15'W by naval auxiliary (Ocean Boarding Vessel) HMS Marsdale (Lt.Cdr. D.H.F. Armstrong, RNR), she was put into service with the MOWT as Empire Garden, reconnaissance vessel Gonzenheim (4000 GRT, built 1937, former Norwegian Kongsfjord) was scuttled by her own crew after being sighted by HMS Esperance Bay ((Capt.(ret) G.S. Holden, RN) and intercepted by HMS Nelson (Capt. G.J.A. Miles, RN) and finally ordered to be boarded by HMS Neptune in position 43°29'N, 24°04'W. The next day (5 June) supply vessel Egerland (10040 GRT, built 1940) was intercepted by HMS London and HMS Brilliant in approximate position 07°00'N, 31°00'W. On 12 June, HMS Sheffield, intercepted tanker Friedrich Breme (10397 GRT, built 1936) in position 49°48'N, 22°20'W and finally on 15 June, HMS Dunedin (Capt. R.S. Lovatt, RN), captured the tanker Lothringen (10746 GRT, built 1940, former Dutch Papendrecht) in position 19°49'N, 38°30'W which had first been sighted by an aircraft from HMS Eagle (Capt. E.G.N. Rushbrooke, DSC, RN). The Lothringen was sent to Bermuda and was put into service by the MOWT as Empire Salvage. (69)
20 May 1941
HMS Neptune (Capt. R.C. O'Conor, RN) conducted aircraft launching and recovering exercises at Scapa Flow. These were followed by gunnery exercises. (67)
23 May 1941
HMS Neptune (Capt. R.C. O'Conor, RN) conducted torpedo firing exercises, DG trials and compass swing test at Scapa Flow.
While en-route to the anchorage she collided with the trawler HMS Foss. (67)
24 May 1941
HMS Neptune (Capt. R.C. O'Conor, RN) conducted gunnery exercises off Scapa Flow. (67)
25 May 1941
HMS Neptune (Capt. R.C. O'Conor, RN) departed Scapa Flow for Greenock. (67)
26 May 1941
HMS Neptune (Capt. R.C. O'Conor, RN) arrived at Greenock. (67)
31 May 1941
Convoy WS 8X.
This convoy departed the Clyde on 31 May 1941 and arrived off Aden on 11 July 1941 after which the convoy was dispersed and the ship proceeded to Aden independently.
The convoy departed from the Clyde around 2230B/31 and was made up of the following transports; Duchess of Bedford (British, 20123 GRT, built 1928), Port Wyndham (British, 11005 GRT, built 1935) and Waiwera (British, 12435 GRT, built 1934).
On departure from the Clyde the convoy was escorted by the aircraft carrier HMS Victorious (Capt. H.C. Bovell, RN), heavy cruiser HMS Norfolk (Capt. A.J.L. Phillips, RN), the light cruiser HMS Neptune (Capt. R.C. O'Conor, RN) and the armed merchant cruiser HMS Esperance Bay (Capt.(Retd.) G.S. Holden, RN).
Around 0700B/1, the A/S escort joined the convoy. This was made up of the destroyers HMS Legion (Cdr. R.F. Jessel, RN), Piorun (Cdr. E.J.S. Plawski), HMCS Saguenay (Lt. P.E. Haddon, RCN), HMS Wivern (Cdr. M.D.C. Meyrick, RN), HMS Wild Swan (Lt.Cdr. C.E.L. Sclater, RN), HMS Vansittart (Lt.Cdr. R.L.S. Gaisford, RN), HMS Brighton (Cdr.(Retd.) C.W.V.T.S. Lepper, RN), HMS St. Marys (Lt. K.H.J.L. Phibbs, RN) and HMS Sherwood (Lt.Cdr. S.W.F. Bennetts, RN).
Around 1445B/2, ORP Piorun obtained an A/S contact in position 53°30'N, 16°46'W at a range of 1200 yards. She immediately attacked with depth charges. A total of 18 depth charges was dropped in four attack runs after which the contact was lost and Piorun rejoined the convoy around an hour later.
Around 0700B/3, in position 50°22'N, 19°55'E, HMS Wivern, HMS Wild Swan and HMS Vansittart were detached to Gibraltar.
Around 0900B/3, in position 49°57'N, 20°05'E, HMS St. Marys and HMS Brighton were detached to return to the U.K.
Around 1200B/3, in position 49°20'N, 20°30'W, HMS Esperance Bay was detached to search for enemy supply vessels operating in the North Atlantic.
Around 1500B/3, in position 48°40'N, 20°59'E, HMS Legion was detached to make rendezvous with a transport.
Around 1845B/3, HMCS Sauguenay parted company to proceed to Canada.
Around 2000B/3, in position 46°50'N, 22°29'E, HMS Sherwood and ORP Piorun parted company to return to the U.K.
At 1825B/4, in position 42°25'N, 23°39'E, HMS Neptune was detached to intercept a vessel reported by the Esperance Bay as well as aircraft from HMS Victorious.
Around 2100B/4, HMS Victorious was also detached to aid in the search of this suspected enemy supply vessel.
Around 2100B/5, HMS Victorious and HMS Neptune rejoined the convoy. The enemy vessel had been intercepted but had been scuttled by her crew and salvage was not possible. HMS Neptune had picked up the German crew.
Around 0100A/7, HMS Victorious and HMS Neptune parted company. They had been ordered to proceed to Gibraltar.
Around 1400Z/9, the destroyer HMS Velox (Lt.Cdr. E.G. Roper, DSC, RN) joined the convoy escort.
The corvette HMS Aster (Lt.Cdr. E. Hewitt, RD, RNR) was to have joined the convoy coming from Bathurst. She had arrived at Bathurst late and she did not manage to join the convoy.
The convoy arrived at Freetown on 11 June.
------------------------------------------------------------------------------------------------------
The convoy departed Freetown on 15 June 1941 escorted by HMS Neptune.
The convoy arrived at Capetown on 24 June 1941 after which HMS Neptune proceeded to Simonstown.
------------------------------------------------------------------------------------------------------
The convoy departed Capetown on 28 June 1941 still escorted by HMS Neptune.
The convoy arrived at Kilindini on 6 July 1941. It departed later the same day for Aden.
The convoy was dispersed on 11 July 1941. HMS Neptune then proceeded to Aden arriving later the same day. (70)
5 Jun 1941
Interception of the German supply vessel Gonzenheim
At 1825B/4, in position 42°25'N, 23°39'E, HMS Neptune (Capt. R.C. O'Conor, RN) was detached from convoy WS 8X to intercept a vessel reported by HMS Esperance Bay (Capt.(Retd.) G.S. Holden, RN).
HMS Esperance Bay had not been able to intercept the ship herself because of insufficient speed.
At 2001B/4, HMS Neptune sighted HMS Nelson (Capt. G.J.A. Miles, RN) which was also searching for the enemy ship having left convoy SL 75 around 1600A/4. She reported that the German ship was ahead of her and ordered HMS Neptune to close as fast as possible. Shortly afterwards HMS Nelson reported that the enemy had stopped.
At 2052B/4, HMS Neptune sighted the enemy ship. Twelve minutes later the enemy was seen to abandon ship and flames were visibile.
At 2135B/4, HMS Neptune sent a boarding party over to the enemy ship to see if she could be saved.
At 2150B/4, HMS Neptune started to pick up the enemy crew of 67 Germans which had abandoned ship in two lifeboats which were also hoisted in.
The enemy ship could not be saved and was eventually sunk by HMS Neptune shortly after midnight in position 43°32'N, 23°56'E.
Around 2100B/4, HMS Victorious (Capt. H.C. Bovell, RN) was also detached from the convoy.
Around 2100B/5, HMS Victorious and HMS Neptune rejoined the convoy. The enemy vessel had been intercepted but had been scuttled by her crew and salvage was not possible. HMS Neptune had picked up the German crew which she later landed at Gibraltar. (70)
9 Jun 1941
Around 0900A/9, HMS Neptune arrived at Gibraltar where the German prisoners were landed. Also she fuelled.
She departed for Freetown around 2030A/9. (67)
13 Jun 1941
Around 1600N/13, HMS Neptune (Capt. R.C. O'Conor, RN) arrived at Freetown.
She now continued escort duty with convoy WS 8X. She the event ' Convoy WS 8X ' for 31 May 1941 for more info on her movements while with this convoy. (67)
12 Jul 1941
HMS Neptune (Capt. R.C. O'Conor, RN) departed Aden for Suez. (71)
15 Jul 1941
HMS Neptune (Capt. R.C. O'Conor, RN) arrived at Suez. (71)
17 Jul 1941
HMS Neptune (Capt. R.C. O'Conor, RN) transited the Suez Canal northbound and arrived at Port Said. At Port Said the catapult and aircraft were landed and some extra AA armament was fitted instead. (71)
18 Jul 1941
HMS Neptune (Capt. R.C. O'Conor, RN) departed Port Said for Alexandria. (71)
19 Jul 1941
HMS Neptune (Capt. R.C. O'Conor, RN) arrived at Alexandria where she joined the Mediterranean Fleet. (71)
22 Jul 1941
Around 2100C/22, the Mediterranean Fleet, made up of the battleships HMS Queen Elizabeth (Capt. C.B. Barry, DSO, RN, flying the flag of Vice-Admiral H.D. Pridham-Whippell, KCB, CVO, RN), HMS Valiant (Capt. C.E. Morgan, DSO, RN), light cruisers HMS Naiad (Capt. M.H.A. Kelsey, DSC, RN, flying the flag of Vice-Admiral E.L.S. King, CB, MVO, RN), HMS Phoebe (Capt. G. Grantham, RN), HMS Neptune (Capt. R.C. O'Conor, RN), HMAS Hobart (Capt. H.L. Howden, CBE, RAN), fast minelayers HMS Abdiel (Capt. E. Peydell-Bouverie, MVO, RN), HMS Latona (Capt. S.L. Bateson, RN) and the destroyers HMS Griffin (Cdr. J. Lee-Barber, DSO, RN), HMS Hasty (Lt.Cdr. L.R.K. Tyrwhitt, DSC, RN), HMS Havock (Lt. G.R.G. Watkins, RN), HMS Jackal (Lt.Cdr. R.McC.P. Jonas, DSC, RN), HMS Kimberley (Cdr. J.S.M. Richardson, DSO, RN), HMS Kipling (Cdr. A. St. Clair-Ford, RN) and HMAS Nizam (Lt.Cdr. M.J. Clark, RAN) departed Alexandria to proceed to a position to the west of Crete.
Around 1400C/22, the light cruisers HMS Ajax (Capt. E.D.B. McCarthy, DSO, RN, flying the flag of Rear-Admiral H.B. Rawlings, OBE, RN), HMS Leander (New Zealand Division) (Capt. R.H. Bevan, RN) and the destroyers HMS Jervis (Capt. P.J. Mack, DSO, RN), HMS Jaguar (Lt.Cdr. J.F.W. Hine, RN), HMS Kandahar (Cdr. W.G.A. Robson, DSO, RN) and HMS Kingston (Lt.Cdr. P. Somerville, DSO, DSC, RN) had departed Haifa to rendez-vous with the fleet at 0600C/23.
At daylight on 23 July the AA cruiser HMS Carlisle (A/Cdr. W. Pope, RN) also joined the fleet.
After dark on 23 July the fleet turned eastwards. HMS Neptune, HMS Abdiel and HMS Kimberley were then detached with orders to proceed to Port Said where they arrived on 24 July.
HMS Latona, HMS Jervis, HMS Jaguar and HMS Kandahar were detached on the 24th to make rendezvous off Alexandria with the damaged aircraft carrier HMS Formidable (Capt. A.W.la T. Bisset, RN) and escort her to Port Said. A/Rear-Admiral D.W. Boyd, CBE, DSC, RN had struck his flag in HMS Formidable before departure. HMS Formidable arrived at Port Said on the 25th and immediately entered the Suez Canal for a southbound passage. She arrived at Ismalia early in the evening of the 25th. HMS Formidable is to proceed to the U.S.A. for repairs. HMS Latona and the destroyers then proceeded to Haifa.
On the 24th HMS Leander was also detached with orders to proceed to Port Said where she arrived on 25 July to embark troops together with HMS Latona and HMS Jaguar.
The bulk of the fleet returned to Alexandria around 1800C/24. (72)
24 Jul 1941
Around 1530C/24, the light cruiser HMS Neptune (Capt. R.C. O'Conor, RN), fast minelayer HMS Abdiel (Capt. E. Peydell-Bouverie, MVO, RN) and the destroyer HMS Kimberley (Cdr. J.S.M. Richardson, DSO, RN) departed Port Said for Famagusta loaded with troops and supplies. The troops were landed during the night of 24/25 July. On completion, the ships returned to Port Said where they arrived around 1615C/25. (73)
26 Jul 1941
Around 1130C/26, the light cruiser HMS Neptune (Capt. R.C. O'Conor, RN), fast minelayer HMS Abdiel (Capt. E. Peydell-Bouverie, MVO, RN) and the destroyer HMS Kimberley (Cdr. J.S.M. Richardson, DSO, RN) departed Port Said for Famagusta loaded with troops and supplies. The troops were landed during the night of 26/27 July. On completion, the ships proceeded to Haifa where they arrived around 1000C/27. (73)
28 Jul 1941
Around 1800C/28, the light cruiser HMS Neptune (Capt. R.C. O'Conor, RN), fast minelayer HMS Latona (Capt. S.L. Bateson, RN) and the destroyers HMS Jervis (Capt. P.J. Mack, DSO, RN) and HMS Jaguar (Lt.Cdr. J.F.W. Hine, RN) departed Haifa for Alexandria. At sea they were joined by the fast minelayer HMS Abdiel (Capt. E. Peydell-Bouverie, MVO, RN). All ships arrived at Alexandria around 1000C/29. (73)
4 Aug 1941
Around 1155C/4, HMS Neptune (Capt. R.C. O'Conor, RN), HMS Abdiel (Capt. E. Pleydell-Bouverie, MVO, RN), HMS Jackal (Lt.Cdr. R.McC.P. Jonas, DSC, RN) and HMS Kipling (Cdr. A. St. Clair-Ford, RN) departed Alexandria for Port Said. They arrived at Port Said around 1030C/5. (72)
7 Aug 1941
HMS Neptune (Capt. R.C. O'Conor, RN), HMS Abdiel (Capt. E. Pleydell-Bouverie, MVO, RN) and HMS Jackal (Lt.Cdr. R.McC.P. Jonas, DSC, RN) departed Port Said around 1300C/7 with troops for Famagusta.
They landed the troops during the night of 7/8 August and arrived at Haifa around 1130C/8. (74)
12 Aug 1941
HMS Neptune (Capt. R.C. O'Conor, RN), HMS Abdiel (Capt. E. Pleydell-Bouverie, MVO, RN) and HMS Jackal (Lt.Cdr. R.McC.P. Jonas, DSC, RN) departed Haifa around 0600C/12 for Port Said where they arrived around 1530C/12. (74)
13 Aug 1941
Around 1430C/13, HMS Neptune (Capt. R.C. O'Conor, RN), HMS Abdiel (Capt. E. Pleydell-Bouverie, MVO, RN) and HMS Jackal (Lt.Cdr. R.McC.P. Jonas, DSC, RN) departed Port Said with troops for Famagusta. (74)
14 Aug 1941
Around 0145C/14, HMS Neptune (Capt. R.C. O'Conor, RN), HMS Abdiel (Capt. E. Pleydell-Bouverie, MVO, RN) and HMS Jackal (Lt.Cdr. R.McC.P. Jonas, DSC, RN) arrived at Famagusta. After landing the troops HMS Neptune departed for Alexandria and HMS Abdiel and HMS Jackal for Port Said. They all arrived at their destination later the same day or early the following day (HMS Neptune). (72)
20 Aug 1941
Around 0830C/20 the fast minelayer HMS Latona (Capt. S.L. Bateson, RN) and the destroyers HMS Kingston (Lt.Cdr. P. Somerville, DSO, DSC, RN), HMS Kipling (Cdr. A. St.Clair Ford, RN) and HMAS Nizam (Lt.Cdr. M.J. Clark, RAN) departed Alexandria with troops and supplies for Tobruk. Cover was provided by the light cruisers HMS Ajax (Capt. E.D.B. McCarthy, DSO, RN, flying the flag of Rear-Admiral H.B. Rawlings, OBE, RN) and HMS Neptune (Capt. R.C. O'Conor, RN) which departed Alexandria at the same time.
Having unloaded at Tobruk, HMS Latona, HMS Kingston, HMS Kipling and HMAS Nizam departed there around 0050C/21.
On the return trip they were attacked by German Ju-88 bombers. HMAS Nizam was near missed in position 31°45'N, 26°09'E (north-east of Sidi Barani) and sustained some hull damage.
All ships returned to Alexandria around 1810C/21. (75)
24 Aug 1941
Around 0830C/24, the fast minelayer HMS Latona (Capt. S.L. Bateson, RN) and the destroyers HMS Griffin (Cdr. J. Lee-Barber, DSO, RN), HMS Kingston (Lt.Cdr. P. Somerville, DSO, DSC, RN) and HMS Kipling (Cdr. A. St.Clair Ford, RN) departed Alexandria with troops and supplies for Tobruk. Cover was provided by the light cruisers HMS Ajax (Capt. E.D.B. McCarthy, DSO, RN, flying the flag of Rear-Admiral H.B. Rawlings, OBE, RN) and HMS Neptune (Capt. R.C. O'Conor, RN).
All ships returned to Alexandria around 1330C/25. (72)
26 Aug 1941
Around 0900C/26, the fast minelayer HMS Latona (Capt. S.L. Bateson, RN) and the destroyers HMS Jervis (Capt. P.J. Mack, DSO and Bar, RN with Rear-Admiral I.G. Glennie, RN on board), HMS Griffin (Cdr. J. Lee-Barber, DSO, RN) and HMS Havock (Lt. G.R.G. Watkins, DSC, RN) departed Alexandria for Tobruk. Cover for these ships was provided by the light cruisers HMS Ajax (Capt. E.D.B. McCarthy, DSO, RN, flying the flag of Rear-Admiral H.B. Rawlings, OBE, RN) and HMS Neptune (Capt. R.C. O'Conor, RN).
The ships arrived back at Alexandria around 1500C/27. (72)
28 Aug 1941
Around 0845C/28, the fast minelayer HMS Latona (Capt. S.L. Bateson, RN) and the destroyers HMAS Napier (Capt. S.H.T. Arliss, RN), HMS Jackal (Lt.Cdr. R.McC.P. Jonas, DSC, RN) and
HMS Decoy (Lt.Cdr. J.M. Alliston, RN) departed Alexandria for Tobruk. They were covered by the light cruisers HMS Ajax (Capt. E.D.B. McCarthy, DSO, RN, flying the flag of Rear-Admiral H.B. Rawlings, OBE, RN) and HMS Neptune (Capt. R.C. O'Conor, RN).
All ships returned to Alexandria around 1500C/29. (72)
9 Sep 1941
HMS Barham (Capt. G.C. Cooke, RN), HMS Neptune (Capt. R.C. O'Conor, RN), HMS Abdiel (Capt. E. Peydell-Bouverie, MVO, RN), HMS Latona (Capt. S.L. Bateson, RN), HMAS Napier (Capt. S.H.T. Arliss, RN) and HMAS Nizam (Lt.Cdr. M.J. Clark, RAN) conducted exerises off Alexandria.
Shorty after noon they were joined by the light cruisers HMS Ajax (Capt. E.D.B. McCarthy, DSO, RN, flying the flag of Rear-Admiral H.B. Rawlings, OBE, RN) and HMAS Hobart (Capt. H.L. Howden, CBE, RAN).
HMS Barham, HMS Neptune, HMS Ajax and HMAS Hobart returned to Alexandria early in the evening and HMS Napier returned to Alexandria late in the evening. The other ships remained at sea. (76)
15 Sep 1941
Around 0855C/15, the destroyers HMAS Napier (Capt. S.H.T. Arliss, RN), HMAS Nizam (Lt.Cdr. M.J. Clark, RAN) and HMS Havock (Lt. G.R.G. Watkins, DSC, RN) departed Alexandria with supplies for Tobruk where they arrived around 2325C/15.
The light cruisers HMS Ajax (Capt. E.D.B. McCarthy, DSO, RN, flying the flag of Rear-Admiral H.B. Rawlings, OBE, RN), HMS Neptune (Capt. R.C. O'Conor, RN) and HMAS Hobart (Capt. H.L. Howden, CBE, RAN) had departed Alexandria around 0840C/15 for exercises.
The destroyers HMS Kimberley (Cdr. J.S.M. Richardson, DSO, RN) and HMS Kingston (Lt.Cdr. P. Somerville, DSO, DSC, RN) departed Alexandria around 1035C/15 to join the light cruisers on completion of their exercises and then to cover provide cover for the store carrying destroyers.
All ships returned to Alexandria on the 16th, HMAS Napier, HMAS Nizam and HMS Havock around 1345C/16 followed by HMS Kingston around 1405C/16. HMS Ajax, HMS Neptune and HMAS Hobart returned around 1445C/16 and finally HMS Kimberley entered harbour around 1610C/16. (77)
17 Sep 1941
Around 1850B/17, HMS Ajax (Capt. E.D.B. McCarthy, DSO, RN, flying the flag of Rear-Admiral H.B. Rawlings, OBE, RN), HMS Neptune (Capt. R.C. O'Conor, RN) and HMAS Hobart (Capt. H.L. Howden, CBE, RAN) departed Alexandria to embark troops at Beirut or Haifa.
Around 0800B/18, HMS Neptune parted company with the other ships and proceeded to Haifa arriving there around 1110B/18.
HMS Ajax and HMAS Hobart arrived at Beirut around 1405B/18.
HMS Neptune departed Haifa around 0430B/19 and arrived at Beirut around 0815B/19.
All three cruisers departed Beirut for Alexandria around 1100B/19.
They were joined at sea around 1230B/19 by the destroyers HMS Griffin (Cdr. J. Lee-Barber, DSO, RN) and HMS Hotspur (Lt. T.D. Herrick, DSC, RN).
All five ships arrived at Alexandria around 0615B/20. (78)
22 Sep 1941
Around 0800B/22, the fast minelayer HMS Abdiel (Capt. E. Peydell-Bouverie, MVO, RN) and the destroyers HMS Kandahar (Cdr. W.G.A. Robson, DSO, RN), HMS Jaguar (Lt.Cdr. J.F.W. Hine, RN) and HMS Griffin (Cdr. J. Lee-Barber, DSO, RN) departed Alexandria with about 1000 troops and supplies for Tobruk.
Their return passage was covered by the light cruisers HMS Ajax (Capt. E.D.B. McCarthy, DSO, RN, flying the flag of Rear-Admiral H.B. Rawlings, OBE, RN), HMS Neptune (Capt. R.C. O'Conor, RN) and HMAS Hobart (Capt. H.L. Howden, CBE, RAN) which departed Alexandria around 2200B/22.
All ships returned to Alexandria around noon the following day.
This was 'Serial 8' of 'Operation Supercharge'. (79)
26 Sep 1941
Around 0900B/26, the battleships HMS Queen Elizabeth (Capt. C.B. Barry, DSO, RN, flying the flag of Admiral Sir A.B. Cunningham, GCB, DSO and 2 Bars, RN), HMS Barham (Capt. G.C. Cooke, RN, flying the flag of Vice-Admiral H.D. Pridham-Whippell, KCB, CVO, RN), HMS Valiant (Capt. C.E. Morgan, DSO, RN), light cruisers HMS Ajax (Capt. E.D.B. McCarthy, DSO, RN, flying the flag of Rear-Admiral H.B. Rawlings, OBE, RN), HMS Neptune (Capt. R.C. O'Conor, RN), HMAS Hobart (Capt. H.L. Howden, CBE, RAN) and the destroyers HMS Jervis (Capt. P.J. Mack, DSO and Bar, RN), HMS Jupiter (Lt.Cdr. N.V.J.P. Thew, RN), HMS Kingston (Lt.Cdr. P. Somerville, DSO, DSC, RN), HMS Kipling (Cdr. A. St.Clair-Ford, RN), HMS Hero (Cdr. H.W. Biggs, DSO and Bar, RN), HMS Hotspur (Lt. T.D. Herrick, DSC, RN), HMS Decoy (Lt.Cdr. J.M. Alliston, RN) and HMAS Vendetta (Lt.Cdr. C.J. Stephenson, RAN) departed Alexandria for a diversion in the Eastern Mediterranean during 'Operation Halberd' in the Western Mediterranean.
They returned to Alexandria in the afternoon of the 27th. (72)
8 Oct 1941
HMS Queen Elizabeth (Capt. C.B. Barry, DSO, RN, flying the flag of Admiral Sir A.B. Cunningham, GCB, DSO and 2 Bars, RN), HMS Neptune (Capt. R.C. O'Conor, RN), HMS Jaguar (Lt.Cdr. J.F.W. Hine, RN), HMS Jupiter (Lt.Cdr. N.V.J.P. Thew, RN), HMS Kandahar (Cdr. W.G.A. Robson, DSO, RN) and HMS Kipling (Cdr. A. St.Clair-Ford, RN) conducted exercises off Alexandria.
HMS Queen Elizabeth and HMS Neptune returned to Alexandria in the afternoon. The destroyers only returned early in the afternoon of the following day.
23 Oct 1941
The light cruisers HMS Ajax (Capt. E.D.B. McCarthy, DSO, RN, flying the flag of Rear-Admiral H.B. Rawlings, OBE, RN), HMS Neptune (Capt. R.C. O'Conor, RN), HMAS Hobart (Capt. H.L. Howden, CBE, RAN), destroyers HMAS Napier (Capt. S.H.T. Arliss, RN), HMAS Nizam (Lt.Cdr. M.J. Clark, RAN), HMS Jupiter (Lt.Cdr. N.V.J.P. Thew, RN), HMS Hasty (Lt.Cdr. L.R.K. Tyrwhitt, DSC, RN) and the escort destroyers HMS Avon Vale (Lt.Cdr. P.A.R. Withers, DSO, RN) and HMS Eridge (Lt.Cdr. W.F.N. Gregory-Smith, RN) departed Alexandria around 0845B/23 on a bombardment operation.
During the night of 23/24 October the light cruisers and the escort destroyers bombarded the Bardia area. Petrol dumps and a building, thought to be the Army headquarters were the main targets.
The four fleet destroyers had been detached and bombarded the Sollum area.
All ships then returned to Alexandria. The cruisers arrived around 1145B/24. (72)
25 Oct 1941
The light cruisers HMS Ajax (Capt. E.D.B. McCarthy, DSO, RN, flying the flag of Rear-Admiral H.B. Rawlings, OBE, RN), HMS Neptune (Capt. R.C. O'Conor, RN), HMAS Hobart (Capt. H.L. Howden, CBE, RAN) and the destroyers HMS Jervis (Capt. P.J. Mack, DSO and Bar, RN), HMS Jaguar (Lt.Cdr. J.F.W. Hine, RN), HMS Jupiter (Lt.Cdr. N.V.J.P. Thew, RN), HMS Kimberley (Cdr. J.S.M. Richardson, DSO, RN), HMAS Napier (Capt. S.H.T. Arliss, RN), HMAS Nizam (Lt.Cdr. M.J. Clark, RAN) and HMS Hasty (Lt.Cdr. L.R.K. Tyrwhitt, DSC, RN) departed Alexandria around 1400B/25 for further bombardment operations.
The light cruisers and the destroyers HMAS Napier, HMAS Nizam and HMS Hasty bombarded the Bardia area during the night of 25/26 October.
The destroyers HMS Jervis, HMS Jaguar, HMS Jupiter and HMS Kimberley were detached to go to the assistance of the fast minelayer HMS Latona (Capt. S.L. Bateson, RN) which had been bombed and later sank as result of the damage.
All ships returned to Alexandria very late in the morning or in the first half of the afternoon of the 26th. (72)
5 Nov 1941
The A/S whaler HMS KOS XIX / Cocker (Lt. L.H. Davies, RNR) sighted a periscope about 32 nautical miles west of Alexandria at 2220/5.
A hunt was started and she was joined by the corvette HMS Snapdragon (T/Lt. P.H. Potter, RNR), A/S whaler HMS Falk (Lt. H.S. Upperton, RNR) and the A/S motor boat HMS MA/SB 2.
Destroyer HMS Encounter (Lt.Cdr. E.V.St J. Morgan, RN) was sent from Alexandria to assist. She already sailed at 2325/5.
Two more destroyers, HMS Hotspur (Lt. T.D. Herrick, DSC, RN) and HMS Decoy (Lt.Cdr. J.M. Alliston, RN), joined in the morning 6th. They had sailed at 0900/6 and 1000/6 respectively.
The destroyers were recalled to harbour at 1800 and arrived later in the evening. No contact had been obtained.
As an oil slick was sighted in the area of the hunt on the 7th the destroyers HMS Hotspur and HMS Kipling (Cdr. A. St.Clair-Ford, RN) were sent to hunt in the area again. They departed Alexandria at 1200 and 1400 hours respectively.
The search continued during the night of 7/8 November. HMS Encounter joined the destroyers in the morning. She sailed from Alexandria at 0815/8.
The hunt was however soon abandoned as no contact could be obtained and and the three destroyers then escorted the light cruiser HMS Neptune (Capt. R.C. O'Conor, RN) during a practice bombardment at Aboukir. HMS Neptune had departed Alexandria at 1000/8.
Following the exercise HMS Neptune immediately returned to Alexandria arriving at 1630/8.
HMS Encounter, HMS Hotspur and HMS Kipling returned to Alexandria at 1015/9 having remained outside on patrol for another night. (80)
16 Nov 1941
Operation Chieftan
Dummy convoy to Malta from Gibraltar to create a diversion for the enemy during army operations in Libya.
16 November 1941.
Western Mediterranean.
On 16 November a dummy convoy departed Gibraltar and proceeded eastwards, it was made up of the merchant vessels; Baron Newlands (British, 3386 GRT, built 1928), Blairatholl (British, 3319 GRT, built 1925), Cisneros (British, 1886 GRT, built 1926), Ottinge (British, 2818 GRT, built 1940) and Shuna (British, 1575 GRT, built 1937).
The RFA tanker Brown Ranger (3417 GRT, built 1941) was also part of the convoy.
Escort was provided by the destroyer HMS Wild Swan (Lt.Cdr. C.E.L. Sclater, RN), sloop HMS Deptford (Lt.Cdr. H.R. White, RN), and the corvettes HMS Convolvulus (T/Lt. R.C. Connell, RNR), HMS Marigold (T/Lt. J. Renwick, RNR) and HMS Rhododendron (Lt.Cdr. W.N.H. Faichney, DSO, RNR).
HMS Wild Swan got an A/S contact and was detached to hunt it reinforced by the corvette HMS Samphire (Lt.Cdr. F.T. Renny, DSC, RNR) from Gibraltar.
The corvette Marigold detected and depth charged the German submarine U-433. The submarine surfaced and was sunk at 2155/6 on 16 November 1941 in the Mediterranean east of Gibraltar, in position 36°13'N, 04°42'W.
17 November 1941.
Western Mediterranean.
The dummy convoy turned back to the eastwards again on the 17th.
18 November 1941.
Western Mediterranean.
The dummy convoy arrived back at Gibraltar in the evening of the 18th.
Eastern Mediterranean.
Around 0730/18 the battleships HMS Queen Elizabeth (Capt. C.B. Barry, DSO, RN, flying the flag of Admiral Sir A.B. Cunningham, GCB, DSO and 2 Bars, RN), HMS Barham (Capt. G.C. Cooke, RN, flying the flag of Vice-Admiral H.D. Pridham-Whippell, KCB, CVO, RN), HMS Valiant (Capt. C.E. Morgan, DSO, RN), light cruisers HMS Naiad (Capt. M.H.A. Kelsey, DSC, RN, flying the flag of Rear-Admiral P.L. Vian, DSO and 2 Bars, RN), HMS Euryalus (Capt. E.W. Bush, DSO, DSC, RN), HMS Galatea (Capt. E.W.B. Sim, RN) and the destroyers HMS Jervis (Capt. P.J. Mack, DSO and Bar, RN), HMS Jackal (Lt.Cdr. R.McC.P. Jonas, DSC, RN), HMS Kimberley (Cdr. J.S.M. Richardson, DSO, RN), HMS Kingston (Lt.Cdr. P. Somerville, DSO, DSC, RN), HMS Kipling (Cdr. A. St.Clair Ford, RN), HMAS Napier (Capt. S.H.T. Arliss, RN), HMAS Nizam (Lt.Cdr. M.J. Clark, RAN), HMS Decoy (Lt.Cdr. J.M. Alliston, RN) and the escort destroyers HMS Avon Vale (Lt.Cdr. P.A.R. Withers, DSO, RN) and HMS Eridge (Lt.Cdr. W.F.N. Gregory-Smith, RN) departed Alexandria to be at sea to support several operations in the Mediterranean.
Around 1105B/18, the fleet was joined by the light cruisers HMS Ajax (Capt. E.D.B. McCarthy, DSO, RN, flying the flag of Rear-Admiral H.B. Rawlings, OBE, RN), HMS Neptune (Capt. R.C. O'Conor, RN), and HMAS Hobart (Capt. H.L. Howden, CBE, RAN) and the destroyers HMS Kandahar (Cdr. W.G.A. Robson, DSO, DSC, RN), HMS Hasty (Lt.Cdr. L.R.K. Tyrwhitt, DSC, RN) and HMS Hotspur (Lt. T.D. Herrick, DSC, RN) which had already been at sea.
The fleet turned back towards Alexandria after dark.
On the 18th HMS Naiad and HMS Euryalus split off together with the destroyers HMS Jackal and HMS Kipling for a night bombardment of the Helfaya pass area upon which they also returned to Alexandria. They too arrived before noon on the 19th.
' Force K ', made up of light cruisers HMS Aurora (Capt. W.G. Agnew, RN), HMS Penelope (Capt. A.D. Nicholl, RN) and the destroyers HMS Lance (Lt.Cdr. R.W.F. Northcott, RN) and HMS Lively (Lt.Cdr. W.F.E. Hussey, DSC, RN), departed Malta around 1845/18 to create a diversion during the night.
19 November 1941.
Eastern Mediterranean.
' Force K ' returned to Malta around 0730/19.
The fleet arrived back in harbour before noon on the 19th followed shortly afterwards by HMS Naiad, HMS Euryalus, HMS Jackal and HMS Kipling. (72)
17 Nov 1941
Around 1115B/17 the light cruisers HMS Ajax (Capt. E.D.B. McCarthy, DSO, RN, flying the flag of Rear-Admiral H.B. Rawlings, OBE, RN), HMS Neptune (Capt. R.C. O'Conor, RN), and HMAS Hobart (Capt. H.L. Howden, CBE, RAN) and the destroyers HMS Kandahar (Cdr. W.G.A. Robson, DSO, DSC, RN), HMS Hasty (Lt.Cdr. L.R.K. Tyrwhitt, DSC, RN) and HMS Hotspur (Lt. T.D. Herrick, DSC, RN) departed Alexandria to bombard the Sollum area during the night of 17/18 November 1941. The bombardment however had to be cancelled due to the bad weather conditions. The ships then joined the Mediterranean Fleet which had departed Alexandria in the morning of the 18th at noon on the 18th.
They returned to Alexandria with the Fleet on the 19th.
[For more info see the event ' Operation Chieftan ' for 16 November 1941.] (80)
20 Nov 1941
Around 1130B/20, the light cruisers HMS Ajax (Capt. E.D.B. McCarthy, DSO, RN, flying the flag of Rear-Admiral H.B. Rawlings, OBE, RN), HMS Neptune (Capt. R.C. O'Conor, RN) and HMAS Hobart (Capt. H.L. Howden, CBE, RAN) departed Alexandria to conduct a bombardment of the Bardia area during the night of 20/21 November. They were joined off the gate by the escort destroyers HMS Avon Vale (Lt.Cdr. P.A.R. Withers, DSO, RN) and HMS Heythrop (Lt.Cdr R.S. Stafford, RN) which had departed around 1000B/20.
Around 1400B/20, they were joined, about 40 miles east of Alexandria by the escort destroyers HMS Farndale (Cdr. S.H. Carlill, RN) and HMS Eridge (Lt.Cdr. W.F.N. Gregory-Smith, RN) which had departed Alexandria around 1315B/19 for an A/S hunt for a reported enemy submarine reported by an aircraft. (which in the end turned out to be HMSAS Southern Maid).
A bombardment was carried out around 0200B/21 and course was then set to join the fleet at sea which was done around noon. (81)
21 Nov 1941
Operations ME 7 and Landmark.
Diversionary attack on Tripoli to divert enemy air strenght away from the Bardia / Halfaya pass area during land operations.
The battleships HMS Queen Elizabeth (Capt. C.B. Barry, DSO, RN, flying the flag of Admiral Sir A.B. Cunningham, GCB, DSO and 2 Bars, RN), HMS Barham (Capt. G.C. Cooke, RN, flying the flag of Vice-Admiral H.D. Pridham-Whippell, KCB, CVO, RN), HMS Valiant (Capt. C.E. Morgan, DSO, RN), light cruisers HMS Naiad (Capt. M.H.A. Kelsey, DSC, RN, flying the flag of Rear-Admiral P.L. Vian, DSO and 2 Bars, RN), HMS Euryalus (Capt. E.W. Bush, DSO, DSC, RN), HMS Galatea (Capt. E.W.B. Sim, RN) and the destroyers HMS Jervis (Capt. P.J. Mack, DSO and Bar, RN), HMS Jackal (Lt.Cdr. R.McC.P. Jonas, DSC, RN), HMS Kandahar (Cdr. W.G.A. Robson, DSO, DSC, RN), HMS Kimberley (Cdr. J.S.M. Richardson, DSO, RN), HMS Kingston (Lt.Cdr. P. Somerville, DSO, DSC, RN), HMS Kipling (Cdr. A. St.Clair Ford, RN), HMAS Napier (Capt. S.H.T. Arliss, RN), HMAS Nizam (Lt.Cdr. M.J. Clark, RAN), HMS Hasty (Lt.Cdr. L.R.K. Tyrwhitt, DSC, RN), HMS Hotspur (Lt. T.D. Herrick, DSC, RN) and HMS Decoy (Lt.Cdr. J.M. Alliston, RN) departed Alexandria for operation ME 7.
At noon, the light cruisers HMS Ajax (Capt. E.D.B. McCarthy, DSO, RN, flying the flag of Rear-Admiral H.B. Rawlings, OBE, RN), HMS Neptune (Capt. R.C. O'Conor, RN), HMAS Hobart (Capt. H.L. Howden, CBE, RAN) and the escort destroyers HMS Avon Vale (Lt.Cdr. P.A.R. Withers, DSO, RN), HMS Eridge (Lt.Cdr. W.F.N. Gregory-Smith, RN), HMS Farndale (Cdr. S.H. Carlill, RN) and HMS Heythrop (Lt.Cdr R.S. Stafford, RN) joined the fleet at sea having completed their bombardment. The four hunt-class destroyers were however detached to return to Alexandria where they arrived around 1500B/21.
After dark HMS Naiad, HMS Euryalus, HMS Galatea were detached after dark to make false W/T reports further to the west. The fleet then turned back towards Alexandria.
The fleet arrived back at Alexandria at daybreak on the 22nd. The detached cruisers arrived back later the same day.
To simulate a fake landing attempt on the coast near Tripoli (Operation Landmark) a convoy made up of the transports HMS Breconshire (9776 GRT, built 1939), Ajax (7540 GRT, built 1931), Clan Ferguson (7347 GRT, built 1938) and Sydney Star (12696 GRT, built 1936) departed Malta. It was escorted by the corvette HMS Gloxinia (Lt.Cdr. A.J.C. Pomeroy, RNVR) and cover was provided by ' Force K ', made up of HMS Aurora (Capt. W.G. Agnew, RN), HMS Penelope (Capt. A.D. Nicholl, RN) and the destroyers HMS Lance (Lt.Cdr. R.W.F. Northcott, RN) and HMS Lively (Lt.Cdr. W.F.E. Hussey, DSC, RN). These ships all departed Malta around 1415/21. [Both destroyers had actually departed around 1235/21, presumably to conduct an A/S sweep before the other ships departed the harbour.]
' Force K ' returned to Malta around 0600/22 followed around 2 hours later by the convoy. It does not appear the convoy had been sighted by the enemy. (72)
23 Nov 1941
Operations against enemy convoy's / Sinking of HMS Barham.
23 November 1941.
'Force K', made up of the light cruisers HMS Aurora (Capt. W.G. Agnew, RN), HMS Penelope (Capt. A.D. Nicholl, RN) and the destroyers HMS Lance (Lt.Cdr. R.W.F. Northcott, RN) and HMS Lively (Lt.Cdr. W.F.E. Hussey, DSC, RN), departed Malta around 2330B/23 to intercept reported enemy convoy's. They were to proceed to position 33°40'N, 21°14'E at first.
24 November 1941.
'Force B', made up of the light cuisers HMS Naiad (Capt. M.H.A. Kelsey, DSC, RN, flying the flag of Rear-Admiral P.L. Vian, DSO and 2 Bars, RN), HMS Euryalus (Capt. E.W. Bush, DSO, DSC, RN), HMS Ajax (Capt. E.D.B. McCarthy, DSO, RN, flying the flag of Rear-Admiral H.B. Rawlings, OBE, RN), HMS Neptune (Capt. R.C. O'Conor, RN), HMS Galatea (Capt. E.W.B. Sim, RN) and the destroyers HMS Kandahar (Cdr. W.G.A. Robson, DSO, DSC, RN), HMS Kimberley (Cdr. J.S.M. Richardson, DSO, RN), HMS Kingston (Lt.Cdr. P. Somerville, DSO, DSC, RN) and HMS Hotspur (Lt. T.D. Herrick, DSC, RN) departed Alexandria around 0500B/24 to also operate directly against the enemy convoy's.
A cover force, made up of the battleships HMS Queen Elizabeth (Capt. C.B. Barry, DSO, RN, flying the flag of Admiral Sir A.B. Cunningham, GCB, DSO and 2 Bars, RN), HMS Barham (Capt. G.C. Cooke, RN, flying the flag of Vice-Admiral H.D. Pridham-Whippell, KCB, CVO, RN), HMS Valiant (Capt. C.E. Morgan, DSO, RN) and the destroyers HMS Jervis (Capt. P.J. Mack, DSO and Bar, RN), HMS Griffin (Capt. H.St.L. Nicolson, DSO and Bar, RN) and HMS Decoy (Lt.Cdr. J.M. Alliston, RN) departed Alexandria around 1700 hours. They were joined at sea by the escort destroyers HMS Avon Vale (Lt.Cdr. P.A.R. Withers, DSO, RN), HMS Eridge (Lt.Cdr. W.F.N. Gregory-Smith, RN) and HMS Farndale (Cdr. S.H. Carlill, RN). Around 2245 hours these escort destroyers were relieved by the destroyers HMAS Napier (Capt. S.H.T. Arliss, RN), HMAS Nizam (Lt.Cdr. M.J. Clark, RAN), HMS Kipling (Cdr. A. St.Clair Ford, RN), HMS Jackal (Lt.Cdr. R.McC.P. Jonas, DSC, RN) and HMS Hasty (Lt.Cdr. L.R.K. Tyrwhitt, DSC, RN) which came from Alexandria but had not completed fuelling at the time the fleet sailed.
In the meantime the Italian submarine Luigi Settembrini had heard the HE of fast moving ships which was thought to be 'Force K'. This was reported shortly after 0500B/24. Enemy convoy's were then ordered to proceed to the nearest ports.
At 1040B/24, ' Force K ' was informed that an enemy convoy was in position 35°40'N, 22°22'E. Enemy course was 239° at 5 knots.
It appeared likely to Capt. Agnew, Senior Officer ' Force K ', that the enemy from the current position of ' Force K ' and its course would think his ships would be on passage from Malta to Alexandria. Therefore this course was held for as long as possible in order to mislead the enemy in order to avoid the possibility that the convoy would be turning back. Capt. Agnew also thought it wise to attack as late as possible in the day so that the convoy would be further away from Crete and that there would be less daylight left for the enemy to deliver dive-bombing attacks.
At 1310B/24, ' Force K ' altered course to 029° and the ships were spread five miles apart in the order, from left to right, HMS Lively, HMS Penelope, HMS Lance and HMS Aurora. For the next three hours enemy aircraft, mostly He-111's, ere seen apparently ferrying between Greece and Benghasi. These were engaged whenever they provided a suitable target.
At 1524B/24, HMS Lively and HMS Penelope sighted smoke bearing 005° and these reports were quickly followed by ' masts in sight '.
All the ships of ' Force K ' at once altered course to intercept. HMS Aurora and HMS Lance increasing to full speed.
During the approach a number of Ju-88's which had apparently been escorting the convoy, attacked with bombs in shallow dives. These attacks were ineffective.
HMS Penelope was now closing the convoy rapidly. HMS Lively was dropping back to clear Penelope's line of fire and to give her AA protection from an up-sun direction. The two enemy escorts were zig-zagging across the front of the merchant ships laying smoke and firing at HMS Penelope.
As ' Force K ' gradually closed, the enemy escorts made off to the northward, leaving the merchant ships to their fate.
Up to this point the merchant ships had been firing their guns, but when the destroyers left them they stopped engines and abandoned ship.
HMS Penelope then engaged the merchant ships which caught fire quickly and after about ten minutes blew up.
There were no casualties in ' Force K ' but HMS Penelope was holed above the waterline by splinters.
The action took place within 100 miles of Crete and there was over two hours of daylight remaining so at 1630B/24 ' Force K ' retired to the westward at 23 knots.
As there was insufficient fuel remaining in the destroyers for upcoming operations Capt. Agnew decided to retire to Malta to refuel.
One of the enemy convoys, which was en-route from the Aegean to Benghazi, however did not receive the order to return and it was this convoy that was attacked by ' Force K '. Both transports in the convoy, the Maritza (German, 2910 GRT, built 1936) and Procida (German, 1842 GRT, built 1927), were sunk but the two escorts, the Italian torpedo boats Cassiopea and Lupo managed to escape although Cassiopea was damaged by splinters.
25 November 1941.
'Force K' returned to Malta around 0745B/25.
'Force B' meanwhile had set course to conduct a sweep alongt the coast of Cyrenaica during the night of 25/26 November but they sighted nothing.
At 1629B/25, the fleet (cover force) was attacked north-north-east of Sidi Barrani, Egypt in position 32°34'N, 26°24'E by the German uboat U-331 and HMS Barham was hit on the port side by three torpedoes. She quickly rolled over and then a magazine exploded. She quickly sank. The destroyers HMS Jervis, HMS Jackal and HMAS Nizam were left behind to pick up survivors while the fleet continued on to the westward.
26 November 1941.
The fleet (cover force) returned to Alexandria around 1000B/26. The three detached destroyers returned at 1400B/26. A total of 449 survivors had been picked up from HMS Barham.
'Force B' returned to Alexandria around 1800B/26. (82)
27 Nov 1941
' Force B ' made up of the light cruisers HMS Ajax (Capt. E.D.B. McCarthy, DSO, RN, flying the flag of Rear-Admiral H.B. Rawlings, OBE, RN), HMS Neptune (Capt. R.C. O'Conor, RN) and the destroyers HMS Kimberley (Cdr. J.S.M. Richardson, DSO, RN) and HMS Kingston (Lt.Cdr. P. Somerville, DSO, DSC, RN) departed Alexandria 0500B/27 for Malta where they were to join ' Force K ' operating from there.
They were joined for the first part of the passage to Malta by the light cruisers HMS Naiad (Capt. M.H.A. Kelsey, DSC, RN, flying the flag of Rear-Admiral P.L. Vian, DSO and 2 Bars, RN), HMS Euryalus (Capt. E.W. Bush, DSO, DSC, RN) and the destroyers HMS Griffin (Capt. H.St.L. Nicolson, DSO and Bar, RN) and HMS Hotspur (Lt. T.D. Herrick, DSC, RN).
They remained in company until 1650B/27 after which they set course to return to Alexandria while making a sweep along the coast of Cyrenaica. They returned to Alexandria around 0845B/28.
' Force B '; HMS Ajax, HMS Neptune, HMS Kimberley and HMS Kingston arrived at Malta around 0845B/29. (72)
30 Nov 1941
Around ' Force B ' made up of the light cruisers HMS Ajax (Capt. E.D.B. McCarthy, DSO, RN, flying the flag of Rear-Admiral H.B. Rawlings, OBE, RN), HMS Neptune (Capt. R.C. O'Conor, RN) and the destroyers HMS Kimberley (Cdr. J.S.M. Richardson, DSO, RN) and HMS Kingston (Lt.Cdr. P. Somerville, DSO, DSC, RN) and ' Force K ' made up of the light cruisers HMS Aurora (Capt. W.G. Agnew, RN), HMS Penelope (Capt. A.D. Nicholl, RN) and the destroyer HMS Lively (Lt.Cdr. W.F.E. Hussey, DSC, RN) [HMS Lance remained at Malta] departed Malta at 0500B/30 to intercept Italian forces that had been reported in the Ionian Sea.
Around 2330B/30, ' Force K ' was detached with orders to intercept the Italian transport Adriatico (1976 GRT, built 1931) which was en-route, unescorted, from Argostoli (departed 2300B/29) to Benghazi. She was intercepted and sunk around 0315/1 north-east of Benghazi in position 32°52'N, 20°30'E. HMS Lively picked up two officers and nineteen ratings from the steamer. The Italian destroyer Giovanni da Verrazzano was sailed from Tripoli and rescued 66 survivors and also picked up 3 bodies. The hospital ship Aquileja (9322 GRT, built 1914) was also sent to look for survivors
Around 1800B/1, ' Force K ' sighted the Italian tanker Iridio Mantovani (10540 GRT, built 1939) and its escorting destroyer Alvise da Mosto. Soon both ships were sunk with gunfire north-west of Tripoli in position 33°45'N, 12°30'E with HMS Lively picking up survivors. The tanker had already been damaged by air attack.
The tanker Iridio Mantovani had sailed from Taranto at 1500B/26 escorted by the destroyer Alvise Da Mosto (equipped with German S-Gerät) and the torpedo boats Giuseppe Dezza and Enrico Cosenz. They crossed the Strait of Messina and proceeded north of the Sicilian coast to Trapani where they arrived at 0500B/28. Mantovani escorted this time only by Alvise Da Mosto sailed from Trapani at 1335B/30 for Tripoli.
' Force B ' arrived back at Malta around 1815B/1. ' Force K ' returned to Malta around 0730B/2. Both force had not sighted any more of the enemy. (83)
6 Dec 1941
The destroyers HMS Kandahar (Cdr. W.G.A. Robson, DSO, DSC, RN) and HMS Jaguar (Lt.Cdr. L.R.K. Tyrwhitt, DSC, RN) departed Alexandria at 0630B/6 to patrol off Derna during the night of 6/7 December 1941 and then proceed to Malta where they arrived around 0915B/8.
Around 1315B/6, the light cruisers HMAS Hobart (Capt. H.L. Howden, CBE, RAN), HMS Galatea (Capt. E.W.B. Sim, RN), AA cruiser HMS Carlisle (Capt. D.M.L. Neame, DSO, RN) and the destroyers HMS Griffin (Capt. H.St.L. Nicolson, DSO and Bar, RN) and HMS Hotspur (Lt. T.D. Herrick, DSC, RN) departed Alexandria to make rendezvous with the transport HMS Breconshire (9776 GRT, built 1939) which was coming from Malta having departed there around 1700B/5 escorted by the destroyers HMS Kimberley (Cdr. J.S.M. Richardson, DSO, RN) and HMS Kingston (Lt.Cdr. P. Somerville, DSO, DSC, RN). To cover these ships the light cruisers HMS Ajax (Capt. E.D.B. McCarthy, DSO, RN, flying the flag of Rear-Admiral H.B. Rawlings, OBE, RN), HMS Neptune (Capt. R.C. O’Coner, RN) and destroyer HMS Lively (Lt.Cdr. W.F.E. Hussey, DSC, RN) had departed Malta around 2000B/5 and joined with HMS Breconshire, HMS Kimberley and HMS Kingston around 0800B/6.
Around 0700B/7, HMAS Hobart, HMS Galatea, HMS Carlisle, HMS Griffin and HMS Hotspur joined HMS Kingston and HMS Kimberley to escort HMS Breconshire to Alexandria where they arrived around 0445B/8. HMS Ajax, HMS Neptune and HMS Lively then set course to return to Malta where they arrived around 0400B/8.
Later on the 7th both forces were attacked by enemy aircraft several times but no damage was caused. (84)
9 Dec 1941
The light cruisers HMS Neptune (Capt. R.C. O'Conor, RN), HMS Aurora (Capt. W.G. Agnew, RN), HMS Penelope (Capt. A.D. Nicholl, RN) and the destroyers HMS Kandahar (Cdr. W.G.A. Robson, DSO, DSC, RN) and HMS Jaguar (Lt.Cdr. L.R.K. Tyrwhitt, DSC, RN) departed Malta at 1830B/9 to intercept a reported enemy convoy to the east of Malta. No contact was made and the ships returned to Malta around 0745B/10. (85)
15 Dec 1941
Operation MF 1 and the resulting first Battle of Sirte.
Operation MF 1, passage of the British supply ship HMS Breconshire to Malta.
Around 2200B/15 the British supply ship HMS Breconshire (9776 GRT, built 1939) departed Alexandria being escorted by HMS Naiad (Capt. M.A.H. Kelsey, DSC, RN flying the flag of Rear-Admiral P.L. Vian, DSO and 2 Bars, RN), HMS Euryalus (Capt. E.W. Bush, DSO, DSC, RN), HMS Carlisle (Capt. D.M.L. Neame, DSO, RN), HMS Jervis (Capt. P.J. Mack, DSO and Bar, RN), HMS Kimberley (Cdr. J.S.M. Richardson, DSO, RN), HMS Kingston (Lt.Cdr. P. Somerville, DSO, DSC, RN), HMS Kipling (Cdr. A. St.Clair Ford, RN), HMAS Nizam (Lt.Cdr. M.J. Clark, RAN), HMS Havock (Lt. G.R.G. Watkins, DSC, RN) and HMS Decoy (Lt.Cdr. J.M. Alliston, RN). This last destroyer was also to proceed to Malta for repairs to her bow that had been damaged in a collision at Alexandria on 4 December. HMS Breconshire was carrying oil fuel for Malta.
At 1100/16 the Allied destroyers HMS Sikh (Cdr. G.H. Stokes, DSC, RN), HMS Maori (Cdr. R.E. Courage, DSO, DSC and Bar, RN), HMS Legion (Cdr. R.F. Jessel, RN) and HrMs Isaac Sweers (Cdr. J. Houtsmuller, RNN) departed Malta. They joined up with the convoy at daylight on the 17th. During the day the convoy was attacked by enemy high level and torpedo bombers
These were followed at 1800B/16 by ‘Force K’; HMS Aurora (Capt. W.G. Agnew, CB, RN), HMS Penelope (Capt. A.D. Nicholl, RN), HMS Lance (Lt.Cdr. R.W.F. Northcott, RN) and HMS Lively (Lt.Cdr. W.F.E. Hussey, DSC, RN).
At dark on the 16th HMS Carlisle, HMS Havock and HMS Kingston were detached to make a W/T diversion to the eastward at midnight of the night of 16/17 and then to proceed to Alexandria. They were later joined by HMS Griffin (Capt. H.St.L. Nicolson, DSO and Bar, RN).
Enemy heavy forces were reported at sea at 2230B/16 by the submarines HMS Unbeaten (Lt. Cdr. E.A. Woodward, RN) and HMS Utmost (Lt.Cdr. R.D. Cayley, DSO, RN) in the Gulf of Taranto area. Neither submarine was able to attack. The Italians were at sea to cover an imported Axis convoy to North Africa.
From Taranto had departed the transports Monginevro (5324 GRT, built 1940), Napoli (6142 GRT, built 1941) and Vettor Pisani (6339 GRT, built 1939). They had a close escort of the destroyers Ugolino Vivaldi, Antonio Da Noli, Nicoloso da Recco, Lanzerotto Malocello, Emanuele Pessagno, Nicolò Zeno. From Naples the German transport Ankara (4768 GRT, built 1937) departed on the same day. She had a close escort made up of the destroyer Saetta and the torpedo-boat Pegaso.
Cover was provided by two groups of warships. One group was made up of the battleship Caio Dulio, the light cruisers Emanuele Filiberto Duca D’Aosta, Muzio Attendolo, Raimondo Montecuccoli and the destroyers Aviere, Ascari and Camicia Nera. The other, and larger group, was made up of the battleships Littorio, Andrea Doria, Guilio Cesare, heavy cruisers Gorizia, Trento and the destroyers Granatiere, Bersagliere, Fuciliere, Alpino, Corazziere, Carabiniere, Antoniotto Usodimare, Maestrale, Alfredo Oriani and Vincenzo Gioberti.
The enemy heavy forces were reported by reconnaissance aircraft at 0825B/17 and again at 1525B/17 when they were with their convoy and only about 60 nautical miles from the Allied convoy. Very few Allied aircraft were available for reconnaissance and shadowing was therefore not carried out at all. At 1745B/17 the Allied convoy unexpectedly ran into the larger of the Italian cover forces. The Italian battleships opened fire but drew off to the northward when the Allied convoy escorts closed to attack. Contact was lost in the dark. When both forces made contact HMS Breconshire was detached with HMS Havock and HMS Decoy as escorts. They later made rendez-vous with ‘Force K’.
To reinforce the convoy HMS Neptune (Capt. R.C. O’Coner, RN), HMS Jaguar (Lt.Cdr. L.R.K. Tyrwhitt, DSC, RN) and HMS Kandahar (Cdr. W.G.A. Robson, DSO, DSC, RN) were sailed from Malta.
The original convoy escorts meanwhile retired to the eastward and then proceeded to the north of Benghazi to try to intercept the enemy convoy but as it was bound for Tripoli they made no contact. They therefore retired eastwards and arrived at Alexandria during the night of 18/19 December. HMS Kipling had been damaged by a near miss on the 17th. One rating had been killed during this attack.
HMS Breconshire and her escorts arrived safely at Malta in the afternoon of December 18th. (72)
19 Dec 1941
Sortie by ' Force K ' and loss of HMS Neptune and HMS Kandahar.
Around 1800B/18, 'Force K'; made up of light cruisers HMS Neptune (Capt. R.C. O'Conor, RN), HMS Aurora (Capt. W.G. Agnew, RN), HMS Penelope (Capt. A.D. Nicholl, RN) and the destroyers HMS Kandahar (Cdr. W.G.A. Robson, DSO, DSC, RN), HMS Lance (Lt.Cdr. R.W.F. Northcott, RN), HMS Lively (Lt.Cdr. W.F.E. Hussey, DSC, RN) and HMS Havock (Lt. G.R.G. Watkins, DSC, RN), departed Malta to intercept an imported Italian convoy bound for Tripoli.
This enemy convoy was made up of the transports Monginevro (5324 GRT, built 1940), Napoli (6142 GRT, built 1941) and Vettor Pisani (6339 GRT, built 1939). They were escorted by the destroyers Ugolino Vivaldi, Antonio Da Noli, Nicoloso da Recco, Lanzerotto Malocello, Emanuele Pessagno and Nicolò Zeno.
While trying to intercept 'Force K' ran into an unknown Italian minefield (German mines were used). HMS Neptune which was leading, struck a mine on her port side at 0106B/19 in position 33°09'0"N, 13°20'5"E. At 0108B/19 a similar explosion occured on board HMS Aurora. At 0110B/19 HMS Penelope exploded a mine, probably in her paravanes. The mine had exploded abreast the bridge on the port side. HMS Neptune hit another mine at 0116B/19 followed shortly afterwards by yet another one.
HMS Neptune was heavily damaged. HMS Aurora was also heavily damaged while damage to HMS Penolope was, compared to the other two cruisers, mimor. HMS Aurora soon set course trying to return to Malta taking HMS Lance and HMS Havock with her. The other ships remained in the area trying to assist HMS Neptune.
At 0130B/19, HMS Aurora ordered ' one destroyer go alongside Neptune'. HMS Kandahar then made a signal to HMS Lance ' take charge of destroyers '. HMS Kandahar then commenced to close HMS Neptune. While closing she was ordered by HMS Neptune ' Keep to leaward until i have drifted clear of minefield '.
At 0218B/19, HMS Penelope received a signal from HMS Neptune that she was preparing to be taken in tow.
At 0227B/19, a signal was received by HMS Kandahar from HMS Penelope. ' Have told Lively to close Neptune. I will close and take Neptune in tow when signalled '.
At 0309B/19, HMS Neptune ordered HMS Penelope to close as it was thought HMS Neptune had by now drifted clear of the minefield and was ready to be taken in tow. However at 0318B/19, HMS Kandahar which was also closing HMS Neptune at 15 knots to render assistance hit a mine despite using her Asdic to try to detect mines. Distance to HMS Neptune at that moment was 7 cables. HMS Penelope at once steered to get clear and was shortly afterwards ordered by HMS Neptune to ' Keep away '.
At 0330B/19, HMS Lively was seen to be closing as a signal was made by HMS Kandahar ordered in her to ' clear out '.
On a quick examination of the damage HMS Kandahar was found to be flooded up to the after engine room bulkhead. So at 0334B/19 a signal was made to HMS Penelope, ' Ship is flooded up to engine room bulkhead, can be towed but i realise this is impossible '.
Then at 0400B/19, HMS Neptune hit a fourth mine shattering all hopes that HMS Penelope and HMS Lively could help the by now two stricken ships. They were left with no choice to return to Malta. After the fourth explosion HMS Neptune was seen, by the crew of HMS Kandahar, to turn over on her port side and she began to sink slowly. HMS Kandahar too was seriously damaged being awash aft up to the funnel.
HMS Aurora, HMS Penelope, HMS Lance, HMS Lively and HMS Havock returned to Malta around 1230B/19.
HMS Aurora was patched up at Malta before returning home for repairs at Liverpool from April to June 1942. HMS Penelope was repaired at Malta until January 1942.
Back to HMS Kandahar now, after the explosion the engine room bulkhead was shored and boats and Carley floats lowered. The only boat thought to be serviceable was the whaler. While this boat was being hauled round the bows to the Port side the line parted and the boat drifted away. She was seen to be making water and with the crew bailing hard so she was hailed and told to make for the ship again. This she failed to do and the boat was not seen again.
Confidential books, charts and documents were thrown overboard in well-weighted sacks and containers, Fleet Code only being retained. All Fleet Decodes were unfortunately jettisoned.
Three torpedoes, which could be fired from the forward tubes, were fired with stop valves closed. Due to damage the remaining seven could not be fired.
The situation now was that steam was being maintained in No.1 boiler room and No.3 boiler room. All auxiliary machinery in the engine room was running. All lights had failed due to the flooding of the after main switchboard. Fire control circuits were out of action. Both forward 4.7" mountings were workable in hand control. The Pom-Pom was out of action. Two 0.5" machine guns and two Oerlikons were operational. The ship was watertight from the after engine room bulkhead forward, but could not steam due to the loss of the propellers.
At daylight all top weight that could be cast loose was jettisoned. Jury aerials were rigged and all W/T sets were got into working order.
At about 0915B/19 a single JU-88 reconnaissance aircraft approached from the South and closed the ship and then flew away to the North. At about 0945B/20 a single S- 79 came up from the South and flew round the ship and thn returned towards Tripoli. At about 1000B/10 a Maryland closed, circled the ship and returned to the North.
Shortly after this a signal was transmitted on Admiral's Wave to any British warship ' Have been closed and inspected by reconnaissance aircraft. Am prepared to sink ship on arrival of enemy. ' The signal also included the ships position.
No reply was received from Malta for this signal on Admirals Wave, so a further signal was made on 465 KCs. ' Am still afloat, then the position was given., Drift Easterly about 1 knot '. [The positions in both signals have been censored.]
Around 1330B/19, six Blenheim aircraft were seen flying low approaching from Northwards and making in the direction of Tripoli.
Around 1600B/19, a signal was received from the Vice-Admiral, Malta that HMS Jaguar (Lt.Cdr. L.R.K. Tyrwhitt, DSC, RN) had departed Malta and was coming to our assistance. This signal was decoded using the Fleet Code.
Around 1700B/19, a Maryland aircraft flew close around the ship. The crew put their thumbs up and departed Northwards.
At 2200B/19, a Wellington aircraft arrived that was to guide HMS Jaguar to the stricken ship and from then on until arrival of HMS Jaguar at 0420B/20 this aircraft closed the ship at intermittent intervals. The report of six enemy E-Boats in the vicinity was received from the Wellington and it was estimated that they were about 7 miles to Southward of ship around 2300B/19.
During the night the weather was deteriorating rapidly with a rising wind and sea and at 0400B/20 the ship took a list of 15° to Port having heretofore been listed to Starboard. This made the Engineer Officer think that she had lost stability due to the engine room bulkhead having collapsed. Correctly he reported to me immediately and I ordered everyone on the Upper Deck and made a signal on 465 KCs to HMS Jaguar ' Am sinking '. Further investigation proved that the bulkhead was holding and that change of list must have been entirely due to the wind getting on the Starboard quarter of the ship. The ' Am sinking ' signal was then cancelled.
Around 0420B/20, HMS Jaguar was seen on the Starboard quarter and the following signal was made to her ' My ship's head 160°. Come my port side bow to stern '. Conditions were very difficult due to wind and sea and the rate of drift of HMS Kandahar, but HMS Jaguar managed to get alongside at his first attempt. However it was immediately apparent that the damage to HMS Jaguar would be considerable if she stayed there so she was ordered to go astern out of it. Some 50 men jumped from HMS Kandahar to HMS Jaguar in the brief period she had been alongside.
After consideration a signal was then made to HMS Jaguar ' Intend to abandon and sink ship. Lie to windward, to pick up survivors. Leave not later than 0530 '. The order to abandon ship was then given and the necessary steps taken to ensure the ship would sink.
Again Jaguar's ship handling was perfect and the recovery of survivors was done most expeditiously. It was expected that HMS Kandahar would sink in about 20 minutes but as she had not completely foundered HMS Jaguar torpedoed her before leaving and she was seen to sink when she left the area. HMS Jaguar arrived at Malta later on December, 20th.
A total of 165 survivors had been picked up from HMS Kandahar but no survivors from HMS Neptune had been seen by the British.
In the end only one survivor was picked up by the Italian torpedo boat Calliope on 24 December. A second survivor on the same Carley float drowned during the rescue attempt due to his weak state.
On 19 January 1942 there is an entry in the war diary of Supermarine (Italian naval command) that 27 bodies, thought to be from Neptune had by now been recoved on the Libyan coast between Zlitan and Misurata. (86)
Sources
- ADM 53/112876
- ADM 53/109908 + ADM 53/109909
- ADM 53/109909 + ADM 199/380
- ADM 53/109909
- ADM 186/794
- ADM 53/109642 + ADM 53/109910 + ADM 53/110944 + ADM 53/110977 + ADM 53/110992 + ADM 53/111234
- ADM 53/109910
- ADM 199/380
- ADM 53/109911
- ADM 53/110181 + ADM 199/380
- ADM 53/109911 + ADM 199/380
- ADM 53/107948 + ADM 53/109911 + ADM 199/380
- ADM 53/109912 + ADM 199/380
- ADM 53/109912
- ADM 53/109172 + ADM 53/109912 + ADM 199/380
- ADM 53/111429 + ADM 53/112868 + ADM 199/380
- ADM 53/111429 + ADM 53/111919 + ADM 53/112968
- ADM 53/111919
- ADM 53/113068 + ADM 199/380
- ADM 53/112868 + ADM 53/113068 + ADM 199/380
- ADM 53/111320
- ADM 53/112868
- ADM 53/112868 + ADM 199/380
- ADM 53/112868 + ADM 53/113104
- ADM 53/112869 + ADM 199/380
- ADM 53/112869
- ADM 53/112870 + ADM 199/380
- ADM 53/112870
- ADM 53/112871 + ADM 199/380
- ADM 53/112871 + ADM 53/113226 + ADM 199/380
- ADM 53/112871 + ADM 53/112919
- ADM 53/112871 + ADM 53/112872
- ADM 53/112872
- Report of proceedings of the Australian Destroyer Flotilla for May 1940
- ADM 53/112920
- ADM 53/112872 + ADM 53/112920
- ADM 53/112344 + ADM 53/112872 + ADM 53/112920 + ADM 53/113294
- ADM 53/111325 + ADM 53/112345 + ADM 53/112921 + ADM 53/113295
- ADM 199/386 + ADM 199/445
- ADM 199/386 + ADM 234/323
- ADM 199/386
- ADM 199/386 + ADM 234/317
- ADM 199/386 + ADM 199/391
- ADM 53/112875
- ADM 53/112875 + ADM 199/383
- ADM 199/383
- ADM 53/112876 + ADM 199/383
- ADM 53/112877
- ADM 53/112877 + ADM 199/383
- ADM 53/112878
- ADM 53/112878 + ADM 199/381
- ADM 53/111968 + ADM 53/112878
- ADM 53/112879 + ADM 199/381
- ADM 53/112879
- ADM 53/111969 + ADM 53/112879
- ADM 53/112042 + ADM 53/112879 + ADM 199/381
- ADM 53/112042 + ADM 53/112879
- ADM 53/114055 + ADM 53/114288
- ADM 53/114770
- ADM 53/114055 + ADM 53/114288 + ADM 53/114770
- ADM 199/394
- ADM 53/114770 + ADM 53/115050
- ADM 53/114482 + ADM 53/114770 + ADM 199/661
- ADM 53/114483 + ADM 53/114771 + ADM 199/661
- ADM 53/114771
- ADM 53/114772
- ADM 53/114774
- ADM 53/114774 + ADM 53/114888
- ADM 234/322
- ADM 199/1138
- ADM 53/114776
- ADM 199/415
- ADM 53/114776 + ADM 199/415
- ADM 53/114777 + ADM 199/415
- ADM 199/415 + Report of proceedings of HMAS Nizam for August 1941
- ADM 199/415 + Report of proceedings of HMAS Hobart for September 1941
- ADM 53/113533 + ADM 53/114778 + ADM 53/115214 + ADM 199/415 + Report of proceedings of HMAS Hobart for September 1941 + Report of proceedings of HMAS Nizam for September 1941
- ADM 53/113533 + ADM 53/114778 + ADM 199/415
- ADM 53/115213 + ADM 199/415
- ADM 53/115216 + ADM 199/415
- ADM 53/113535 + ADM 53/114780 + ADM 199/415
- ADM 1/12257 + ADM 199/415
- ADM 53/113535 + ADM 53/113536 + ADM 53/113680 + ADM 53/113681 + ADM 53/114780 + ADM 53/114852 + ADM 53/114853 + ADM 199/413 + ADM 199/415
- ADM 53/115217 + ADM 199/415
- ADM 53/114853 + ADM 199/415
- ADM 1/11947
ADM numbers indicate documents at the British National Archives at Kew, London.