
| Navy | The Royal Australian Navy |
| Type | Destroyer |
| Class | Admiralty V & W |
| Pennant | D 31 |
| Built by | A. Stephen & Sons Ltd. (Glasgow, Scotland) |
| Ordered | 9 Dec 1916 |
| Laid down | 17 May 1917 |
| Launched | 8 May 1918 |
| Commissioned | 11 Oct 1933 |
| Lost | 25 Sep 1942 |
| Loss position | 9° 11'S, 125° 43'E |
| History | Completed as HMS Voyager on 24 June 1918. Transferred to Australia and commissioned into the RAN on 11 October 1933. Scuttled in Betano Bay, Timor, in approximate position 09°11'S, 125°43'E after being grounded on 23 September and then damaged by a Japanese air attack on 24 September. HMAS Voyager (Lt.Cdr. Ruper Cowper Robison, DSC, RAN) was landing reinforcements and supplies for the Dutch / Australian guerilla force on Timor at the time of her loss. |
| Former name | HMS Voyager |
Commands listed for HMAS Voyager (D 31)
Please note that we're still working on this section
and that we only list Commanding Officers for the duration of the Second World War.
| Commander | From | To | |
| 1 | Lt.Cdr. James Cairns Morrow, RAN | 26 Apr 1938 | 27 Dec 1940 |
| 2 | Capt. Hector Macdonald Laws Waller, DSO, RAN | 27 Dec 1940 | 9 Jan 1941 |
| 3 | Cdr. James Cairns Morrow, DSO, RAN | 9 Jan 1941 | 17 Nov 1941 |
| 4 | Lt. William Frank Cook, RAN | 18 Nov 1941 | 5 Jan 1942 |
| 5 | Lt.Cdr. Rupert Cowper Robison, RAN | 6 Jan 1942 | 25 Sep 1942 |
You can help improve our commands section
Click here to Submit events/comments/updates for this vessel.
Please use this if you spot mistakes or want to improve this ships page.
Notable events involving Voyager include:
The page of HMAS Voyager was last updated in July 2022.
3 Sep 1939
The light cruiser HMAS Hobart (Capt. H.L. Howden, RAN) and the destroyer HMAS Voyager (Lt.Cdr. J.C. Morrow, RAN) departed Sydney for patrol.
They parted company the following day but both ships patrolled the shipping lanes near Cape Howe. (1)
6 Sep 1939
The light cruiser HMAS Hobart (Capt. H.L. Howden, RAN) and the destroyer HMAS Voyager (Lt.Cdr. J.C. Morrow, RAN) both arrived at Williamstown, Melbourne from patrol. (1)
7 Sep 1939
HMAS Voyager (Lt.Cdr. J.C. Morrow, RAN) is docked in the Duke and Orr's Dry Dock at Melbourne. She was undocked the next day. (2)
8 Sep 1939
HMAS Vampire (Lt.Cdr. J.A. Walsh, RAN) and HMAS Voyager (Lt.Cdr. J.C. Morrow, RAN) departed Williamstown, Melbourne for Fremantle to join HMAS Sydney (Capt. J.W.A. Waller, RN) which was based there. (3)
14 Sep 1939
HMAS Vampire (Lt.Cdr. J.A. Walsh, RAN) and HMAS Voyager (Lt.Cdr. J.C. Morrow, RAN) arrived at Fremantle from Williamstown, Melbourne. (3)
18 Sep 1939
HMAS Voyager (Lt.Cdr. J.C. Morrow, RAN) conducted a searchlight exercises off Fremantle with the local defences. (2)
26 Sep 1939
HMAS Sydney (Capt. J.W.A. Waller, RN) and HMAS Voyager (Lt.Cdr. J.C. Morrow, RAN) conducted gunnery exercises off Fremantle. HMAS Sydney was just returning from patrol. On completion of the gunnery exercises the cruiser also conducted torpedo firing and height finding exercises and then entered harbour. (4)
9 Oct 1939
HMAS Sydney (Capt. J.W.A. Waller, RN), HMAS Vampire (Lt.Cdr. J.A. Walsh, RAN) and HMAS Voyager (Lt.Cdr. J.C. Morrow, RAN) conducted exercises off Sydney.
The destroyers returned to Fremantle in the evening. HMAS Sydney remained out for more exercises and returned to Fremantle on the 10th. (5)
14 Oct 1939
HMAS Vampire (Lt.Cdr. J.A. Walsh, RAN) and HMAS Voyager (Lt.Cdr. J.C. Morrow, RAN) departed Fremantle to proceed to Singapore via the Sunda Strait. (6)
21 Oct 1939
HMAS Vampire (Lt.Cdr. J.A. Walsh, RAN) and HMAS Voyager (Lt.Cdr. J.C. Morrow, RAN) arrived at Singapore from Fremantle. (6)
30 Oct 1939
HMAS Vampire (Lt.Cdr. J.A. Walsh, RAN) returned to Singapore from patrol in the Johore Strait after having been relieved by HMAS Voyager (Lt.Cdr. J.C. Morrow, RAN). (6)
1 Nov 1939
HMAS Voyager (Lt.Cdr. J.C. Morrow, RAN) was relieved on the Johore patrol by HMS Stronghold (Lt.Cdr. R. Alexander, RN).
HMAS Voyager was then joined by HMAS Vampire (Lt.Cdr. J.A. Walsh, RAN) and the two destroyers then conducted A/S exercises with the submarine HMS Parthian (Lt.Cdr. M.G. Rimington, RN). (2)
2 Nov 1939
HMAS Vampire (Lt.Cdr. J.A. Walsh, RAN) and HMAS Voyager (Lt.Cdr. J.C. Morrow, RAN) conducted A/S exercises off Singapore with HMS Parthian (Lt.Cdr. M.G. Rimington, RN).
On completion of the exercises the destroyers proceeded to Serangoon Harbour while HMS Parthian remained out for night exercises. (7)
3 Nov 1939
HMAS Vampire (Lt.Cdr. J.A. Walsh, RAN) and HMAS Voyager (Lt.Cdr. J.C. Morrow, RAN) proceeded to sea again and then conducted exercises with HMS Parthian (Lt.Cdr. M.G. Rimington, RN). These included A/S exercises for the destroyers and torpedo firing and attack exercises for HMS Parthian. (7)
7 Nov 1939
During 7 and 8 November 1939, the destroyers HMAS Stuart (Cdr. H.M.L. Waller, RAN), HMAS Vampire (Lt.Cdr. J.A. Walsh, RAN), HMAS Vendetta (Lt.Cdr. G.L. Cant, RAN), HMAS Voyager (Lt.Cdr. J.C. Morrow, RAN) and HMAS Waterhen (Lt.Cdr. J.H. Swain, RN) conducted gunnery exercises off Singapore. Also A/S exercises were carried out with the submarines HMS Parthian (Lt.Cdr. M.G. Rimington, RN) and HMS Rover (Lt.Cdr. H.A.L. Marsham, RN).
On the 7th the destroyers also search for the crew of a crashed aircraft but none were found.
On completion of the exercises on the 8th, HMAS Vampire, HMAS Voyager and HMAS Parthian returned to Singapore.
HMAS Stuart, HMAS Vendetta, HMAS Waterhen and HMS Rover remained out for exercises and only returned to Singapore on the 10th. (8)
13 Nov 1939
HMAS Stuart (Cdr. H.M.L. Waller, RAN), HMAS Vampire (Lt.Cdr. J.A. Walsh, RAN), HMAS Vendetta (Lt.Cdr. G.L. Cant, RAN), HMAS Voyager (Lt.Cdr. J.C. Morrow, RAN) and HMAS Waterhen (Lt.Cdr. J.H. Swain, RN) departed Singapore for Colombo.
On the 15th, HMAS Vendetta was detached to Penang as Surgeon Lt. E.D. Hull, RANR had to be taken to hospital with an acute appendicitis. (9)
17 Nov 1939
In the afternoon, HMAS Vampire (Lt.Cdr. J.A. Walsh, RAN) and HMAS Voyager (Lt.Cdr. J.C. Morrow, RAN) parted company with HMAS Stuart (Cdr. H.M.L. Waller, RAN) and HMAS Waterhen (Lt.Cdr. J.H. Swain, RN) to proceed to Trincomalee. The two other destroyers were to continue the passage to Colombo. (10)
18 Nov 1939
HMAS Vampire (Lt.Cdr. J.A. Walsh, RAN) and HMAS Voyager (Lt.Cdr. J.C. Morrow, RAN) arrived at Trincomalee from Singapore. (11)
20 Nov 1939
HMAS Vampire (Lt.Cdr. J.A. Walsh, RAN) and HMAS Voyager (Lt.Cdr. J.C. Morrow, RAN) departed Trincomalee for Nancowry. (11)
23 Nov 1939
' Force M ', made up of HMS Kent (Capt. D. Young-Jamieson, RN) and Suffren (Capt. R.J.M. Dillard) arrived at Nancowry. Here they were fuelled during 23/24 November by the RFA tanker Appleleaf (5891 GRT, built 1917).
The destroyers HMAS Vampire (Lt.Cdr. J.A. Walsh, RAN) and HMAS Voyager (Lt.Cdr. J.C. Morrow, RAN) were also at Nancowry having arrived there earlier the same day and patrolled at sea one by one during the time the cruisers were at Nancowry. (12)
25 Nov 1939
HMAS Voyager (Lt.Cdr. J.C. Morrow, RAN) departed Nancowry to search isolated anchorages in the Andaman and Nicobar Islands. She was also to pay a visit to Port Blair.
HMAS Vampire (Lt.Cdr. J.A. Walsh, RAN) remained at Nancowry as Guard Ship. (11)
26 Nov 1939
HMAS Voyager (Lt.Cdr. J.C. Morrow, RAN) arrived at Port Blair from patrol. (2)
27 Nov 1939
HMAS Voyager (Lt.Cdr. J.C. Morrow, RAN) departed Port Blair to return to Nancowry and search isolated anchorages in the Andaman and Nicobar Islands for enemy activity en-route. (2)
28 Nov 1939
' Force M ', made up of HMS Kent (Capt. D. Young-Jamieson, RN) and Suffren (Capt. R.J.M. Dillard) returned to Nancowry from patrol.
They were at Nancowry during 28 to 30 November. During this time they were fuelled by the RFA tanker Appleleaf (5891 GRT, built 1917).
The destroyers HMAS Vampire (Lt.Cdr. J.A. Walsh, RAN) and HMAS Voyager (Lt.Cdr. J.C. Morrow, RAN) were also at Nancowry and patrolled at sea one by one during the time the cruisers were at Nancowry. HMAS Voyager had returned from patrol earlier in the day. (12)
30 Nov 1939
' Force M ', made up of HMS Kent (Capt. D. Young-Jamieson, RN) and Suffren (Capt. R.J.M. Dillard) departed Nancowry for Colombo. The destroyers HMAS Vampire (Lt.Cdr. J.A. Walsh, RAN) and HMAS Voyager (Lt.Cdr. J.C. Morrow, RAN) were also in company during the passage. (12)
2 Dec 1939
' Force M ', made up of HMS Kent (Capt. D. Young-Jamieson, RN) and Suffren (Capt. R.J.M. Dillard) as well as the destroyers HMAS Vampire (Lt.Cdr. J.A. Walsh, RAN) and HMAS Voyager (Lt.Cdr. J.C. Morrow, RAN) arrived at Colombo from Nancowry. (13)
8 Dec 1939
HMS Diamond (Lt.Cdr. P.A. Cartwright, RN), HMAS Vampire (Lt.Cdr. J.A. Walsh, RAN) and HMAS Voyager (Lt.Cdr. J.C. Morrow, RAN) departed Colombo for Aden.
On the 13th, HMS Diamond parted company and continued the passage to Aden independently. (14)
10 Dec 1939
Convoy K 6.
This convoy departed Bombay on 10 December 1939.
It was made up of the transports; Cap Tourane (French, 8009 GRT, built 1923), D'Artagnan (French, 15105 GRT, built 1925), Lancashire (British, 9557 GRT, built 1917), Rajula (British, 8478 GRT, built 1926), Rohna (British, 8602 GRT, built 1926), Tairea (British, 7934 GRT, built 1924) and Talamba (British, 8018 GRT, built 1924).
These ships were carrying Indian and French troops and mules.
On departure from Bombay the convoy was escorted by the light cruiser HMAS Hobart (Capt. H.L. Howden, RAN) and the armed merchant cruisers HMS Ranchi (Capt.(Retd.) H.C. Legge, DSC, RN) and HMS Maloja (Capt.(Retd.) C.R. Dane, RN).
Cover for he convoy was proviced by the heavy cruisers HMS Kent (Capt. D. Young-Jamieson, RN) and Suffren (Capt. R.J.M. Dillard) which had departed Colombo on 9 December. They turned back at midnight during the night of 11/12 December 1939.
On 15 December 1939, on entering the Gulf of Aden the escorts parted company with the convoy which then proceeded unescorted to Suez where it arrived on 20 December.
After passing the Suez Canal the convoy departed Port Said on 21 December escorted by the destroyers HMAS Vampire (Lt.Cdr. J.A. Walsh, RAN) and HMAS Voyager (Lt.Cdr. J.C. Morrow, RAN).
The destroyers were relieved on 24 December by their sister ships HMAS Vendetta (Lt.Cdr. G.L. Cant, RAN) and HMAS Waterhen (Lt.Cdr. J.H. Swain, RN).
The convoy arrived at Marseilles on 26 December.
15 Dec 1939
HMAS Vampire (Lt.Cdr. J.A. Walsh, RAN) and HMAS Voyager (Lt.Cdr. J.C. Morrow, RAN) arrived at Aden from Colombo.
After fuelling they departed for Suez later the same day. (15)
18 Dec 1939
HMAS Vampire (Lt.Cdr. J.A. Walsh, RAN) and HMAS Voyager (Lt.Cdr. J.C. Morrow, RAN) arrived at Suez. They then transited the Suez Canal Northbound and arrived at Port Said later the same day. (15)
21 Dec 1939
HMAS Vampire (Lt.Cdr. J.A. Walsh, RAN) and HMAS Voyager (Lt.Cdr. J.C. Morrow, RAN) departed Port Said for Malta. They were escorting convoy K 6 during the passage.
[For more info on this convoy see the event ' Convoy K 6 ' for 10 December 1939.] (15)
24 Dec 1939
HMAS Vampire (Lt.Cdr. J.A. Walsh, RAN) and HMAS Voyager (Lt.Cdr. J.C. Morrow, RAN) arrived at Malta after convoy escort duty.
Before entering harbour gunnery exercises were carried out.
HMAS Vampire then commenced boiler clearing and she was also docked at the Malta Dockyard [exact date not known to us.] (15)
1 Jan 1940
HMAS Voyager (Lt.Cdr. J.C. Morrow, RAN) departed Malta. Off Malta she took over the escort of the transport Ettrick (British, 11229 GRT, built 1938) from HMS Bideford (Cdr. R.F. Elkins, RN). (2)
4 Jan 1940
HMAS Voyager (Lt.Cdr. J.C. Morrow, RAN) and the transport Ettrick (British, 11229 GRT, built 1938) arrived at Marseilles.
HMAS Voyager departed Marseilles later the same day to return to Malta. (2)
6 Jan 1940
HMAS Voyager (Lt.Cdr. J.C. Morrow, RAN) arrived at Malta from Marseilles. (2)
9 Jan 1940
HMAS Voyager (Lt.Cdr. J.C. Morrow, RAN) conducted gunnery and torpedo firing exercises off Malta. On completion of the exercises course was set for Alexandria. (2)
11 Jan 1940
HMAS Voyager (Lt.Cdr. J.C. Morrow, RAN) arrived at Alexandria from Malta. (2)
12 Jan 1940
Convoy K6B.
This convoy departed Haifa on 12 January 1940.
It was made up of the transports; Devonshire (British, 11275 GRT, built 1939), Dilwara (British, 11080 GRT, built 1936), Rajula (British, 8478 GRT, built 1926), Rohna (British, 8602 GRT, built 1926), Tairea (British, 7934 GRT, built 1924) and Talamba (British, 8018 GRT, built 1924).
On departure from Haifa the convoy was escorted by the destroyer HMAS Stuart (Cdr. H.M.L. Waller, RAN).
Later the same day the convoy was joined by the repair ship HMS Resource (Capt.(Retd.) D.B. O’Connell, RN) and the destroyer HMAS Voyager (Lt.Cdr. J.C. Morrow, RAN). They had departed Alexandria also on the 12th.
On the 15th, east of Malta, the destroyer HMAS Waterhen (Lt.Cdr. J.H. Swain, RN) joined relieving HMAS Voyager which then proceeded to Malta to fuel and then to rejoin the convoy. On HMAS Voyager doing so, HMS Resource parted company and proceeded to Malta escorted by HMAS Stuart.
On the 16th, HMAS Waterhen parted company with the convoy to return to Malta.
Later on the 16th, HMAS Vampire (Lt.Cdr. J.A. Walsh, RAN) joined the convoy coming from Marseilles.
The convoy arrived at Marseilles on the 18th. (10)
18 Jan 1940
HMAS Vampire (Lt.Cdr. J.A. Walsh, RAN) and HMAS Voyager (Lt.Cdr. J.C. Morrow, RAN) arrived at Marseilles with convoy K6B. (16)
23 Jan 1940
Convoy Cavalry 1.
This convoy departed Marseilles on 23 January 1940.
It was made up of the transports; Devonshire (British, 11275 GRT, built 1939), Dilwara (British, 11080 GRT, built 1936), Rajula (British, 8478 GRT, built 1926), Rohna (British, 8602 GRT, built 1926) and Talamba (British, 8018 GRT, built 1924).
They were transporting troops for Palestine. Destination was Haifa.
Escort on departure from Marseilles was provided by the destroyers HMAS Vampire (Lt.Cdr. J.A. Walsh, RAN) and HMAS Voyager (Lt.Cdr. J.C. Morrow, RAN).
On the 25th, HMAS Vampire and HMAS Voyager were relieved by HMAS Vendetta (Lt.Cdr. G.L. Cant, RAN).
The convoy arrived ay Haifa on 29 January 1940. (10)
26 Jan 1940
HMAS Vampire (Lt.Cdr. J.A. Walsh, RAN) and HMAS Voyager (Lt.Cdr. J.C. Morrow, RAN) arrived at Malta from convoy escort duty. (16)
30 Jan 1940
HMAS Voyager (Lt.Cdr. J.C. Morrow, RAN) is docked at Malta. (2)
8 Feb 1940
Off Malta, HMAS Voyager (Lt.Cdr. J.C. Morrow, RAN), took over the escort of the transport Neuralia (British, 9182 GRT, built 1912) from HMAS Vampire (Lt.Cdr. J.A. Walsh, RAN). (10)
12 Feb 1940
HMAS Voyager (Lt.Cdr. J.C. Morrow, RAN) and the transport Neuralia (British, 9182 GRT, built 1912) arrived off Port Said. HMAS Voyager then parted company with the transport and proceeded to Alexandria where she arrived later the same day. (2)
13 Feb 1940
HMAS Voyager (Lt.Cdr. J.C. Morrow, RAN) departed Alexandria for Malta. (2)
14 Feb 1940
HMAS Voyager (Lt.Cdr. J.C. Morrow, RAN) arrived at Malta from Alexandria. (2)
19 Feb 1940
Off Malta, HMAS Voyager (Lt.Cdr. J.C. Morrow, RAN), conducted range and inclination and A/S exercises with HMS Oswald (?) serving as target.
HMAS Voyager departed Malta later the same day to escort the transport Duchess of Athol (British, 20119 GRT, built 1928) to Alexandria. (2)
21 Feb 1940
HMAS Voyager (Lt.Cdr. J.C. Morrow, RAN) and the Duchess of Athol (British, 20119 GRT, built 1928) arrived at Alexandria. (2)
23 Feb 1940
HMAS Voyager (Lt.Cdr. J.C. Morrow, RAN) and the Duchess of Athol (British, 20119 GRT, built 1928) departed Alexandria to return to Malta. (2)
25 Feb 1940
HMAS Voyager (Lt.Cdr. J.C. Morrow, RAN) and the Duchess of Athol (British, 20119 GRT, built 1928) arrived at Malta from Alexandria. (2)
28 Feb 1940
HMAS Voyager (Lt.Cdr. J.C. Morrow, RAN) conducted exercises off Malta with the local defences. She also conducted gunnery exercises.
She then took over the escort of the transport Nevasa (British, 9213 GRT, built 1913) from HMAS Vendetta (Lt. J. Smallwood, RN) course was then set for Marseilles.
HMAS Vendetta then entered Valetta harbour, Malta. (17)
2 Mar 1940
HMAS Voyager (Lt.Cdr. J.C. Morrow, RAN) and the transports Lancashire (British, 9557 GRT, built 1917 and Nevasa (British, 9213 GRT, built 1913) arrived at Marseilles. (2)
4 Mar 1940
HMAS Voyager (Lt.Cdr. J.C. Morrow, RAN) departed Marseilles escorting the transports Rajula (British, 8478 GRT, built 1926) and Rohna (British, 8602 GRT, built 1926) towards the vicinity of Malta after which they were to continue on unescorted to Haifa. (18)
7 Mar 1940
HMAS Voyager (Lt.Cdr. J.C. Morrow, RAN) arrived at Malta from escort duty. (2)
8 Mar 1940
HMAS Voyager (Lt.Cdr. J.C. Morrow, RAN) and HMS Westcott (Lt.Cdr. W.F.R. Segrave, RN) conducted torpedo firing exercises off Malta. They also conducted A/S exercises with HMS Oswald (Lt.Cdr. D.A. Fraser, RN). (2)
9 Mar 1940
HMAS Voyager (Lt.Cdr. J.C. Morrow, RAN) departed Malta to take over escort of the transport Nevasa (British, 9213 GRT, built 1913) from HMAS Vendetta (Lt. J. Smallwood, RN). The Nevasa was en-route from Marseilles to Port Said. HMAS Vendetta then entered Valetta harbour, Malta. (18)
12 Mar 1940
HMAS Voyager (Lt.Cdr. J.C. Morrow, RAN) and the transport Nevasa (British, 9213 GRT, built 1913) arrived at Port Said. (2)
14 Mar 1940
HMAS Voyager (Lt.Cdr. J.C. Morrow, RAN) departed Port Said for Alexandria. She was escorting the transport Talma (British, 10000 GRT, built 1923). (18)
15 Mar 1940
HMAS Voyager (Lt.Cdr. J.C. Morrow, RAN) and the transport Talma (British, 10000 GRT, built 1923) arrived at Alexandria from Port Said.
They departed Alexandria for Marseilles later the same day. (2)
18 Mar 1940
HMAS Voyager (Lt.Cdr. J.C. Morrow, RAN) arrived at Malta after the escort of the transport Talma (British, 10000 GRT, built 1923) had been taken over by the French destroyer L'Alcyon (Lt.Cdr. J.M. Bosvieux).
The L'Alcyon and Talma arrived at Marseilles on the 20th. (18)
20 Mar 1940
HMAS Voyager (Lt.Cdr. J.C. Morrow, RAN) departed Malta to take over escort of the transports Lancashire (British, 9557 GRT, built 1917) and
Talamba (British, 8018 GRT, built 1924) from HMAS Vendetta (Lt. J. Smallwood, RN). HMAS Vendetta then proceeded to Malta arriving there later the same day. (19)
21 Mar 1940
HMAS Voyager (Lt.Cdr. J.C. Morrow, RAN) is ordered to return to Malta so she parted company with the transports Lancashire (British, 9557 GRT, built 1917) and
Talamba (British, 8018 GRT, built 1924) which then continued their passage to Port Said unescorted. (2)
22 Mar 1940
HMAS Voyager (Lt.Cdr. J.C. Morrow, RAN) arrived at Malta from escort duty. She departed for Gibraltar later the same day. (2)
22 Mar 1940
At 1108A/22, the aircraft carrier HMS Ark Royal (Capt. A.J. Power, RN, flying the flag of Vice-Admiral L.V. Wells, CB, DSO, RN) passed to boom to leave Portland Bay. She is to proceed to the Mediterranean for training her aircrews.
On departure from Portland she is escorted by the destroyers HMS Isis (Cdr. J.C. Clouston, RN) and HMS Imogen (Cdr. C.L. Firth, MVO, RN).
The destroyers parted company at 1749A/23. HMS Ark Royal then proceeded unescorted.
At 1203A/25, she was joined, in position 36°02'N, 09°36'W by the destroyer HMS Bulldog (Lt.Cdr. J.S.M. Richardson, RN) and about half an hour later by the destroyer HMS Active (Lt.Cdr. E.C.L. Turner, RN). These destroyers had departed Gibraltar on the 24th.
At 1747A/25, the destroyer HMAS Voyager (Lt.Cdr. J.C. Morrow, RAN) joined in approximate position 36°00'N, 07°50'W. HMS Active then parted company to make rendezvous with a merchant vessel coming from Freetown.
Around 1100A/28, HMS Ark Royal and her two escorting destroyers arrived at Malta. (20)
24 Mar 1940
HMAS Voyager (Lt.Cdr. J.C. Morrow, RAN) arrived at Gibraltar from Malta. (2)
25 Mar 1940
HMAS Voyager (Lt.Cdr. J.C. Morrow, RAN) departed Gibraltar to join the escort of the aircraft carrier HMS Ark Royal (Capt. A.J. Power, RN, flying the flag of Vice-Admiral L.V. Wells, CB, DSO, RN). [See the event for 22 March]. (2)
31 Mar 1940
The aircraft carriers HMS Ark Royal (Capt. A.J. Power, RN, flying the flag of Vice-Admiral L.V. Wells, CB, DSO, RN) and HMS Glorious (Capt. G. D’Oyly-Hughes, DSO and Bar, DSC, RN) departed Malta for Alexandria. They were being escorted by the destroyers HMS Bulldog (Lt.Cdr. J.S.M. Richardson, RN), HMS Westcott (Lt.Cdr. W.F.R. Segrave, RN) and HMAS Voyager (Lt.Cdr. J.C. Morrow, RAN).
En-route flying exercises were conducted.
At 0800B/2, HMS Glorious and HMS Westcott parted company to remain at sea for further flying exercises.
Around 1530B/2, HMS Ark Royal, HMS Bulldog and HMAS Voyager arrived at Alexandria.
Around 1700B/4, HMS Glorious and HMS Westcott arrived at Alexandria. (21)
2 Apr 1940
HMAS Voyager (Lt.Cdr. J.C. Morrow, RAN) departed Alexandria escorting the transport Dilwara (British, 11080 GRT, built 1936) to the vicinity of Malta. (22)
5 Apr 1940
HMAS Voyager (Lt.Cdr. J.C. Morrow, RAN) arrived at Malta after she had been relieved near Malta of escorting the transport Dilwara (British, 11080 GRT, built 1936).
The Dilwara then continued on to Marseilles but now escorted by HMAS Waterhen (Lt.Cdr. J.H. Swain, RN) which had departed Malta earlier on the 5th. (22)
6 Apr 1940
HMAS Voyager (Lt.Cdr. J.C. Morrow, RAN) is taken in hand for a short refit at Malta. (23)
8 Apr 1940
HMAS Voyager (Lt.Cdr. J.C. Morrow, RAN) is docked at Malta. (23)
29 Apr 1940
HMAS Voyager (Lt.Cdr. J.C. Morrow, RAN) is undocked. (23)
3 May 1940
The repair ship HMS Resource (Capt.(Retd.) D.B. O’Connell, RN) departed Malta for Alexandria. She was escorted by the destroyers HMAS Vendetta (Lt. R. Rhoades RAN), HMAS Voyager (Lt.Cdr. J.C. Morrow, RAN) and HMAS Waterhen (Lt.Cdr. J.H. Swain, RN). (24)
4 May 1940
The destroyers HMAS Stuart (Cdr. H.M.L. Waller, RAN) and HMAS Vampire (Lt.Cdr. J.A. Walsh, RAN) departed Alexandria to make rendezvous with the repair ship HMS Resource (Capt.(Retd.) D.B. O’Connell, RN) that was being escorted by the destroyers HMAS Vendetta (Lt. R. Rhoades RAN), HMAS Voyager (Lt.Cdr. J.C. Morrow, RAN) and HMAS Waterhen (Lt.Cdr. J.H. Swain, RN).
Rendezvous was effected the following day when they took over the escort of the repair ship from the original destroyer screen. (25)
6 May 1940
HMAS Vendetta (Lt. R. Rhoades RAN), HMAS Voyager (Lt.Cdr. J.C. Morrow, RAN) and HMAS Waterhen (Lt.Cdr. J.H. Swain, RN) returned to Malta from escort duty. (25)
7 May 1940
HMAS Vendetta (Lt. R. Rhoades RAN), HMAS Voyager (Lt.Cdr. J.C. Morrow, RAN) and HMAS Waterhen (Lt.Cdr. J.H. Swain, RN) departed Malta to make rendezvous with HMS Warspite (Capt. D.B. Fisher, OBE, RN) and her escort coming from the direction of Gibraltar. (25)
8 May 1940
The destroyers HMAS Vendetta (Lt. R. Rhoades RAN), HMAS Voyager (Lt.Cdr. J.C. Morrow, RAN) and HMAS Waterhen (Lt.Cdr. J.H. Swain, RN), took over the escort of the battleship HMS Warspite (Capt. D.B. Fisher, OBE, RN) from HMS Keppel (Lt.Cdr.(Emgy.) E.G. Heywood-Lonsdale, RN), HMS Velox (Cdr.(Retd.) J.C. Colvill, RN) and HMS Vortigern (Lt.Cdr. R.S. Howlett, RN) which then set course to return to Gibraltar. (26)
10 May 1940
HMS Warspite (Capt. D.B. Fisher, OBE, RN), HMAS Vendetta (Lt. R. Rhoades RAN), HMAS Voyager (Lt.Cdr. J.C. Morrow, RAN) and HMAS Waterhen (Lt.Cdr. J.H. Swain, RN) arrived at Alexandria. (25)
11 May 1940
During 11/12, HMAS Voyager (Lt.Cdr. J.C. Morrow, RAN), patrolled off Alexandria. (23)
14 May 1940
The heavy cruisers Duquesne (Capt. G.E. Besineau), Tourville (Capt. A.J.A. Marloy), light cruisers HMS Neptune (Capt. J.A.V. Morse, DSO, RN), HMS Orion (Capt. G.R.B. Back, RN, flying the flag of Vice-Admiral J.C. Tovey, CB, DSO, RN), HMS Delhi (Capt. A.S. Russell, RN), HMS Dragon (Capt. R.G. Bowes-Lyon, MVO, RN), destroyers HMAS Stuart (Cdr. H.M.L. Waller, RAN), HMAS Vampire (Lt.Cdr. J.A. Walsh, RAN, HMAS Vendetta (Lt. R. Rhoades RAN), HMAS Voyager (Lt.Cdr. J.C. Morrow, RAN), HMS Tigre (Capt. M. De La Forest Divonne), Lynx (Cdr. A.M. De Gouyon Matignon de Pontourade) and Forbin (Lt.Cdr. R.C.M. Chartellier) conducted exercises off Alexandria. (27)
15 May 1940
Fleet exercises were carried out of Alexandria in which the following warships are thought to have participated; battleships HMS Warspite (Capt. D.B. Fisher, OBE, RN, flying the flag of A/Admiral Sir A.B. Cunningham, KCB, DSO and 2 Bars, RN), HMS Royal Sovereign (Capt. H.B. Jacomb, RN), heavy cruisers Duquesne (Capt. G.E. Besineau), Tourville (Capt. A.J.A. Marloy), light cruisers HMS Neptune (Capt. J.A.V. Morse, DSO, RN), HMS Orion (Capt. G.R.B. Back, RN, flying the flag of Vice-Admiral J.C. Tovey, CB, DSO, RN), HMS Delhi (Capt. A.S. Russell, RN), HMS Dragon (Capt. R.G. Bowes-Lyon, MVO, RN), Duguay Trouin (Capt. J.M.C. Trolley de Prevaux), destroyers HMAS Stuart (Cdr. H.M.L. Waller, RAN), HMAS Vampire (Lt.Cdr. J.A. Walsh, RAN, HMAS Vendetta (Lt. R. Rhoades RAN), HMAS Voyager (Lt.Cdr. J.C. Morrow, RAN), HMAS Waterhen (Lt.Cdr. J.H. Swain, RN), HMS Tigre (Capt. M. De La Forest Divonne), Lynx (Cdr. A.M. De Gouyon Matignon de Pontourade) and Forbin (Lt.Cdr. R.C.M. Chartellier).
Some of these ships remained out on exercises during the night of 15/16 May.
[It is possible that more ships participated in these exercises but much information is not available.]
16 May 1940
During 16/17, HMAS Voyager (Lt.Cdr. J.C. Morrow, RAN), patrolled off Alexandria. (23)
16 May 1940
HMS Pandora (Lt.Cdr. J.W. Linton, RN) conducted exercises off Alexandria with HMAS Vampire (Lt.Cdr. J.A. Walsh, RAN) and HMAS Voyager (Lt.Cdr. J.C. Morrow, RAN). (28)
20 May 1940
The French battleships Bretagne (Capt. L.R.E. de Pivian) and Provence (Capt. G.T.E. Barois) departed Alexandria for Bizerta. They were escorted by the French destroyers HMS Tigre (Capt. M. De La Forest Divonne), Lynx (Cdr. A.M. De Gouyon Matignon de Pontourade) and the Australian destroyers HMAS Stuart (Cdr. H.M.L. Waller, RAN), HMAS Vampire (Lt.Cdr. J.A. Walsh, RAN, HMAS Voyager (Lt.Cdr. J.C. Morrow, RAN) and HMAS Waterhen (Lt.Cdr. J.H. Swain, RN) departed Alexandria for Bizerta.
On 22 May two two more French destroyers joined company, these were Bordelais (Cdr. D.F.M.V. De Bourgoing) and Trombe (Cdr. A.A.M. Lepotier).
On 23 May the Australian destroyers parted company off Bizerta and proceeded to Malta arriving later the same day. (22)
23 May 1940
HMAS Stuart (Cdr. H.M.L. Waller, RAN), HMAS Vampire (Lt.Cdr. J.A. Walsh, RAN), HMAS Voyager (Lt.Cdr. J.C. Morrow, RAN) and HMAS Waterhen (Lt.Cdr. J.H. Swain, RN) arrived at Malta. (25)
24 May 1940
HMAS Stuart (Cdr. H.M.L. Waller, RAN), HMAS Voyager (Lt.Cdr. J.C. Morrow, RAN) and HMAS Waterhen (Lt.Cdr. J.H. Swain, RN) departed Malta for Alexandria where they arrived on the 25th.
HMAS Vampire (Lt.Cdr. J.A. Walsh, RAN) was to have sailed with them but was unable to do so due to an engine room defect. She departed later the same day together with HMS Havock (Lt.Cdr. R.E. Courage, DSO, RN). They arrived at Alexandria on the 26th. (29)
27 May 1940
During the morning and afternoon the battleship Lorraine (Capt. L.M.L. Rey) conducted exercises off Alexandria. She was escorted by the destroyers HMAS Voyager (Lt.Cdr. J.C. Morrow, RAN) and HMAS Waterhen (Lt.Cdr. J.H. Swain, RN). (30)
27 May 1940
In the evening, HMAS Vampire (Lt.Cdr. J.A. Walsh, RAN) and HMAS Voyager (Lt.Cdr. J.C. Morrow, RAN), conducted exercises off Alexandria. (31)
29 May 1940
HMS Oswald (Lt.Cdr. D.A. Fraser, RN) and HMS Phoenix (Lt.Cdr. G.H. Nowell, RN) conducted exercises off Alexandria with HMAS Voyager (Lt.Cdr. J.C. Morrow, RAN). (32)
30 May 1940
During 30/31 May, HMS Neptune (Capt. R.C. O'Conor, RN) and HMS Orion (Capt. G.R.B. Back, RN, flying the flag of Vice-Admiral J.C. Tovey, CB, DSO, RN) conducted exercises off Alexandria. These included night exercises.
Destroyers were also out exercising, the destroyers involved appears to have been the following [it is possible not all these destroyers participated in these exercises and also some destroyer which did participate might not be listed]; HMS Nubian (Cdr. R.W. Ravenhill, RN), HMS Mohawk (Cdr. J.W.M. Eaton, RN), HMS Juno (Cdr. W.E. Wilson, RN), HMS Imperial (Lt.Cdr. C.A.deW. Kitcat, RN), HMS Ilex (Lt.Cdr. P.L. Saumarez, DSC, RN), HMS Hyperion (Cdr. H.St.L. Nicholson, RN), HMS Hostile (Cdr. J.P. Wright, DSO, RN), HMS Hero (Cdr. H.W. Biggs, RN), HMS Hereward (Lt.Cdr. C.W. Greening, RN), HMS Hasty, (Lt.Cdr. L.R.K. Tyrwhitt, RN), HMS Decoy (Cdr. E.G. McGregor, DSO, RN), HMAS Stuart (Cdr. H.M.L. Waller, RAN), HMAS Waterhen (Lt.Cdr. J.H. Swain, RN), HMAS Voyager (Lt.Cdr. J.C. Morrow, RAN) and HMAS Vampire (Lt.Cdr. J.A. Walsh, RAN). (33)
3 Jun 1940
Fleet exercises were carried out of Alexandria in which the following warships are thought to have participated; battleships HMS Royal Sovereign (Capt. H.B. Jacomb, RN, flying the flag of Rear-Admiral H.D. Pridham-Whippell, CB, CVO, RN), HMS Malaya (Capt. Sir A.F.E. Palliser, DSC, RN), Lorraine (Capt. L.M.L. Rey), aircraft carrier HMS Eagle (Capt. A.R.M. Bridge, RN), light cruisers HMS Orion (Capt. G.R.B. Back, RN, flying the flag of Vice Admiral J.C. Tovey, CB, DSO, RN), HMS Neptune (Capt. R.C. O'Conor, RN), HMAS Sydney (Capt. J.A. Collins, RAN), HMS Gloucester (Capt. F.R. Garside, CBE, RN), destroyers HMAS Stuart (Cdr. H.M.L. Waller, RAN), HMAS Vampire (Lt.Cdr. J.A. Walsh, RAN), HMAS Voyager (Lt.Cdr. J.C. Morrow, RAN), HMS Decoy (Cdr. E.G. McGregor, DSO, RN), HMS Havock (Lt.Cdr. R.E. Courage, DSO, RN), HMS Hereward (Lt.Cdr. C.W. Greening, RN), HMS Hostile (Cdr. J.P. Wright, DSO, RN), HMS Janus (Cdr. J.A.W. Tothill, RN), HMS Juno (Cdr. W.E. Wilson, RN), HMS Mohawk (Cdr. J.W.M. Eaton, RN) and HMS Nubian (Cdr. R.W. Ravenhill, RN).
Most of these ships remained out on exercises during the night of 3/4 June.
[It is possible that more ships participated in these exercises but not much information is available.]
6 Jun 1940
HMAS Stuart (Cdr. H.M.L. Waller, RAN), HMAS Voyager (Lt.Cdr. J.C. Morrow, RAN), HMAS Waterhen (Lt.Cdr. J.H. Swain, RN) and HMS Decoy (Cdr. E.G. McGregor, DSO, RN) conducted exercises off Alexandria. (34)
10 Jun 1940
In the evening, HMS Eagle (Capt. A.R.M. Bridge, RN) conducted flying exercises off Alexandria. She was escorted by the destroyer HMAS Vampire (Lt.Cdr. J.A. Walsh, RAN) and HMAS Voyager (Lt.Cdr. J.C. Morrow, RAN). They returned to harbour late in the evening. (35)
11 Jun 1940
Operations in the Eastern Mediterranean, 11 to 15 June 1940.
Around 0100B/11, Cruisers of the 7th Cruiser Squadron; (HMS Orion (Capt. G.R.B. Back, RN, flying the flag of Vice Admiral J.C. Tovey, CB, DSO, RN), HMS Neptune (Capt. R.C. O'Conor, RN), HMS Gloucester (Capt. F.R. Garside, CBE, RN), HMS Liverpool (Capt. P.A. Read, RN) and HMAS Sydney (Capt. J.A. Collins, RAN) departed Alexandria.
Around 0230B/11, other ships of the Mediterranean Fleet departed Alexandria; battleships HMS Warspite (Capt. D.B. Fisher, OBE, RN flying the flag of A/Admiral Sir A.B. Cunningham, KCB, DSO and 2 Bars, RN), HMS Malaya (Capt. Sir A.F.E. Palliser, DSC, RN) and aircraft carrier HMS Eagle (Capt. A.R.M. Bridge, RN). They were escorted by the destroyers HMAS Stuart (Cdr. H.M.L. Waller, RAN), HMAS Vampire (Lt.Cdr. J.A. Walsh, RAN), HMAS Voyager (Cdr. J.C. Morrow, RAN), HMS Hasty, (Lt.Cdr. L.R.K. Tyrwhitt, RN), HMS Ilex (Lt.Cdr. P.L. Saumarez, DSC, RN), HMS Janus (Cdr. J.A.W. Tothill, RN), HMS Juno (Cdr. W.E. Wilson, RN) and HMS Nubian (Cdr. R.W. Ravenhill, RN).
The destroyers HMS Dainty (Cdr. M.S. Thomas, RN) and HMS Diamond (Lt.Cdr. P.A. Cartwright, RN) had already departed Malta on the 10th to join the Fleet at sea.
The Fleet was joined at 0845B/11, by HMS Caledon (Capt. C.P. Clarke, RN) which had departed Port Said at 2355B/10. Around 1330B/11, HMS Calypso (Capt. H.A. Rowley, RN) also joined the fleet having departed Port Said on 9 June for patrol in the Kithera Channel. Also in the afternoon destroyer HMS Mohawk (Cdr. J.W.M. Eaton, RN) joined coming from Alexandria.
In the evening, around 1845B/11, the destroyers HMS Havock (Lt.Cdr. R.E. Courage, DSO, RN), HMS Hereward (Lt.Cdr. C.W. Greening, RN), HMS Hero (Cdr. H.W. Biggs, RN), HMS Hostile (Cdr. J.P. Wright, DSO, RN), HMS Hyperion (Cdr. H.St.L. Nicholson, RN) and HMS Imperial (Lt.Cdr. C.A.deW. Kitcat, RN) also joined. These destroyers (minus HMS Hereward) had been on an A/S hunt to the west of Alexandria during 10/11 June 1940. A little over an hour later the three Australian destroyers then left the Fleet for Alexandria where they arrived on the 12th.
Around 2015B/11, HMS Caledon, HMS Calypso and HMS Dainty split off from the fleet for a sweep to the south of Crete. During this sweep HMS Calypso was torpedoed by the Italian submarine Bagnolini around 0300B/12. She sank at 0334B/12. HMS Caledon and HMS Dainty then picked up the survivors and landed them on the 13th at Alexandria.
During the night of 11/12 June 1940, HMS Orion and HMAS Sydney made a sweep of Benghazi but had no contact with the enemy. At the same time HMS Gloucester and HMS Liverpool made a sweep of Tobruk. They shelled the harbour and coast defence ship San Giorgio inside it. Also they engaged three Italian auxiliary gunboats; Palmaiola, Riccardo Grazioli Lante and Giovanni Berta. The last one was sunk during the engagement.
All British ships returned to Alexandria on 14/15 June except for HMS Diamond which returned to Malta. [The date she arrived there is currently not known to us.] (36)
12 Jun 1940
HMAS Stuart (Cdr. H.M.L. Waller, RAN), HMAS Vampire (Lt.Cdr. J.A. Walsh, RAN), HMAS Voyager (Cdr. J.C. Morrow, RAN) and HMS Decoy (Cdr. E.G. McGregor, DSO, RN) departed Alexandria for an A/S sweep of the approaches to Alexandria. HMAS Waterhen (Lt.Cdr. J.H. Swain, RN) was already out on patrol since the 11th.
Early on the 13th, HMAS Waterhen returned to Alexandria to fuel but she later rejoined.
Later on the 13th a recently laid minefield was discovered and some of the mines were swept. These mines had been laid be the Italian minelaying submarine Pietro Micca.
At 1910C/13, HMAS Voyager obtained an A/S contact and attacked with depth charges.
At 2000C/13, HMAS Voyager reported that the submarine broke surface and that she then opened fire on the submarine which then disappeared. Two more patterns of depth charges were then dropped and the submarine was claimed to be sunk.
At 0100C/14, HMAS Voyager again obtained an A/S contact and dropped her last pattern of depth charges. The contact was lost at 0150C/14 but regained at 0200C/14. HMAS Stuart and HMS Decoy meanwhile had joined and started dropping depth charges.
Around 1130C/14, out of depth charges, HMAS Voyager arrived at Alexandria. She departed around 1510C/14 to reinforce the screen of the battlefleet which was approaching Alexandria and she entered Alexandria with the battlefleet around 2000C/14.
HMAS Stuart and HMS Decoy also returned to Alexandria on the 14th. (37)
15 Jun 1940
Around 1245C/15, HMAS Voyager (Cdr. J.C. Morrow, RAN) departed Alexandria for A/S patrol. (38)
16 Jun 1940
Opertion MD 2
Destroyer A/S sweep off Alexandria.
At 1400 hours the following destroyers left Alexandria for A/S sweeps; Force M: HMS Nubian (Cdr. R.W. Ravenhill, RN), HMS Mohawk (Cdr. J.W.M. Eaton, RN), HMS Janus (Cdr. J.A.W. Tothill, RN) and HMS Juno (Cdr. W.E. Wilson, RN).
Force H: HMS Hyperion (Cdr. H.St.L. Nicolson, RN), HMS Havock (Lt.Cdr. R.E. Courage, DSO, RN), HMS Hereward (Lt.Cdr. C.W. Greening, RN) and HMS Hasty (Lt.Cdr. L.R.K. Tyrwhitt, RN).
Force S: HMAS Stuart (Cdr. H.M.L. Waller, RAN), HMAS Vampire (Lt.Cdr. J.A. Walsh, RAN), HMAS Voyager (Cdr. J.C. Morrow, RAN) and HMS Dainty (Cdr. M.S. Thomas, RN). HMAS Voyager joined at sea as she had already been on patrol since the 15th.
The next day, the 17th, a report was received that four enemy light craft were seen at noon off the Syrian coast steering south. Force M was then ordered to proceed to the Scarpanto Strait and Force H was ordered to proceed to a position 60 nautical miles to the south of Cyprus. Also the light cruiser HMS Gloucester (Capt. F.R. Garside, CBE, RN) sailed from Alexandria to support them. The report appeared to be false and HMS Gloucester and the destroyers of Force M returned to Alexandria on the 19th. The destroyers of Forces H and S had returned there on the 18th. (39)
18 Jun 1940
From 18 to 22 June 1940, HMAS Voyager (Lt.Cdr. J.C. Morrow, RAN) was cleaning boilers at Alexandria. (38)
22 Jun 1940
Around 1600C/22, HMAS Voyager (Lt.Cdr. J.C. Morrow, RAN) departed Alexandria for A/S patrol near Alexandria. (38)
25 Jun 1940
Around 1130C/25, HMAS Voyager (Lt.Cdr. J.C. Morrow, RAN) returned to Alexandria from patrol. (38)
26 Jun 1940
Around 0745C/26, HMAS Voyager (Lt.Cdr. J.C. Morrow, RAN) departed Alexandria for local patrol. She returned to harbour around 1915C/26. (38)
27 Jun 1940
Around 0600C/27, the destroyers HMS Dainty (Cdr. M.S. Thomas, RN), HMS Decoy (Cdr. E.G. McGregor, RN), HMS Defender (Lt.Cdr. St.J.R.J. Tyrwhitt, RN), HMS Ilex (Lt.Cdr. P.L. Saumarez, DSC, RN) and HMAS Voyager (Lt.Cdr. J.C. Morrow, RAN) departed Alexandria for an A/S sweep in the Eastern Mediterranean.
In the evening the Italian submarine Console Generale Liuzzi was scuttled south-east of Crete in position 33°36'N, 27°27'E after being depth charged and forced to surface by the above detroyers.
27 Jun 1940
Operation MA 3, convoy’s from Malta and convoy AS 1 from the Dardanelles.
Convoy AS 1 from the Aegean (mostly from the Dardanelles) to Port Said.
This convoy was made up of the following ships:
From the Dardanelles: British merchants: Deebank (5060 GRT, built 1929), Destro (3553 GRT, built 1920), Eastlea (4267 GRT, 1924), Egyptian Prince (3490 GRT, 1922), Palermo (2797 GRT, built 1938), Volo (1587 GRT, built 1938) and the tug Brittania towing the small river tanker Danube Shell II (704 GRT, built 1934).
From Kalamata: British merchant Destro (3553 GRT, built 1920).
From Izmir: British merchant African Prince (4653 GRT, built 1939).
The Dutch merchant Ganymedes (2682 GRT, built 1917) also joined the convoy. Her port of origin is currently unknown to us.
These ships were escorted by the British light cruisers HMS Caledon (Capt. C.P. Clarke, RN), HMS Capetown (Capt. T.H. Back, RN, senior officer of the escort) and the destroyers HMS Nubian (Cdr. R.W. Ravenhill, RN), HMS Mohawk (Cdr. J.W.M. Eaton, RN), HMAS Vampire (Lt.Cdr. J.A. Walsh, RAN) and ORP Garland (Kpt. mar. (Lt.Cdr.) A. Doroszkowski). These ships had sailed from Port Said (HMS Capetown, HMS Nubian, HMS Mohawk. These ships had sailed late in the afternoon of the 26th.) and Alexandria (HMS Caledon, HMAS Vampire and ORP Garland. These ships had sailed in the evening of the 26th).
The escort joined up with the convoy late in the morning of 28 June 1940 and then proceeded towards Port Said where it arrived on 3 July 1940. In the afternoon of 29 June 1940, when near the Doro Channel, the convoy had been bombed by Italian aircraft but no damage had been sustained. The next day, when between Gavdo Island and Crete the convoy was attacked again by the Italian air force but again no damage was sustained. Following the first air attack HMS Orion, HMS Neptune and HMAS Sydney proceeded to the convoy to provide additional protection. They were near the convoy when it was attacked for the second time and were attacked themselves by eight enemy aircraft. Heavy bombs fell close to the Orion and Neptune but no actual hits were sustained although Neptune suffered some splinter damage to her aircraft and some superficial damage to the superstructure as well. The aircraft was jettisoned due to the danger of fire. Three of her crew were injured. The three cruisers left the convoy at 0900/1. When they arrived at Alexandria in the second half of 1 July 1940, HMAS Sydney landed 44 survivors from the Espero.
Operation MA 3
On 27 June 1940, five destroyers, (Force C), HMS Decoy (Cdr. E.G. McGregor, DSO, RN), HMS Dainty (Cdr. M.S. Thomas, RN), HMS Defender (Lt.Cdr. St.J.R.J. Tyrwhitt, RN), HMS Ilex (Lt.Cdr. P.L. Saumarez, DSC, RN) and HMAS Voyager (Lt.Cdr. J.C. Morrow, RAN) departed Alexandria at 0600B/27 to carry out an A/S hunt off the Anti-Kithera channel on 28 June leaving that area at 2200B/28 to arrive at Malta at 1800B/29 to provide escort for two groups of merchants ships that were to proceed from Malta to Alexandria. They were to sail at 2100B/29 with a 13 knot convoy and a 9 knot convoy. The convoy’s were to arrive at Alexandria on 2 July and 4 July respectively. The fast convoy was to be escorted by HMS Dainty, HMS Ilex and one destroyer from Malta, HMS Diamond (Lt.Cdr. P.A. Cartwright, RN). The slow convoy was to be escorted by the other destroyers, HMS Decoy, HMS Defender and HMAS Voyager. In the end the sailing of both these convoy's was cancelled.
Also on 27 June 1940, at 1100 hours, to provide cover for the convoy’s from a position about 60 nautical miles north of their track. They were to return to Alexandria at 1800/3. Force B, made up of the battleships HMS Royal Sovereign (Capt. H.B. Jacomb, RN, flying the flag of Rear-Admiral H.D. Pridham-Whippell, CB, CVO, RN), HMS Ramillies (Capt. H.T. Baillie-Grohman, OBE, DSO, RN), aircraft carrier HMS Eagle (Capt. A.R.M. Bridge, RN) and the destroyers HMS Hyperion (Cdr. H.St.L. Nicholson, RN), HMS Hasty, (Lt.Cdr. L.R.K. Tyrwhitt, RN), HMS Havock (Lt.Cdr. R.E. Courage, DSO, RN), HMS Hereward (Lt.Cdr. C.W. Greening, RN), HMS Hero (Cdr. H.W. Biggs, RN), HMS Juno (Cdr. W.E. Wilson, RN) and HMS Janus (Cdr. J.A.W. Tothill, RN) were to leave Alexandria at 1230B/28. They were to cruise to the north-west of position 35°N, 22°E from 2000B/29 until the convoy had passed.
The 7th Cruiser Squadron (Force A), made up of (1st Division) HMS Orion (Capt. G.R.B. Back, RN, flying the flag of Vice Admiral J.C. Tovey, CB, DSO, RN), HMS Neptune (Capt. R.C. O'Conor, RN), HMAS Sydney (Capt. J.A. Collins, RAN), (2nd Divsion) HMS Gloucester (Capt. F.R. Garside, CBE, RN) and HMS Liverpool (Capt. P.A. Read, RN). These had departed Alexandria also at 1100B/27 to provide close cover for the convoy’s coming from Malta.
On 28 June air reconnaissance reported three Italian destroyers about 75 nautical miles west-south-west of Cape Matapan and the 7th Cruiser Squadron set a course to intercept which they successfully did at 1830 hours. In a long range action one of the Italian destroyers, the Espero was sunk by HMAS Sydney. She attacked the British cruisers so that the other two destroyers had a chance to escape in which the succeeded. During the action HMS Liverpool was hit by a 4.7" shell which cut the degaussing wire. After this action it was decided the next to postpone the sailing of the convoy’s and to send HMS Gloucester and HMS Liverpool to Port Said (Bitter Lakes) to complete with ammunition. The remaining forces were ordered to cover convoy AS 1 coming from the Aegean. As said above the other three cruisers of the 7th Cruiser Squadron returned to Alexandria on 1 July. HMS Royal Sovereign, HMS Ramillies, HMS Eagle and their escorting destroyers returned to Alexandria around 1000B/2.
The A/S sweep by the five destroyers also proved very successful as they sank three Italian submarines. On the 27th the Console Generale Liuzzi by HMS Decoy, HMS Defender and HMS Ilex and on the 29th HMS Decoy, HMS Dainty, Defender, HMS Ilex and HMAS Voyager carried out depth charge attacks on three Italian submarines. They sank the Uebi Scebelli and damaged the Salpa. The Capitano Tarantini managed to escape. Following the sinking of the Uebi Scebelli, HMAS Voyager picked up secret Italian documents and she was ordered to proceed with these documents to Alexandria where she arrived in the second half of 30 June 1940. The destroyers HMAS Stuart (Capt. H.M.L. Waller, RAN) and HMS Hostile (Cdr. J.P. Wright, DSO, RN) proceeded to sea from Alexandria P.M. on the 29th to join the hunt for other Italian submarines of which the patrol positions were mentioned in these secret documents. On completion of their A/S hunt they joined convoy AS 1. HMS Dainty had picked up 10 officers and 72 ratings from the Liuzzi and Uebi Scebelli. The destroyers, minus HMAS Voyager continued their A/S sweep until 2000B/30 but no further enemy submarines were encountered. HMAS Voyager, which had besides survivors, also recovered secret enemy documents from the water, had parted company around 1810B/30 to take these to Alexandria.
Convoy AS 1 arrived at Port Said on 2 July 1940. It's (close) escorts arrived at Alexandria also on 2 July 1940. (39)
29 Jun 1940
On 29 June 1940 around 0615 hours the Italian submarine Uebi Scebeli was sunk in the central Mediterranean in position 35°16'N, 20°20'E by the British destroyers HMS Dainty (Cdr. M.S. Thomas, RN), HMS Decoy (Cdr. E.G. McGregor, RN), HMS Defender (Lt.Cdr. St.J.R.J. Tyrwhitt, RN), HMS Ilex (Lt.Cdr. P.L. Saumarez, DSC, RN) and the Australian destroyer HMAS Voyager (Lt.Cdr. J.C. Morrow, RAN). The Italian submarines Capitano Tarantini and Salpa were also hunted but escaped.
It is also possible that the submarine sunk might have been the Italian Argonauta.
30 Jun 1940
Around 1930C/30, HMAS Voyager (Lt.Cdr. J.C. Morrow, RAN) arrived at Alexandria. (38)
7 Jul 1940
Operation MA 5 and the resulting battle of Punta Stilo on 9 July 1940.
The passage of convoys MF 1 (fast) and MS 1 (slow) from Malta to Alexandria with evacuees and fleet stores.
After the cancellation of Operation MA 3 a new plan to pass the convoys from Malta to Alexandria was made.
The Mediterranean Fleet, less HMS Ramillies and the 3rd Cruiser Squadron (HMS Caledon and HMS Capetown) departed Alexandria on 7 July 1940 to carry out operation MA 5, the object being to cover convoys MF 1 (fast) and MS 1 (slow) from Malta to Alexandria with evacuees and fleet stores.
The composition of these convoys were as follows:
Convoy MF 1, the fast convoy: This convoy departed Malta on 9 July 1940 and arrived at Alexandria on 11 July 1940 and was made up of the Egyptian merchant El Nil (7775 GRT, built 1916), British merchants Knight of Malta (1553 GRT, built 1929), Rodi (3220 GRT, built 1928, former Italian).
Convoy MS 1, the slow convoy: This convoy departed Malta on 10 July 1940 and arrived at Alexandria on 14 July 1940 and was made up of the British merchant ships Kirkland (1361 GRT, built 1934), Misirah (6836 GRT, built 1919), Tweed (2697 GRT, built 1926), Zealand (2726 GRT, built 1930) and the Norwegian merchant Novasli (3194 GRT, built 1920).
Cover for these convoys was provided by ships of the Mediterranean Fleet which was divided into three groups:
Force A: Light cruisers HMS Orion (Capt. G.R.B. Back, RN, flying the flag of Vice Admiral J.C. Tovey, CB, DSO, RN), HMS Neptune (Capt. R.C. O'Conor, RN), HMS Gloucester (Capt. F.R. Garside, CBE, RN), HMS Liverpool (Capt. P.A. Read, RN) and HMAS Sydney (Capt. J.A. Collins, RAN) and the destroyer HMAS Stuart (Capt. H.M.L. Waller, RAN).
Force B: Battleship HMS Warspite (Capt. D.B. Fisher, OBE, RN flying the flag of A/Admiral Sir A.B. Cunningham, KCB, DSO and 2 Bars, RN), destroyers HMS Nubian (Cdr. R.W. Ravenhill, RN), HMS Mohawk (Cdr. J.W.M. Eaton, RN), HMS Hero (Cdr. H.W. Biggs, RN), HMS Hereward (Lt.Cdr. C.W. Greening, RN) and HMS Decoy (Cdr. E.G. McGregor, DSO, RN).
Force C: Battleships HMS Royal Sovereign (Capt. H.B. Jacomb, RN, flying the flag of Rear-Admiral H.D. Pridham-Whippell, CB, CVO, RN), HMS Malaya (Capt. Sir A.F.E. Palliser, DSC, RN), aircraft carrier HMS Eagle (Capt. A.R.M. Bridge, RN), destroyers HMS Hyperion (Cdr. H.St.L. Nicholson, RN), HMS Hasty, (Lt.Cdr. L.R.K. Tyrwhitt, RN), HMS Hostile (Cdr. J.P. Wright, DSO, RN), HMS Ilex (Lt.Cdr. P.L. Saumarez, DSC, RN), HMS Imperial (Lt.Cdr. C.A.deW. Kitcat, RN), HMS Dainty (Cdr. M.S. Thomas, RN), HMS Defender (Cdr. St.J.R.J. Tyrwhitt, RN), HMS Janus (Cdr. J.A.W. Tothill, RN), HMS Juno (Cdr. W.E. Wilson, RN), HMAS Vampire (Lt.Cdr. J.A. Walsh, RAN) and HMAS Voyager (Cdr. J.C. Morrow, RAN).
8 July 1940.
All forces were clear of the harbour by midnight during the night of 7/8 July 1940. All forces were to make rendez-vous in position 36°30’N, 17°40’E at 1400B/10. HMS Liverpool, who was en-route from Port Said to Alexandria with spare 6" ammunition from the East Indies station, arrived at Alexandria at 0202 hours. She then quickly unloaded some of the 6" ammuntion and topped off with fuel. She departed Alexandria at 0520 hours to join her force at sea. HMS Imperial had to return to Alexandria with defects.
Shortly before midnight, at 2359 hours, HMS Hasty reported that she sighted a surfaced submarine at a range of 1000 yards. A full pattern depth charge attack was made an the submarine was thought to have been sunk. One hour later when about to rejoin Force C she carried out another attack on a confirmed contact. It was consided that this attack caused damage to another Italian submarine.
At 0807B/8 a report was received from the submarine HMS Phoenix (Lt.Cdr. G.H. Nowell, RN) that she had sighted two enemy battleships escorted by four destroyers in position 35°23’N, 17°45’E, steering 180° at 0515B/8. It was suspected that this force was covering an important enemy convoy. The Vice-Admiral, Malta, was ordered to arrange air reconnaissance to the eastward and to the Rear-Admiral, Alexandria to arrange for a flying boat to shadow this force. Two enemy submarines were sighted by A/S patrols from HMS Eagle.
The Italians were aware of the Mediterranean Fleet being at sea as the Fleet had been reported by the Italian submarine Beilul. This resulted in air attacks on the Fleet during the 8th.
Damage was done to HMS Gloucester which was hit on the compass platform causing seven officers to be killed and three wounded. Amongst the officers killed was the ships Captain. Besides the officers eleven ratings were killed and six were wounded.
At 1510B/8 a flying boat reported a force of three battleships, six cruisers and seven destroyers in position 33°18’N, 19°45’E, steering 340°. At 1610 hours it was reported that this force had changed course to 070°. The flying boat that reported this force had to return to base at 1715 hours but no relief was available to continue shadowing. The Commander-in-Chief therefore, in the absence of further information, decided to continue the course of the Fleet to the north-westward in order to get between the enemy and his base. A mean line of advance of 310° at 20 knots was therefore maintained during the night.
9 July 1940.
There were no incidents during the night and at 0600 hours the Fleet was concentrated in position 36°55’N, 20°30’E. An air search by aircraft from HMS Eagle was commenced at dawn between 180° and 300°. Meanwhile a mean line of advance of 300° at 16 knots was maintained by the Fleet.
The first enemy report was received from a flying boat from Malta who reported two battleships, four cruisers and ten destroyers at 0732 hours in position 37°00’N, 17°00’E, steering 330° and subsequent reports showed that there was a further large force of cruisers and destroyers in the vicinity.
A second search by aircraft from HMS Eagle covered these positions and by 1130 hours it was considered that the enemy’s position was sufficiently well established to launch the air striking force. At this time the enemy fleet was approximately 90 miles to the westward of our forces. Unfortunately, touch with the enemy fleet was lost by the shadowing aircraft at this time and shortly afterwards it appears that the enemy turned to the southward. The striking force therefore failed to locate the enemy battlefleet, but carried out an attack on some cruisers at about 1330 hours without result.
Touch was regained with the enemy battleships at 1340 hours by a relief shadower from HMS Eagle and by a flying boat. The air striking force was flown of again at 1539 hours shortly after action was joined and they are believed to have scored one hit on a cruiser. All aircraft from HMS Eagle returned. In the meanwhile reports from shadowing aircraft show that the enemy force consisted of two battleships of the Cavour-class, twelve cruisers and twenty destroyers, and that they appeared to be keeping close to the coast of Calabria.
At 1400 hours the British Fleet as in position 38°02’N, 18°40’E. The 7th Cruiser Squadron was 8 nautical miles ahead of HMS Warspite, with HMS Royal Sovereign, HMS Eagle and HMS Malaya 10 nautical miles astern. Destroyers were screening these ships. The mean line of advance the Fleet was 270° the speed being limited by that of HMS Royal Sovereign. The Commander-in-Chief was obliged to use HMS Warspite as a battle cruiser to keep ahead of the battle Squadron, in order to support the cruisers, who being so few and lacking 8” ships, were very weak compared to the enemy’s cruiser force.
At 1510 hours the enemy, consisting of six 8” cruisers and a number of destroyers, was sighted steering about 020°. HMS Eagle and the 19th division (HMAS Stuart, HMAS Vampire and HMAS Voyager) were now detached from the 1st Battle Squadron and the damaged HMS Gloucester was ordered to join them. At 1514 hours HMS Neptune sighted the enemy battlefleet bearing 260° from HMS Warspite The ensuing action can best be described in five phases.
Phase 1.
A short action with enemy 8” and 6” cruisers in which our own cruisers were out ranged and came under a very heavy fire. HMS Warspite intervened and engaged successively two 8” and two 6” cruisers at long range, which after a few salvos turned away. One hit might have been obtained on a 8” cruiser.
Phase 2.
After a short lull, during which HMS Warspite fell back on HMS Malaya who was now proceeding ahead of HMS Royal Sovereign. HMS Warspite and HMS Malaya then engaged two battleships of the Cavour-class at 1553 hours. HMS Warspite was straddled at 26000 yards and she herself scored a hit on one of the enemy battleships (the Guilio Cesare). The enemy then turned away making smoke. HMS Malaya was outranged and by now HMS Royal Sovereign was now well astern and never got into action. The 7th Cruiser Squadron continued their action with the enemy cruisers, who appeared to be working round to the north with the intention of engaging HMS Eagle. They were driven off with the assistance of a few salvoes from HMS Warspite.
Phase 3.
Enemy destroyers moved out to attack, but half heartedly, and made a large volumes of smoke which soon obscured the larger targets. Destroyers were now ordered to counter attack the enemy destroyers, in which they were assisted by the 7th Cruiser Squadron, but before the range could be closed sufficiently to do damage to them the enemy retired behind their extensive smoke screen.
Phase 4.
The British fleet chased up the smoke but, appreciating that to pass through it would be playing the enemy’s game, and suspecting that enemy submarines might be in the vicinity, the Commander-in-Chief worked round to the northward and windward of the screen. When clear, all enemy forces were out of sight and air attacks had started. The British fleet was now (1652 hours) only 45 miles from the coast of Calabria and continued on a westerly course until within 25 miles of the Punta Stilo lighthouse.
Phase 5.
A succession of heavy bombing attacks were carried out between 1640 and 1912 hours. At least nine distinct bombing attacks were made and it is estimated that probably some 100 aircraft took part. Many attacks were made on HMS Eagle, but the fleet suffered no damage. Between 1640 and 1740 hours the fleet made good a course of 270° and from 1740 hours of 220°, this latter course being selected in the hope that the enemy would renew the fight. At 1830 hours it became clear that the enemy could not be intercepted before reaching Messina and course was altered to the south-eastward to open the land, turning back at 2115 hours to 220° for a position south of Malta.
During the action one of the aircraft from HMS Warspite was damaged by gun blast of her own gunfire and had to be jettisoned. The other aircraft was catapulted for action observation. After this mission was completed the aircraft landed at Malta. During the night there were no incidents.
10 July 1940.
At 0800 hours, the fleet was in position 35°24’N, 15°27’E, steering west, and remained cruising to the southward of Malta throughout the day while destroyers were sent there to refuel. The following fuelling programme was carried out. At 0530 hours the following destroyers arrived at Malta; HMAS Stuart, HMS Dainty, HMS Defender, HMS Hyperion, HMS Hostile, HMS Hasty, HMS Ilex and HMS Juno. After they had fuelled they sailed again at 1115 hours and rejoined the fleet at 1525 hours.
HMS Hero, HMS Hereward, HMS Decoy, HMAS Vampire and HMAS Voyager were then sent in, the last three to sail with convoy MS 1 after fuelling.
At 2030 hours, HMS Royal Sovereign with HMS Nubian, HMS Mohawk and HMS Janus were detached to refuel and to rejoin the fleet before noon the next day.
HMS Gloucester and HMAS Stuart were detached to join convoy MF 1, which had been sailed from Malta at 2300B/9 escorted by HMS Jervis (Capt. P.J. Mack, DSO, RN), HMS Diamond (Lt.Cdr. P.A. Cartwright, RN) and HMAS Vendetta (Lt.Cdr. R. Rhoades RAN).
In the morning an air raid took place at Malta at 0855 hours. Three or four of the attackers were shot down. Destroyers that were fuelling at Malta were not hit.
Flying boat reconnaissance of Augusta had located three cruisers and eight destroyers in harbour and at 1850 hours a strike force was flown off from HMS Eagle to carry out a dust attack. Unfortunately the enemy forces left harbour before the attack force arrived. One flight however located a Navigatori class destroyer in a small bay to the northward, which was sunk, this was the Leone Pancaldo which was later raised and repaired. The other flight did not drop their torpedoes. All aircraft landed safely at Malta.
At 2100 hours the position of the fleet was 35°28’N, 14°30’E, steering 180°. There were no incidents during the night.
In view of the heavy bombing attacks experienced during the last three days, the Commander-in-Chief has requested the Air Officer Commander-in-Chief, Middle East, to do anything possible to occupy the Italian air forces during the passage of the fleet and the convoys to Alexandria.
11 July 1940.
At 0130 hours, the fleet altered course to 000° to be in position 35°10’N, 15°00’E at 0800 hours. HMS Royal Sovereign with HMS Hero, HMS Hereward, HMS Nubian, HMS Mohawk and HMS Janus rejoined from Malta at this time, and HMS Eagle landed on her striking force from Malta.
At 0900 hours the Commander-in-Chief in HMS Warspite, screened by HMS Nubian, HMS Mohawk, HMS Juno and HMAS Vampire, proceeded ahead to return to Alexandria at 19 knots. The Rear-Admiral, First Battle Squadron, in HMS Royal Sovereign , with HMS Malaya and HMS Eagle and the remaining destroyers, proceeded on a mean line of advance of 80° at 12 knots to cover the passage of the convoys. The 7th Cruiser Squadron had already been detached at 2000B/10 to search to the eastward in the wake of convoy MF 1.
The fleet was again subjected to heavy bombing attacks. Between 1248 and 1815 hours, five attacks were made on HMS Warspite and her escorting destroyers. A total of 66 bombs were counted. Between 1112 and 1834 hours, twelve attacks were carried out on forces in company with Rear-Admiral First Battle Squadron, a total of about 120 bombs were dropped. No damage was sustained. It was noted that the fleet was shadowed by aircraft who homed in attacking aircraft.
At 1200 hours, HMAS Vampire was sighted. She reported that her Gunner had been badly wounded in an air attack made on convoy MS 1 at 1015 hours. The officer was transferred to HMS Mohawk for treatment but died aboard that ship later the same day.
At 2100 hours, HMS Warspite was in position 34°22’N, 19°17’E steering 110°.
12 July 1940.
There had been no incidents during the night. Course was altered to 070° at 0200 hours and to 100° at 0630 hours. Course was altered from time to time during the day to throw off shadowers and attacking aircraft.
At 0700 hours, Vice-Admiral (D) with the 7th Cruiser Squadron rejoined the Commander-in-Chief. Vice-Admiral (D) in HMS Orion, together with HMS Neptune was detached to join convoy MF 1.
The following bombing attacks took place during the day; Between 0850 and 1550 hours, seventeen attacks were made on HMS Warspite. About 160 bombs were dropped but none hit although there were several near misses. On the First Battle Squadron and HMS Eagle between 1110 and 1804 hours, three attacks were made, 25 bombs were dropped but none hit.
13 July 1940.
HMS Warspite, HMS Orion, HMS Neptune, HMS Liverpool, HMAS Sydney, HMS Nubian, HMS Mohawk, HMS Juno and HMAS Vampire arrived at Alexandria around 0600 hours. Convoy MF 1 and it’s escort (HMS Jervis, HMS Diamond and HMAS Vendetta) arrived during the forenoon. HMS Gloucester had detached from the convoy around 0400 hours and had already arrived at Alexandria around 0800 hours. This convoy had been unmolested during it’s passage from Malta to Alexandria.
HMS Ramillies (Capt. H.T. Baillie-Grohman, OBE, DSO, RN) then departed Alexandria to join the escort of convoy MS 1 escorted by HMS Diamond, HMS Havock (Lt.Cdr. R.E. Courage, DSO, RN), HMS Imperial and HMAS Vendetta. The two cruisers from the 3rd Cruiser Squadron, HMS Caledon (Capt. C.P. Clarke, RN) and HMS Capetown (Capt. T.H. Back, RN), had already left Alexandria on the 12th to join the escort of convoy MS 1.
14 July 1940.
The 1st Battle Squadron, HMS Eagle and their escorting destroyers arrived at Alexandria in the forenoon. They reported very heavy bombing attacks of the Libyan coast. Three enemy aircraft were reported shot down by fighters from HMS Eagle while a fourth was thought to be heavily damaged.
15 July 1940.
Convoy MS 1, HMS Ramillies, HMS Caledon, HMS Capetown, HMS Diamond, HMS Havock, HMS Imperial, HMAS Vendetta, HMS Decoy, HMAS Vampire and HMAS Voyager arrived at Alexandria before noon.
Italian forces involved in the battle of Punta Stilo.
On 6 July 1940 an important Italian troop convoy departed Naples for Benghazi, Libya. This convoy was made up of the troopship Esperia (11398 GRT, built 1920) and the transports Calitea (4013 GRT, built 1933), Marco Foscarini (6338 GRT, built 1940), Vettor Pisani (6339 GRT, built 1939). Escort was provided by the torpedo boats Orsa, Pegaso, Procione and Orione. The next day this convoy was joined by the transport Francesco Barbaro (6343 GRT, built 1940) that came from Catania and was escorted by the torpedo boats Giuseppe Cesare Abba and Rosolino Pilo. Cover for this convoy was provided by the light cruisers Giovanni Delle Bande Nere and Bartolomeo Colleoni and the destroyers Maestrale, Libeccio, Grecale and Scirocco.
This cover force was joined on 7 July by the heavy cruiser Pola and the destroyers Lanciere, Carabinieri, Corazziere and Ascari which came from Augusta.
From Messina came the heavy cruisers Zara, Fiume, Gorizia and the destroyers Vittorio Alfieri, Giosuè Carducci, Vincenzo Gioberti and Alfredo Oriani.
From Messina (these ships departed shortly after the other ships) came also the heavy cruisers Bolzano and Trento and the destroyers Artigliere, Camicia Nera, Aviere and Geniere.
From Palermo came the light cruisers Eugenio di Savoia, Emanuelle Filiberto Duca D’Aosta, Muzio Attendolo and Raimondo Montecuccoli with the destroyers Granatiere, Fuceliere, Bersagliere and Alpino.
From Taranto came the battleships Gulio Cesare (flagship) and Conte di Cavour with the dstroyers Freccia, Saetta, Dardo and Strale.
Also from Taranto came the light cruisers Giuseppe Garibaldi and Luigi di Savoia Duca Degli Abruzzi with the destroyers Folgore, Fulmine, Baleno and Lampo.
And finally, also from Taranto, came the light cruisers Armando Diaz, Luigi Cadorna, Alberto di Giussano, Alberico di Barbiano and the destroyers Antonio Pigafetta, Nicolò Zeno, Nicoloso Da Recco, Emanuele Pessagno and Antoniotto Usodimare. Later the destroyers Ugolino Vivaldi, Antonio Da Noli and Leone Pancaldo were sent out as reinforements.
The destroyers Stale, Dardo and Antonio da Noli developed mechanical problems and had to return to port for repairs.
During the battle with the Mediterranean Fleet the following ships sustained damage; Battleship Gulio Cesare was hit by a heavy shell from HMS Warspite, heavy cruiser Bolzano sustained three medium shell hits. As stated earlier the destroyer Leone Pancaldo was sunk off Augusta by aircraft from HMS Eagle but was later raised and repaired.
The Italian convoy meanwhile had arrived at Benghazi without losses on 8 July. (39)
15 Jul 1940
HMS Ramillies (Capt. H.T. Baillie-Grohman, OBE, DSO, RN), HMS Caledon (Capt. C.P. Clarke, RN), HMS Capetown (Capt. T.H. Back, RN), HMS Imperial (Lt.Cdr. C.A.deW. Kitcat, RN), HMS Havock (Lt.Cdr. R.E. Courage, DSO, RN), HMS Decoy (Cdr. E.G. McGregor, DSO, RN), HMS Diamond (Lt.Cdr. P.A. Cartwright, RN), HMAS Vampire (Lt.Cdr. J.A. Walsh, RAN), HMAS Vendetta (Lt.Cdr. R. Rhoades RAN) and HMAS Voyager (Cdr. J.C. Morrow, RAN) arrived at Alexandria from operations. (39)
19 Jul 1940
In the morning HMAS Voyager (Cdr. J.C. Morrow, RAN) served as target off Alexandria during torpedo firing exercises by FAA aircraft. (40)
19 Jul 1940
Action of Cape Spada, 19 July 1940.
Plan for operations against enemy submarines and shipping in the Aegean.
On 18 July 1940, four destroyers departed Alexandria for an anti-submarine hunt towards the Kaso Strait and then along the north coast of Crete. These destroyers were; HMS Hyperion (Cdr. H.St.L. Nicolson, DSO, RN), HMS Hasty (Lt.Cdr. L.R.K. Tyrwhitt, RN), HMS Hero (Cdr. H.W. Biggs, DSO, RN) and HMS Ilex (Lt.Cdr. P.L. Saumarez, DSC, RN).
The same day the Australian light cruiser HMAS Sydney (Capt. J.A. Collins, RAN) departed Alexandria with the destroyer HMS Havock (Cdr. R.E. Courage, DSO, DSC, RN) for an anti-shipping raid into the Gulf of Athens.
Two more destroyers left Alexandria for Port Said, these were HMS Hereward (Lt.Cdr. C.W. Greening, RN) and HMS Imperial (Lt.Cdr. C.A.deW. Kitcat, RN). They were to escort a convoy towards the Aegean and then to bring back a convoy from the Aegean to Egypt.
Proceeding of the sweeping forces up to the time of the sighting of two enemy cruisers, 18 – 19 July 1940.
The destroyers which were to perform the A/S sweep sailed from Alexandria at 0015/18 carrying out an A/S sweep towards the Kaso Strait. After passing through the Strait at 2130 hours they kept well over towards the Cretan shore to avoid being sighted from Kaso Island. They then steered towards the westward at 18 knots between Ovo Island and the Cretan mainland. At 0600C/19 course was altered to 240° to pass through the Anti-Kithera Channel. At 0722 hours two Italian cruisers were sighted ahead by HMS Hero.
Meanwhile HMAS Sydney and HMS Havock had sailed from Alexandria at 0430/18. After passing through the Kaso Strait at 2345 hours they steered 295° at 18 knots. At 0733C/19 they were in position 010°, Cape Spada, 40 nautical miles when HMAS Sydney received the enemy report from HMS Hyperion of two enemy cruisers steering 160°, bearing 255°, distant 10 nautical miles. HMS Hyperion gave her position as 340°, Agria Grabusa lighthouse, 3 nautical miles. Acting on this information, Captain Collins of HMAS Sydney altered course at 0736 hours to 240° to close the destroyers.
When an amplifying report from HMS Hyperion gave her course as 060°, and the enemy course as 360°, HMAS Sydney altered course to 190° and commenced to work up to full speed. At 0800 hours another alteration of course was made to 150°. Shortly afterwards signals were received from the Commander-in-Chief directing the destroyers to join up with HMAS Sydney and the latter to support them.
When Commander Nicolson continued from time to time to inform HMAS Sydney of his movements of his division and of the enemy, Captain Collins preserved W/T silence to avoid disclosing the presence of HMAS Sydney. In this he was entirely successful. Further alterations of course by HMAS Sydney were; at 0815 hours to 160°, at 0820 hours to 120°.
At 0826 hours the enemy cruisers were sighted. They were steering 090°, bearing 188°, range 23000 yards. They were about 20° before the starboard beam.
Until 0722 hours the destroyer division had been spread in line abreast 1.5 nautical miles apart, carrying out an A/S sweep at 18 knots. After sighting the enemy Commander Nicholson turned his division to starboard together to course 060°, and, in accordance with previous instructions, the destroyers concentrated in sub-divisions on the Hyperion.
It was estimated that HMAS Sydney at 0900 hours would be in a position 010°, Cape Spada, 55 nautical miles, and while steering towards this position Commander Nicholson endeavoured to work round to the northward. At 0725 hours, when speed was increased to 25 knots, the enemy was seen to have altered course to 360°.
Destroyer engagement with the enemy cruisers.
At 0726C/19 one of the enemy cruisers opened fire on HMS Hyperion and HMS Ilex an the latter returned fire. With their engines working up fast the speed of the destroyers was increased to 31 knots by 0735 hours. HMS Hyperion now opened fire with her after guns at maximum range, but ceased firing very soon as all her shots fell short. The enemy’s shooting was erratic, probably because he was firing against the sun. His salvoes fell short.
Although the range was opening rapidly, the enemy instead of heading in chase of the destroyers held on their course due north. Possibly he was uncertain of the strength of the force opposing him, but whatever the reason his neglect to close lost him a favourable chance of utilising his superior gun power. At 0738 hours the enemy bore 270°, range was 11 nautical miles, and HMS Hyperion at 0740 hours, ordered her division to cease firing as the enemy was out of range. Five minutes later the enemy also ceased fire.
At 0747 hours, the enemy, who bore 270°, range 14 nautical miles, was still steering north. With the object of gaining ground and of identifying the class of the enemy cruisers, the destroyer division altered course to 360°. At 0753 hours, when the enemy turned to close, course was altered back to 060°. The Commander-in-Chief’s signal to join HMAS Sydney was received by HMS Hyperion at 0800 hours, and four minutes later course was altered to 030°, with the enemy then bearing 265°, range 17 nautical miles. The enemy’s course at that moment was 090°. These positions were signaled to HMAS Sydney at 0805 hours, and course was altered to 060° one minute later. At about this time a Greek steamer was sighted ahead but it wisely turned north quickly.
Still trying to work to the northward, the destroyer’s course was altered to 040° at 0814 hours and to 030° at 0821 hours. The enemy re-opened fire at 0825 hours, but again his shooting was very short and erratic. After five minutes the enemy ceased fire and was then seen to be altering course to the southward.
HMAS Sydney and HMS Havock sighted by the destroyer division.
At 0819C/19 gun flashes were seen away on the port beam of HMS Hyperion and a minute later the destroyers enjoyed the welcome sight of HMAS Sydney and HMS Havock bearing 290°, range 10 nautical miles. Commander Nicolson immediately altered course, first to 020° and at 0832 hours to 240°. Finally at 0835 hours he formed the division in line ahead and altered course to 260°. The enemy cruisers, now 17400 yards distant, were steaming fast to the southward, making heavy black smoke. At 0838 hours, the destroyer division, now steering 170°, opened fire in divisional concentration at extreme range on the left hand cruiser but the enemy was drawing out of range and the destroyers ceased fire at 0843 hours as their salvoes were falling short.
At 0844 hours, HMAS Sydney ordered the destroyers to ‘close and attack the enemy with torpedoes’. Course was altered together to 215°, and the Hyperion signalling the division to form on a line bearing 350°, at 0846 hours fired a ranging salvo. One minute later the enemy altered course to starboard.
HMAS Sydney engaged enemy cruisers.
The action now had become a stern chase, whose main interest lies in the movements of HMAS Sydney from the moment of her sighting the enemy. Her unexpected arrival together with HMS Havock seems to have taken the Italians completely by surprise. They were then engaged with the destroyers on the other side, and, in fact, their first impression was that they had to deal with two Allied cruisers.
At 0829 hours, when HMAS Sydney opened fire on the leading enemy cruiser at a range of 20000 yards. The fall of her salvoes were the first intimation of her presence to the enemy. The destroyer division was at that time still out of sight.
When the enemy recovered from their surprise at 0832 hours, he returned a concentrated fire on the Sydney, while the latter continued on a south-easterly course to intercept the destroyer division at and at the same time to close the enemy. The enemy salvoes fell short at first, then over, with an occasional straddle. At 0835 hours, the Sydney’s fire appeared to be effective, and the enemy was seen to be turning away. When the destroyer division was sighted at 0838 hours, steering south, about 6 nautical miles off, HMS Havock hauled over to join the other destroyers. Captain Collins signalled the destroyer division to attack with torpedoes, but a further alteration off course by the enemy, to the south-westward at 0840 hours prevented any possibility of a torpedo attack. HMAS Sydney turned to course 215° in pursuit of the now rapidly retreating enemy, and an alteration which brought her on the beam of the destroyers, who, at 0846 hours, were practically in line abreast in close order chasing at full speed.
In the early stages of the action there was some difficulty of identifying the class of the enemy cruisers but by now they had been identified as being of the ‘Bande Nere’ class. In fact they were the Giovanni delle Bande Nere herself and the Bartolomeo Colleoni which had left Tripoli on 17 July for Leros.
Chase of the enemy cruisers.
About 0846C/19 the Sydney’s original target was so obscured by smoke that fire was shifted to the rear cruiser (the Colleoni), which was engaged by ‘A’ and ‘B’ turrets on bearing 203° at a range of 18000 yards. The destroyer division at 0848 hours also renewed its fire at extreme range for a couple of minutes.
At 0851 hours, as the enemy altered course to port, the Sydney made a similar movement, which had the effect of opening her ‘A’ arcs. The enemy, making vast quantities of smoke, next altered course at 0853 hours to starboard. The purpose of these manoeuvres are not clear. Perhaps they were trying to throw of the pursuit to the eastward under the cover of smoke. If so it failed, for the Sydney, observing the enemy steading on course 230° at 0856 hours, resumed the chase in a south-westerly direction.
For a minute, at 0901 hours, the Sydney checked fire while she shifted target again to the leading cruiser (Bande Nere). When this ship at 0908 hours again became obscured by smoke fire was shifted back to the rear cruiser (Colleoni) then bearing 210° at a range of 18500 yards. At 0915 hours, HMAS Sydney altered course 30° to starboard to open her ‘A’ arcs, and it was soon evident that her fire had considerable effect. With the range down to 17500 yards at 0919 hours the Sydney also came under an accurate fire, receiving her only hit at 0921 hours. This projectile, bursting on the foremost funnel, blew a hole about 3 feet square in the casings, causing minor damage to three boats and some fittings but only one slight casualty.
The Bartolomeo Colleoni disabled.
The range now began to close rapidly, and at 0923C/19 the Colleoni was seen to be stopped, apparently out of action, in position 250° , Cape Spada, 5 nautical miles. According to the evidence of prisoners, she was brought to by a shot in the engine or boiler room. All her lights went out and the electrical machinery ceased functioning, including the turret power hoists and steering gear. The Colleoni was now left to her fate by the Bande Nere, which, after making a tentative turn towards made off at high speed, and, steering 205°, rounded Agria Grabusa Island at a distance of about a mile.
During the 40 minutes chase described above, the destroyer division, at 32 knots, had made every effort to reduce the range, altering course as necessary from time to time. At 0909 hours, fire was renewed for a minute to test the range, and at 0911 hours the division formed on a line of bearing 350° . At 0918 hours, the range of the rear cruiser (Colleoni) was down to 17000 yards and closing rapidly. Course was altered to 240° at 0923 hours and fire opened in a divisional concentration on the Colleoni from 14500 yards. At 0928 hours the Colleoni was seen to be stopped and silent. For some minutes she had been hit repeatedly. Her whole bridge structure was soon in flames.
The Bartolomeo Colleoni torpedoed.
The Hyperion and the Ilex prepared to attack with torpedoes and the Hero was ordered by Commander Nicholson to take charge of the other two destroyers. At 0935C/19, HMS Hyperion fired four and HMS Ilex two torpedoes from a range of 1400 yards. One torpedo from the Ilex hit the Colleoni forward, blowing away about 100 feet of her bows and her aircraft. The Hyperion’s torpedoes, however, owning to too great a spread, passed two ahead and two astern of the Colleoni and ran on to explode on the shore of Agria Grabusa Island.
According to survivors accounts, the men of the Colleoni started to jump overboard as soon as the ship stopped, and many of them were in the sea before to torpedo from the Ilex struck the ship. She had suffered many casualties forward, round the bridge and on the upper deck. Her Captain (Captain U. Navaro) was seriously wounded and died from his wounds at Alexandria on 23 July 1940. The Italians were much impressed by the rate and accuracy of the gunfire from the Allied ships and their tactical superiority.
During the chase the destroyers were never within satisfactory range, the last distance being 14000 yards until after the Colleoni started to drop back. The shooting from HMAS Sydney as seen from HMS Hyperion had been excellent except for a short spell when a large spread was noted.
When Captain Collins, at 0933 hours, ordered Commander Nicholson to torpedo the Colleoni the range was 7500 yards. The Colleoni was then on fire amidships, and a heavy explosion was seen to occur forward. Captain Collins signaled to HMS Hyperion to leave one destroyer to deal with the disabled enemy and to resume the chase of the other cruiser in which HMAS Sydney, HMS Hero and HMS Hasty were pressing on at full speed.
Sinking of the Bartolomeo Colleoni.
At 0952C/19 the Hyperion closed in and, observing the Colleoni more or less abandoned but not sinking or too heavily on fire, Commander Nicholson’s first intention, as he passed down her starboard side, was to go alongside and salve everything possible. Barely two minutes elapsed, however, before a large fire, breaking out in the forward superstructure, was followed by an explosion which blew the whole bridge away in a cloud of smoke. The Hyperion then fired another torpedo at short range, which hit the doomed ship amidships. At 0959 hours the Colleoni heeled over and sank bottom up, in position 029° , Agria Grabusa lighthouse, 4.6 nautical miles. HMS Hyperion and HMS Ilex immediately began to rescue survivors in which they were soon joined by HMS Havock.
Chase of the Giovanni delle Bande Nere.
At 0945C/19 the Bande Nere, after passing between the island of Pondiko Nisi and the Cretan mainlan, bore 192° at a range of 20000 yards. As on board the Sydney ammunition in the ‘A’ and ‘B’ turrets was running low she had to check fire. The Bande Nere however, continued firing from her after guns but the shots consistently fell 300 yards away on the Sydney’s quarter. Captain Collins at 0955 hours repeated his signal to the destroyers to finish off the Colleoni and three minutes later he re-opened fire on the Bande Nere from 20000 yards. With the range increasing and the visibility of the target and fall of shot becoming more and more indistinct HMAS Sydney checked fire again at 1011 hours. The haze combined with the enemy’s smoke now rendered spotting conditions impossible. The result from a final couple of salvoes at 1022 hours from 21000 yards could not be observed. By that time the Sydney had remaining only four rounds per gun in ‘A’ turret and only one round per gun in ‘B’ turret. Shortly afterwards the Bande Nere, now 11 nautical miles off, was completely lost from sight in the haze. She was last seen to do 32 knots on course 200°.
HMS Hero and HMS Hasty had continued the chase at 31 knots, firing ranging salvoes at intervals, which all fell short. At 1028 hours, HMS Hero informed HMAS Sydney that she was unable to close the enemy and broke off the chase. She formed, with HMS Hasty a close screen on HMAS Sydney. When last seen from the destroyers at 1044 hours, the Bande Nere bore 177°, 15 nautical miles. At 1037 hours, HMAS Sydney finally abandoned the chase and altered course for Alexandria, reducing speed to 25 knots to allow HMS Hyperion and HMS Ilex to come up.
Rescue of the survivors from the Bartolomeo Colleoni.
At 1024C/19, leaving HMS Havock to continue picking up survivors of the Colleoni, HMS Hyperion and HMS Ilex had proceeded at high speed to join HMAS Sydney. HMS Ilex had 230 prisoners on board of which about 30 were seriously wounded and 3 subsequently died the same night.
HMS Havock, as mentioned earlier, had been ahead of HMAS Sydney, but had proceeded to join the other destroyers when the action commenced. Taking up station on the starboard wing when she got within range at 0911 hours and joined in with the concentration fire. The shooting, even at longer range, appeared to be effective, several hits being observed.
HMS Havock then joined HMS Hyperion and HMS Ilex and closed in on the Colleoni after that ship had come to a halt.
When the HMS Hyperion and HMS Ilex left the scene of the sinking HMS Havock carried on rescuing the survivors. By 1237 hours she had picked up some 260 survivors. Six Italian bombers were then seen approaching from the southward. HMS Havock was forced to abandon her humane task and left the scene at full speed for Alexandria.
HMS Havock damaged in air attack.
At 1245C/19 the enemy aircraft attacked in two formations of three aircraft each but without success. At 1455 hours nine more aircraft attacked in flights of three, the second flight scoring a near miss which penetrated and flooded no.2 boiler room. These attacks, which were made from levels between 3000 and 4000 feet were countered with effective gunfire, which in two instances broke up the formations. Two ratings in the boiler room received minor injuries. The bomb that caused the damage appeared to be 250lb, which burst 6 feet under water, about 10 feet from the ships side. After loosing way for about 5 minutes, the Havock picked up speed again and proceeded at 24 knots.
On receiving the Havock’s signals around 1500 hours, reporting her damage, HMAS Sydney turned back to support her. HMS Hero and HMS Hasty were ordered to continue to Alexandria. Shorty afterwards a heavy bombing attack was made on HMAS Sydney but without success. Realising the possible danger of submarine attack, Captain Collins, ordered HMS Hyperion and HMS Ilex to join him. At 1540 hours, HMS Havock was sighted and HMAS Sydney took station one nautical mile astern of her.
Meanwhile HMS Hyperion and HMS Ilex were proceeding towards Alexandria being unable to make rendez-vous. When the report of HMS Havock was received stating that she was damaged in an air attack, Commander Nicholson turned back and at 1840 hours they made rendez-vous with the Sydney and Havock. One more air attack was made between 1845 and 1848 hours but no damage was done.
At 2100 hours, HMAS Sydney parted company to join the 7th Cruiser Squadron. The destroyers continued on towards Alexandria where they arrived at 0845C/20.
Fleet movements 19-20 July 1940.
Acting on the possibility that other enemy forces might be at sea, the Commander-in-Chief, immediately after he received information that enemy ships had been sighted off Cape Spada, took the following measures; Air reconnaissance by flying boats of 201 Group was to be sent out to search for the Bande Nere. The movements of Convoy Aegean North 2 were postponed and the ships which had sailed from Port Said were ordered to return. An oiler convoy from Alexandria to Port Said was ordered to proceed unescorted. The Fleet was ordered to proceed to sea.
At 0915C/19, HMS Orion (Capt. G.R.B. Back, RN, flying the flag of Vice Admiral J.C. Tovey, CB, DSO, RN) with HMS Neptune (Capt. R.C. O'Conor, RN) put to sea to sweep to the north-westward.
At 1100C/19, HMS Warspite (Capt. D.B. Fisher, OBE, RN, flying the flag of A/Admiral Sir A.B. Cunningham, KCB, DSO and 2 Bars, RN) with a destroyer screen (these appeared to have been HMS Jervis (Capt. P.J. Mack, DSO, RN), HMS Mohawk (Cdr. J.W.M. Eaton, RN) and HMAS Stuart (Capt. H.M.L. Waller, RAN)) sailed for a sweep in the same direction.
At 1230C/19, HMS Malaya (Capt. Sir A.F.E. Palliser, DSC, RN), HMS Ramillies (Capt. H.T. Baillie-Grohman, OBE, DSO, RN), HMS Eagle (Capt. A.R.M. Bridge, RN), HMS Liverpool (Capt. P.A. Read, RN) and a destroyer screen (seems to be made up of HMS Nubian (Cdr. R.W. Ravenhill, RN), HMS Janus (Cdr. J.A.W. Tothill, RN), HMS Diamond (Lt.Cdr. P.A. Cartwright, RN), HMS Hereward, HMS Imperial, HMAS Vendetta (Lt.Cdr. R. Rhoades RAN) and HMAS Voyager (Cdr. J.C. Morrow, RAN)) sailed for a sweep to the westward.
From the Sydney’s last enemy report at 1016C/19, indicating that the Bande Nere was steaming south-westwards at high speed it was evident that she could reach Tobruk without being intercepted if she was making for that port. HMS Eagle was therefore ordered to prepare a striking force to attack Tobruk harbour and 201 Group was requested to make a dusk reconnaissance. HMS Liverpool was detached to join HMAS Sydney as additional escort for the damaged HMS Havock. HMS Liverpool joined HMAS Sydney at 0500C/20.
As there was no further information of the Bande Nere during the afternoon, the Commander-in-Chief decided that at 2100 hours all forces should return to Alexandria. The aircraft from HMS Warspite which was catapulted at 1700C/19 to make a search of the Tobruk area made a forced lading to the eastward of that port. The destroyer HMS Jervis was detached to search the area for the missing aircraft but failed to find it. Search for the aircraft continued on the 20th by aircraft from 201 Group but again they failed to find the missing aircraft. An Italian report on 25 July 1940 stated that the crew had been rescued.
Aircraft of No. 55 and 211 Squadrons carried out bombing attacks on shipping in Tobruk harbour and claimed several hits. At 0240C/20 six aircraft from No. 844 Squadron FAA from HMS Eagle made a successful moonlight torpedo attack on shipping at Tobruk, encountering heavy barrage fire from all sides of the harbour, which damaged three aircraft, seriously wounded one observer and slightly wounded a pilot. Hits were claimed on three ships, and a sheet of flame from an oiler indicated that she was carrying petrol. During this attack the Italian destroyers Nembo and Ostro were sunk as was the merchant vessel Sereno (2333 GRT, built 1918).
The Fleet returned to Alexandria on the morning of the 20th where all ships cheered HMAS Sydney and the destroyers when they entered harbour. The total number of Italian prisoners disembarked was 545 officers and men from a complement of the Bartolomeo Colleoni of about 630 officers and men. The Bande Nere eventually returned to Tripoli and was reported there on 26 July. (41)
25 Jul 1940
Late in the afternoon, HMAS Voyager (Cdr. J.C. Morrow, RAN) departed Alexandria escorting the merchant vessels
Eastlea (British, 4267 GRT, built 1924),
Hopecastle (British, 5178 GRT, built 1937),
Masirah (British, 6578 GRT, built 1919),
Ovula (Dutch (tanker), 6256 GRT, built 1938) and
Volo (British, 1587 GRT, built 1938) to Port Said.
They all arrived at Port Said late the following afternoon. (42)
28 Jul 1940
In the evening, HMAS Voyager (Cdr. J.C. Morrow, RAN) departed Port Said escorting the merchant vessel
Verbania (British, 6558 GRT, built 1907, former Italian, later renamed Empire Tamar)
They arrived at Haifa late the following afternoon. (42)
29 Jul 1940
In the evening, HMAS Voyager (Cdr. J.C. Morrow, RAN) departed Haifa escorting the merchant vessels
Duffield (British (tanker), 8516 GRT, built 1938),
Kirkland (British, 1361 GRT, built 1934) and
Tynefield (British (tanker), 5856 GRT, built 1926).
They arrived off Port Said the following day where the Tynefield was detached and another merchant vessel, the Lateef (Egyptian, 503 GRT, built 1903) joined.
They all arrived at Alexandria early in the evening of the 31st. (42)
1 Aug 1940
HMAS Vampire (Lt.Cdr. J.A. Walsh, RAN) and HMAS Voyager (Cdr. J.C. Morrow, RAN) are docked in the floating dock (AFD 5) at Alexandria. (43)
2 Aug 1940
HMAS Vampire (Lt.Cdr. J.A. Walsh, RAN) and HMAS Voyager (Cdr. J.C. Morrow, RAN) are undocked.
HMAS Vampire was then taken in hand for a short refit at Alexandria while HMAS Voyager commenced boiler cleaning which was completed on 7 August. (43)
7 Aug 1940
At 1300C/7, HMAS Voyager (Cdr. J.C. Morrow, RAN) is evacuated and closed off for fumigation. The ships company re-boarded the ship at 0715C/9. (44)
10 Aug 1940
HMS Dainty (Cdr. M.S. Thomas, RN), HMS Decoy (Cdr. E.G. McGregor, RN) and HMS Defender (Cdr. St.J.R.J. Tyrwhitt, RN) and HMAS Voyager (Cdr. J.C. Morrow, RAN) conducted gunnery exercises off Alexandria. (45)
14 Aug 1940
Around 0600C/14, HMAS Voyager (Cdr. J.C. Morrow, RAN) and HMAS Waterhen (Lt.Cdr. J.H. Swain, RN) departed Alexandria to escort a local convoy to Port Said where they arrived around 2350C/14.
[No details available on which ships were in the local convoy.] (46)
15 Aug 1940
Around 1410C/15, HMAS Voyager (Cdr. J.C. Morrow, RAN) and HMAS Waterhen (Lt.Cdr. J.H. Swain, RN) departed Port Said to escort a local convoy to Alexandria where they arrived around 0730C/16.
HMAS Voyager did not enter harbour. She set course to return Port Said.
[No details available on which ships were in the local convoys.] (46)
16 Aug 1940
Around 1600C/16, HMAS Voyager (Cdr. J.C. Morrow, RAN) arrived at Port Said. (44)
17 Aug 1940
Around 1520C/17, HMAS Voyager (Cdr. J.C. Morrow, RAN) departed Port Said to escort a local convoy to Alexandria where they arrived around 0830C/18.
[No details available on which ships were in the local convoy.] (44)
22 Aug 1940
A/S trawler HMS Loch Melfort (T/Lt. F. Graham-Brown, RNR), which was on local A/S patrol reported a submarine contact 13 miles 320° from Ras el Tin.
To assist in the A/S hunt the destroyers HMS Juno (Cdr. W.E. Wilson, RN), HMAS Voyager (Cdr. J.C. Morrow, RAN) and HMAS Waterhen (Lt.Cdr. J.H. Swain, RN) departed Alexandria to assist, but no further contact was made.
[File ADM 199/386, gives that the destroyer HMS Ilex (Lt.Cdr. P.L. Saumarez, DSC, RN) was also involved but from several ships logs which were present at Alexandria it is obvious that it was HMAS Waterhen which sailed in company with HMS Juno. HMAS Voyager had departed a little earlier to escort a local convoy to Port Said but most likely the sailing of this convoy was then postponed and she joined the A/S hunt.]
After the A/S hunt had been completed / cancelled, HMAS Voyager proceeded towards Port Said with the local convoy. [No details available on which ships were in this convoy.] (47)
23 Aug 1940
At 1510C/23, HMAS Voyager (Cdr. J.C. Morrow, RAN) arrived off Port Said with a local convoy from Alexandria. The convoy was then detached into Port Said.
At 1600C/23, HMAS Voyager set off for Haifa escorting another local convoy from Port Said to Haifa. [No details available on which ships were in this local convoy, though the merchant vessel Peshawur (British, 7934 GRT, built 1919) appeared to have been in this convoy.]
HMAS Voyager and the convoy arrived at Haifa around 0730C/24. (44)
24 Aug 1940
Around 1100C/24, HMAS Voyager (Cdr. J.C. Morrow, RAN) departed Haifa to escort a local convoy to Port Said / Alexandria.
The convoy arrived off Port Said around 1230C/25 where the Port Said section of the convoy proceeded into Port Said and one ship joined the remainder of the convoy for Alexandria.
HMAS Voyager arrived at Alexandria with the convoy around 0915C/26. [No details available on which ships were in the local convoy, although the merchant vessel British Architect (British (tanker), 7388 GRT, built 1922) appeared to have been part of the convoy from Haifa to Port Said.] (48)
28 Aug 1940
The aircraft carrier HMS Eagle (Capt. A.R.M. Bridge, RN) conducted flying exercises off Alexandria. She was escorted by HMS Dainty (Cdr. M.S. Thomas, RN), HMAS Vampire (Lt.Cdr. J.A. Walsh, RAN), HMAS Vendetta (Lt.Cdr. R. Rhoades, RAN) and HMAS Voyager (Cdr. J.C. Morrow, RAN). (49)
29 Aug 1940
Operation Hats.
Passage of reinforcements for the Mediterranean Fleet from Gibraltar to Alexandria, subsequent operations by the fleet as well as the passage of convoys MF 2 from Alexandria to Malta and AS 3 from Piraeus to Port Said.
29 August 1940.
At 2045C/29, convoy MF 2, made up of the transports Cornwall (10603 GRT, built 1920), Volo (1587 GRT, built 1938) and the Royal Fleet Auxiliary tanker Plumleaf (5916 GRT, built 1917) departed Alexandria for Malta. These ships were escorted by the destroyers (‘Force J’) HMS Jervis (Capt. P.J. Mack, DSO, RN), HMS Juno (Cdr. W.E. Wilson, RN), HMS Dainty (Cdr. M.S. Thomas, RN) and HMS Diamond (Lt.Cdr. P.A. Cartwright, RN).
30 August 1940.
At 0445C/30, the main battlefleet (‘Force I’) departed Alexandria and was made up of the battleships HMS Warspite (Capt. D.B. Fisher, CBE, RN, flying the flag of A/Admiral A.B. Cunningham, KCB, DSO and 2 Bars, RN), HMS Malaya (Capt. Sir A.F.E. Palliser, DSC, RN, flying the flag of Rear-Admiral H.D. Pridham-Whippell, CB, CVO, RN), aircraft carrier HMS Eagle (Capt. A.R.M. Bridge, RN), light cruisers HMS Orion (Capt. G.R.B. Back, RN) and HMAS Sydney (Capt. J.A. Collins, CB, RAN). Escort was provided by the destroyers HMAS Stuart (Capt. H.M.L. Waller, RAN), HMAS Voyager (Cdr. J.C. Morrow, RAN), HMAS Vampire (Lt.Cdr. J.A. Walsh, RAN), HMAS Vendetta (Lt.Cdr. R. Rhoades, RAN), HMS Decoy (Cdr. E.G. McGregor, RN), HMS Defender (Cdr. St.J.R.J. Tyrwhitt, RN), HMS Hereward (Lt.Cdr. C.W. Greening, RN), HMS Imperial (Lt.Cdr. C.A.deW. Kitcat, RN) and ORP Garland (Kpt. mar. (Lt.Cdr.) A. Doroszkowski).
Shortly afterwards the heavy cruiser HMS Kent (Capt. D. Young-Jamieson, RN, flying the flag of Rear-Admiral E. de F. Renouf, CVO, RN), light cruisers HMS Liverpool (Capt. P.A. Read, RN), HMS Gloucester (Capt. H.A. Rowley, RN) and the destroyers Hyperion (Cdr. H.St.L. Nicolson, DSO and Bar, RN), HMS Hasty (Lt.Cdr. L.R.K. Tyrwhitt, RN) and HMS Ilex (Lt.Cdr. P.L. Saumarez, DSC, RN) also departed Alexandria. These ships were also part of ‘Force I’.
---------------------------------------------------------------------------------------------------------------------------------
From Gibraltar the following forces went to sea, they departed around 0845A/30.
’Force B’ which was made up of the battlecruiser HMS Renown (Capt C.E.B. Simeon, RN, flying the flag of Vice-Admiral J.F. Somerville, KCB, DSO, RN), aircraft carrier HMS Ark Royal (Capt. C.S. Holland, RN), light cruiser HMS Sheffield (Capt. C.A.A. Larcom, RN). Escort was provided by the destroyers HMS Faulknor (Capt. A.F. de Salis, RN), HMS Fury (Lt.Cdr. T.C. Robinson, RN), HMS Fortune (Cdr. E.A. Gibbs, DSO, RN), HMS Firedrake (Lt.Cdr. S.H. Norris, DSC, RN), HMS Foresight (Lt.Cdr. G.T. Lambert, RN), HMS Forester (Lt.Cdr. E.B. Tancock, RN) and HMS Encounter (Lt.Cdr. E.V.St J. Morgan, RN).
At the same time ‘Force F’ departed, this force was the reinforcement for the Mediterranean Fleet and was made up of the battleship HMS Valiant (Capt. H.B. Rawlings, OBE, RN), aircraft carrier HMS Illustrious (Capt. D.W. Boyd, DSC, RN, flying the flag of Rear-Admiral A.L.St.G. Lyster, CVO, DSO, RN), light (AA) cruisers HMS Coventry (Capt. D. Gilmour, RN), HMS Calcutta (Capt. D.M. Lees, DSO, RN). They were escorted by HMS Nubian (Cdr. R.W. Ravenhill, RN), HMS Mohawk (Cdr. J.W.M. Eaton, RN), HMS Janus (Cdr. J.A.W. Tothill, RN), HMS Hero (Cdr. H.W. Biggs, DSO, RN), HMS Gallant (Lt.Cdr. C.P.F. Brown, RN), HMS Greyhound (Cdr. W.R. Marshall A'Deane, DSO, DSC, RN), HMS Griffin (Lt.Cdr. J. Lee-Barber, DSO, RN) and HMS Hotspur (Cdr. H.F.H Layman, DSO, RN).
A third ‘force’, called ‘Force W’ also departed at the same time, it was made up of the destroyers HMS Velox (Cdr.(Retd.) J.C. Colvill, RN) and HMS Wishart (Cdr. E.T. Cooper, RN). These destroyers were to split off from the other forces off the Baliaric Islands and proceed northwards and transmit false messages deceiving the Italians into thinking that ‘Force H’ from Gibraltar was proceeding towards the Genoa area.
31 August 1940.
During the day HMS Eagle flew off A/S and fighter patrols.
At 0845C/31, HMS Kent, HMS Liverpool, HMS Gloucester and their escort of HMS Hyperion, HMS Hasty and HMS Ilex were sighted by enemy aircraft. They made rendez-vous with the bulk of the Mediterranean Fleet later the same day which was then also sighted by enemy aircraft.
Shortly after noon convoy MF 2 was bombed by enemy aircraft in position 35°14’N, 23°11’E.
At 1420C/31, two Gladiators were flown off by HMS Eagle. When these returned at 1530C/31 they reported that they had shot down an Italian aircraft but another shadowing aircraft was heard to be making reports.
At 1554C/31, HMS Kent, HMS Liverpool and HMS Gloucester were detached to give AA protection to the convoy. They were ordered to rejoin the fleet at 2000C/31.
At 1635C/31 an aircraft reported that the transport Cornwall had been hit aft by a bomb and that she was on fire. It was also reported that the fire was under control and that Cornwall was still proceeding with the convoy.
At 1815C/31 HMS Decoy was detached to join the three cruisers.
Also at 1815C/31, an aircraft from HMS Eagle reported sighting an enemy force of two battleship, seven cruisers and eight destroyers in position 37°18’N, 18°52’E. Which was about 140 nautical miles from Warspite at that moment. This position was later corrected to 37°02’N, 19°04’E. It was therefore decided to remain close to the convoy during the night.
At 1930C/31, the three cruisers were sighted and between 1950C/31 and 2020C/31 all aircraft returned to HMS Eagle.
At 2057C/31, HMS Jervis reported that at 2015C/31 the convoy was in position 35°24’N, 21°50’E, course 260°, speed 9.5 knots. It was also reported that Cornwall her steering gear had been wrecked and that she was steering on her main engines.
Later that evening more sighting reports of enemy warships were received coming from two submarines.
---------------------------------------------------------------------------------------------------------------------------------
At 0815C/31, HMS Ark Royal launched six search aircraft. Fighter patrol was also maintained overhead
At 1240C/31, a section of Skua’s on fighter patrol were ordered to intercept an Italian shadower that had been detected by RD/F. They managed to intercept the enemy at 1248C/31 and shoot it down in flames.
At 1630C/31, another Italian shadower was shot down by the fighter patrol.
At 2150C/31, in position 39°30’N, 04°01’E, ‘Force W’ comprising HMS Velox and HMS Wishart, was detached for the W/T diversion. They were to proceed to the north-east and during the passage they were to transmit a series of messages by W/T in approximate position 41°00’N, 04°30’E. This part of the operation was called ‘Operation Squawk’.
1 September 1940.
At 0630C/1, HMS Eagle launched nine aircraft to conduct a search between 310° and 140° to a depth of 100 miles. These aircraft sighted nothing.
At 1035C/1, four more aircraft were flown off to search between 180° and 210° to a depth of 60 miles.
At noon ‘Force I’, the main battlefleet, was in position 34°48’N, 18°59’E.
At 1300C/1, HMS Eagle flew off four more aircraft to search between 235° and 315° to a depth of 60 miles. This search was maintained for the remainder of the day. Aircraft being flown off at 1545C/1 and 1745C/1. The last patrol returned at 2015C/1. No enemy forces had been sighted.
At 1330C/1 an, enemy reconnaissance aircraft was sighted over the fleet.
At 1400C/1, HMS Orion and HMAS Sydney were detached to make rendez-vous in position 34°42’N, 16°20’E with the destroyer HMS Wryneck (Lt.Cdr. R.H.D. Lane, RN) which had been refitting and rearming at Malta and had recently recommissioned for service. They were then to make rendezvous with ‘Force J’. The convoy was sighted at 1530C/1.
A flying boat operating from Malta reported enemy warships, a force made up of two battleships, ten cruisers and a large number of destroyers was sighted in position 38°52’N, 18°16’E at 1600C/1. They were steering towards Taranto. These forces were shadowed until 1857C/1 when it was absolutely clear that the enemy was returning to their bases.
During the night the fleet would remain near the convoy with the cruiser force to the north and the battleforce to the south of the convoy.
Plumleaf and Volo, escorted by HMS Dainty and HMS Diamond were ordered to proceed to Malta at maximum speed while HMS Jervis and HMS Juno remained behind with the damaged Cornwall.
From the main battleforce HMAS Stuart, HMAS Vendetta, HMAS Vampire and HMS Defender were detached to Malta at 2000C/1 where they were to refuel.
---------------------------------------------------------------------------------------------------------------------------------
Meanwhile in the western Mediterranean at 0325C/1 a strike force was launched by HMS Ark Royal, 155 miles, 264° from Cagliari to raid Elmas aerodrome. After flying off the fleet altered course to the flying on position which was 120 miles, 226° from Cagliari.
The striking force consisted of nine Swordfish each armed with four 250lb G.P. bombs and 8 250lb incendiary bombs. Parachute flares were also carried by each plane. Weather conditions were good.
At 0600C/1, the aircraft attacked the aerodrome after establishing its position by dropping flares. Bombs were released from 3000 feet and hits were observed on the barracks, aerodrome buildings and aircraft dispersed round the aerodrome. Several fires were seen to start.
All aircraft returned safely, landing on around 0800C/1. On the way back they had attacked an enemy submarine with machine gun fire in position 38°20’N, 07°20’E. The submarine fired a yellow flare and then dived. HMS Greyhound and HMS Hotspur were then detached to hunt the submarine but they did not made contact with the enemy. The submarine involved was the Italian Diaspro. She was first machine gunned and reported the attacking aircraft as a Sunderland (sic). She then dived. Five explosions were then heard of which one was close enough to shake the submarine.
After landing on the striking force course was altered to the south-westward to give the Italians the impression that having bombed Cagliari the force had achieved its object and was withdrawing. But as there apparently there were no Italian aircraft shadowing the force at this moment this seems to have failed.
At 1030C/1, course was altered to 080°. From this time onwards fighter patrols, each of six aircraft, were maintained over the force throughout the day.
At 1630C/1, HMS Illustrious flew off seven aircraft to conduct a search to the eastward until maximum range.
At 1730C/1, RD/F reported an aircraft approaching the force from ahead. Intercepted Italian reports indicted that the force was being shadowed. Both carriers then vectored fighters. They did not sight enemy aircraft but a section of Fulmars from HMS Illustrious attacked a British Hudson in error.
At 2200C/1, when in position 38°06’N, 10°51’E, HMS Valiant, HMS Illustrious, HMS Coventry, HMS Calcutta, HMS Nubian, HMS Mohawk, HMS Janus, HMS Hero, HMS Gallant, HMS Griffin, HMS Greyhound and HMS Hotspur parted company and proceeded to the south-eastward.
The remainder of the ships proceeded to the northwards for 15 minutes and then altered course to the west and increased speed to 24 knots to reach a suitable spot for a second air strike on Cagliari.
2 September 1940.
At 0700C/2, A/S patrols were flown off by HMS Eagle and the mean line of advance was changed to 320° for the rendez-vous position with ‘Force F’. At 0800C/2 the fleet was in position 35°25’N, 13°48’E.
At 0900C/2, HMS Valiant and HMS Illustrious were sighted right ahead. With them were HMS Orion, HMAS Sydney, HMS Wryneck, HMS Gallant, HMS Greyhound, HMS Griffin and HMS Hotspur. HMS Coventry, HMS Calcutta, HMS Nubian, HMS Mohawk, HMS Janus and HMS Juno had been detached to Malta to refuel.
At 0930C/2, HMAS Vampire and HMAS Vendetta rejoined from Malta and HMS Hereward and HMS Ilex were now detached to refuel at Malta.
At 0940C/2, when the fleet was in position 35°40’N, 13°43’E, and steaming on a course of 140°, the fleet was formed as follows; HMS Warspite, HMS Illustrious, HMS Malaya, HMS Eagle, HMS Valiant. HMS Orion and HMAS Sydney were stationed 12 cables 20° on either bow. The destroyers were in Sreening Diagram No. 6A.
A standing patrol of four Fulmars from HMS Illustrious was maintained over the fleet at 12000 feet. A/S patrols were provided by Illustrious and Eagle if required.
At 1010C/2, HMS Valiant was detached to Malta with an escort of the destroyers HMS Hyperion, HMS Hasty, HMS Decoy and HMS Wryneck.
At 0930C/2 an enemy aircraft reported three cruisers and at 1030C/2, Rear-Admiral Cruiser Squadron 3 with HMS Kent, HMS Liverpool and HMS Gloucester, reported that they were being shadowed in position 35°29’N, 14°40’E. Three Fulmars for A/S protection were then flown off.
At 1050C/2, an enemy aircraft was heard to report a large naval force. An Italian reconnaissance aircraft was shot down shortly afterwards and nothing more was heard from this aircraft after this.
At 1130C/2, the Vice-Admiral Malta reported that the convoy had arrived there safely.
At noon the fleet was in position 35°29’N, 14°25’E steering 100°. The fleet remained about 35 nautical miles south of Malta during the afternoon.
At 1425C/2, HMS Janus was detached to Malta with correspondence and to refuel.
At 1504C/2, HMS Coventry, HMS Janus, HMS Juno, HMS Nubian and HMS Mohawk, joined the fleet.
At 1600C/2, the fleet was in position 35°14’N, 14°21’E. At this time a bombing attack took place. Eight bombs fell astern of HMS Eagle.
At 1645C/2, HMS Hereward and HMS Ilex rejoined the fleet.
At 1657C/2, HMS Malaya, HMS Eagle, HMS Coventry, HMS Janus, HMS Juno, HMS Dainty, HMS Diamond, HMAS Vampire, HMAS Vendetta (‘Force E’) and HMS Kent, HMS Liverpool, HMS Gloucester, HMS Nubian and HMS Mohawk (‘Force A’) were detached.
At 1730C/2, HMS Gallant and HMS Ilex reported a submarine contact and attacked with depth charges. The fleet made an emergency alteration of course.
At 1856C/2, HMAS Voyager was detached to Malta and at 1900C/2 HMS Calcutta, HMS Hasty, HMS Hero, HMS Decoy and HMS Wryneck rejoined.
Between 1900C/2 and 1910C/2, two bombing attacks were made on the fleet. During these attacks several Italian aircraft were shot down.
At 1945C/2, when in position 35°20’N, 14°07’E, the fleet altered course to 040° to close the Malta swept channel as HMS Valiant was expected to rejoin the fleet at this time. Valiant was , however, delayed until 2030C/2 owing to an air raid on Malta and course was altered to 140° at 15 knots at 2100C/2 in position 35°38’N, 14°26’E. In the meantime the last aircraft had returned at 2045C/2.
At 2200C/2, HMS Gallant, HMS Greyhound, HMS Griffin, HMS Hotspur and ORP Garland detached to Malta to refuel and then they were to proceed to Gibraltar.
At 2330C/2, HMS Valiant, screened by HMAS Stuart, HMS Hyperion, HMS Imperial and HMS Janus, was 10 nautical miles 270° from HMS Warspite. Course was altered to 090° and speed was increased to 18 knots at this time.
---------------------------------------------------------------------------------------------------------------------------------
At 0350C/2, HMS Ark Royal, launched a striking force of nine Swordfish aircraft armed with 4 250 lb. G.P. bombs and 20 lb. Cooper of 25 lb. incendiary bombs, in addition to parachute flares. Weather conditions were however not very good.
On reaching the vicinity of their objectives, the aerodrome and the power station, the aircraft encountered a layer of cloud at 5000 feet and another layer at 4000 feet. The valleys appeared to be filled with mist or fog and low clouds. Parachute flares were dropped at intervals for a period of about 45 minutes in the hope of identifying the targets, but without success.
Four aircraft then attacked searchlights, putting one of them out of action. Two attacked, what was thought to be, a flare path which turned out to be a field two miles to the north-west of the aerodrome, The three remaining aircraft jettisoned their bombs into the sea.
During the attack the aircraft encountered heavy AA barrage fire. This fire was continued until the aircraft were over 17 miles from the aerodrome. It was apparent that the AA defence had been increased since the last attack. Searchlights were few and ineffective and appeared to have no form of control.
By 0800C/2 all aircraft had returned and the fleet was in position 37°48’N, 06°11’E and the fleet proceeded at 26 knots to the westward to get out of range of the expected enemy air attack. These however did not develop as apparently the fleet was not shadowed by the enemy.
3 September 1940.
At 0130C/3, HMS Valiant took station astern of the line and HMAS Stuart, HMS Hyperion, HMS Imperial and HMS Janus joined the screen.
At 0640C/3, A/S patrols were flown off, two aircraft were searching up to a depth of 60 nautical miles.
At 0700C/3, HMS Defender rejoined. She had been delayed at Malta with a defective Asdic dome and had been docked there. Repairs however could not be made as there were no spare parts available at Malta.
At 0800C/3, the Commander-in-Chief, with ‘Force I’ was in position 35°27’N, 19°10’E, steering for the Kithera Channel and ‘Force A’ was in position 35°16’N, 20°58’E steering for the south of Crete. HMS Kent, HMS Liverpool, HMS Gloucester, HMS Nubian and HMS Mohawk had been detached at dawn and were proceeding direct to make rendez-vous with convoy AS 3 in position 37°10’N, 23°15’E (off the Gulf of Athens) at 1800/3.
Convoy AS 3 was made up of the following merchant vessels Cavallo (British, 2269 GRT , built 1922), Destro (British, 3553 GRT , built 1920), Ann Stathatos (Greek, 5685 GRT , built 1918) and Hydroussa (Greek, 2038 GRT , built 1922).
At 2200C/3, HMAS Stuart stopped with a burst steam pipe and was instructed to join convoy AS 3 after repairs.
At 2230C/3, HMS Ilex and HMS Decoy were detached for a dawn bombardment of Scarpanto.
---------------------------------------------------------------------------------------------------------------------------------
Meanwhile in the western Mediterranean nothing of further interest occured with the fleet and ' Force H ' arrived at Gibraltar around 1100A/3.
At 1645C/3, HMS Gallant, HMS Griffin, HMS Greyhound, HMS Hotspur and ORP Garland departed Malta for Gibraltar. They first made an A/S sweep to the south and west of Malta before continuing on their passage.
4 September 1940.
At 0345C/4, in position 35°44’N, 25°56’E, eight Swordfish aircraft were flow off from HMS Illustrious to attack Calatos aerodrome (Rhodes). Twelve aircraft were initially intended to carry out this attack but due to a crash on deck the remainder could not be launched. Twelve aircraft were flown off by HMS Eagle to attack Maritsa aerodrome (also on Rhodes).
At 0400C/4, HMS Calcutta parted company to join convoy AS 3.
At 0505C/4, HMS Orion and HMAS Sydney were in position 35°09’N, 26°55’E. HMAS Sydney then proceeded to bombard Makryalo aerodrome and HMS Orion to bombard Pegadia Bay.
At 0625C/4, a Swordfish aircraft from HMS Illustrious crashed while taking off, two of the crew were rescued by HMS Imperial but the observer did not survive the crash.
Between 0730C/4 and 0740C/4 the striking forces returned to HMS Illustrious and HMS Eagle. The aircraft from Illustrious reported that at 0555C/4 two of them had attacked barracks and ammunition dumps at south-east of Callato. The other six Swordfish attacked Callato and a number of aircraft parked on the north edge of the field were probably destroyed. The aircraft from Eagle reported two main hangers hit at Maritsa as well as a petrol dump, barrack blocks and workshops set on fire. The aircraft from Eagle encountered fighters and our of them failed to return.
At 0800C/4, the Commander-in-Chief with his force was in position 35°00’N, 26°54’E, steering 150°. At 0820C/4, large volumes of smoke were seen over the horizon in the direction of Rhodes.
At 1055C/4, HMS Orion, HMAS Sydney, HMS Ilex and HMS Decoy rejoined. Orion reported that no military targets could be identified at Pegadia and what might have been the military barracks had a considerable village behind it. She had fired only a few rounds. Sydney reported that the eastern part of the landing ground at Makriyalo was plasetered. Only one small building was seen and it was destroyed. Two Motor Torpedo Boats which came out were engaged by Ilex and were reported sunk. Sydney’s aircraft reported that three more were present and that two retired and the third one was damaged.
Between 1110C/4 and 1158C/4, three bombing attacks were made on the fleet. Three aircraft dropped six bombs just astern of HMS Warspite. Another aircraft dropped a stick of six bombs near the destroyer screen. Another aircraft dropped a stick of bombs near HMS Ilex.
At 1145C/4, an A/S patrol aircraft dropped a bomb on a suspected submarine some two nautical miles from Warspite. HMS Imperial obtained a faint contact and attacked but without result.
At noon, the Commander-in-Chief, in HMS Warspite was with HMS Valiant, HMS Illustrious, HMS Hyperion, HMS Hero, HMS Hasty, HMS Hereward, HMS Imperial, HMS Janus and HMS Defender in position 34°42’N, 27°35’E. HMS Malaya, HMS Eagle, HMS Juno, HMS Dainty, HMS Diamond, HMAS Vampire, HMAS Vendetta and HMS Wryneck were 40 nautical miles to the southward proceeding independently to Alexandria where they arrived at 2100C/4 on this day.
---------------------------------------------------------------------------------------------------------------------------------
Meanwhile in the western Mediterreanean, between 1225 and 1430C/4, HMS Gallant, HMS Griffin, HMS Greyhound, HMS Hotspur and ORP Garland were attacked by high level bombers without result.Garland had leaks in two boilers was towed from 1715C/4 to 1845C/4 by Griffin until she was able to proceed after repairs on one boiler.
5 September 1940.
At 0610C/5, HMS Hereward investigated a contact and the fleet made an emergency turn. Shortly afterwards, at 0700C/5, the swept channel was reached and the fleet entered Alexandria harbour without further incident.
HMS Kent, HMS Liverpool, HMS Gloucester were ordered to remain with convoy AS 3 until after dark and then to proceed to Alexandria where they arrived early the next day.
---------------------------------------------------------------------------------------------------------------------------------
HMS Gallant, HMS Griffin, HMS Greyhound, HMS Hotspur and ORP Garland arrived at Gibraltar at 2020A/5.
6 September 1940.
HMS Nubian and HMS Mohawk remained with convoy AS 3 until relieved at 0600C/6 by HMS Hereward and HMS Imperial. They arrived at Alexandria in the afternoon.
Already before noon HMS Coventry, HMS Calcutta and HMAS Stuart had arrived at Alexandria.
Convoy AS 3, now escorted by HMS Hereward and HMS Imperial arrived at Port Said in the afternoon as well. (50)
2 Sep 1940
Around 2110C/2, HMAS Voyager (Cdr. J.C. Morrow, RAN) arrived at Malta from operations. She had been detached to Malta as she was to undergo a refit there. (51)
3 Sep 1940
HMAS Voyager (Cdr. J.C. Morrow, RAN) is taken in hand for refit at Malta. (51)
10 Sep 1940
HMAS Voyager (Cdr. J.C. Morrow, RAN) is docked in No.5 Dock at the Malta Dockyard. (51)
11 Sep 1940
HMAS Voyager (Cdr. J.C. Morrow, DSO, RAN) is undocked. (51)
27 Sep 1940
With her refit completed, HMAS Voyager (Cdr. J.C. Morrow, RAN) (Cdr. J.C. Morrow, DSO, RAN), conducted compass swing trials at Malta.
She departed Malta around 1740B/27 to search for enemy submarines which had been reported by aircraft. She returned to harbour around 0715B/28. Also participating in this A/S hunt were the A/S trawlers HMS Beryl and HMS Jade. (52)
29 Sep 1940
Operation MB 5.
Transport of troops to Malta.
29 September 1940.
Shortly after midnight the Mediterranean fleet was clear of Alexandria harbour. For this sortie the fleet was made up of the battleships HMS Warspite (Capt. D.B. Fisher, CBE, RN), HMS Valiant (Capt. H.B. Rawlings, OBE, RN), aircraft carrier HMS Illustrious (Capt. D.W. Boyd, DSC, RN, flying the flag of Rear-Admiral A.L.St.G. Lyster, CVO, DSO, RN), heavy cruiser HMS York (Capt. R.H. Portal, DSC, RN), light cruisers HMS Orion (Capt. G.R.B. Back, RN), HMAS Sydney (Capt. J.A. Collins, CB, RAN). Escort was provided by the destroyers HMS Hyperion (Cdr. H.St.L. Nicolson, DSO and Bar, RN), HMS Hereward (Lt.Cdr. C.W. Greening, RN), HMS Hero (Cdr. H.W. Biggs, DSO, RN), HMS Ilex (Lt.Cdr. P.L. Saumarez, DSC and Bar, RN), HMS Imperial (Lt.Cdr. C.A.deW. Kitcat, RN), HMS Jervis (Capt. P.J. Mack, DSO, RN), HMS Juno (Cdr. W.E. Wilson, RN), HMS Janus (Cdr. J.A.W. Tothill, RN), HMS Nubian (Cdr. R.W. Ravenhill, RN), HMS Mohawk (Cdr. J.W.M. Eaton, RN) and HMAS Stuart (Lt. N.J.M. Teacher, RN).
Shortly after the fleet the light cruisers HMS Gloucester (Capt. H.A. Rowley, RN) and HMS Liverpool (Capt. P.A. Read, RN) also departed Alexandria. They had on board a total of about 1200 soldiers for Malta. They were to make rendez-vous with the fleet before daylight.
At 0730 hours, HMS Jervis investigated a contact and at 0905 hours, HMS Imperial was detached to search a Turkish merchant for contraband.
At 1030 hours an enemy showing aircraft was detected and three Fulmars were flown off at 1037 hours to intercept. The shadowing aircraft was shot down. One of the Fulmar’s however had to force land in the sea. The crew was picked up by HMAS Stuart.
At noon the fleet was in position 32°52’N, 26°52’E.
At 1315 hours, HMAS Stuart reported having a burst steam pipe and she was ordered to return to Alexandria. En-route to Alexandria she encountered the Italian submarine Gondar at 2215 hours in position 31°35’N, 28°48’E. Gondar submerged and HMAS Stuart carried out several depth charge attacks forcing the Italians to surface. On surfacing she was attacked by a flying boat. The Italian submarine sank at 0925/30. Almost the entire crew was picked up, two Italians did not survive the sinking. HMS Diamond (Lt.Cdr. P.A. Cartwright, RN) was sent from Alexandria to assist but the Italian submarine sank around the time she arrived on the scene.
At 1420 hours, a second shadowing enemy aircraft was shot down by the fighter cover.
At 1446 hours, a small formation of enemy aircraft was detected by RD/F and seven minutes later a formation of three enemy aircraft dropped about thirty bombs near HMS York. One enemy aircraft was shot down.
At 1510 hours, a second enemy air attack occurred. A formation of five aircraft dropped twenty to thirty bombs near HMS Warspite. Many splinters landed on board causing some damage to gun shields and also three minor casualties.
At 1641 hours, four torpedo bombers made an attack on HMS Illustrious but no torpedo tracks were seen by her. One track was spotted by HMS Liverpool though.
Two of the Fulmars from HMS Illustrious made forced landings in Crete. The crews and te aircraft were interned.
At 2400 hours the fleet was in position 34°08’N, 22°38’E.
30 September 1940.
There were no incidents during the night.
At 0700 hours, reconnaissance aircraft were flown off by Illustrious to search between 270° and 330° to a depth of 80 nautical miles. This search located nothing.
At 1030 hours, a second search was flown off to search between 260° and 330° to a depth of 120 nautical miles. At 1126 hours one of these aircraft reported an unknown number of enemy vessels.
At 1210 hours, the aircraft that made the sighting reported that the force she sighted was made up of three heavy cruisers, four light cruisers and seven destroyers. They were steering to the north-west in position 37°04’N, 18°25’E. At this time they bore 340°, 80 nautical miles from the fleet.
At 1225 hours, the fleet altered course to close the enemy. Relief reconnaissance aircraft and a striking force were made ready in Illustrious.
At 1230 hours, another reconnaissance aircraft reported having sighted enemy battleships and a large number of destroyers in position 37°45’N, 18°15’E, steering 325°, speed 22 knots which was at that moment 116 nautical miles bearing 340° from the fleet.
No striking force was launched as only a few aircraft were available due to the reconnaissance flights. Also to launch a small force for a daylight attack on the large enemy force of warships was suicide. They were held back for a dusk attack in case the enemy would proceed towards the fleet. They however did not do so and appeared to be returning to Taranto.
A relief shadower was launched to keep in contact with the enemy battlefleet which this aircraft did from 1445 to 1600 hours when it was recalled after an aircraft from Malta had also made contact with the enemy at 1545 hours. At 1812 hours the enemy was in position 38°28’N, 17°15’E and tey now appeared to be making for Messina.
At 1450 hours, HMS Gloucester and HMS Liverpool were detached to Malta. Also HMS York and HMS Mohawk were detached to positions 350°, 20 nautical miles and 340°, 40 nautical miles from the fleet respectively to aid in the return of the shadowing aircraft. After the return of these aircraft HMS Mohawk was ordered to proceed to Malta.
At 1910 hours, the fleet was in position 34°38’N, 17°42’E steering 310° and at 2359 hours the fleet was in position 38°24’N, 17°06’E steering now 040° since 2300 hours.
1 October 1940.
Again there were no incidents during the night. At 0300 hours, the fleet altered course to 090° to provide cover for the cruisers on their run towards Malta and their return to the fleet.
At 0001 hours, HMAS Voyager (Cdr. J.C. Morrow, DSO, RAN) departed Malta to join the fleet which she did at 1245 hours.
HMS Gloucester and HMS Liverpool departed Malta at 0230 hours. They rejoined the fleet at 1745 hours.
At 0700 and 1000 hours, air searches were flown off to search between 270° and 045° to maximum depth but these did not find the enemy.
At 1055 hours, an enemy aircraft was sighted. At 1115 hours a Fulmar show down a Cant. 506 plane which was probably this aircraft.
At noon the fleet was in position 35°45’N, 20°18’E.
At 1545 hours, HMS Calcutta (Capt. D.M. Lees, DSO, RN) joined the fleet after having completed convoy duty.
At 1600 hours, the fleet was in position 35°43’N, 21°35’E steering 120°, speed 16 knots.
At sunset HMS Orion and HMAS Sydney were detached to carry out a sweep in the Gulf of Athens and then through the Doro Channel towards Tenedos.
At 2359 hours, the fleet was in position 34°23’N, 24°17’E steering 100° since 2300 hours.
2 October 1940.
At 0500 hours, HMS Havock (Cdr. R.E. Courage, DSO, DSC, RN) which had been on convoy escort duties with HMS Hasty (Lt.Cdr. L.R.K. Tyrwhitt, RN) reported being in contact with an enemy submarine in position 33°26’N, 26°12’E. HMS Calcutta was detached to join these destroyers. At 0815 hours, Havock reported that the enemy submarine had surfaced, surrendered and scuttled at 0715 hours. The submarine had been surprised on the surface by the destroyer and was engaged with gunfire and when she dived with depth charges.
At 0700 hours, fighter patrols were flown off by HMS Illustrious and HMS Gloucester and HMS Liverpool were detached to carry out gunnery practices before returning to Alexandria.
At 0810 hours, the Fulmar fighter patrol sighted enemy aircraft and started a chase but they were unable to catch them.
Around 0925 hours the destroyers HMS Dainty (Cdr. M.S. Thomas, DSO, RN) and HMAS Vendetta (Lt.Cdr. R. Rhoades RAN) departed Alexandria to join the battlefleet which they did around 1415 hours.
HMS Calcutta, HMS Hasty and HMS Havock joined the fleet at noon in position 32°40’N, 28°05’E. Calcutta was however soon detached to proceed independently to Alexandria.
At 1430 hours, HMS Illustrious launched a striking force which then made a practice attack on the fleet.
At 1740 hours, shortly before arriving at Alexandria, HMS Warspite and HMS Valiant carried out gunnery exercises.
The fleet arrived at Alexandria around 2000 hours.
3 October 1940.
HMS Orion and HMAS Sydney also returned to Alexandria on completion of their sweep in the Aegean. They had also bombarded Stampalia at 2350/2 but the results were unobserved. (53)
3 Oct 1940
Shortly after midnight the battleships HMS Malaya (Capt. A.F.E. Palliser, DSC, RN, flying the flag of Rear-Admiral H.D. Pridham-Whippell, CB, CVO, RN), HMS Ramillies (Capt. H.T. Baillie-Grohman, OBE, DSO, RN), aircraft carrier HMS Eagle (Capt. A.R.M. Bridge, RN), light cruiser HMS Ajax (Capt. E.D. McCarthy, RN), AA cruiser HMS Coventry (Capt. D. Gilmour, RN) and the destroyers HMAS Vampire (Capt. H.M.L. Waller, DSO, RAN), HMAS Voyager (Cdr. J.C. Morrow, DSO, RAN), HMAS Vendetta (Lt.Cdr. R. Rhoades RAN), HMAS Waterhen (Lt.Cdr. J.H. Swain, RN), HMS Dainty (Cdr. M.S. Thomas, DSO, RN), HMS Decoy (Cdr. E.G. McGregor, DSO, RN), HMS Defender (Cdr. St.J.R.J. Tyrwhitt, RN) and HMS Diamond (Lt.Cdr. P.A. Cartwright, RN) departed Alexandria to exert a threat upon enemy Libyan convoys and cover Crete. Also some exercises were to be carried out. (53)
6 Oct 1940
Shortly after noon, HMS Malaya (Capt. A.F.E. Palliser, DSC, RN, flying the flag of Rear-Admiral H.D. Pridham-Whippell, CB, CVO, RN), HMS Ramillies (Capt. H.T. Baillie-Grohman, OBE, DSO, RN), aircraft carrier HMS Eagle (Capt. A.R.M. Bridge, RN) and the destroyers HMAS Vampire (Capt. H.M.L. Waller, DSO, RAN), HMAS Voyager (Cdr. J.C. Morrow, DSO, RAN), HMAS Vendetta (Lt.Cdr. R. Rhoades RAN), HMAS Waterhen (Lt.Cdr. J.H. Swain, RN), HMS Dainty (Cdr. M.S. Thomas, DSO, RN), HMS Decoy (Cdr. E.G. McGregor, DSO, RN), HMS Defender (Cdr. St.J.R.J. Tyrwhitt, RN) and HMS Diamond (Lt.Cdr. P.A. Cartwright, RN) returned to Alexandria.
The light cruiser HMS Ajax (Capt. E.D. McCarthy, RN) and AA cruiser HMS Coventry (Capt. D. Gilmour, RN) had already arrived at Alexandria very late on the 5th after being detached from the Force earlier on the 5th. (53)
8 Oct 1940
Operation MB 6.
Convoy MF 3 from Alexandria to Malta and MF 4 from Malta to Alexandria.
8 October 1940.
Around 0900B/8, the Mediterranean Fleet made up of the battleships HMS Warspite (Capt. D.B. Fisher, CBE, RN, flying the flag of A/Admiral Sir A.B. Cunningham, KCB, DSO and 2 Bars, RN), HMS Valiant (Capt. H.B. Rawlings, OBE, RN), HMS Malaya (Capt. A.F.E. Palliser, DSC, RN, flying the flag of Rear-Admiral H.D. Pridham-Whippell, CB, CVO, RN), HMS Ramillies (Capt. H.T. Baillie-Grohman, OBE, DSO, RN), aircraft carriers HMS Illustrious (Capt. D.W. Boyd, DSC, RN, flying the flag of Rear-Admiral A.L.St.G. Lyster, CVO, DSO, RN), HMS Eagle (Capt. A.R.M. Bridge, RN), heavy cruisers HMS York (Capt. R.H. Portal, DSC, RN), light cruisers HMS Gloucester (Capt. H.A. Rowley, RN), HMS Ajax (Capt. E.D. McCarthy, RN), HMS Orion (Capt. G.R.B. Back, RN), HMAS Sydney (Capt. J.A. Collins, CB, RAN). They were escorted by the destroyers HMS Hyperion (Cdr. H.St.L. Nicolson, DSO and Bar, RN), HMS Havock (Cdr. R.E. Courage, DSO, DSC, RN), HMS Hasty (Cdr. L.R.K. Tyrwhitt, RN), HMS Hero (Cdr. H.W. Biggs, DSO, RN), HMS Hereward (Lt.Cdr. C.W. Greening, RN), HMS Ilex (Lt.Cdr. P.L. Saumarez, DSC and Bar, RN), HMS Imperial (Lt.Cdr. C.A.deW. Kitcat, RN), HMS Jervis (Capt. P.J. Mack, DSO, RN), HMS Janus (Cdr. J.A.W. Tothill, RN), HMS Juno (Cdr. W.E. Wilson, RN), HMS Nubian (Cdr. R.W. Ravenhill, RN), HMS Dainty (Cdr. M.S. Thomas, DSO, RN), HMS Decoy (Cdr. E.G. McGregor, DSO, RN), HMS Defender (Cdr. St.J.R.J. Tyrwhitt, RN), HMAS Vampire (Capt. H.M.L. Waller, DSO, RAN) and HMAS Vendetta (Lt.Cdr. R. Rhoades RAN).
When the fleet was clear of the swept channel gunnery exercises were carried out. On completion of these exercises the fleet proceeded to the north-westward divided into several groups.
At 2000B/8, the merchant vessels Memnon (7506 GRT, built 1931), Lanarkshire (11275 GRT, built 1940), Clan Macaulay (10492 GRT, built 1936) and Clan Ferguson (7347 GRT, built 1938), which made up convoy MF 3 departed Alexandria for Malta. They were escorted by HMS Coventry (Capt. D. Gilmour, RN), HMS Calcutta (Capt. D.M. Lees, DSO, RN), HMAS Stuart ( Lt. R.C. Robison, RAN), HMAS Voyager (Cdr. J.C. Morrow, DSO, RAN), HMAS Waterhen (Lt.Cdr. J.H. Swain, RN) and HMS Wryneck (Lt.Cdr. R.H.D. Lane, RN).
At midnight the main body of the fleet was in position 31°58’N, 27°33’E steering 350°.
9 October 1940.
At 0524B/9, in position 33°11’N, 27°20’E, HMS Nubian, obtained a contact. HMS Hyperion then reported that a torpedo was approaching HMS Malaya. An object, possibly a torpedo at the end of its run, was sighted moving slowly and emitting small columns of smoke.
At 0550B/9, A/S patrols were flown off. These were maintained throughout the day.
At 0800B/9, the main body of the fleet was in position 33°33’N, 26°47’E. At 1000B/8, HMS Liverpool (Capt. P.A. Read, RN) and HMS Diamond (Lt.Cdr. P.A. Cartwright, RN), who had been delayed in sailing from Alexandria, joined the fleet. They had departed Alexandria shortly after midnight this day.
At noon the fleet was in position 33°51’N, 26°32’E, steering 280°.
At 1600B/9, the convoy was in position 34°18’N, 25°06’E making a good 13 knots. During the day three A/S contacts were made. One of the contacts warranted a depth charge attack by HMAS Vendetta.
At 2200B/9, the fleet altered course to 320°.
At midnight the fleet was in position 34°41’N, 23°23’E.
10 October 1940.
There were no incidents during the night and at 0400B/10 the fleet changed course to 300°.
At 0600B/10, aircraft were flown off the search between 270° and 340°.
At 1030B/10, a new air search was started between 240° and 340°, also a course change was made to close the convoy.
The first air search located a submarine on the surface in position 36°31’N, 20°20’E. Two aircraft were sent out to attack this submarine. Both depth charges that were dropped failed to explode. Other aircraft were then sent but the submarine was not found as she must have submerged. Two A/S contacts were made by the destroyer screen during the forenoon.
At 1330B/10, the fleet was in position 35°36’N, 20°42’E, steering 270°. The convoy was at this time 22 nautical miles astern of the fleet.
At 1400B/10, a final air search was launched.
At 1432B/10, one of the search aircraft reported an enemy submarine submerging 20 nautical miles ahead of the fleet. HMS Jervis, HMS Juno and HMS Ilex were sent ahead to hunt this submarine but with no result. Later a report was received that the aircraft had straddled the submarine with four bombs.
At 1600B/10, HMAS Vampire, the port wing destroyer in the screen, obtained a contact and made four depth charge attacks on it. She rejoined the screen at 1745B/10.
Late in the afternoon HMS Ramillies, HMS Nubian, HMS Hero and HMS Hereward were detached to fuel at Malta as were HMS Hyperion, HMS Hasty and HMS Ilex shortly afterwards. Also late in the afternoon the cruisers HMS York, HMS Gloucester and HMS Liverpool were detached to join the convoy.
At 1825B/10, HMS Defender attacked a suspected A/S contact with depth charges.
At 2000B/10, the main body of the fleet was in position 35°52’N, 18°55’E, course 300° which was changed to 270 at 2200B/10.
11 October 1940.
Again there were no incidents during the night.
At 0630B/11, aircraft were flown off to search the sector between 000° and 070°, keeping clear of the land. No enemy forces were sighted.
At 0800B/11, the main body of the fleet was in position 35°30’N, 15°39’E. Around this time HMS Ajax was detached to join HMS York, HMS Gloucester and HMS Liverpool near the convoy.
At 0915B/11, HMS Decoy was detached to fuel at Malta and HMS Mohawk (Cdr. J.W.M. Eaton, RN) joined the screen coming from Malta.
At 0942B/11, HMS Imperial was detached to fuel at Malta.
At 1105B/11, HMS Imperial reported that she had hit a mine in position 35°34’N, 14°34’E. She was able to proceed at slow speed to Malta with HMS Decoy standing by. She finally entered Malta at 1600B/11 being towed by Decoy. It was estimated that repairs would take at least four months.
During the forenoon several floating mines were sighted and HMS Coventry cut one off with her paravanes in position 35°30’N, 14°28’E so it was evident that there was an enemy minefield in this area.
At noon the main body of the fleet was in position 35°14’N, 14°50’E.
At 1450B/11, HMAS Vampire was detached to Malta. During the afternoon the fleet remained approximately 20 nautical miles to the south-west of Malta while the destroyers refuelled.
At 1600B/11, the convoy arrived safely at Malta.
At 1800B/11, HMS Nubian, HMS Hero and HMS Havock rejoined and HMS Dainty, HMS Defender and HMS Diamond were detached to refuel at Malta.
At 2100B/11, HMAS Vendetta, who had reported that she had her starboard engine out of action, was detached to Malta where she would remain for repairs.
At 2230B/11, Convoy MF 4 departed Malta for Alexandria. This convoy was made up of the Royal Fleet Auxiliary tanker Plumleaf (5916 GRT, built 1917) and the transport Volo (1587 GRT, built 1938). The river gunboat HMS Aphis (Lt.Cdr R.S. Stafford, RN), which had been refitting at Malta, was also part of this convoy. Escort for this convoy was provided by HMS Coventry, HMS Calcutta, HMS Wryneck and HMAS Waterhen. HMAS Stuart remained at Malta for a much needed refit.
Due to the weather conditions the British ships remained undetected by enemy aircraft.
12 October 1940.
At 0230B/12, HMS Ajax reported that she was engaging three enemy destroyers in position 35°57’N, 16°42’E and that she had sunk two of them. She then reported two cruisers in position 36°00’N, 16°53’E at 0306B/12. At 0333B/12 she reported that she had lost touch with them.
At 0400B/12, the bulk of the fleet was in position 35°10’N, 15°45’E, approximately 70 nautical miles to the south-west of Ajax.
At 0600B/12, aircraft were flown off to search between 340° and 070°.
At 0645B/12, HMS Orion reported that one enemy ship was still burning in position 35°47’N, 16°25’E at 0510B/12.
At 0710B/12, a flying boat reported two enemy destroyers in the same position. One on fire being towed by the other. On receipt of these reports a striking force of four aircraft was flown off. The fleet altered course to 010° to close.
At 0716B/12, HMS York, HMS Gloucester and HMS Liverpool reported they were closing to investigate smoke on the horizon. When closing they were obviously sighted by the enemy destroyer that was towing which then casted off the tow and retired to the north-westward at high speed. She was attacked with torpedoes by the air striking force but no hits were obtained. In the meantime the cruisers had closed the crippled destroyer which had hoisted the white flag. The survivors were ordered to abandon ship after which she was sunk by gun and torpedo fire from HMS York. Rafts were thrown in the water for the survivors. Later a few survivors were picked up by HMS Nubian and HMAS Vampire. They reported that the enemy destroyer sunk was the Artigliere.
At 0930B/12, the bulk of the fleet was in position 35°47’E, 16°42’E, steering 120°.
Between 0915B/12 and 1034B/12, HMS Orion, HMAS Sydney and HMS Ajax rejoined the bulk of the fleet. HMS Ajax reported that following her action D/G, RD/F and one 4” gun were out of action. She had also two officers killed and one seriously wounded. Also she had lost ten ratings killed and twenty minor casualties.
At 1000B/12, HMS Dainty, HMS Defender and HMS Diamond rejoined the fleet from Malta as did HMS Revenge that was escorted by HMS Jervis, HMS Janus, HMS Hereward and HMS Decoy.
At 1150B/12, a flying boat from Malta reported three Italian heavy cruisers and three destroyers in position 36°10’N, 16°02’E. They were steering to the north-westward. This flying boat did not shadow and no further reports on this force were received. HMS Liverpool, HMS Orion, HMAS Sydney and HMS York were ordered to proceed to cover convoy MF 4 which was then in position 35°15’N, 16°22’E, 55 nautical miles to the southward of the enemy cruisers. In the meantime the fleet had been located by enemy aircraft and one shadower was shot down by Fulmars at 1145B/12.
At 1232B/12, the fleet was attacked by eleven enemy aircraft but only a few bombs were dropped. At 1345B/12 the fleet was again attacked, this time by five aircraft which dropped eleven bombs near HMS Eagle. During this time Fulmars prevented other enemy aircraft from attacking.
At 1440B/12, when in position 35°30’N, 17°50’E, course was altered to 200° to close the convoy and at 1630B/12 when in position 35°23’N, 17°20’E (080°, 21 nautical miles from the convoy), course was altered to 090°.
The weather deteriorated rapidly during the day and aircraft from the final search had to be homed in by D/F. The last aircraft was landed on in the dark at 1850B/12.
At 2000B/12, the fleet was in position 35°25’N, 18°10’E still steering 090°. At 2200B/12 this was altered to 070°.
13 October 1940.
At 0100B/13, the fleet was in position 36°02’N, 19°23’E and course was altered to 120° and at 0400 to 160°.
At 0600B/13, aircraft were flown off to search between 280° and 310°.
At 0700B/13, HMS Ajax, HMS Jervis and HMS Janus were detached to join convoy AS 4 which sailed from the Gulf of Athens around that time. From convoy MF 4 HMS Coventry was also detached later to join this convoy.
At 0800B/13, when in position 36°00’N, 21°04’E, course was altered to 240° to close convoy MF 4. At 1307B/13 they sighted the convoy in position 35°46’N, 20°32’E. The convoy was steering 095° making a good 9 knots. As the transport Volo was able to make 12 knots she was ordered to proceed ahead escorted by HMS Wryneck.
At 1120B/13, HMS Illustrious, HMS Gloucester, HMS Liverpool, HMS Nubian, HMS Havock, HMS Hero and HMS Hereward were detached to carry out a night attack on Leros.
During the rest of the day the course of the fleet was adjusted to remain close to convoy MF 4.
At 1800B/13, the fleet was in position 35°42’N, 22°24’E and changed course to 140° doing 14 knots.
At midnight the fleet was in position 34°35’N, 23°42’E.
14 October 1940.
At 0300B/14, the fleet altered course to 090°.
At 0600B/14, HMS Eagle launched aircraft to search between 270° and 330°.
At 0800B/14, the fleet was in position 34°24’N, 25°37’E.
At 0840B/14, the Illustrious-force rejoined. They reported a very successful attack on Port Lago. Complete surprise had been achieved. Fiveteen aircraft took part in the attack. They dropped 92 250-lb bombs. Hangars at Lepida Cove were set on fire, workshops and probably a fuel tank hit at San Georgio. All aircraft had returned safely.
At 0900B/14, HMS York, which was short of fuel, was detached to Alexandria together with HMS Defender. They arrived at Alexandria very late on the 14th.
At 0945B/14, aircraft from HMS Eagle reported that both convoys MF 4 and AS 4 were together about 10 nautical miles east of Gavdo Island at 0830B/13, making good 10 knots. Volo and HMS Wryneck were 60 nautical miles ahead.
At 1132B/14, HMAS Vampire and HMS Hasty obtained an A/S contact and attacked with depth charges firing a total of three patterns.
At 1230B/14, HMS Ajax rejoined the fleet which had remained near position 34°35’N, 25°37’E to provide cover for the convoys.
At 1435B/14, the fleet was attacked by five enemy aircraft which dropped their bombs outside the destroyer screen after having been attacked by AA gunfire.
At 1442B/14, a second attack was made by three aircraft, their bombs landed between HMS Warspite and HMS Illustrious.
At 1600B/14, the fleet was in position 34°13’N, 25°54’E, steering 130°.
At 1902B/14, HMS Valiant and HMS Illustrious opened a heavy barrage of AA fire and later Valiant reported that she had shot down an enemy aircraft.
At 1911B/14, HMS Liverpool reported that she had been struck by a torpedo in position 33°58’E, 26°20’E at 1855B/14. She was heavily on fire and required assistance.
HMS Decoy and HMS Hereward were sent to stand by her.
At 2345B/14, the tug HMS St. Issey was sailed from Alexandria.
At midnight the fleet was in position 32°40’N, 27°38’E and course was altered to 310° to cover the passage of HMS Liverpool to Alexandria.
15 October 1940.
At 0100B/15, it was reported that HMS Liverpool was being towed by HMS Orion in position 33°57’N, 26°33’E making good 9 knots on a course of 135°. The fire was under control.
At 0630B/15, when the fleet was in position 33°36’N, 26°20’E, course was altered to close HMS Liverpool.
At noon, HMS Liverpool was in position 32°50’N, 27°31’E. By this time the tow from HMS Orion had parted. HMS Liverpool’s bow was hanging down and acted as a rudder. HMS Liverpool had three screws in action.
At 1432B/15, the towline had again been passed and the damaged portion of the full forward of ‘A’ turret had broken off and this simplified towing.
The fleet remained in close company until dusk and then proceeded to Alexandria. HMS Mohawk was detached to take of the escort duties wit convoy AS 4 from HMS Jervis and to escort this convoy to Port Said.
16 October 1940.
The fleet arrived at Alexandria around 0100B/16.
HMS Liverpool and it’s escort arrived in the harbour around noon.
Convoy ME 4 arrived at Alexandria later in the afternoon. (53)
20 Oct 1940
HMAS Voyager (Cdr. J.C. Morrow, DSO, RAN) departed Alexandria for Haifa. (54)
21 Oct 1940
HMAS Voyager (Cdr. J.C. Morrow, DSO, RAN) arrived at Haifa from Alexandria.
She departed again later the same day escorting a local convoy to Port Said and Alexandria.
On the 22nd the convoy was detached to enter Port Said.
[No details available on which ships were in this local convoy.] (54)
22 Oct 1940
Around 1410C/22, HMAS Voyager (Cdr. J.C. Morrow, DSO, RAN) arrived at Alexandria from Haifa and escort duty. (54)
23 Oct 1940
Around 0915B/23, the destroyers HMS Jervis (Capt. P.J. Mack, DSO, RN), HMS Janus (Cdr. J.A.W. Tothill, RN), HMS Juno (Cdr. W.E. Wilson, RN), HMS Mohawk (Cdr. J.W.M. Eaton, RN), HMS Hereward (Lt.Cdr. C.W. Greening, RN), HMS Hero (Cdr. H.W. Biggs, DSO, RN) and HMAS Voyager (Cdr. J.C. Morrow, DSO, RAN) departed Alexandria for exercises.
They returned around 2115B/23 except for HMAS Voyager which had already returned around 1430B/23. (55)
24 Oct 1940
Operation MAQ 2.
Operations in the Aegean.
24 October 1940.
Convoy AN 5 departed Port Said for Piraeus, Greece. It was made up of three merchant vessels; two of which were the Cavallo (British, 2269 GRT, built 1922) and Guido (British, 3921 GRT, built 1920). Escort was provided by the destroyers HMS Havock (Cdr. R.E. Courage, DSO, DSC, RN) and HMS Hero (Cdr. H.W. Biggs, DSO, RN). They were joined in position 33°40'N, 28°20'E around 0800/25 by the AA cruiser HMS Calcutta (Capt. D.M. Lees, DSO, RN) which had sailed from Alexandria.
25 October 1940.
To provide cover for this convoy the battleship HMS Malaya (Capt. A.F.E. Palliser, DSC, RN, flying the flag of A/Rear-Admiral H.B. Rawlings, OBE, RN), aircraft carrier HMS Eagle (Capt. A.R.M. Bridge, RN), AA cruiser HMS Coventry (Capt. D. Gilmour, RN) and the destroyers HMAS Vampire (Capt. H.M.L. Waller, DSO, RAN), HMAS Voyager (Cdr. J.C. Morrow, DSO, RAN), HMS Hyperion (Cdr. H.St.L. Nicolson, DSO and Bar, RN), HMS Mohawk (Cdr. J.W.M. Eaton, RN), HMS Janus (Cdr. J.A.W. Tothill, RN) and HMS Wryneck (Lt.Cdr. R.H.D. Lane, RN).
The light cruisers HMS Orion (Capt. G.R.B. Back, RN), HMAS Sydney (Capt. J.A. Collins, CB, RAN) and the destroyers HMS Jervis (Capt. P.J. Mack, DSO, RN) and HMS Juno (Cdr. W.E. Wilson, RN) also departed Alexandria on the 25th to operate off the Dardanelles on contraband control duties.
26 October 1940.
It had been intended that aircraft from HMS Eagle should carry out a raid on Maltezana on Stampalia at dawn but bad weather prevented this.
27 October 1940.
As weather had improved at dawn aircraft from HMS Eagle carried out a raid on Maltezana on Stampalia. It was reported that hangars were hit and set on fire. One hit was obtained on the seaplane slipway and about 20 250lb bombs were dropped on barracks and the ammunition dump area. A heavy eplosion was heard by the last aircraft about 10 minutes after leaving the area. Eight aircraft took part and all returned safely to HMS Eagle. There was no enemy air activity. The convoy meanwhile had arrived safely at Piraeus.
28 October 1940.
All warships involved in the operation returned to Alexandria p.m. today. (53)
29 Oct 1940
Operation BN.
Landing of British troop on Crete.
29 October 1940.
By 0130B/29, the Mediterranean Fleet had left Alexandria Harbour. For this operation the fleet made up of the battleships HMS Warspite (Capt. D.B. Fisher, CBE, RN, flying the flag of A/Admiral A.B. Cunningham, KCB, DSO and 2 Bars, RN), HMS Valiant (A/Capt. J.P.L. Reid, RN), HMS Malaya (Capt. A.F.E. Palliser, DSC, RN, flying the flag of A/Rear-Admiral H.B. Rawlings, OBE, RN), HMS Ramillies (Capt. A.D. Read, RN), aircraft carriers HMS Illustrious (Capt. D.W. Boyd, DSC, RN, flying the flag of Rear-Admiral A.L.St.G. Lyster, CVO, DSO, RN), HMS Eagle (Capt. A.R.M. Bridge, RN), heavy cruisers HMS York (Capt. R.H. Portal, DSC, RN), light cruisers HMS Gloucester (Capt. H.A. Rowley, RN), HMS Orion (Capt. G.R.B. Back, RN), HMAS Sydney (Capt. J.A. Collins, CB, RAN). Escort was provided by the destroyers HMS Hyperion (Cdr. H.St.L. Nicolson, DSO and Bar, RN), HMS Havock (Cdr. R.E. Courage, DSO, DSC, RN), HMS Hasty (Lt.Cdr. L.R.K. Tyrwhitt, RN), HMS Hero (Cdr. H.W. Biggs, DSO, RN), HMS Hereward (Lt.Cdr. C.W. Greening, RN), HMS Ilex (Lt.Cdr. P.L. Saumarez, DSC and Bar, RN), HMS Dainty (Cdr. M.S. Thomas, DSO, RN), HMS Decoy (Cdr. E.G. McGregor, DSO, RN), HMS Defender (Cdr. St.J.R.J. Tyrwhitt, RN), HMS Diamond (Lt.Cdr. P.A. Cartwright, RN), HMS Jervis (Capt. P.J. Mack, DSO, RN), HMS Janus (Cdr. J.A.W. Tothill, RN), HMS Juno (Cdr. W.E. Wilson, RN), HMS Nubian (Cdr. R.W. Ravenhill, RN), HMS Mohawk (Cdr. J.W.M. Eaton, RN).
On clearing the swept channel the fleet set a course of 315° at 15 knots.
At 0700B/29, A/S patrols were flown off.
At noon, the fleet was in position 32°32’N, 27°30’E.
At 1350B/29, the fleet altered course to 350°.
At 1400B/29, a convoy carrying troops, made up of Royal Fleet Auxiliary tankers Olna (7073 GRT, built 1921), Brambleleaf (5917 GRT, built 1917), the armed boarding vessels HMS Chakla (Cdr. L.C. Bach, RD, RNR) and HMS Fiona (Cdr. A.H.H. Griffiths, RD, RNR), departed Alexandria for Suda Bay. They were escorted by the AA cruisers HMS Coventry (Capt. D. Gilmour, RN), HMS Calcutta (Capt. D.M. Lees, DSO, RN), net tender HMS Protector (Cdr. R.J. Gardner, RN), the destroyers HMAS Vampire (Capt. H.M.L. Waller, DSO, RAN), HMAS Voyager (Cdr. J.C. Morrow, DSO, RAN), HMAS Waterhen (Lt.Cdr. J.H. Swain, RN), HMS Wryneck (Lt.Cdr. R.H.D. Lane, RN) and the minesweeper HMS Fareham (Lt. W.J.P. Church, RN).
At 1800B/29, the fleet altered course to 290°.
At midnight the fleet was in position 34°10’N, 25°04’E.
30 October 1940.
There were no incidents during the night. A/S patrols and aircraft to search a sector 270° to 000° to maximum depth were flown off.
At 0800B/30, the fleet was in position 35°00’N, 22°50’E, course 310°, speed 16 knots. Visibility was poor and the earlier launched air search sighted nothing.
At 1130B/30, HMS Dainty obtained an A/S contact. Later an Italian report was picked up that the fleet had been sighted by either an aircraft or a submarine at 1120B/30.
At noon, the fleet was in position 35°20’N, 22°00’E.
At 1230B/30, a second air search was launched but again these sighted nothing.
At 2000B/30, the fleet was in position 36°35’N, 20°43’E steering 340°.
31 October 1940.
At 0330B/31, when in position 38°18’N, 19°25’E the fleet altered course to 160°.
At 0430B/31, HMS Ajax (Capt. E.D. McCarthy, RN), departed Alexandria with troops for Suda Bay.
At 0645B/31, an air search was flown off to search between the Greek coast and 270°.
At 0800B/31, the fleet was in position 37°22’N, 20°35’E steering 090°. The air search did not sight the enemy but three Greek destroyers were sighted.
At 1020B/31, HMS Warspite catapulted her Walrus aircraft to take the Fleet Gunnery Officer to Suda Bay.
At 1150B/31, the fleet was sighted and reported by an enemy aircraft.
At noon, the fleet was in position 37°02’N, 21°25’E. During the afternoon the fleet proceeded to the southward.
At 1600B/31, the fleet was in position 36°17’N, 21°37’E. A second air search during the afternoon had sighted nothing.
At 1450B/31, HMS Juno and HMS Defender were detached to Suda Bay to refuel.
At 1530B/31, HMS Nubian and HMS Mohawk rejoined the fleet having been detached late in the morning to investigate Navarinon Bay.
At 1630B/31 the convoy arrived at Suda Bay less Olna escorted by Calcutta and Wryneck, these ships arrived at 0630/1. The Australian destroyers remained out on A/S patrol until HMS Protector completed a net barrier on 2 November.
At 1830B/31, when the fleet was in position 36°15’N, 21°30’E course was changed to 280°.
At 2300B/31, the fleet altered course to 100°.
At midnight the fleet was in position 36°20’N, 20°25’E.
1 November 1940.
At 0100B/1, the fleet changed course to 120°.
At 0630B/1, A/S and search aircraft were flown off. The search was to take place between 270° and the Greek coast.
At 0650B/1, HMS Ajax arrived at Suda Bay.
At 0700B/1, HMS Juno returned from fuelling at Suda Bay. With her was HMAS Voyager. She would take the place of HMS Defender who had fouled the nets at Suda Bay.
At 0800B/1, the fleet was in position 35°23’N, 22°38’E steering 280°. The fleet remained west of Crete to cover the Suda Bay operations.
At 1020B/1, the fleet was reported by an enemy aircraft and at 1155B/1 an enemy aircraft was shot down in flames by the fighter patrol.Another Italian aircraft was damaged by them.
At noon, the fleet was in position 35°43’N, 22°00’E steering 130°.
At 1630B/1, the Commander-in-Chief, in HMS Warspite and with HMS Illustrious, HMS York, HMS Gloucester, HMS Jervis, HMS Hero, HMS Hereward, HMS Hasty and HMS Ilex split off and proceeded towards Alexandria.
At midnight, the Commander-in-Chief (HMS Warspite) was in position 33°52’N, 24°25’E.
2 November 1940.
At 1340B/2, the group of ships not with the Commander-in-Chief were attacked by four Italian torpedo bombers in position 32°39’N, 27°11’E. All torpedoes however missed astern.
At 1900B/2, the Commander-in-Chief, in HMS Warspite, arrived at Alexandria.
HMS Orion and HMAS Sydney arrived at Alexandria shortly before midnight.
The remainder of the fleet did not enter the harbour during the dark hours due to the weather conditions. They arrived at Alexandria in groups the next day. (53)
4 Nov 1940
Several operations in the Mediterranean.
Operation MB 8, convoy operations in the Eastern Mediterranean.
Operation Coat, transfer of reinforcements from the Western Mediterranean to the Eastern Mediterranean.
Operation Crack, air attack on Cagliary, Sardinia.
Operation Judgment, air attack on Taranto.
4 November 1940.
Convoy AN 6 departed Port Said / Alexandria today for Greece. The convoy was made up of the following tankers; Adinda (Dutch, 3359 GRT, built 1939), British Sergeant (5868 GRT, built 1922), Pass of Balhama (758 GRT, built 1933) and the transports Hannah Moller (2931 GRT, built 1911), Odysseus (Greek, 4577 GRT, built 1913). Several more transports (probably Greek) were also part of this convoy.
The Pass of Balhama sailed from Alexandria, the others from Port Said.
The convoy was escorted by the A/S trawlers HMS Kingston Crystal (Lt.Cdr. G.H.P. James, RNR) and HMS Kingston Cyanite (Skr. F.A. Yeomans, RNR).
HMS Ajax (Capt. E.D. McCarthy, RN) and HMAS Sydney (Capt. J.A. Collins, CB, RAN) both proceeded from Alexandria to Port Said on this day. At Port Said the were to embark troops for Crete.
Owning to breakdowns in Kingston Crystal and Kingston Cyanite, HMS Dainty (Cdr. M.S. Thomas, DSO, RN), HMS Kingston Coral (Skr. W. Kirman, RNR) and HMS Sindonis (Ch.Skr. G. Rawding, RNR) departed Alexandria late on the 4th to rendez-vous with convoy AN 6.
5 November 1940.
Convoy MW 3 departed Alexandria for Malta. This convoy was made up of the transports Devis (6054 GRT, built 1938), Rodi (3220 GRT, built 1928, former Italian), Volo (1587 GRT, built 1938), Waiwera (12435 GRT, built 1934) and the Royal Fleet Auxiliary tanker Plumleaf (5916 GRT, built 1917).
Escort was provided by the AA cruisers HMS Coventry (Capt. D. Gilmour, RN), HMS Calcutta (Capt. D.M. Lees, DSO, RN) and the destroyers HMS Diamond (Lt.Cdr. P.A. Cartwright, RN), HMAS Vampire (Capt. H.M.L. Waller, DSO, RAN), HMAS Voyager (Cdr. J.C. Morrow, DSO, RAN), HMAS Waterhen (Lt.Cdr. J.H. Swain, RN) and the minesweeper HMS Abingdon (Lt. G.A. Simmers, RNR).
Also sailing with this convoy were the transport Brisbane Star (12791 GRT, built 1937) and the Royal Fleet Auxiliary tanker (5917 GRT, built 1917), the the armed boarding vessels HMS Chakla (Cdr. L.C. Bach, RD, RNR) and HMS Fiona (Cdr. A.H.H. Griffiths, RD, RNR), net tender HMS Protector (Cdr. R.J. Gardner, RN). They were to sail with this convoy until off Crete when they were to be detached to proceed to Suda Bay.
HMS Ajax and HMAS Sydney departed Port Said for Suda Bay with Headquarters, 14th Infantery Brigade, one light and one heavy AA battery and administrative troops.
6 November 1940.
Vice-Admiral light forces, in HMS Orion (Capt. G.R.B. Back, RN, flying the flag of Vice-Admiral H.D. Pridham-Whippell, CB, CVO, RN), left Alexandria for Piraeus to consult with the Greek authorities. Also some RAF personnel was embarked for passage.
At 0600B/6, convoy AN 6 was in position 34°40’N, 22°20’E.
The Commander-in-Chief departed Alexandria with the battleships HMS Warspite (Capt. D.B. Fisher, CBE, RN, flying the flag of Admiral Sir A.B. Cunningham, KCB, DSO, RN), HMS Valiant (A/Capt. J.P.L. Reid, RN), aircraft carrier HMS Illustrious (Capt. D.W. Boyd, DSC, RN, flying the flag of Rear-Admiral A.L.St.G. Lyster, CVO, DSO, RN). They were escorted by HMS Hyperion (Cdr. H.St.L. Nicolson, DSO and Bar, RN), HMS Hasty (Lt.Cdr. L.R.K. Tyrwhitt, RN), ), HMS Havock (Cdr. R.E. Courage, DSO, DSC, RN), HMS Hero (Cdr. H.W. Biggs, DSO, RN), HMS Hereward (Lt.Cdr. C.W. Greening, RN), HMS Ilex (Lt.Cdr. P.L. Saumarez, DSC and Bar, RN), HMS Decoy (Cdr. E.G. McGregor, DSO, RN) and HMS Defender (Lt.Cdr. G.L. Farnfield, RN).
The Rear-Admiral 1st Battle Squadron sailed with HMS Malaya (Capt. A.F.E. Palliser, DSC, RN, flying the flag of A/Rear-Admiral H.B. Rawlings, OBE, RN), HMS Ramillies (Capt. A.D. Read, RN). They were escorted by HMS Jervis (Capt. P.J. Mack, DSO, RN), HMS Janus (Cdr. J.A.W. Tothill, RN), HMS Juno (Cdr. St.J.R.J. Thyrwhitt, RN), HMS Nubian (Cdr. R.W. Ravenhill, RN) and HMS Mohawk (Cdr. J.W.M. Eaton, RN). HMS Eagle had defects and was unable to proceed to sea with this group as had been originally intended. Three aircraft from Eagle were embarked on Illustrious.
The heavy cruiser HMS York (Capt. R.H. Portal, DSC, RN) and the light cruiser HMS Gloucester (Capt. H.A. Rowley, RN, flying the flag of Rear-Admiral E. de F. Renouf, CVO, RN) also departed Alexandria for these operations.
The fleet was clear of the harbour by 1300B/6, and then proceded on a mean line of advance of 310° until 1800B/6 when it was changed to 270°. At 2000B/6, course was changed to 320°.
7 November 1940.
There were no incidents during the night.
At 0800 hours, the Commander-in-Chief was in position 34°15’N, 24°47’E.
Around 1000B/7, the Vice-Admiral light forces, arrived at Piraeus in HMS Orion.
At noon, the Commander-in-Chief was in position 34°26’N, 23°43’E. At this time the mean line of advance was changed to 320°.
At 1300B/7, aircraft were flown off to search a sector 300° to 360°. Nothing was however sighted by this search.
At 1700B/7, HMAS Sydney joined the Commander-in-Chief from Suda Bay. She reported that ships for Suda Bay had all arrived according to plan and that stores and troops had all ben landed by dark on 6 November.
At 1800B/7, the position of convoy MW 3 was 35°44’N, 22°41’E and shortly afterwards the convoy altered course to 290°.
At 2000B/7, the position of the convoy was 35°48’N. 21°45’E, course was now altered to 320°.
----------------------------------------------------------------------------------------------------------------------------
At 1800A/7, ‘Force H’ departed Gibraltar for ‘Operation Coat’ and ‘Operation Crack’. ‘Force H’ was made up of the aircraft carrier HMS Ark Royal (Capt. C.S. Holland, RN, flying the flag of Vice-Admiral J.F. Somerville, KCB, DSO, RN), light cruiser HMS Sheffield (Capt. C.A.A. Larcom, RN) and the destroyers HMS Faulknor (Capt. A.F. de Salis, RN), HMS Firedrake (Lt.Cdr. S.H. Norris, DSC, RN), HMS Forester (Lt.Cdr. E.B. Tancock, RN), HMS Fortune (Cdr. E.A. Gibbs, DSO, RN), HMS Foxhound (Cdr. G.H. Peters, DSC, RN), HMS Fury (Lt.Cdr. T.C. Robinson, RN), HMS Duncan (Cdr. A.D.B. James, RN), HMS Isis (Cdr. C.S.B. Swinley, DSC, RN). Also part of this force were a group of warships that was to reinforce the Mediterranean Fleet. These were the battleship HMS Barham (Capt G.C. Cooke, RN), heavy cruiser HMS Berwick (Capt. G.L. Warren, RN), light cruiser HMS Glasgow (Capt. H. Hickling, RN) and the destroyers HMS Gallant (Lt.Cdr. C.P.F. Brown, RN), HMS Greyhound (Cdr. W.R. Marshall A'Deane, DSC, RN) and HMS Griffin (Lt.Cdr J. Lee-Barber, DSO, RN). These ships carried troops for Malta as well as three of the destroyers from ‘Force H’, HMS Faulknor, HMS Fortune, HMS Fury. A total of 2150 troops were embarked as follows; HMS Berwick 750, HMS Barham 700, HMS Glasgow 400, and the six destroyers had each 50 troops on board.
8 November 1940.
At 0001B/8, the Commander-in-Chief was in position 36°36’N, 21°08’E, the mean line of advance was 280°.
At 0400B/8, the mean line of advance was changed to 220°.
At 0645B/8, an air search was flown off to search a sector 310° to the Greek coast. It sighted nothing.
At 0900B/8, when the Commander-in-Chief was in position 36°40’N, 18°50’E course was changed to 180° to close the convoy.
At noon, the Commander-in-Chief was in position 35°57’N, 18°46’E. The convoy was at that time in position 35°46’N, 18°41’E. Also around noon he convoy was reported by an enemy aircraft and at 1230 hours one Cant. 501 was attacked by Gladiators but apparently managed to escape.
At 1400B/8, aircraft were flown off to search between 200° and 350°. Also one aircraft was flown off with messages for Malta. The air search again sighted nothing.
At 1520B/8, the fleet was reported by enemy aircraft.
At 1610B/8, three Fulmar fighters attacked a formation of seven Italian S. 79’s shooting down two of them. The remainder jettisoned their bombs and made off.
At 1700B/8, HMS Ajax joined the fleet coming from Suda Bay.
The fleet had remained in a covering position to the north of the convoy all day and at 1830B/8, when in position 35°’20’N, 17°25’E course was changed to 000°. At that time the convoy was only five nautical miles to the southward of the fleet.
At 2130B/8, the fleet altered course to 180°.
At 2230B/8, the fleet altered course to 210°.
----------------------------------------------------------------------------------------------------------------------------
At dawn A/S air patrols were flown off by HMS Ark Royal. These were maintained throughout the day.
A fighter patrol was maintained throughout the afternoon but no enemy aircraft were encountered.
The weather was fine and visibility good it was considered very likely that the force would be sighted and attacked by enemy aircraft. So it was decided at 1530 hours that HMS Ark Royal, HMS Sheffield, HMS Glasgow and six destroyers would proceed ahead to carry out the planned attack (‘Operation Crack’) on the Cagliari aerodrome. [According to the plan these destroyers should be HMS Faulknor, HMS Foretune, HMS Fury, Gallant, HMS Greyhound and HMS Griffin. It is currently not known to us if it were indeed these destroyers that with this force when they split off from the other ships.]
That evening fighters from the Ark Royal shot down an enemy aircraft.
9 November 1940.
At 0001B/9, the Commander-in-Chief was in position 35°42’N, 17°09’E, the mean line of advance was 270°.
At 0800B/9, the convoy was closed in position 34°42’N, 15°00’E.
At 0920B/9, HMS Ramillies, HMS Hyperion, HMS Hero and HMS Ilex were detached to join the convoy and escort it to Malta. The weather was overcast and squally so no air search was flown off.
The main fleet remained to the south-west of the Medina-Bank during the day. The 3rd and 7th Cruiser Squadrons being detached to search to the north.
The main fleet was being shadowed by enemy aircraft and was reported four times between 1048B/9 and 1550B/9. One Cant 506B aircraft was shot down by a Fulmar at 1640B/9.
At noon, the Commander-in-Chief was in position 34°47’N, 16°35’E.
At 1219B/9, a Swordfish A/S patrol force landed near HMS Warspite shortly after taking off. The crew was picked up by HMS Jervis. The depth charge and A/S bombs exploded close to Warspite.
At 2100B/9, when the Commander-in-Chief was in position 34°45’N, 16°10’E, course was altered to 310° to make rendez-vous with ‘Force F’, the reinforcements for the Mediterranean Fleet coming from Gibraltar.
----------------------------------------------------------------------------------------------------------------------------
At 0430B/9, HMS Ark Royal launched a strike force of nine Swordfish aircraft to bomb Cagliari aerodrome with direct and delay action bombs. On completion of flying off, course was altered to 160° for the flying on position.
At 0745B/9, a fighter section and a section of three Fulmars that were to be transferred to HMS Illustrious (via Malta) were flown off and the nine Swordfish of the strike force landed on. The fighter section for Illustrious landed at Malta at 1020 hours.
The raid on Cagliari appeared to have been quite successful. Five Swordfish attacked the aerodrome and hits were observed on two hangars an other buildings. Two fires were seen to break out and also a large explosion occurred. One Swordfish attacked a group of seaplanes moored off the jetty. Another Swordfish attacked some factories near the power station and obtained a direct hit with a 250-lb bomb and incendiaries. The remaining two aircraft were unable to locate the target and attacked AA batteries instead. Two fires were seen to start but the AA batteries continued firing.
On completion of flying on course was altered to rendez-vous with HMS Barham, HMS Berwick and the remaining five destroyers which were sighted at 0910 hours. The ships then formed up in formation and set off on an easterly course at 18 knots.
At 0930B/9 an enemy aircraft that was shadowing the fleet was picked up by RD/F at a distance of about thirty miles. After working round the fleet clockwise the aircraft was sighted by HMS Barham and then by the Fulmar fighter patrol. The aircraft, which was a large floatplane, was shot down at 1005B/9, twenty miles on the starboard beam of the fleet.
At 1048B/9, a large formation of enemy aircraft was located by RD/F about fifty miles ahead of the fleet and closing. Five minutes later a section of Skua’s was flown off.
A section of Fulmar’s intercepted the enemy as they were working their way round to the sun and forced them to turn away but ten minutes later the enemy again approached. The fleet was then bombed from a height of 13000 feet. No British ships were hit, although HMS Barham, HMS Ark Royal and HMS Duncan had been near missed. It was believed that one of the attackers was shot down.
Throughout the remainder of the day fighter patrols were kept up but no further enemy aircraft attacked the fleet.
At 1915B/9, HMS Ark Royal, HMS Sheffield, HMS Duncan, HMS Isis, HMS Firedrake, HMS Forester and HMS Foxhound turned to the west. HMS Barham, HMS Berwick, HMS Glasgow, HMS Faulknor, HMS Fortune, HMS Fury, HMS Gallant, HMS Greyhound and HMS Griffin continued to the east under the command of Capt. Warren of the Berwick, which was the senior Captain.
10 November 1940.
At 0001B/10, the Commander-in-Chief was in position 35°13’N, 15°25’E steering 300°. Shortly afterwards, at 0010 hours, two heavy explosions were felt. It appears that the fleet had been under attack at this time.
At 0700B/10, aircraft were flown off to search a sector 315° to 045°. Shortly after takeoff one Swordfish crashed into the sea. The crew was rescued by HMS Nubian.
At 0715B/10, the 3rd and 7th Cruiser Squadrons rejoined. Shortly afterwards, at 0730B/10, HMAS Vampire, HMAS Voyager, HMAS Waterhen, HMS Dainty, HMS Diamond, HMS Hyperion, HMS Havock and HMS Ilex joined the fleet. HMS Jervis, HMS Janus, HMS Juno, HMS Nubian, HMS Mohawk, HMS Decoy, HMS Defender and HMS Hasty were detached to fuel at Malta.
At 1015B/10, rendez-vous was made with ‘Force F’ which was made up of HMS Barham, HMS Berwick, HMS Glasgow, HMS Griffin, HMS Greyhound, HMS Gallant, HMS Fury, HMS Fortune and HMS Faulknor. HMS Fortune and HMS Fury joined the destroyer screen. The other ships were ordered to proceed to Malta to land troops and stores there. The course of he fleet was changed to 110° in position 36°08’N, 13°10’E around this time.
At noon, the Commander-in-Chief was in position 35°55’N, 13°30’E.
At 1330B/10, convoy ME 3 departed Malta. It consisted of the transports Memnon (7506 GRT, built 1931), Lanarkshire (11275 GRT, built 1940), Clan Macaulay (10492 GRT, built 1936) and Clan Ferguson (7347 GRT, built 1938). Escort was provided by the battleship HMS Ramillies, AA cruiser HMS Coventry and the destroyers HMS Decoy and HMS Defender.
Around 1400B/10 the monitor HMS Terror (Cdr. H.J. Haynes, DSC, RN) and the destroyer HMAS Vendetta (Lt.Cdr. R. Rhoades RAN) departed Malta for Suda Bay. Before departure HMAS Vendetta had first carried out an A/S patrol off Valetta harbour.
At 1435B/10, HMS Mohawk rejoined the fleet.
At 1450B/10, HMS Hero was detached to Malta with correspondence.
In the afternoon three Fulmars, which had been flown to Malta from HMS Ark Royal, landed on HMS Illustrious.
At 2100B/10, the Commander-in-Chief was in position 35°15’N, 14°16’E steering 090°. The 3rd and 7th Cruiser Squadrons were detached to search between 020° to 040°.
----------------------------------------------------------------------------------------------------------------------------
In the western Mediterranean all was quiet. Fighter patrols were maintained overhead during the day. Also A/S patrols were maintained all day.
11 November 1940.
At 0001B/11, the Commander-in-Chief was in position 35°18’N, 15°14’E. At 0100 hours the fleet altered course to 060°.
At 0135B/11, HMS Ramillies, which was with convoy ME 3, reported three explosions in position 34°35’N, 16°08’E. This might have been a submarine attack. [This was indeed the case as the Italian submarine Pier Capponi attacked a battleship around this time.]
At 0700B/11, an air search was launched to search between 315° and 045°. One aircraft was flown to Malta to collect photographs of Taranto harbour.
At 0800B/11, the Commander-in-Chief was in position 36°55’N, 17°36’E.
At noon, the Vice-Admiral light forces in HMS Orion coming from Piraeus, joined the fleet in position 36°10’N, 18°30’E. Correspondence was transferred to HMS Warspite via HMS Griffin.
At 1310B/11, the Vice-Admiral light forces, in HMS Orion and with HMS Ajax and HMAS Sydney, HMS Nubian and HMS Mohawk in company, parted company to carry out an anti-shipping raid into the Straits of Otranto.
At 1800B/11, HMS Illustrious, HMS York, HMS Gloucester, escorted by HMS Hyperion, HMS Hasty, HMS Havock and HMS Ilex were detached for ‘Operation Judgement’ the torpedo and dive-bombing attack on the Italian fleet in Taranto harbour.
For this operation this force proceeded to position 38°11’N, 19°30’E. Here aircraft were flown off in two waves, at 2000 and at 2100 hours.
At 2000B/11, the Commander-in-Chief was in position 37°54’N, 19°09’E. One hour later the fleet altered course to 000°.
At 2030B/11, the Vice-Admiral light forces with the cruisers passed through position 39°10’N, 19°30’E, course 340° doing 25 knots.
At 2140B/11, HMS Juno obtained an A/S contact and attacked it with depth charges.
----------------------------------------------------------------------------------------------------------------------------
In the western Mediterranean the fleet arrived back at Gibraltar around 0800A/11.
12 November 1940.
At 0700B/12, both detached groups rejoined the fleet. The attack on Taranto harbour was reported as a success. Eleven torpedoes had been dropped and hits were claimed on a Littorio-class and two Cavour-class battleships in the outer harbour. Sticks of bombs had been dropped amongst the warships in the inner harbour. Two aircraft failed to return to HMS Illustrious. [Damage was done to the battleships Littorio (three torpedo hits), Caio Duilio and Conte di Cavour (one torpedo hit each), in fact the Conti di Cavour never returned to service. Also damaged (by bombs) were the heavy cruiser Trento and the destroyer Libeccio.]
The raid into the Straits of Otranto had also been successful as an Italian convoy had been intercepted off Valona around 0115 and largely destroyed. The convoy had been made up of four merchant vessels which had all been sunk. There had been two escorts, thought to be destroyers or torpedo boats. These managed to escape. [The merchant vessels Antonio Locatelli (5691 GRT, built 1920), Capo Vado (4391 GRT, built 1906), Catalani (2429 GRT, built 1929) and Premuda (4427 GRT, built 1907) had been sunk. Their escorts had been the armed merchant cruiser Ramb III (3667 GRT, built 1938) and the torpedo boat Nicola Fabrizi. The convoy had been en-route from Vlore, Albania to Brindisi.]
At 0800B/12, the fleet was in position 37°20’N, 20°18’E.
At 0930B/12, HMS Warspite catapulted her Walrus aircraft to take massages to Suda Bay for forwarding to the Admiralty by transmission.
At noon, the fleet was in position 37°20’N, 20°08’E. Course at that time was 140°.
As it was intended to repeat ‘Operation Judgement’ tonight the fleet remained in the area. Course being altered to 340° at 1600 hours.
Fortunately the fleet was not reported at this time. Three enemy aircraft were shot down during the day but these were shot down before they had reported the fleet.
At 1800B/12, the decision was taken not to proceed with the repeat of ‘Operation Jugement’ due to the bad weather in the Gulf of Taranto. At that time the fleet was in position 37°06’N, 19°44’E. Course was set to 140° to return to Alexandria.
At 1830B/12, HMS Malaya, HMS Ajax, HMS Dainty, HMS Diamond, HMS Greyhound, HMS Griffin and HMS Gallant were detached to fuel at Suda Bay. HMS Berwick and HMS York were detached to proceed to Alexandria where they arrived in the evening of the 13th.
13 November 1940.
At 0001B/13, the Commander-in-Chief was in position 35°44’N, 20°53’E.
At 0630B/13, HMS Terror and HMAS Vendetta arrived at Suda Bay. Terror was to remain at Suda Bay as guardship.
At 1000B/13, the force with HMS Malaya arrived at Suda Bay. After fuelling the departed later the same day for Alexandria taking HMAS Vendetta with them.
Also around 1000B/13, convoy ME 3 arrived at Alexandria.
At noon, the Commander-in-Chief was in position 34°23’N, 23°43’E.
At about 1530B/13, Fulmar’s attacked an Italian shadowing aircraft which however managed to escape although damaged.
At 1600B/13, the fleet altered course to 050° when in position 33°23’N, 26°18’E. Course was altered back to 090° at 1800B/13. RD/F later detacted an enemy formation to the southward but the fleet was not sighted.
At 2000B/13, the fleet was in position 33°38’N, 27°34’E.
14 November 1940.
Around 0700B/14, the bulk of the fleet with the Commander-in-Chief arrived at Alexandria. (56)
14 Nov 1940
From 14 to 19 November 1940, HMAS Voyager (Cdr. J.C. Morrow, DSO, RAN) cleaned boilers at Alexandria.
On the 16th a captured Italian Breda gun was fitted forward of the after binnacle. (57)
21 Nov 1940
During 21/22 November 1940, the aircraft carrier HMS Illustrious (Capt. D.W. Boyd, DSC, RN, flying the flag of Rear-Admiral A.L.St.G. Lyster, CVO, DSO, RN) conducted flying exercises off Alexandria. She was escorted by the destroyers HMAS Vendetta (Lt.Cdr. R. Rhoades RAN) and HMAS Voyager (Cdr. J.C. Morrow, DSO, RAN), HMAS Waterhen (Lt.Cdr. J.H. Swain, RN), HMS Hasty (Lt.Cdr. L.R.K. Tyrwhitt, RN) and HMS Havock (Cdr. R.E. Courage, DSO, DSC, RN). (58)
23 Nov 1940
Operation MB 9.
Convoy operations in the Eastern Mediterranean.
See also the event for 25 November 1940 called ‘Operation Collar and the resulting Battle of Cape Spartivento’ for the events in the Western Mediterranean.
23 November 1940.
Convoy MW 4 departed Alexandria for Malta today. The convoy was made up of the transports HMS Breconshire (9776 GRT, built 1939), Memnon (7506 GRT, built 1931), Clan Ferguson (7347 GRT, built 1938) and Clan Macaulay (10492 GRT, built 1936). Close escort was provided by (‘Force D’) the AA cruisers HMS Coventry (Capt. D. Gilmour, RN), HMS Calcutta (Capt. D.M. Lees, DSO, RN) and the destroyers HMS Greyhound (Cdr. W.R. Marshall A'Deane, DSC, RN), HMAS Vampire (Capt. H.M.L. Waller, DSO, RAN), HMAS Vendetta (Lt.Cdr. R. Rhoades RAN) and HMAS Voyager (Cdr. J.C. Morrow, DSO, RAN).
A cover force (‘Force C’) for this convoy also departed Alexandria today. They were to proceed to Suda Bay where they were to refuel. This cover force was made up of the battleships HMS Malaya (Capt. A.F.E. Palliser, DSC, RN), HMS Ramillies (Capt. A.D. Read, RN), aircraft carrier HMS Eagle (Capt. A.R.M. Bridge, RN), light cuisers HMS Orion (Capt. G.R.B. Back, RN, flying the flag of Vice-Admiral H.D. Pridham-Whippell, CB, CVO, RN), HMS Ajax (Capt. E.D. McCarthy, RN), HMAS Sydney (Capt. J.A. Collins, CB, RAN) and the destroyers HMS Hyperion (Cdr. H.St.L. Nicolson, DSO and Bar, RN), HMS Hasty (Lt.Cdr. L.R.K. Tyrwhitt, RN), HMS Havock (Cdr. R.E. Courage, DSO, DSC, RN), HMS Ilex (Lt.Cdr. P.L. Saumarez, DSC and Bar, RN), HMS Gallant (Lt.Cdr. C.P.F. Brown, RN), HMS Dainty (Cdr. M.S. Thomas, DSO, RN), HMS Defender (Lt.Cdr. G.L. Farnfield, RN) and HMS Diamond (Lt.Cdr. P.A. Cartwright, RN).
HMS Berwick (Capt. G.L. Warren, RN) departed Alexandria later this day to make rendez-vous with ‘Force C’ off Suda Bay next morning.
24 November 1940.
Both ‘Force C’ and ‘Force D’ passed the Kaso Strait early this day. ‘Force C’ arrived at Suda Bay to refuel at 0800B/24.
At noon, the convoy was attacked by three enemy torpedo bombers in position 36°13’N, 24°48’E. The enemy planes were forced to drop their torpedoes from long range by the effective AA fire from the escorts and no hits were obtained.
In the afternoon both forces passed the Kithera Channel.
25 November 1940.
At 0200B/25, the 3rd Cruiser Squadron, HMS York (Capt. R.H. Portal, DSC, RN), HMS Gloucester (Capt. H.A. Rowley, RN, flying the flag of Rear-Admiral E. de F. Renouf, CVO, RN) and HMS Glasgow (Capt. H. Hickling, RN), departed Alexandria for exercises.
Around 0300B/25, ‘Force A’ departed Alexandria to provide cover for the operations. This force was made up of the battleships HMS Warspite (Capt. D.B. Fisher, CBE, RN, flying the flag of Admiral Sir A.B. Cunningham, KCB, DSO, RN), HMS Valiant (Capt. C.E. Morgan, DSO, RN), aircraft carrier HMS Illustrious (Capt. D.W. Boyd, DSC, RN, flying the flag of Rear-Admiral A.L.St.G. Lyster, CVO, DSO, RN) and the destroyers HMS Jervis (Capt. P.J. Mack, DSO, RN), HMS Janus (Cdr. J.A.W. Tothill, RN), HMS Juno (Cdr. St.J.R.J. Tyrwhitt, RN), HMS Nubian (Cdr. R.W. Ravenhill, RN), HMS Mohawk (Cdr. J.W.M. Eaton, RN), HMS Griffin (Lt.Cdr J. Lee-Barber, DSO, RN), HMS Decoy (Cdr. E.G. McGregor, DSO, RN), HMS Wryneck (Lt.Cdr. R.H.D. Lane, RN) and HMAS Waterhen (Lt.Cdr. J.H. Swain, RN). HMS Decoy had completed temporary repairs at Alexandria to the damage she had sustained in an air attack on 13 November. She was to proceed to the Malta Dockyard for permanent repairs.
At 0500B/25, HMS Hero (Cdr. H.W. Biggs, DSO, RN) and HMS Hereward (Lt.Cdr. C.W. Greening, RN) departed Malta to make rendez-vous the next day with ‘Force A’.
At 0645B/25, Illustrious flew off fighter and A/S patrols.
Around 1600B/25, having completed their exercises, the 3rd Cruiser Squadron joined ‘Force A’.
At 2000B/25, ‘Force A’ was in position 34°25’N, 26°33’E, steering 000°.
26 November 1940.
At 0030B/26, ‘Force A’ changed course to 285°.
At 0230B/26, HMS Illustrious, with HMS Gloucester, HMS Glasgow, HMS Janus, HMS Juno, HMS Mohawk and HMS Nubian split off for an air attack on Port Laki, Leros.
At 0300B/26, HMS Illustrious began to fly off the aircraft involved in the raid, which were a total of 15.
At 0600B/26, off Suda Bay, the aircraft returned to HMS Illustrious. They reported that targets were difficult to distinguish but fires were started in the dockyard and other areas. Two aircraft attacked a ship, believed to be a cruiser, but the results were unobserved. One aircraft failed to return.
Meanwhile, at 0500B/26, HMS York, had been detached to refuel at Suda Bay and then to join the Rear-Admiral 3rd Cruiser Squadron (in Gloucester) off Cape Matapan.
The remainder of ‘Force A’ entered Suda Bay between 0700 and 0830B/26. The destroyers were fuelled there.
A fighter patrol was maintained over the harbour until ‘Force A’ sailed again around 1030B/26. They then set course for the Kithera Channel.
Meanwhile convoy MW 4 had arrived at Malta around 0800B/26. Also HMS Malaya and HMS Ramillies had put into the harbour.
At noon, ‘Force A’ was in position 35°37’N, 24°20’E. As it was considered that the fleet had been located by enemy aircraft a fighter patrol was flown off and maintained for the remainder of the day (during daylight hours).
Also around noon HMS Ramillies, HMS Newcastle (Capt. E.A. Aylmer, DSC, RN), HMS Coventry, HMS Greyhound, HMS Gallant, HMS Hereward, HMS Defender and HMS Diamond departed Malta to join HMS Berwick at sea and then proceed westwards to join the fleet in the western Mediterranean.
At 1600B/26, ‘Force A’ was in position 35°44’N, 23°05’E. At 1630B/26, Convoy ME 4 departed Malta for Alexandria. This convoy was made up of the transports Waiwera (12435 GRT, built 1934), Cornwall (10603 GRT, built 1920), Rodi (3220 GRT, built 1928, former Italian), Volo (1587 GRT, built 1938) and Devis (6054 GRT, built 1938). Escort was provided by HMS Calcutta, HMAS Vampire, HMAS Vendetta and HMAS Voyager.
At 1815B/26, ‘Force A’ altered course to 220° and at 1930B/26, when in position 35°52’N, 22°08’E, to 290°. This course was maintained throughout the night to cover the convoy.
27 November 1940.
At 0001B/27, ‘Force A’ was in position 36°15’N, 20°40’E.
At 0600B/27, ‘Force A’ altered course to 230°.
At 0700B/27, an air search was flown off to search a sector of 295° to 025° but nothing was sighted.
At 1100B/27, the 3rd Cruiser Squadron (HMS York, HMS Gloucester and HMS Glasgow) rejoined the fleet having carried out a sweep to the north-west of the fleet through positions 36°06’N, 20°56’E and 37°48’N, 17°47’E.
At noon ‘Force A’ was in position 35°56’N, 17°47’E.
On receipt of enemy reports from ‘Force H’, the 3rd Cruiser Squadron was detached to the west to cover the ‘Collar convoy’ coming from that direction. They were to reach a rendez-vous position of 36°32’N, 12°00’E at 0400/28.
The fleet remained in a covering position for convoy ME 4 for the rest of the day. A second air search was flown off at 1430B/27 to search a sector between 310° and 010° but again sighted nothing.
28 November 1940.
At 0230B/28, ‘Force A’ was in position 35°15’N, 14°24’E. Course was altered to 320° to rendez-vous with the ‘Collar convoy’ in position 36°00’N, 13°25’E.
At 0700B/28, HMS Wryneck was detached to fuel at Malta, she returned in the afternoon.
At 0800B/28, the 3rd Cruiser Squadron was sighted and one hour later rendezvous was made with the ‘Collar convoy’ in position 36°02’N, 13°18’E. HMS Decoy and HMS Hotspur (Cdr. H.F.H Layman, DSO, RN) were detached with the merchant vessels Clan Forbes (7529 GRT, built 1938) and Clan Fraser (7529 GRT, built 1939) to Malta. Where they arrived at 1430B/27. The destroyers also remained at Malta where they were to refit / be repaired. At the same time HMS Greyhound joined the destroyer screen of the fleet.
The merchant vessel New Zealand Star (10740 GRT, built 1935) proceeded eastwards escorted by HMS Defender and HMS Hereward. Cover was provided by HMS Manchester (Capt. H.A. Packer, RN) and HMS Southampton (Capt. B.C.B. Brooke, RN).
At 1200B/28, ‘Force A’ was in position 35°41’N, 14°11’E. Half an hour later course was altered to 270° to close the corvettes HMS Peony (Lt.Cdr. (rtd.) M.B. Sherwood, DSO, RN), HMS Salvia (Lt.Cdr. J.I. Miller, DSO, RD, RNR), HMS Gloxinia (Lt.Cdr. A.J.C. Pomeroy, RNVR) and HMS Hyacinth (T/Lt. F.C. Hopkins, RNR) which were astern of the convoyas they had been unable to keep up. They were sighted at 1245B/28 and course was then altered to 180°.
At 1250B/28, HMS Glasgow was attacked by six Italian JU-87 dive bombers. One bomb fell within 30 yards from the ship but all the others missed by a wider margin. Glasgow sustained no damage or casualties.
Of the corvettes HMS Gloxinia had to put into Malta with the defects, while the remaining three proceeded to Suda Bay.
At 1600B/28, ‘Force A’ was in position 35°20’N, 14°37’E. The 3rd Cruiser Squadron was again detached to patrol to the north, this time to cover the passage of the corvettes to Suda Bay.
At 1700B/28, HMS Griffin was detached to Malta with engine defects.
Meanwhile from the escort of convoy ME 4 (the group with HMS Malaya) the destroyers HMS Diamond and HMAS Waterhen were detached to escort convoy AS 7 from the Aegean to Port Said.
29 November 1940.
At 0001B/29, ‘Force A’ was in position 35°18’N, 17°03’E.
At 0730B/29, an air search was flown off to search a sector between 310° and 020°.
At 1200B/29, ‘Force A’ was in position 35°00’N, 21°00’E. The three remaining corvettes were at that time 80 nautical miles to the north-westward.
At 1330B/29, the 3rd Cruiser Squadron was detached to Suda Bay.
At 1450B/29, HMS Manchester and HMS Southampton joined ‘Force A’ but at 1720B/29 they were detached to proceed independently to Alexandria.
At 2000B/29, ‘Force A’ was in position 34°37’N, 23°20’E.
Convoy ME 4 arrived at Alexandria this day as did her escort ‘Force C’. Some of the merchant vessels (Volo, Rodi and Cornwall) continued on to Port Said escorted by HMAS Vendetta and HMAS Voyager.
30 November 1940.
At 0001B/30, ‘Force A’ was in position 34°00’N, 24°45’E.
In the morning HMS Manchester and HMS Southampton arrived at Alexandria.
Also in the morning HMS York, HMS Gloucester and HMS Glasgow arrived at Suda Bay as did the three corvettes.
Around 1800B/30, ‘Force A’ arrived at Alexandria.
The remaining ships of the convoy and their escorts arrived at Port Said on this day. (53)
2 Dec 1940
Convoy AN 8.
This convoy departed Port Said on 2 December 1940.
It was made up of the merchant vessels Efthalia Mari (Greek, 4195 GRT, built 1919), Kehrea (Greek, 1968 GRT, built 1912), Palermo (British, 2797 GRT, built 1938), Petroil (Greek (tanker), 4434 GRT, built 1902) and Runo (British, 1858 GRT, built 1920).
On departure from Port Said the convoy was escorted by the destroyer HMAS Vendetta (Lt.Cdr. R. Rhoades RAN).
Around 0910B/5, the destroyer HMAS Voyager (Cdr. J.C. Morrow, DSO, RAN) joined the escort. She had departed Alexandria on 2 December.
Around 1730B/5, the convoy commenced passing the Kaso Strait northbound.
The convoy arrived at Piraeus shortly after noon on the 7th. (59)
8 Dec 1940
Around 1600B/8, HMAS Vendetta (Lt.Cdr. R. Rhoades RAN) and HMAS Voyager (Cdr. J.C. Morrow, DSO, RAN) departed Piraeus for Alexandria. They had been standing by to escort convoy AS 8, but as the convoy's sailing was postponed the destroyers were ordered to return to Alexandria. (59)
9 Dec 1940
Around 1500B/9, HMAS Vendetta (Lt.Cdr. R. Rhoades RAN) and HMAS Voyager (Cdr. J.C. Morrow, DSO, RAN) arrived at Alexandria from Piraeus. (59)
10 Dec 1940
Operations against the Italian army in Cyrenaica.
10 December 1940.
A force 'Force C' departed Alexandria today to be available for bombadment duties in the Sollum area if required by the army. This force was made up of the battleships HMS Barham (Capt. G.C. Cooke, RN, flying the flag of A/Rear-Admiral H.B. Rawlings, OBE, RN), HMS Valiant (Capt. C.E. Morgan, DSO, RN), AA cruiser HMS Coventry (Capt. D. Gilmour, RN), destroyers HMS Gallant (Lt.Cdr. C.P.F. Brown, RN), HMAS Vampire (Capt. H.M.L. Waller, DSO, RAN), HMAS Vendetta (Lt.Cdr. R. Rhoades RAN) and HMAS Voyager (Cdr. J.C. Morrow, DSO, RAN), HMS Wryneck (Lt.Cdr. R.H.D. Lane, RN), HMS Dainty (Cdr. M.S. Thomas, DSO, RN) and HMS Juno (Cdr. St.J.R.J. Tyrwhitt, RN).
Another force 'Force D' also departed Alexandria but with orders to make an air attack on El Adem airport near Tobruk. This force was made up of the aircraft carrier HMS Illustrious (Capt. D.W. Boyd, DSC, RN, flying the flag of Rear-Admiral A.L.St.G. Lyster, CVO, DSO, RN), heavy cruiser HMS York (Capt. R.H. Portal, DSC, RN), light cruiser HMS Gloucester (Capt. H.A. Rowley, RN, flying the flag of Rear-Admiral E. de F. Renouf, CVO, RN) and the destroyers HMS Ilex (Lt.Cdr. P.L. Saumarez, DSC and Bar, RN), HMS Hero (Cdr. H.W. Biggs, DSO, RN) and HMS Hasty (Lt.Cdr. L.R.K. Tyrwhitt, RN).
11 December 1940.
HMS Hyperion (Cdr. H.St.L. Nicolson, DSO and Bar, RN), HMS Diamond (Lt.Cdr. P.A. Cartwright, RN) and HMS Mohawk (Cdr. J.W.M. Eaton, RN) departed Alexandria to join 'Force C' at sea.
12 December 1940.
'Force C' and HMS York were to bombard Bardia but due to the bad visibility this was cancelled.
Aircraft from HMS Illustrious attacked Italian barges to the west of Bardia.
Upon completion of this attack both forces set course to return to Alexandria minus the destroyers that had joined the day before these were ordered to patrol between Ras el Melh and Mersa Matruh. HMS Coventry also remained at sea to search for a missing lighter between Mersa Matruh and Barrani. HMS Juno proceeded to Mersa Matruh to pick up Italian POW's for transport to Alexandria.
Both forces returned to Alexandria today minus the ships mentioned above. All ships were in harbour well before noon.
13 December 1940.
At 2042 hours, HMS Coventry, was hit by a torpedo in the bow from the Italian submarine Neghelli in position 32°37'N, 26°44'E. HMS Hyperion, HMS Diamond and HMS Mohawk then went to her assistance.
14 December 1940.
Around 0015 hours the three destroyers mentioned earlier joined the damaged Coventry. Around 0530 hours they were also joined by HMS Jervis (Capt. P.J. Mack, DSO, RN), HMS Janus (Cdr. J.A.W. Tothill, RN) and HMS Hereward (Lt.Cdr. C.W. Greening, RN).
HMS Coventry then continued on towards Alexandria steaming backwards escorted by HMS Jervis and HMS Janus where they arrived later today.
The other four destroyers were detached for an A/S sweep along the Libyan coast during which HMS Hyperion and HMS Hereward sank the Italian submarine Naiade in position 32°03'N, 25°26'E. The destroyers returned to Alexandria on the 15th. (53)
14 Dec 1940
HMAS Vampire (Capt. H.M.L. Waller, DSO, RAN), HMAS Vendetta (Lt.Cdr. R. Rhoades RAN) and HMAS Voyager (Cdr. J.C. Morrow, DSO, RAN) departed Alexandria for an A/S sweep and to provide cover for the Bombarding Squadron which was operating in the Gulf of Sollum. This Squadron was made up of the monitor HMS Terror (Cdr. H.J. Haynes, DSC, RN) and the gunboats HMS Aphis (Lt.Cdr.(Retd.) J.O. Campbell, DSC, RN) and HMS Ladybird (Cdr.(Retd.) J.F. Blackburn, RN).
On the 14th HMS Terror bombarded Bardia supported by the smaller gunboats which conducted bombardments as required.
At 1800C/14, HMAS Vampire departed the area to return to Alexandria.
On the 15th weather was too rough for the smaller gunboats to operate and they remained at Mersah Matruh. HMS Terror did bombard Bardia and many fires were started in the bombardment area.
On the 16th, HMS Terror continued to bombard the enemy. She was attacked by four enemy torpedo aircraft but none of the torpedoes fired hit. HMAS Vendetta and HMAS Voyager were taken under fire while operating with HMS Terror. HMAS Voyager sustained some splinter damage and one men was wounded when she was straddled by shore batteries. HMAS Vampire meanwhile conducted an A/S patrol in the area. At twilight she was attacked by two enemy torpedo aircraft and a torpedo missed astern by 50 yards.
Late on the 16th, HMAS Vendetta was ordered to proceed to Alexandria. (60)
17 Dec 1940
Late in the afternoon, the monitor HMS Terror (Cdr. H.J. Haynes, DSC, RN) and the destroyer HMAS Voyager (Cdr. J.C. Morrow, DSO, RAN) bombarded enemy troop movements along a coastal road west of Bardia.
The destroyer HMAS Waterhen (Lt.Cdr. J.H. Swain, RN) joined them during the day coming from Alexandria.
Gunboat HMS Ladybird (Lt.Cdr.(Retd.) J.F. Blackburn, RN) was also operating in the area.
At 2100B/17, HMAS Voyager was ordered to return to Alexandria. (61)
18 Dec 1940
Around 1730B/18, HMAS Voyager (Cdr. J.C. Morrow, DSO, RAN) arrived at Alexandria from operations in the Gulf of Bardia.
She departed for Bardia around 2245B/18. She had embarked some troops. (62)
19 Dec 1940
Around 0650B/19, HMAS Voyager (Cdr. J.C. Morrow, DSO, RAN) arrived at Mersa Matruh where more troops and equipment were taken on board. She departed for Sollum around 0940B/19.
Around 1420B/19, she anchored of Sollum and the troops and their equipment were disembarked.
She left around 1815B/19 to return to Mersa Matruh. Around 1900B/19, an A/S contact was obtained and a hunt was started. Between 1934B/19 and 2037B/19 a total of three patterns of depth charges were dropped. A/S contact was lost at 2220B/19.
At 0050B/20, the A/S search was left to HMAS Vendetta (Lt.Cdr. R. Rhoades RAN).
Around 1715B/20, HMAS Vendetta left the area to return to Alexandria. (62)
20 Dec 1940
Around 0845B/20, HMAS Voyager (Cdr. J.C. Morrow, DSO, RAN) arrived at Mersa Matruh.
Around 1005B/20, HMAS Voyager attempted to tow off a grounded vessel but the tow line parted and the attempt was abandoned.
Around 1230B/20, HMAS Voyager departed Mersa Matruh for Sollum but before arriving there she took over the escort of the water tanker Myriel (3560 GRT, built 1913) to Alexandria around 2030B/20.
She left the Myriel around 1100B/21 and then set course to the Gulf of Sollum. (62)
21 Dec 1940
HMAS Voyager (Cdr. J.C. Morrow, DSO, RAN) and HMAS Waterhen (Lt.Cdr. J.H. Swain, RN) conducted an A/S patrol in / off the Gulf of Sollum.
HMAS Waterhen later proceeded eastwards. (63)
22 Dec 1940
Around 1040B/22, HMAS Voyager (Cdr. J.C. Morrow, DSO, RAN) departed the Sollum area to return to Alexandria where she arrived around 1610B/22. (62)
23 Dec 1940
Around 0430B/23, HMAS Voyager (Cdr. J.C. Morrow, DSO, RAN) departed Alexandria to escort the water tanker Myriel (3560 GRT, built 1913) to Sollum.
Around 0800B/24, HMAS Voyager commenced an A/S patrol off Sollum.
Around 0400B/26, HMAS Voyager discontinued her patrol and set course for Alexandria where she arrived around 1510B/26. (62)
27 Dec 1940
Around 0010B/27, HMAS Voyager (Capt. H.M.L. Waller, DSO, RAN) departed Alexandria escorting a local convoy to Sollum.
Around 2100B/27, Capt. Waller was temporary transferred to HMS Terror (Cdr. H.J. Haynes, DSC, RN).
HMAS Voyager then proceeded on A/S patrol off Sollum with Cdr. J.C. Morrow, DSO, RAN again in command.
Around 0410B/28, Capt. Waller transferred from HMS Terror to HMAS Voyager and HMS Terror then proceeded for a bombardment of Bardia screened by HMAS Voyager.
Around 1100B/28, Capt. Waller was again transferred to HMS Terror after their return to Sollum from the bombardment.
Around 1900B/28, HMAS Voyager proceeded on a patrol between Bardia and Tobruk to search for enemy shipping. (64)
29 Dec 1940
Around 0145B/29, HMAS Voyager (Cdr. J.C. Morrow, RAN), which is on patrol between Bardia and Tobruk, intercepted a small Italian auxiliary ketch.
Ten minutes later the vessel was brought to with a shot across her bows. British POW's aboard the vessel then took control and followed HMAS Voyager towards Sollum. The Italian vessel in question was the Zingarella (190 GRT). The Italian vessel was later taken into service by the British.
Around 1635B/29, they arrived off Sollum very the captured vessel was detached and HMAS Voyager assumed an A/S patrol off the Gulf of Sollum.
At 1620B/30, Capt. Waller boarded HMAS Voyager again which departed the area around 1945B/30 to proceed to Alexandria where she arrived around 0625B/31. (62)
1 Jan 1941
Shortly after midnight, HMAS Voyager (Capt. H.M.L. Waller, DSO, RAN) and HMS Diamond (Lt.Cdr. P.A. Cartwright, RN) departed Alexandria for Sollum where they arrived later the same day. (25)
2 Jan 1941
Operation MC 5, attack on Bardia.
2 January 1941.
Today, ships from the Inshore Squadron bombarded the Italian (Libyan) town of Bardia where the Italian garrison was cut off. The ships involved were the monitor HMS Terror (Cdr. H.J. Haynes, DSC, RN), river gunboats HMS Aphis (Lt.Cdr.(Retd.) J.O. Campbell, DSC, RN) and HMS Ladybird (Lt.Cdr.(Retd.) J.F. Blackburn, RN) as well as the destroyers HMAS Voyager (Capt. H.M.L. Waller, DSO, RAN) and HMS Dainty (Cdr. M.S. Thomas, DSO, RN). During the day HMS Terror was attacked by Italian torpedo bombers around 1820 hours but no damage was done to her. HMAS Voyager was bombed three times (at 1411, 1600 and 1830 hours) but also sustained no damage.
Before noon this day the aircraft carrier HMS Illustrious (Capt. D.W. Boyd, CBE, DSC, RN, flying the flag of Rear-Admiral A.L.St.G. Lyster, CB, CVO, DSO, RN) departed Alexandria to fly on her aircraft. She was escorted by the destroyers HMS Greyhound (Cdr. W.R. Marshall A’Deane, DSO, DSC, RN), HMS Griffin (Lt.Cdr. J. Lee-Barber, DSO, RN), HMS Ilex (Capt. H.St.L. Nicolson, DSO and Bar, RN) and HMS Juno (Cdr. St.J.R.J. Tyrwhitt, RN).
Around 1800 hours the Mediterranean Fleet departed Alexandria. For this sortie the fleet was made up of the battleships HMS Warspite (Capt. D.B. Fisher, OBE, RN flying the flag of A/Admiral Sir A.B. Cunningham, KCB, DSO and 2 Bars, RN), HMS Barham (Capt. G.C. Cooke, RN, flying the flag of A/Rear-Admiral H.B. Rawlings, OBE, RN), HMS Valiant (Capt. C.E. Morgan, DSO, RN), heavy cruiser HMS York (Capt. R.H. Portal, DSC, RN), light cruiser HMS Gloucester (Capt. H.A. Rowley, RN, flying the flag of Rear-Admiral E. de F. Renouf, CVO, RN), AA cruiser HMS Calcutta (Capt. D.M. Lees, DSO, RN) and the destroyers HMS Nubian (Cdr. R.W. Ravenhill, RN), HMS Mohawk (Cdr. J.W.M. Eaton, RN), HMS Janus (Cdr. J.A.W. Tothill, RN), HMS Gallant (Lt.Cdr. C.P.F. Brown, DSC, RN), HMS Diamond (Lt.Cdr. P.A. Cartwright, RN), HMS Wryneck (Lt.Cdr. R.H.D. Lane, RN) and HMAS Vendetta (Lt.Cdr. R. Rhoades, RAN).
When the fleet was clear of the swept channel a course was set to pass through position 282°, Ras-el-Tin, 30 nautical miles at 2000 hours on a course of 285° at 18 knots. At 2030 hours, HMS Illustrious formed astern of the line. Her escorting destroyers took up positions in the screen of the fleet.
3 January 1941.
The fleet adjusted course and speed to pass through position 32°00’N, 26°35’E at 0400 hours. Course was then altered to 250° and at 1410 hours speed was reduced to 8 knots for 15 minutes to allow HMS Janus, HMS Juno, HMS Ilex, HMS Greyhound and HMS Gallant to stream their T.S.D.S. (minesweeping gear).
At 0500 hours, the Rear-Admiral Aircraft Carriers in HMS Illustrious parted company. She was detached with HMS Gloucester, HMS York, HMS Gallant, HMS Diamond, HMS Wryneck and HMAS Vendetta as escorts. They were to proceed to position 32°10’N, 25°30’E from where HMS Illustrious was to operate her aircraft.
At 0700 hours, the destroyers HMAS Voyager and HMS Dainty joined the fleet coming from Sollum. Also at this time spotting aircraft were flown off the aid the fall of shot for the upcoming bombardment of Bardia. Warspite and Valiant catapulted an aircraft to spot their own fall of shot and an aircraft to spot the fall of shot of Barham was flown off from land with the second observer from Warspite on board. Fighter and A/S patrols were provided by Illustrious.
At 0805 hours, when in position 31°45’N, 25°12’E, the fleet altered course to 335 degrees at 15 knots and HMS Calcutta took station 1 nautical mile on the beam of the leading T.S.D.S. destroyer. The bombardment area was the northern part of Bardia defended area, and the object to attack was large M.T. concentrations in this area to hinder the formation of a counter attacking force against the Australian division.
Fire was opened at 0810 hours and at 0830 hours course was reversed for a second run. The bombardment was completed by 0855 hours. Course was then altered to 100° and to 045° at 0910 hours.
Spotting aircraft reports indicated that the main armament bombardment was a success. Secondary armament and destroyers engaged the coast defence batteries and opportunity targets. A coastal battery engaged the battleships during the bombardment, but there was no damage and there were no casualties.
At 1000 hours, HMS Illustrious and her escorts rejoined the fleet. HMS Gloucester, HMS York and HMS Calcutta were detached to return to Alexandria and HMS Wryneck and HMS Vendatta were detached to proceed to Sollum.
At noon the fleet was in position 31°50’N, 25°12’E, course was 090°. At 1500 hours course was altered to 010° and to 140° at 1600 hours. At midnight the fleet was in position 31°50’N, 28°29’E, still steering 140°. The fleet arrived at Alexandria in the forenoon of the 4th.
During this day HMS Terror, HMS Aphis and HMS Ladybird had already bombarded the area from first light until the fleet bombardment commenced. They resumed bombarding after the fleet had retired. Three bombing air attacks were made on HMS Terror during the afternoon. HMS Aphis engaged the coast defence batteries. She sustained slight damage due to a near miss and tow of her crew were killed and two wounded. HMS Terror and the two gunboats then proceeded to Alexandria. (65)
3 Jan 1941
Around 2115B/3, HMAS Voyager (Capt. H.M.L. Waller, DSO, RAN) arrived at Alexandria from operations after being detached from the destroyer screen of the battlefleet. (25)
4 Jan 1941
Around 0100B/4, HMAS Voyager (Capt. H.M.L. Waller, DSO, RAN) departed Alexandria for Sollum. She was escorting the transport Cingalese Prince (British, 8474 GRT, built 1929). They arrived at Sullum around 2100B/4.
Capt. Waller was then transferred to HMAS Vendetta (Lt.Cdr. R. Rhodes, RAN).
HMAS Voyager (Cdr. J.C. Morrow, DSO, RAN) then departed Sollom to return to Alexandria where she arrived around 1855B/5. (25)
6 Jan 1941
From 6 to 10, HMAS Voyager (Cdr. J.C. Morrow, DSO, RAN) cleaned boilers at Alexandria. (25)
6 Jan 1941
Operations Excess and Operation MC 4.
Convoy operations in the Mediterranean.
Timespan; 6 January to 18 January 1941.
The principal object of this operation was the passage of a convoy of four ships (five were intended, see below) from Gibraltar to Malta and Piraeus (Operation Excess). One of these was to unload her stores at Malta, the other three had supplies on board for the Greek army.
Three subsidiary convoys (Operation M.C. 4) were to be run between Malta and Egypt. These consisted of two fast ships from Malta to Alexandria (convoy M.E. 5½), two fast ships from Alexandria to Malta (convoy M.W. 5½) and six slow ships from Malta to Port Said and Alexandria (convoy M.E. 6).
Composition of the convoys and their escort.
The ‘Excess convoy from Gibraltar’ was made up of one ship that was to proceed with stores to Malta. This was the Essex (11063 GRT, built 1936). The three other ships were to proceed with stores to Piraeus, these were the Clan Cumming (7264 GRT, built 1938), Clan Macdonald (9653 GRT, built 1939) and Empire Song (9228 GRT, built 1940). It had the light cruiser HMS Bonaventure (Capt. H.G. Egerton, RN) and the destroyers HMS Hasty (Lt.Cdr. L.R.K. Tyrwhitt, RN), HMS Hero (Cdr. H.W. Biggs, DSO, RN), HMS Hereward (Cdr. C.W. Greening, RN) and HMS Duncan (A/Capt. A.D.B. James, RN) as close escort (‘Force F’). A fifth merchant ship was to have been part of this convoy and was to have proceeded to Malta with stores and troops. However this ship, the Northern Prince (10917 GRT, built 1929) grounded at Gibraltar and was not able to join the convoy. The about four-hundred troops now boarded HMS Bonaventure for passage to Malta.
The most dangerous part of the ‘Excess convoy’ would be the part between Sardinia and Malta. For a stretch of about 400 nautical miles ships were exposed to enemy air attack from bases in Sardinia and Sicily less then 150 nautical miles away from the convoy’s track. Also submarines and surface torpedo craft were a constant menace. An attack by large enemy surface forces was thought less likely although this was potentially more dangerous.
’Convoy M.W.5 ½ from Alexandria to Malta’ made the passage westwards at the same time as the Mediterranean fleet moved westwards (see below). This convoy was made up of HMS Breconshire (9776 GRT, built 1939) and Clan Macauley (10492 GRT, built 1936). These ships were escorted by HMS Calcutta (Capt. D.M. Lees, DSO, RN), HMS Defender (Lt.Cdr. G.L. Farnfield, RN) and HMS Diamond (Lt.Cdr. P.A. Cartwright, RN).
’Convoy’s M.E. 5½ and M.E. 6’ that sailed from Malta to Egypt will be dealth with later on.
Cover forces for these convoy’s
At Gibraltar there was ‘Force H’ which had the following ships available for the operation. Battlecruiser HMS Renown (Capt. C.E.B. Simeon, RN and flagship of Vice-Admiral J.F. Somerville, RN, KCB, DSO, RN), battleship HMS Malaya (Capt. A.F.E. Palliser, DSC, RN), aircraft carrier HMS Ark Royal (Capt. C.S. Holland, RN), light cruiser HMS Sheffield (Capt. C.A.A. Larcom, RN) and the destroyers HMS Faulknor (Capt. A.F. de Salis, RN), HMS Firedrake (Lt.Cdr. S.H. Norris, DSO, DSC, RN), HMS Forester (Lt.Cdr. E.B. Tancock, DSC and Bar, RN), HMS Fortune (Lt.Cdr. E.N. Sinclair, RN), HMS Foxhound (Cdr. G.H. Peters, DSC, RN), HMS Fury (Lt.Cdr. T.C. Robinson, RN) and HMS Jaguar (Lt.Cdr. J.F.W. Hine, RN).
’Force H’ was to provide cover for the ‘Excess convoy’ from Gibraltar to the Sicilian narrows.
South-south-west of Sardina ‘Force H’ was to be reinforced by ‘Force B’ which came from the eastern Mediterranean and was made up of the light cruisers HMS Gloucester (Capt. H.A. Rowley, RN, flying the flag of Rear-Admiral E. de F. Renouf, CVO, RN), HMS Southampton (Capt. B.C.B. Brooke, RN) and the destroyer HMS Ilex (Capt. H.St.L. Nicholson, DSO and Bar, RN). The destroyer HMS Janus (Cdr. J.A.W. Tothill, RN) had also been part of 'Force B' during the passage from Alexandria to Malta but remained there for a quick docking. After this docking she departed Malta around noon on the 10th to join 'Force A'.
Further cover was to be provided by ‘Force A’, this was the Mediterranean fleet based at Alexandria. This force was made up of the following warships. Battleships HMS Warspite (Capt. D.B. Fisher, CBE, RN, flying the flag of Admiral Sir A.B. Cunningham, KCB, DSO, RN), HMS Valiant (Capt. C.E. Morgan, DSO, RN), aircraft carrier HMS Illustrious (Capt. D.W. Boyd, CBE, DSC, RN, flying the flag of Rear-Admiral A.L.St.G. Lyster, CB, CVO, DSO, RN) and the destroyers HMS Jervis (Capt. P.J. Mack, DSO, RN), HMS Juno (Cdr. St.J.R.J. Thyrwhitt, RN), HMS Mohawk (Cdr. J.W.M. Eaton, RN), HMS Nubian (Cdr. R.W. Ravenhill, RN), HMS Greyhound (Cdr. W.R. Marshall-A’Deane, DSO, DSC, RN), HMS Gallant (Lt.Cdr. C.P.F. Brown, DSC, RN), HMS Griffin (Lt.Cdr. J. Lee-Barber, RN) and HMS Dainty (Cdr. M.S. Thomas, DSO, RN).
During the passage of the ‘Excess convoy’ three submarines were stationed off Sardinia. HMS Pandora off the east coast and HMS Triumph and HMS Upholder were stationed to the south of Sardinia.
Chronology of events
The actual ‘Excess convoy’ and it’s escort (Force F) departed Gibraltar before dark in the evening of January 6th. Course was set to the west as if to proceed into the Atlantic. This was done to deceive enemy spies based in Spain. They turned back in the night after moonset and passes Europa Point well before daylight next morning. At dawn the next morning HMS Bonaventure parted company with the convoy to make rendez-vous with ‘Force H’ which departed Gibraltar around that time. All that day the ‘Excess convoy’ followed the Spanish coast so as if to make for a Spanish port. During the night of 7/8 January the convoy crossed over towards the coast of North-Africa and steered eastwards towards the Sicilian narrows while keeping about 30 nautical miles from the shore of North Africa. ‘Force H’ overtook the convoy during the night and was now stationed to the north-east of it to shield it from Italian air attack. If Italian naval units were reported the plan was that he would join the convoy.
In the morning of the 8th, HMS Bonaventure rejoined the actual ‘Excess convoy’. Late in the afternoon of the 8th HMS Malaya escorted by HMS Firedrake and HMS Jaguar parted company with ‘Force H’ and joined the ‘Excess convoy’ very early in the evening.
At dawn on the 9th ‘Force H’ was ahead of the convoy. At 0500/9, while in position 37°45’N, 07°15’E, HMS Ark Royal flew off five Swordfish aircraft for Malta which was still some 350 nautical miles away. All of which arrived safely. ‘Force H’ then turned back and joined the ‘Excess convoy’ at 0900/9 about 120 nautical miles south-west of Sardinia. HMS Ark Royal meanwhile had launched several aircraft, one of her reconnaissance aircraft reported at 0918 hours that it had sighted two enemy cruisers and two destroyers but this soon turned out to be Rear-Admiral Renouf’s ‘Force B’ which was to join the Excess convoy for the passage through the Sicilian narrows. They joined the convoy about one hour later.
’Force B’ had departed Alexandria in the morning of the 6th with troop for Malta on board. They had arrived at Malta in the morning of the 8th and after disembarking the troops (25 officers and 484 other ranks of the Army and RAF) sailed early in the afternoon. At 0900/9 ‘Force B’ was sighted by an Italian reconnaissance aircraft. This aircraft soon made off when being fired at. One hour later another Italian reconnaissance aircraft was however sighted. It was engaged by the fighter patrol from HMS Ark Royal but managed to escape. At 1320 hours, while in position 37°38’N, 08°31’E, Italian bombers arrived on the scene and made their attack on the convoy.
The convoy of the four merchant ships was steaming in two columns in line ahead, 1500 yards apart. HMS Gloucester and HMS Malaya were leading the columns while HMS Bonaventure and HMS Southampton were the sternmost ships. The seven destroyers were placed as a screen ahead of the convoy. ‘Force H’, with HMS Renown, HMS Ark Royal, HMS Sheffield and their five escorting destroyers were on the convoy’s port quarter, operating in close support. The mean line of advance was 088° and the ships were zigzagging at 14 knots.
The enemy consisted of ten Savoia bombers. HMS Sheffield detected them on her radar about 43 nautical miles off, this was the maximum range of her radar equipment. They were fine on the starboard bow and came into sight fourteen minutes later, flying down the starboard side of the convoy out of range of the AA guns at a eight of about 11000 feet. At 1346 hours, when they were broad on the bow, they started their attack. They came in from 145°, which was the bearing of the sun. All the ships opened up a very heavy fire and the enemy was diverted of their course. Eight of the aircraft were seen to drop bombs, some of which fell close to HMS Gloucester and HMS Malaya but no damage was caused. The other two bombers were seen to turn away during their approach. Both were shot down by a Fulmar fighter from HMS Ark Royal. Three men from their crews were picked up from the water. Another bombers is thought to have been shot down by HMS Bonaventure. The other seven are thought to have got away.
Nothing more happened during the afternoon of the 9th. Reconnaissance showed that the Italian fleet was not at sea so at dusk, while in position 37°42’N, 09°53’E, some 30 nautical miles west of the Sicilian narrows and north of Bizerta, Tunisia, ‘Force H’ parted company with the ‘Excess convoy’ and set course to return to Gibraltar. Rear-Admiral Renouf in HMS Gloucester meanwhile continued eastwards with the convoy with his three cruisers and five destroyers of forces ‘B’ and ‘F’.
They had a quiet night, passing Pantelleria after moonset. They remained in deep water to reduce the danger of mines. Next morning, at dawn on the 10th at 0720 hours, they encountered two Italian torpedo boats in position 36°30’N, 12°10’E. HMS Jaguar, the port wing destroyer in the screen, and HMS Bonaventure, stationed astern of the convoy columns, sighted the enemy at the same time. Initially thinking they might be destroyers from the Mediterranean Fleet, which the convoy was due to meet. British ships reported the contact by signal to Rear-Admiral Renouf. HMS Bonaventure challenged the ‘strangers’ and fired a star shell and then turned to engage the enemy working up to full speed. Rear-Admiral Renouf meanwhile turned away with the bulk of the convoy. HMS Southampton, HMS Jaguar and HMS Hereward hauled out from their stations on the engaged side of the convoy and made for the enemy. HMS Bonaventure meanwhile was engaging the right-hand ship of the pair. When the other three ships arrived on the scene Bonaventure shifted her fire to the other enemy ship which came towards her at full speed to attack. The enemy fired her torpedoes which HMS Bonaventure avoided. The four British ships now quickly stopped the enemy but she did not sink. In the end HMS Hereward torpedoed the damaged Italian torpedo boat some 40 minutes later. The other Italian torpedo-boat meanwhile had disappeared. [The Italian ships were the torpedo-boats Vega, which was sunk, and the Circe. HMS Boneventure had sustained some superficial damage from splinters during the action.
Enemy air attacks during 10 January.
At 0800/10, Admiral Cunningham arrived on the scene with ‘Force A’ before the fight was finished. ‘Force A’ turned to the south-east in the wake of the ‘Excess convoy around 0830 hours. While doing so, the destroyer HMS Gallant hit a mine and had her bow blown off. [This was a mine from the Italian minefield ‘7 AN’]. HMS Mohawk took the stricken destroyer in tow towards Malta escorted by HMS Bonaventure and HMS Griffin. They were later joined by HMS Gloucester and HMS Southampton. While HMS Mohawk was passing the towline two Italian torpedo planes attacked but they had to drop their torpedoes from long range and they missed. Between 1130 and 1800 hours, as the tow crept along at five or six knots, with their escort zig-zagging at 20 knots, they were attacked or threatened by aircraft ten times. Nearly all German high level bombers, which came in ones, twos or threes. The enemy dropped bombs in five out of the ten attempts but no hits were obtained. At 1300 hours German dive bombers arrived an obtained a near miss on HMS Southampton causing some minor damage.
At 0500/11, when about 15 nautical miles from Malta, all was going well and Rear-Admiral Renouf made off with for Suda Bay, Crete with HMS Gloucester, HMS Southampton and HMS Diamond. This last ship had joined the evening before. HMS Gallant, still being towed by HMS Mohawk and escorted by HMS Bonaventure and HMS Griffin arrived at Malta in the forenoon. At Malta, HMS Bonaventure disembarked the soldiers she had on board. [HMS Gallant was further damaged by bombs while at Malta and was eventually found to be beyond economical repair and was cannibalized for spares.]
Meanwhile, Admiral Cunningham in ‘Force A’ had a similar experience on a larger scale. He had sailed from Alexandria on the 7th and enemy aircraft spotted his force already on the same day. During the afternoon of the 10th heavy dive bombing attacks were pressed home by the enemy with skill and determination. The main target was HMS Illustrious. Had the enemy attacked the convoy itself the four transports would most likely all have been sunk, instead the Ilustrious was disabled and she would be out of action of many months.
At noon on the 10th the transports were steering south-eastward, zigzagging at 14 to 15 knots with an escort of three destroyers. At 1320 hours, HMS Calcutta joined them. HMS Warspite, HMS Illustrious and HMS Valiant were steaming in line ahead on the convoy’s starboard quarter, course 110° and zigzagging at 17 to 18 knots. These ships were screened by seven destroyers. The weather was clear, with high cloud.
The fleet was in position 35°59’N, 13°13’E some 55 nautical miles west of Malta when the battle began with an air attack by two Savoia torpedo planes which were detected six nautical miles away on the starboard beam at 1220 hours. They came in at a steady level, 150 feet above the water and dropped their torpedoes about 2500 yards from the battleships. They were sighted a minute before firing and the ships received them with a barrage from long- and short-range guns, altering course to avoid the torpedoes, which passed astern of the rearmost ship HMS Valiant. Five Fulmar fighters from the Illustrious had been patrolling above the fleet. One had returned before the attack being damaged while assisting to destroy a shadower some time before the attack. The other four aircraft chased the torpedo aircraft all the way to Linosa Island, which was about 20 miles to the westward. They claimed to have damaged both the enemy machines.
Directly after this attack, while the ships were reforming the line, a strong force of aircraft were reported at 1235 hours, coming from the northward some 30 miles away. The Fulmars, of course, were then a long way off, flying low and with little ammunition remaining. Actually two were even out of ammunition. They were ordered to return and the Illustrious sent up four fresh fighters as well as reliefs for the anti-submarine patrol. This meant a turn of 100° to starboard into the wind to fly off these aircraft. The enemy aircraft came into sight in the middle of this operation which lasted about four minutes. All the ships opened fire. The fleet had just got back to the proper course, 110°, and the Admiral had made the signal to assume loose formation, when the new attack began. The enemy had assembled astern of their target ‘in two very loose and flexible formations’ at a height of 12000 feet.
They were Junkers dive bombers, perhaps as many as 36, of which 18 to 24 attacked HMS Illustrious at 1240 hours, while a dozen attacked the battleships and the destroyer screen. They came down in flights of three on different bearings astern and on either beam, to release their bombs at heights from 1500 to 800 feet, ‘a very severe and brilliantly executed dive-bombing attack’ says Captain Boyd of the Illustrious. The ships altered course continually, and beginning with long-range controlled fire during the approach, shifted to barrage fire as the enemy dived for attack. The ships shot down at least three machines, while the eight Fulmar fighters that were up shot down five more, at the coast of one British machine. Even the two Fulmars that were out of ammo made dummy attacks and forced two Germans to turn away. But, as Captain Boyd pointed out ‘ at least twelve fighters in the air would have been required to make any impression on the enemy, and double that number to keep them off’.
HMS Illustrious was seriously damaged. She was hit six times, mostly with armour-piercing bombs of 1100 pounds. They wrecked the flight deck, destroyed nine aircraft on board and put half the 4.5” guns out of action, and did other damage, besides setting the ship on fire fore and aft and killing and wounding many of the ship’s company (13 officers and 113 ratings killed and 7 officers and 84 ratings injured) . The Warspite too, narrowly escaped serious injury, but got away with a split hawsepipe and a damaged anchor.
As HMS Illustrious was now useless as a carrier and likely to become a drag on the fleet Captain Boyd decided to make for Malta. The Commander-in-Chief gave her two destroyers as escort, one from his own screen and one from the convoy’s (these were HMS Hasty and HMS Jaguar) and she parted company accordingly. She had continual trouble with her steering gear, which at last broke down altogether, so that she had to steer with the engines, making only 17 to 18 knots. Her aircraft that were in the air also proceeded to Malta.
A third attack came at 1330 hours. By this time HMS Illustrious was 10 nautical miles north-eastward of the battleships which, due to the manoeuvres during the previous attack, were nearly as far away from the transports. The enemy came in again with high level bombers. Seven machines attacked the Illustrious and seven more the battleships. They were received with heavy AA fire. All the bombs they dropped fell wide. HMS Calcutta claimed to have destroyed one of the attackers.
More serious in it’s results was a second dive-bombing attack upon HMS Illustrious at 1610 hours. There were 15 JU-87’s Stuka’s escorted by 5 fighters. Actually 9 of the Stuka’s dropped their bombs, the other 6 were kept at bay due to heavy AA fire from the Illustrious, Hasty and Jaguar. One bomb hit and two near misses on the Illustrious were obtained by the enemy for the loss of one of their aircraft which was shot down by the Illustrious and the Jaguar. A few minutes later the 6 Stuka’s that had been driven off attacked the battleships but they again retired after fire was opened on them.
At 1715 hours, 17 more Stuka’s attacked the battleships. Again they were received with heavy AA fire. The enemy dropped their bombs from a greater height and non of them hit although splinters from a near miss killed a rating on board HMS Valiant and a bombs fell very near HMS Janus but it did not explode. The ships may have destroyed one aircraft with their AA fire. Three of the Fulmars from the Illustrious came from Malta and destroyed three of the attackers.
This turned out to be the end of the ordeal for the ‘Excess Convoy’ and its supporting ships of war, but not for HMS Illustrious which had one more encounter with the enemy before she reached Malta. At about 1920 hours, a little more then an hour after sunset and in moonlight, some aircraft approached from seaward when she was only five nautical miles from the entrance to Grand Harbour, Malta. She had received warning from Malta that enemy aircraft were about and she sighted two – probably torpedo planes. Illustrious, Hasty and Jaguar fired a blind barrage on which the enemy disappeared. Directly afterwards HMS Hasty obtained an Asdic contact and attacked it with depth charges, but whether it was a submarine remains uncertain. HMS Illustrious finally entered harbour at 2100 hours accompanied by HMS Jaguar which had passengers to land.
Movements of the actual ‘Excess Convoy’.
In the meantime, after the mild attack at 1340/10, the convoy went on its way unhindered. Its movements then became involved in those of the Malta to Egypt convoys, which were to sail under cover of the main operation with the special support of Vice-Admiral Pridham-Whippell’s ‘Force D’ which was made up of the cruisers HMS Orion (Capt. G.R.B. Back, RN, flying the flag of Vice-Admiral H.D. Pridham-Whippell, CB, CVO, RN), HMS Ajax (Capt. E.D.B. McCarthy, RN), HMAS Perth (Capt. P.W. Bowyer-Smith, RN) and HMS York (Capt. R.H. Portal, DSC, RN). The first of these convoys, the two ships of M.W. 5½ (see above), had left Alexandria for Malta on 7 January, some hours after Admiral Cunningham sailed westwards with ‘Force A’ to meet the ‘Excess Convoy’. To reinforce ' Force D ' the light cruiser HMAS Sydney (Capt. J.A. Collins, CB, RAN) and destroyer HMAS Stuart (Capt. H.M.L. Waller, DSO, RAN) departed Malta on 8 January 1941. They joined ' Force D ' on the 9th. Both transports of this convoy reached Malta without adventure in the morning of the 10th escorted by HMS Calcutta, HMS Diamond and HMS Defender. On arrival HMS Calcutta joined the six slow ships which made up convoy M.E. 6 which was bound for Port Said and Alexandria. The ships in this convoy were the; Devis (6054 GRT, built 1938), Hoegh Hood (tanker, Norwegian, 9351 GRT, built 1936), Pontfield (tanker, 8290 GRT, built 1940), Rodi (3220 GRT, built 1928, former Italian), Trocas (tanker, 7406 GRT, built 1927) and Volo (1587 GRT, built 1938). They were escorted by four corvettes; HMS Peony (Lt.Cdr.(Retd.) M.B. Sherwood, DSO, RN), HMS Salvia (Lt.Cdr. J.I. Miller, DSO, RN, RNR), HMS Hyacinth (T/Lt. F.C. Hopkins, RNR), HMS Gloxinia (Lt.Cdr. A.J.C. Pomeroy, RNVR). At the end of the searched channel this convoy was joined by ‘Force D’. HMS Calcutta was then ordered to join the ‘Excess Convoy’ and arrived in time to defend it from the Italian bombers as already described.
The last convoy, M.E. 5½, two fast ships (the Lanarkshire (8167 GRT, built 1940) and Waiwera (12435 GRT, built 1934)) bound for Alexandria, also left Malta in the morning of the 10th under escort of HMS Diamond. They were to join the ‘Excess Convoy’ until they were to turn to the south to clear Crete and then proceed to Alexandria. The ‘Excess Convoy’ would then proceed to Piraeus, Greece. The two convoys met that afternoon. The transport Essex then left and proceeded to Malta escorted by HMS Hero. After the Essex was safely inside Grand Harbour, HMS Hero joined the fleet.
Vice-Admiral Pridham-Whippell stayed with convoy M.E. 6 until dark on the 10th. As ‘Force A’ was somewhat behind due to the air attacks and Admiral Cunningham ordered Vice Admiral Pridham-Whippell to position HMS Orion and HMAS Perth to the north of the convoy to be in a good position in case of an attack by Italian surface forces. ‘Force A’ made good ground during the night and was some 25 nautical miles north of the convoy by daylight on the 11th at which time Orion and Perth joined ‘Force A’. Their forces stayed within a few miles of the convoy until the afternoon when they turned back to help HMS Gloucester, HMS Southampton which had come under air attack (see below). In the evening the ships destined for Alexandria left the convoy, while HMS Calcutta went ahead to Suda Bay to fuel there. The three ships and their destroyer escort continued on to Piraeus where they arrived safely next morning, at 1000 on the 12th.
HMS Ajax and HMS York had been ordered to join convoy M.E. 6. HMS Ajax however was ordered to proceed to Suda Bay soon after she had joined the convoy. In the morning of the 11th therefore, Rear-Admiral Renouf in HMS Gloucester and with HMS Southampton and HMS Diamond in company, was ordered to overtake the convoy and support it. They were at that moment steering for Suda Bay having left the disabled Gallant off Malta some hours before. Rear-Admiral Renouf altered course accordingly and made 24 knots against the convoys 9 to 10 knots. He also send up a Walrus aircraft to find the convoy.
The sinking of HMS Southampton.
At 1522 hours, when his ships were some 30 nautical miles astern of the convoy, and in position 34°56’N, 18°19’E, they were suddenly attacked by a dozen German Ju-87 ‘Stuka’ dive-bombers. Fortune was against them. The attack came as an entire surprise and according to Captain Rowley of the Gloucester the ‘aircraft were not sighted until the whistle of the first bomb was heard’. Six machines attacked each cruiser, diving steeply from the direction of the sun, releasing a 550-lb bomb each, at heights of around 1500 to 800 feet. The ships opened fire with 4” AA guns and smaller AA guns. They also increased speed and altered course to avoid the attack but two bombs, perhaps three hit HMS Southampton causing disastrous damage. Another hit and some near misses did some damage to HMS Gloucester, most important damage was to her DCT (director control tower). Half-an-hour later seven high-level bombers attacked but they were detected in time and taken under fire as a result of which all bombs fell wide. During the attack the Walrus from HMS Gloucester returned and ditched alongside HMS Diamond which took off the crew and then scuttled the aircraft.
Rear-Admiral Renouf immediately reported the damage to his cruisers to Admiral Cunningham who went to their aid. He send Vice-Admiral Pridham-Whippell ahead with the Orion, Perth, Jervis and Janus. From Malta HMS Griffin and HMS Mohawk were sent. Before they arrived however, Rear-Admiral Renouf reported that the Southampton must be abandoned and that he would sink her. HMS Gloucester took on board 33 officers and 678 ratings of which 4 officers and 58 ratings were wounded while HMS Diamond took on board 16 wounded ratings. Upon this signal the battleships turned east again. HMS Southampton had cought fire badly upon being hit. For a time the ships company fought the fire successfully and kept the ship in action and under control but in the end the fire got out of control. Also it was found that some magazines could not be flooded. In the end the crew had to give it up and was taken off. A torpedo was fired into her by HMS Gloucester but it did not sink her. Soon afterwards Vice-Admiral Pridham-Whippell arrived on the scene and his flagship, HMS Orion then scuttled her with three more torpedoes (four were fired).
Further proceedings of the convoys and the fleet.
Next morning, the 12th, HMS Orion, HMS Perth, HMS Gloucester, HMS Jervis and HMS Janus joined Admiral Cunningham’s Force off the west end of Crete meeting there also A/Rear-Admiral Rawlings (‘Force X’) in HMS Barham (Capt. G.C. Cooke, RN, flying the flag of A/Rear-Admiral H.B. Rawlings, OBE, RN) and with HMS Eagle (Capt. A.R.M. Bridge, CBE, RN), HMS Ajax and their destroyer screen made up of HMAS Stuart, HMAS Vampire (Cdr. J.A. Walsh, RAN), HMAS Vendetta (Lt.Cdr. R. Rhodes, RAN), HMAS Voyager (Cdr. J.C. Morrow, DSO, RAN) and HMS Wryneck (Lt.Cdr. R.H.D. Lane, RN) which had departed Alexandria on 11 January. These ships were to have begun a series of attacks on the Italian shipping routes but the disabling of HMS Illustrious put an end to that part of the plan so Admiral Cunningham took HMS Warspite, HMS Valiant, HMS Gloucester and the destroyers HMS Jervis, HMS Janus, HMS Greyhound, HMS Diamond, HMS Defender, HMS Hero and HMAS Voyager straight to Alexandria where they arrived in the early morning hours of the 13th.
HMS Barham, HMS Eagle, HMS York, HMS Orion, HMS Ajax, HMAS Perth, HMAS Stuart, HMAS Vampire, HMAS Vendetta, HMS Wryneck, HMS Griffin and HMS Mohawk then proceeded to Suda Bay to fuel where they arrived around 1900/12.
After fuelling at Suda Bay, Vice-Admiral Pridham-Whippell took HMS Orion, HMAS Perth to Piraeus where they arrived at 0230/13. There they took some troops from the ‘Excess Convoy’ on board and departed for Malta at 0600/13, a task the Southampton was to have done. They arrived at Malta around 0830/14. After unloading HMS Orion departed for Alexandria later the same day together with HMS Bonaventure and HMS Jaguar. They arrived at Alexandria in the morning of the 16th. HMAS Perth remained at Malta due to defects.
Meanwhile the six ships of convoy M.E. 6 arrived safely at their destinations on 13 January.
HMS Barham, HMS Eagle, HMS Ajax, HMAS Stuart, HMS Juno, HMS Hereward, HMS Hasty and HMS Dainty departed Suda Bay for operations south-west of Crete early in the morning of the 13th. The destroyers HMS Ilex, HMS Wryneck, HMAS Vampire and HMAS Vendetta also departed Suda Bay to conduct a sweep in the Kythera Channel. They joined ‘Force X’ around noon but Vampire and Vendetta were soon detached to investigate explosions which turned out to be underwater volcano activity. Meanwhile Ilex and Wryneck were also detached for a sweep towards Stampalia. These four destroyers fuelled at Suda Bay on the 14th and then departed for Piraeus where they arrived in the evening of the 14th. An A/S sweep had been carried out en-route.
’Force X’ returned to Suda Bay in the afternoon of the 15th and departed from there on the 16th for Alexandria where they arrived on the 18th, although some of the destroyers remained behind at Suda Bay.Leave van given to their crews at Piraeus and the destroyers departed Piraeus early on the 16th. HMS Ilex proceeded independently while HMAS Vampire, HMAS Vendetta and HMS Wryneck peroceeded to Suda Bay joining ' Force X ' on its departure.
Not a single of the 14 merchant ships in the convoys was lost but the fleet paid a heavy price for this loosing a light cruiser and a valuable aircraft carrier out of action for many months. As there were now German aircraft based in Italy future operations for the supply of Malta would be extremely difficult and dangerous.
The return of ' Force H' to Gibraltar.
That now leaves us with the return of ' Force H ' to Gibraltar which parted company with the eastbound convoy and its escort at 1920/9 in position 37°42'N, 09°53'E. ' Force H ' turned away to port. At 1935/9, ' Force H ' alter course to 300° and increased speed to 20 knots. Further alterations to course were made at 2200/9 to 260° and at mindnight durng the night of 9/10 January to 290°.
At 0100/10 course was altered for a quarter of an hour to clear three merchant vessels which had been sighted to the northward in position 38°03'N, 07°58'N, steering 180°. At 0900/10, course was altered to 246° and speed reduced to 18 knots.
A reconnaissance flight of seven aircraft was flown off to carry out an all round search to a depth of 50 miles from position 38°44'N, 05°18'E. On their return at 1030/10, they had nothing to report. Visibility was variable - from 5 to 15 miles. There was a slight sea and wind, force 3 from south-south-west. Speed was increased to 19 knots at 1110/10 since there appeared vibration in HMS Malaya when proceeding at 18 knots.
During the afternoon, three attack exercises were carried out on ' Force H ' by a total of nine Swordfish. Flying was completed by 1800/10. Moonlight exercises were cancelled due to a deterioration of weather and visibility. During the night the wind veered to the southwest and increased to force 6.
At 2345/10, Captain (D), 8th Destroyer Flottila, reported that the destroyers could maintain 19 knots provided that their A/S domes were housed, but would have to reduce to 16 knots if they were to remain lowered. Destroyers were accordingly orderd to house their domes.
The sea increased considerably, and by 0020/11 it was necessary to reduce speed to 14 knots in order to prevent damage to the destroyers. Course was altered for a short time at 0135/11 to avoid a merchant ship sighted in position 36°37'N, 00°06'W, steering to the north. Speed was further reduced to 11 knots by 0310/11, but gradual improvement in sea conditions permitted a corresponding increase of speed, so that by 0700/11, ' Force H ' was proceeding at 17 knots. Later in the day HMS Fury reported tat her forward gun shield had been distorted and that the gun could not be trained.
Six Swordfish were flown off by HMS Ark Royal at 0715/11 in order to carry out a light torpedo attack on ' Force H '. They were landed at 0815/11. At 0930/11, course was altered to 270° and speed increased to 19 knots. Weather conditions continued unfavourable, and not only had air training to be abandoned, but also the projected reconnaissance flight to Oran and Mers-el-Kebir to obtain photographs requisted by the Admiralty.
A London flying boat sent out from Gibraltar as A/S patrol ahead of ' Force H ' was sighted at 1015/11. By 1220/11, the sea had moderated sufficiently for the destroyers to increase speed and HMS Renown, HMS Sheffield, HMS Faulknor and HMS Foxhound proceeded ahead at 24 knots, increasing at 1730/11 to 26 knots. They arrived in harbour at 1920/11. The remainder of ' Force H ' arrived in harbour at 2020/11. (66)
11 Jan 1941
Around 0200B/11, ' Force X ', made up of the battleship HMS Barham (Capt. G.C. Cooke, RN, flying the flag of A/Rear-Admiral H.B. Rawlings, OBE, RN), aircraft carrier HMS Eagle (Capt. A.R.M. Bridge, CBE, RN), light cruiser HMS Ajax and the destroyers HMAS Stuart (Capt. H.M.L. Waller, DSO, RAN), HMAS Vampire (Cdr. J.A. Walsh, RAN), HMAS Vendetta (Lt.Cdr. R. Rhodes, RAN), HMAS Voyager (Cdr. J.C. Morrow, DSO, RAN) and HMS Wryneck (Lt.Cdr. R.H.D. Lane, RN) departed Alexandria for operations.
[For more info see the event ' Operations Excess and Operation M.C. 4 ' for 4 January 1941.]
13 Jan 1941
Around 0730B/13, HMS Warspite (Capt. D.B. Fisher, CBE, RN, flying the flag of Admiral Sir A.B. Cunningham, KCB, DSO, RN), HMS Valiant (Capt. C.E. Morgan, DSO, RN), HMS Gloucester (Capt. H.A. Rowley, RN, flying the flag of Rear-Admiral E. de F. Renouf, CVO, RN), HMS Jervis (Capt. P.J. Mack, DSO, RN), HMS Janus (Cdr. J.A.W. Tothill, RN), HMS Greyhound (Cdr. W.R. Marshall-A’Deane, DSO, DSC, RN), HMS Defender (Lt.Cdr. G.L. Farnfield, RN), HMS Diamond (Lt.Cdr. P.A. Cartwright, RN), HMS Hero (Cdr. H.W. Biggs, DSO, RN) and HMAS Voyager (Cdr. J.C. Morrow, DSO, RAN) arrived at Alexandria from operations.
15 Jan 1941
HMAS Voyager (Cdr. J.C. Morrow, DSO, RAN) departed Alexandria to operate with the Inshore Squadron. (25)
17 Jan 1941
Operation IS 1.
Bombardment of Tobruk.
Timespan; 17 January to 22 January 1941.
At 1800/17 the monitor HMS Terror (Cdr. H.J. Haynes, DSC, RN) and the gunboat HMS Aphis (Lt.Cdr.(Retd.) J.O. Campbell, DSC, RN) departed Alexandria for Operation IS 1. The object was to bombard enemy positions off Mersa-el-Sahal in the Tobruk area during the nights of 18/19 and 19/20 January to aid the British Army in their attempt to capture Tobruk from the Italians.
At 0400/18, a force made up of the light cruisers HMS Orion (Capt. G.R.B. Back, RN, flying the flag of Vice-Admiral H.D. Pridham-Whippell, CB, CVO, RN),HMS Bonaventure (Capt. H.G. Egerton, RN) and the destroyers HMS Jervis (Capt. P.J. Mack, DSO, RN), HMS Nubian (Cdr. R.W. Ravenhill, RN) and HMS Hero (Cdr. H.W. Biggs, DSO, RN) departed Alexandria. They were to cover the operations off Tobruk. The cruisers were to patrol to the north-west while the destroyers were to patrol off the north-east.
The weather however became bad and the operation had to be postponed for 24 hours. The cover forces however remained in their positions as it was thought possible that the old Italian armoured cruiser San Giorgio might try to escape from Tobruk. In the end the cover force was withdrawn for more urgent operations and was ordered to proceed to Suda Bay where they arrived in the afternoon of the 20th. Due to this bad weather the shallow draft HMS Aphis got into trouble as she was unable to seek shelter. Two destroyers and an aircraft were sent out for assistance. She was found at 1300/19 off Damietta. HMS Griffin then accompanied her to Port Said where she arrived at 0700/20. She had to be docked there for repairs to her hull.
The weather however remained bad and it was not possible to bombard during the night of 19/20 January as well. Also HMS Terror sustained weather damage but was able remain at sea.
During the night of 20/21 January, HMS Terror assisted by HMS Gnat (Lt.Cdr. S.R.H. Davenport, RN) and HMS Ladybird (Cdr.(Retd.) J.F. Blackburn, RN) from the Inshore Squadron did manage to carry out her bombardment duties. Little enemy opposition was experienced.
Also the destroyers HMAS Stuart (Capt. H.M.L. Waller, DSO, RAN), HMAS Vampire (Cdr. J.A. Walsh, RAN) and HMAS Voyager (Cdr. J.C. Morrow, DSO, RAN) were on patrol to the west of Tobruk to cut the enemy sea communications. HMAS Stuart and HMAS Vampire had departed Alexandria on 21st the to join the Inshore Squadron. HMAS Voyager had already been operating with the Inshore Squadron since 15 January. During the night of 21/22 January, HMAS Vampire sank the Italian schooner Diego west of Tobruk. The crew of ten were taken prisoner. On the 22nd HMAS Voyager returned to Alexandria due to defects. She was relieved the next day by HMS Defender (Lt.Cdr. G.L. Farnfield, RN).
HMS Terror and HMS Gnat also returned to on the 22nd. HMS Terror had lost her mast and sustained some additional damage in the recent heavy weather. HMS Gnat had to clean her boilers. The destroyers remained on the inshore patrol for now. (65)
23 Jan 1941
HMS Defender (Lt.Cdr. G.L. Farnfield, RN) departed Alexandria around 0800B/23 to relieve HMAS Voyager (Cdr. J.C. Morrow, DSO, RAN) in the Inshore Squadron. The Australian destroyer had been damaged an had return to Alexandria for repairs around 0700B/23. (65)
23 Jan 1941
Further operations with the Inshore Squadron by ships of the 10th Destroyer Flottila.
Timespan: 23 January 1941 to 31 January 1941.
On 23 January 1941, HMAS Stuart (Capt. H.M.L. Waller, DSO, RAN) and HMAS Vampire (Cdr. J.A. Walsh, RAN) were still operating with the Inshore Squadron as HMAS Voyager (Cdr. J.C. Morrow, DSO, RAN) had returned to Alexandria the previous day. HMAS Stuart and HMAS Vampire were reinforced that day by HMS Defender (Lt.Cdr. G.L. Farnfield, RN) which came from Alexandria having sailed from there around 0805B/23.
On the 24th, HMAS Stuart, HMAS Vampire and HMS Defender patrolled north and west of Tobruk. They sank three floating mines. Around 1700B/24, HMAS Stuart set course for Alexandria where she arrived around 0740B/25.
Around 0650B/26, HMAS Stuart departed Alexandria escorting the transport Cingalese Prince (British, 8474 GRT, built 1929) to Tubruk where they arrived on the 27th, having been join en-route by HMAS Vampire and HMS Defender.
On the 28th, HMAS Stuart and HMAS Vampire departed Tobruk for Sollum where they arrived later the same day and were joined by HMAS Voyager. They sailed later the same day to patrol off Derna during the night. Meanwhile HMS Defender had departed Tobruk escorting the Cingalese Prince back to Alexandria where they arrived the following day.
On the 29th, HMAS Stuart and HMAS Vampire entered Tobruk but later departed again to rejoin HMAS Voyager at sea. They then proceeded for an A/S sweep to the north of Raz Azzaz during the night.
On 30 January, HMAS Stuart, HMAS Vampire and HMAS Voyager arrived at Sollum from the A/S patrol at daylight. HMAS Vampire departed again later the same day to patrol of Raz Azzaz and then proceed to Alexandria on complearound 0900B/31. HMAS Stuart and HMAS Voyager, after fuelling, proceeded on another A/S patrol but HMAS Stuart parted company with HMAS Voyager around 1900B/30 to proceed to Alexandria where she arrived around 0945B/31.
On 31 January, HMAS Voyager, having completed patrol, entered Tobruk for repairs to her condensors. HMAS Stuart, which had arrived at Alexandria around 0945B/31, departed again around 1200B/31, escorting the transport Ulster Prince (British, 3791 GRT, built 1930) to Tobruk where they arrived the following day. (67)
27 Jan 1941
Around 1800B/27, HMAS Voyager (Cdr. J.C. Morrow, DSO, RAN) departed Alexandria for duty with the Inshore Squadron to relieve HMS Defender (Lt.Cdr. G.L. Farnfield, RN).
[See the event ' Further operations with the Inshore Squadron by ships of the 10th Destroyer Flottila ' for 23 January 1941 for more information.] (25)
31 Jan 1941
HMAS Voyager (Cdr. J.C. Morrow, DSO, RAN) arrived at Tobruk to effect repairs to her condensors. (25)
1 Feb 1941
Around 1450B/1, HMAS Stuart (Capt. H.M.L. Waller, DSO, RAN) and HMAS Voyager (Cdr. J.C. Morrow, DSO, RAN) departed Tobruk for a patrol off the Cyrenaican coast between Derna and Tobruk. A small lighter was sunk with gunfire.
Early on the 2nd, HMAS Voyager was detached to return to Tobruk where she arrived around 0910B/2.
HMAS Stuart proceeded to Bardia sinking another lighter with gunfire en-route. At Bardia two captured Italian Breda guns and ammunition were embarked. HMAS Stuart then departed Bardia P.M. on the 2nd. She arrived at Alexandria around 0805C/3. (68)
2 Feb 1941
Around 1020B/2, HMAS Voyager (Cdr. J.C. Morrow, DSO, RAN), with the Senior Officer of the Inshore Squadron (Capt. H. Hickling, RN) on board, departed Tobruk for Derna where she arrived around 1345B/2.
Around 1825B/2, she departed Derna for patrol. She returned to Derna around 0830B/3. (69)
3 Feb 1941
Around 1625B/3, HMAS Voyager (Cdr. J.C. Morrow, DSO, RAN), departed Derna for Tobruk where she arrived around 0845B/4. (69)
4 Feb 1941
Around 1035B/4, HMAS Voyager (Cdr. J.C. Morrow, DSO, RAN), departed Tobruk for Alexandria where she arrived around 0735B/5. (69)
9 Feb 1941
HMAS Voyager (Cdr. J.C. Morrow, DSO, RAN) departed Alexandria to escort the armed boarding vessels HMS Chakla (Cdr. L.C. Bach, RD, RNR) and HMS Rosaura (Capt. R. Spencer, RD, RNR) to Tobruk.
They arrived at Tobruk around 1545B/10. (69)
10 Feb 1941
During the night of 10/11 February 1941, HMAS Stuart (Capt. H.M.L. Waller, DSO, RAN), HMAS Vampire (Cdr. J.A. Walsh, RAN), HMAS Voyager (Cdr. J.C. Morrow, DSO, RAN) and HMS Decoy (Cdr. E.G. McGregor, DSO, RN) conducted an A/S sweep to the east of Tobruk. They returned to Tobruk on its completion. (25)
11 Feb 1941
HMAS Stuart (Capt. H.M.L. Waller, DSO, RAN), HMAS Vampire (Cdr. J.A. Walsh, RAN) and HMAS Voyager (Cdr. J.C. Morrow, DSO, RAN) departed Tobruk in the afternoon for local and A/S patrol.
Around 1900C/11, near the end of the swept channel cries were heard from the water and wreckage was sighted with one man clinged to it. He was picked up and proved to be a stoker from the M/S Whaler Southern Floe which had been mined earlier that day around 0405C/11.
The destroyers then set off on an A/S sweep to the westward returning to Tobruk the following morning. (25)
12 Feb 1941
Operation Shelford.
Clearence of Benghazi harbour.
At 0730B/12, HMS Orion (Capt. G.R.B. Back, RN, flying the flag of Vice-Admiral H.D. Pridham-Whippell, CB, CVO, RN) and HMS Ajax (Capt. E.D.B. McCarthy, RN) departed Alexandria to make rendez-vous in position 34°00'N, 21°00'E with the Aegean Force.
The Aegean force, made up of HMS York (Capt. R.H. Portal, DSC, RN), HMS Bonaventure (Capt. H.G. Egerton, RN), HMS Jervis (Capt. P.J. Mack, DSO, RN), HMS Janus (Cdr. J.A.W. Tothill, RN), HMS Jaguar (Lt.Cdr. J.F.W. Hine, RN) and HMS Mohawk (Cdr. J.W.M. Eaton, RN) departed Suda Bay at 1700B/12 to make this rendez-vous.
The whole of this force was to cover the entry of the Inshore Squadron into Benghazi, advancing into the Gulf of Sirte at night and to retire towards Crete by day.
HMS Aphis (Lt.Cdr.(Retd.) J.O. Campbell, DSC, RN) entered Benghazi during daylight on the 12th.
HMS Chakla (Cdr. L.C. Bach, RD, RNR), HMAS Stuart (Capt. H.M.L. Waller, DSO, RAN), HMAS Voyager (Cdr. J.C. Morrow, DSO, RAN), HMAS Vampire (Cdr. J.A. Walsh, RAN), HMS Fareham (Lt. W.J.P. Church, RN), HMS Peony (Lt.Cdr.(Retd.) M.B. Sherwood, DSO, RN) and HMS Hyacinth (T/A/Lt.Cdr. F.C. Hopkins, DSC, RNR) left Tobruk at 0730B/12 to reach Benghazi early on the 13th.
On the 13th, HMS Chakla, HMS Fareham, HMS Peony and HMS Hyacinth entered Bengazi harbour with the destroyers remaining out on patrol. Between 0600B/13 and 0630B/13, first HMS Hereward (Cdr. C.W. Greening, RN) and then HMS Decoy (Cdr. E.G. McGregor, DSO, RN) joined the destroyers on patrol. Several air attacks then followed. Later HMS Hereward, with minesweeping gear embarked, entered Bengazi harbour.
In the afternoon HMAS Vampire was detached to return to Tobruk to escort the monitor HMS Terror (Cdr. H.J. Haynes, DSC, RN) from there to Benghazi.
The remaining destroyers conducted a covering sweep to the north-west of Benghazi during the night.
On the 14th, HMS Hereward rejoined the other destroyers on their return from patrol. P.M. HMS Decoy and HMS Hereward were detached to proceed to Alexandria and HMAS Voyager to Tobruk. HMAS Stuart set course to proceed to Derna. (70)
14 Feb 1941
Around 0700B/14, HMAS Vampire (Cdr. J.A. Walsh, RAN) made rendezvous with HMS Terror (Cdr. H.J. Haynes, DSC, RN) off Toburk and course was then set to Derna where the monitor anchored. HMAS Vampire conducting an A/S sweep in the area during the night of 14/15 February.
HMAS Stuart (Capt. H.M.L. Waller, DSO, RAN) arrived at Derna around 0900B/15 and around 1200B/15, HMS Terror lifted anchor to proceed to Benghazi escorted by the two destroyers.
Around 1900B/15, HMAS Vampire was relieved by HMAS Voyager (Cdr. J.C. Morrow, DSO, RAN). HMAS Vampire then set course for Tobruk where she arrived to fuel early on the 16th.
HMS Terror, HMAS Stuart and HMAS Voyager arrived at Benghazi around 0900B/16. They were preceeded by the corvettes HMS Peony (Lt.Cdr.(Retd.) M.B. Sherwood, DSO, RN) and HMS Hyacinth (T/A/Lt.Cdr. F.C. Hopkins, DSC, RNR) which exploded two acoustic mines while the other ships approached. (71)
16 Feb 1941
HMAS Vampire (Cdr. J.A. Walsh, RAN) departed Tobruk while HMAS Voyager (Cdr. J.C. Morrow, DSO, RAN) departed Benghazi. They were then to rendezvous and conduct patrols between Benghazi and Tobruk.
These patrols lasted until 21 February when they arrived at Tobruk. Some drifting mines had been sunk and on the 18th HMAS Vampire had attacked an A/S contact which turned out to be a school of tunny fish which resulted in a welcome change on the menu for the next 24 hours. HMAS Voyager briefly entered Tobruk on the 18th to fuel. (25)
19 Feb 1941
A convoy made up of the transports Palermo (British, 2928 GRT, built 1938) and Escaut (Belgian, 1087 GRT, built 1938) departed Benghazi for Tobruk.
They were escorted by the AA cruiser HMS Coventry (Capt. D. Gilmour, RN), destroyer HMAS Voyager (Cdr. J.C. Morrow, DSO, RAN), corvettes HMS Gloxinia (Lt.Cdr. A.J.C. Pomeroy, RNVR), HMS Hyacinth (T/Lt. F.C. Hopkins, RNR), HMS Peony (Lt.Cdr.(Retd.) M.B. Sherwood, DSO, RN) and the auxiliary M/S trawlers HMS Arthur Cavanagh (Skr. T.W. Kirby, RNR) and HMS Milford Countess (T/A/S.Lt. R.H. Vallings, RNR).
Shortly after departure the destroyer HMAS Stuart (Capt. H.M.L. Waller, DSO, RAN) joined coming from patrol.
A.M. on the 20th, HMS Coventry parted company.
P.M. on the 20th, HMS Gloxinia, Hyacinth, HMS Arthur Cavenagh and HMS Milford Countess parted company with the convoy to proceed to Alexandria.
The remaining ships arrived at Tobruk on 21 February 1941. (72)
21 Feb 1941
Around 1450B/21, HMAS Voyager (Cdr. J.C. Morrow, DSO, RAN) departed Tobruk to escort the transport Cingalese Prince (British, 8474 GRT, built 1929) to Alexandria. They arrived at Alexandria around 1545B/22. HMAS Voyager then commenced boiler cleaning. (73)
25 Feb 1941
HMAS Voyager (Cdr. J.C. Morrow, DSO, RAN) is docked at Alexandria. (69)
26 Feb 1941
HMAS Voyager (Cdr. J.C. Morrow, DSO, RAN) is undocked. (69)
3 Mar 1941
Around 0800B/3, HMAS Voyager (Cdr. J.C. Morrow, DSO, RAN) departed Alexandria for Tobruk but at 1154B/3 a signal was received to return to Alexandria where she arrived around 1410B/3. (74)
5 Mar 1941
HMS Jervis (Capt. P.J. Mack, DSO, RN), HMS Jaguar (Lt.Cdr. J.F.W. Hine, RN), HMS Mohawk (Cdr. J.W.M. Eaton, RN), HMS Nubian (Cdr. R.W. Ravenhill, RN) and HMAS Voyager (Cdr. J.C. Morrow, DSO, RAN) conducted exercises off Alexandria. (75)
6 Mar 1941
The battleships HMS Barham (Capt. G.C. Cooke, RN, flying the flag of A/Rear-Admiral H.B. Rawlings, OBE, RN), HMS Valiant (Capt. C.E. Morgan, DSO, RN) departed Alexandria around 0600 hours for gunnery exercises following which they proceeded to Suda Bay where they arrived shortly before noon the following day. They were escorted by the destroyers HMS Jervis (Capt. P.J. Mack, DSO, RN), HMS Janus (Cdr. J.A.W. Tothill, RN), HMS Jaguar (Lt.Cdr. J.F.W. Hine, RN), HMS Hotspur (Lt.Cdr. C.P.F. Brown, DSC, RN), HMAS Voyager (Cdr. J.C. Morrow, DSO, RAN) and HMAS Waterhen (Lt.Cdr. J.H. Swain, RN).
A/S patrols were maintained off Suda Bay by destroyers. (65)
8 Mar 1941
HMS Barham (Capt. G.C. Cooke, RN, flying the flag of A/Rear-Admiral H.B. Rawlings, OBE, RN), HMS Valiant (Capt. C.E. Morgan, DSO, RN), HMS Jervis (Capt. P.J. Mack, DSO, RN), HMS Janus (Cdr. J.A.W. Tothill, RN), HMS Jaguar (Lt.Cdr. J.F.W. Hine, RN), HMS Hotspur (Lt.Cdr. C.P.F. Brown, DSC, RN), HMAS Voyager (Cdr. J.C. Morrow, DSO, RAN) and HMAS Waterhen (Lt.Cdr. J.H. Swain, RN) departed Suda Bay to cover the passage of convoy's through the Kithera Strait.
They were joined at sea by the destroyers HMS Nubian (Cdr. R.W. Ravenhill, RN) and HMS Mohawk (Cdr. J.W.M. Eaton, RN) the next day. (65)
10 Mar 1941
HMS Barham (Capt. G.C. Cooke, RN, flying the flag of A/Rear-Admiral H.B. Rawlings, OBE, RN), HMS Valiant (Capt. C.E. Morgan, DSO, RN), HMS Jervis (Capt. P.J. Mack, DSO, RN), HMS Janus (Cdr. J.A.W. Tothill, RN), HMS Nubian (Cdr. R.W. Ravenhill, RN), HMS Mohawk (Cdr. J.W.M. Eaton, RN), HMS Hotspur (Lt.Cdr. C.P.F. Brown, DSC, RN), HMAS Voyager (Cdr. J.C. Morrow, DSO, RAN) and HMAS Waterhen (Lt.Cdr. J.H. Swain, RN) returned to Suda Bay. (65)
12 Mar 1941
HMS Barham (Capt. G.C. Cooke, RN, flying the flag of A/Rear-Admiral H.B. Rawlings, OBE, RN), HMS Valiant (Capt. C.E. Morgan, DSO, RN), HMS Jervis (Capt. P.J. Mack, DSO, RN), HMS Janus (Cdr. J.A.W. Tothill, RN), HMS Hotspur (Lt.Cdr. C.P.F. Brown, DSC, RN), HMAS Voyager (Cdr. J.C. Morrow, DSO, RAN) and HMAS Waterhen (Lt.Cdr. J.H. Swain, RN) departed Suda Bay to cover the passage of convoy's through the Kithera Strait. They were joined by the destroyers HMS Ilex (Capt. H.St.L. Nicolson, DSO and Bar, RN) and HMS Greyhound (Cdr. W.R. Marshall-A'Deane, DSO, DSC, RN) coming from Piraeus.
HMS Hotspur and HMAS Waterhen were later detached for convoy escort duties with the upcoming convoy AS 19.
HMAS Voyager was detached on the 14th with orders to proceed to Alexandria with HMAS Vampire (Cdr. J.A. Walsh, RAN) which was coming from Piraeus. They arrived at Alexandria on the 16th. (65)
15 Mar 1941
HMAS Vampire (Cdr. J.A. Walsh, RAN) departed Piraeus for Alexandria.
Around 1900C/19, she made rendezvous in the Anti-Kythira Channel with HMAS Voyager (Cdr. J.C. Morrow, DSO, RAN) which came from Suda Bay. They then proceeded in company to Alexandria where they arrived around 1545C/16. (76)
16 Mar 1941
Around 1830B/16, HMAS Voyager (Cdr. J.C. Morrow, DSO, RAN) departed Alexandria to overtake and join a convoy from Alexandria to Tobruk.
This convoy was apparently made up of the transport troopship Ulster Prince (British, 3791 GRT, built 1930) and the armed boarding vessel HMS Rosaura (Capt. R. Spencer, RD, RNR). (74)
17 Mar 1941
Around 1535B/17, HMAS Voyager (Cdr. J.C. Morrow, DSO, RAN) arrived at Tobruk with the convoy from Alexandria having joined it around 0700B/17. En-route a drifting mine, which had been sighted on the port side of the convoy, had been sunk around 1005B/17.
Around 1735B/17, HMAS Voyager departed Tobruk for an A/S patrol near the harbour. (74)
18 Mar 1941
Around 0730B/18, HMAS Voyager (Cdr. J.C. Morrow, DSO, RAN) returned to Tobruk from patrol.
In the afternoon, the armed boarding vessel HMS Rosaura (Capt. R. Spencer, RD, RNR) hit a mine shortly after leaving Tobruk. She had on board personnel that were to proceed to Alexandria but also Italian POW's. There were 78 casualties of which 59 were enemy POW's. HMAS Voyager left the harbour to aid in the rescue operations following which she returned to harbour. (74)
18 Mar 1941
Convoy AG 7.
This convoy departed Alexandria on 18 March 1941.
It was made up of the following merchant vessels; Corinthia (Greek, 3721 GRT, built 1911), Hav (Norwegian, 5062 GRT, built 1939), Hellas (Greek, 2081 GRT, built 1916), Menelaus (British, 10307 GRT, built 1923) and Ozarda (British, 6985 GRT, built 1940).
The naval transport HMS Breconshire (9776 GRT, built 1939) (Capt.(Retd.) C.A.G. Hutchenson, RN) was also with the convoy as were the armed boarding vessel
HMS Chakla (Cdr. L.C. Bach, RD, RNR) and HMS Fiona (Cdr. A.H.H. Griffiths, RD, RNR) and the tug HMRT Retriever.
The convoy was escorted by the AA cruiser HMS Carlisle (Capt. T.C. Hampton, RN) and the destroyers HMAS Vampire (Cdr. J.A. Walsh, RAN) and HMS Wryneck (Lt.Cdr. R.H.D. Lane, RN).
Around 1600B/19, the transport Ulster Prince (British, 3791 GRT, built 1930) joined coming from Tobruk being escorted by the destroyer HMAS Voyager (Cdr. J.C. Morrow, DSO, RAN) which also joined the convoy.
The convoy arrived at Piraeus late on the 20th. (77)
19 Mar 1941
Around 0630B/19, the transport Ulster Prince (British, 3791 GRT, built 1930) departed Tobruk to join convoy AG 7 from Alexandria to Piraeus. She was escorted by the destroyer HMAS Voyager (Cdr. J.C. Morrow, DSO, RAN).
They joined the convoy around 1600B/19.
[For more info on this convoy see the event ' Convoy AG 7 ' for 18 March 1941.] (74)
21 Mar 1941
Convoy ASF 21
This convoy departed Piraeus on 21 March 1941 for Alexandria where it arrived on 23 March 1941.
The convoy was made up of the transport HMS Breconshire (9776 GRT, built 1939) and a total of seven merchant vessels.
The armed boarding vessel HMS Chakla (Cdr. L.C. Bach, RD, RNR) also travelled with the convoy.
The convoy was escorted by the destroyers HMAS Voyager (Cdr. J.C. Morrow, DSO, RAN) and HMS Wryneck (Cdr.(Retd.) R.H.D. Lane, RN). (65)
26 Mar 1941
Convoy AG 9
This convoy departed Alexandria on 26 March 1941 for Pireaus where all ships arrived on 29 March 1941.
The convoy was made up of the merchant vessels Brattdal (Norwegian, 4968 GRT, built 1935), Corinthia (Greek, 3721 GRT, built 1911), Hellas (Greek, 2081 GRT, built 1916), Port Halifax (British, 5820 GRT, built 1937) , Thermopylae (Norwegian, 6655 GRT, built 1930) and the naval transport HMS Ulster Prince (3791 GRT, built 1930).
Escort was provided by the Greek destroyer RHS Vasilefs Georgios (Cdr. P. Lappas), Australian destroyers HMAS Vampire (Cdr. J.A. Walsh, RAN), HMAS Voyager (Cdr. J.C. Morrow, DSO, RAN) and the British destroyer HMS Wryneck (Cdr.(Retd.) R.H.D. Lane, RN).
The AA cruiser HMS Calcutta (Capt. D.M. Lees, DSO, RN) joined the convoy around 0800 hours on the 28th near position 33°04’N, 26°32’E. She had departed Suda Bay in the evening of the 27th.
The convoy was routed to pass through the Kythera Channel during the night of 28/29 March 1941.
Italian warships were reported at sea and the convoy was then delayed and kept to the east of the Mediterranean Fleet during the Battle of Cape Matapan.
The convoy arrived at Piraeus around 1900C/29. (65)
1 Apr 1941
Convoy AS 23
This convoy departed Piraeus on 1 April 1941 for Port Said where it arrived on 5 April 1941.
The convoy was made up of the merchant vessels Aegeus (Greek, 4538 GRT, built 1920), Coulouras-Xenos (Greek, 4914 GRT, built 1915), Hollandia (Greek, 1759 GRT, built 1911), Homefield (British, 5324 GRT, built 1919), Mary Livanos (Greek, 4771 GRT, built 1938), Mount Olympus (Greek, 6692 GRT, built 1920), Runo (British, 1858 GRT, built 1920) and Teti (Greek, 2747 GRT, built 1903).
The convoy was escorted by the destroyers HMAS Voyager (Cdr. J.C. Morrow, DSO, RAN), HMS Wryneck (Cdr.(Retd.) R.H.D. Lane, RN) and the sloop HMS Grimsby (Cdr. K.J. D'Arcy, RN).
The convoy was attacked from the air and on 2 April the Coulouras-Xenos was sunk by aircraft bombs off Gavdos Island while the Homefield was badly damaged. She was later sunk by the destroyer HMS Nubian (Cdr. R.W. Ravenhill, RN).
HMAS Voyager arrived at Alexandria on 4 April, HMS Wryneck continued with the convoy to Port Said where it arrived on the 5th. HMS Wryneck then proceeded to Alexandria where she arrived later the same day. (65)
6 Apr 1941
Convoy AC 3.
The troopship Ulster Prince (British, 3791 GRT, built 1930) and the transport Thurland Castle (British, 6372 GRT, built 1929) departed Alexandria for Tobruk.
They were escorted by the AA cruiser HMS Calcutta (Capt. D.M. Lees, DSO, RN) and the destroyers HMS Defender (Lt.Cdr. G.L. Farnfield, RN) and HMAS Voyager (Cdr. J.C. Morrow, DSO, RAN).
The destroyers HMAS Waterhen (Lt.Cdr. J.H. Swain, RN) and HMAS Vendetta (Lt.Cdr. R. Rhoades, RAN) conducted a sweep ahead of this convoy.
The convoy arrived at Tobruk on the 7th. (65)
8 Apr 1941
HMS Calcutta (Capt. D.M. Lees, DSO, RN), HMS Defender (Lt.Cdr. G.L. Farnfield, RN) and HMAS Voyager (Cdr. J.C. Morrow, DSO, RAN) returned to Alexandria after having parted company with the convoy they had been escorting, two miles to the east of Tobruk, the day before. (65)
9 Apr 1941
HMAS Voyager (Cdr. J.C. Morrow, DSO, RAN) is docked in the Gabbari Dry Dock. (78)
12 Apr 1941
HMAS Voyager (Cdr. J.C. Morrow, DSO, RAN) is undocked. She then proceeded to berth near the gun shop for a change to the ships rangefinders. (78)
16 Apr 1941
The infantery landing ships HMS Glenearn (Capt.(Retd.) L.B. Hill, OBE, RN) and HMS Glengyle (A/Capt.(Retd.) C.H. Petrie, RN) departed Alexandria around 0245C/16 for a raid against Bardia. They were being escorted by the AA cruiser HMS Carlisle (Capt. T.C. Hampton, RN) and the destroyers HMAS Stuart (Capt. H.M.L. Waller, DSO, RAN), HMAS Voyager (Cdr. J.C. Morrow, DSO, RAN) and HMS Wryneck (Cdr.(Retd.) R.H.D. Lane, RN).
The submarine HMS Triumph (Lt.Cdr. W.J.W. Woods, RN) was to act as beacon to guide the landing force in to the beach.
After dark on the 16th HMS Carlisle parted company to join convoy AN 27. She was replaced at daylight on the 17th by HMS Coventry (Capt. D. Gilmour, RN).
The raid however was cancelled due to the bad weather conditions and the force returned to Alexandria around 1300C/17. (65)
19 Apr 1941
The infantery landing ship HMS Glengyle (A/Capt.(Retd.) C.H. Petrie, RN) departed Alexandria around 0245C/19 for a raid against Bardia. She was escorted by the AA cruiser HMS Coventry (Capt. D. Gilmour, RN) and the destroyers HMAS Stuart (Capt. H.M.L. Waller, DSO, RAN), HMAS Voyager (Cdr. J.C. Morrow, DSO, RAN) and HMAS Waterhen (Lt.Cdr. J.H. Swain, RN). This last destroyer joined at sea as she had been on other duties before.
The submarine HMS Triumph (Lt.Cdr. W.J.W. Woods, RN) acted as beacon to guide the landing force in to the beach.
Commandoes were landed near Bardia during the night of 19/20 March 1941. Operations commenced around 2205C/19 and were completed around 0500C/20 when course was set to return to Alexandria where they arrived around 2200C/20. (79)
22 Apr 1941
Convoy AG 13.
This convoy departed Alexandria on 22 April 1941.
It was made up of the infantery landing ships HMS Glenearn (Capt.(Retd.) L.B. Hill, OBE, RN), HMS Glengyle (A/Capt.(Retd.) C.H. Petrie, RN), HMS Glenroy (Capt.(Retd.) Sir J.F. Paget, RN) and the transport Ulster Prince (British, 3791 GRT, built 1930).
They were escorted by the destroyers HMAS Stuart (Capt. H.M.L. Waller, DSO, RAN) and HMAS Voyager (Cdr. J.C. Morrow, DSO, RAN).
On leaving harbour at Alexandria HMS Glenroy grounded and was unable to proceed with the convoy and had to be left behind.
The convoy arrived at Suda Bay shortly after midnight on 24 April 1941. (80)
24 Apr 1941
Operation Demon
Evacuation of Allied troops from mainland Greece.
Around 0915C/24, the infantery landing ships HMS Glenearn (Capt.(Retd.) L.B. Hill, OBE, RN), HMS Glengyle (A/Capt.(Retd.) C.H. Petrie, RN) and the transport Ulster Prince (British, 3791 GRT, built 1930) departed Suda Bay to embark troops from mainland Greece.
They were escorted by the AA cruiser HMS Calcutta (Capt. D.M. Lees, DSO, RN), destroyers HMAS Stuart (Capt. H.M.L. Waller, DSO, RAN), HMAS Voyager (Cdr. J.C. Morrow, DSO, RAN) and the corvettes HMS Hyacinth (T/A/Lt.Cdr. F.C. Hopkins, DSC, RNR) and HMS Salvia (Lt.Cdr. J.I. Miller, DSO, RD, RNR).
At 1445C/24, HMAS Voyager obtained an A/S contact in position 36°32'N, 24°02'5"E. One depth charge was dropped followed by three depth charge patterns, at 1455C/24, 1503C/24, 1526C/24 for no definite result. HMAS Voyager rejoined the convoy around 1615C/24. [No italian submarine reported an attack though, so the A/S contact must have been bogus.]
Around 1700C/24, HMS Glenearn, Ulster Queen, HMAS Stuart, HMAS Voyager, HMS Hyacinth parted company with the other ships and set course to Nauplia.
Around 1730C/24, the ships that were proceeding to Nauplia were attacked by dive bombers and one of the JU-88's obtained a bomb hit on the forecastle of HMS Glenearn which caused a fire.
Shortly after the attack the light cruiser HMS Phoebe (Capt. G. Grantham, RN) joined as additional escort.
Around 1800C/24, HMS Glenearn briefly stopped to fight the fire. She later rejoined the attempt to fight the fire had been succesful.
The ships arrived off Nauplia around 2115C/24 and the embarkation of about 7000 troops in all ship commenced.
Around 0350C/25, all ships left the embarkation area however the Ulster Prince grounded and had to be left behind.
Around 1300C/25, HMAS Voyager was detached from the convoy to proceed to Suda Bay at 25 knots. She arrived there around 1450C/25. The troops which had been embarked by HMAS Voyager were disembarked in one hour. The other ships arrived at Suda Bay a little later.
------------------------------------------------------------------------------------------------------------------------------------------
Meanwhile HMS Glengyle, HMS Calcutta and HMS Salvia proceeded to Raphtis to embark troops there. They arrived there around 2130C/24. Also at Raphtis the light cruiser HMAS Perth (Capt. P.W. Bowyer-Smith, RN) arrived around midnight to provide cover (she did not embark troops). Around 0345C/25 they departed to return to Suda Bay having embarked about 6500 troops. They arrived at Suda Bay around 1630C/25 but not before they had been attacked by enemy aircraft but no hits had been obtained. HMAS Perth also arrived at Suda Bay arriving there around 1745B/25.
25 Apr 1941
Around 1800C/25, HMAS Voyager (Cdr. J.C. Morrow, DSO, RAN) departed Suda Bay for Alexandria escorting a convoy of nine ships [identity currently not known to us].
Around 0400C/26, five ships parted company to return to Suda Bay.
Around 0730C/26, HMAS Voyager increased speed. Two ships were unable to keep up and left behind to proceed independently.
Around 1800C/26, HMAS Voyager again increased speed. One of the two remaining ships in company was now also unable to keep up and was ordered to proceed independently.
Around 1650C/27, HMAS Voyager and the sole remaining transport in company arrived at Alexandria. (78)
29 Apr 1941
Convoy GA 15.
This convoy was formed north of Crete on 29 April 1941 for Alexandria / Port Said where it arrived on 1 May 1941.
This convoy was made up of the following transports; Comliebank (British, 5149 GRT, built 1929), Corinthia (Greek, 3721 GRT, built 1911), Delane (British, 6054 GRT, built 1938), Ionia (British, 1936 GRT, built 1923), Itria (British, 6845 GRT, built 1940), Thurland Castle (British, 6372 GRT, built 1929) and the RFA oiler Brambleleaf (5917 GRT, built 1917).
Escort was provided by the AA cruiser HMS Carlisle (Capt. T.C. Hampton, RN), destroyers HMS Kandahar (Cdr. W.G.A. Robson, DSO, RN), HMS Kingston (Lt.Cdr. P. Somerville, DSO, DSC, RN) and the sloop HMS Auckland (Cdr. E.G. Hewitt, DSO, RN).
Cover was provided by the light cruisers HMS Orion (Capt. G.R.B. Back, RN, flying the flag of Vice-Admiral H.D. Pridham-Whippell, CB, CVO, RN), HMS Ajax (Capt. E.D.B. McCarthy, RN), HMAS Perth (Capt. P.W. Bowyer-Smith, RN), HMS Phoebe (Capt. G. Grantham, RN) and the destroyers HMS Decoy (Cdr. E.G. McGregor, DSO, RN), HMS Defender (Lt.Cdr. G.L. Farnfield, RN), HMS Hasty (Lt.Cdr. L.R.K. Tyrwhitt, RN), HMS Hereward (Lt. W.J. Munn, RN) and HMS Nubian (Cdr. R.W. Ravenhill, RN). During an air attack HMS Nubian was near missed sustaining some minor damage.
The battleships HMS Barham (Capt. G.C. Cooke, RN, flying the flag of A/Rear-Admiral H.B. Rawlings, OBE, RN), HMS Valiant (Capt. C.E. Morgan, DSO, RN), aircraft carrier HMS Formidable (Capt. A.W.la T. Bisset, RN), and the destroyers HMAS Stuart (Capt. H.M.L. Waller, DSO, RAN), HMAS Vampire (Cdr. J.A. Walsh, RAN), HMAS Vendetta (Lt.Cdr. R. Rhoades, RAN), HMAS Voyager (Cdr. J.C. Morrow, DSO, RAN), HMAS Waterhen (Lt.Cdr. J.H. Swain, RN) and HMS Greyhound (Cdr. W.R. Marshall-A'Deane, DSO, DSC, RN) sailed from Alexandria to support the convoy. The forces met south of the Kaso Strait on 30 April where HMAS Perth, HMS Phoebe and HMS Nubian joined the force of Rear-Admiral Rawlings. His force was also joined by three more destroyers; HMS Ilex (Capt. H.St.L. Nicholson, DSO and Bar, RN) joined from Alexandria while HMS Jaguar (Lt.Cdr. J.F.W. Hine, RN) and HMS Juno (Cdr. St. J.R.J. Tyrwhitt, RN) joined coming from Malta from where they had sailed on the 28th. HMAS Perth and HMS Nubian were however soon detached and joined the close escort of the actual convoy briefly before they went on ahead to Alexandria.
On 1 May, HMS Jaguar and HMS Juno attacked an A/S contact in position 32°59'N, 27°52'E. During this attack a depth charge exploded prematurely on board HMS Juno causing some minor damage to the ship. Five of the crew were killed in this mishap. Eleven more were wounded. The submarine in question was the Italian Turchese
The bulk of the convoy arrived at Alexandria on the 1st, but Comliebank and Itria went to Port Said instead escorted by HMS Decoy and HMS Defender. They also arrived on May 1st.
On 2 May 1941 the destroyers HMS Hasty, HMS Imperial (Lt.Cdr. C.A.de W. Kitcat, RN), HMS Jaguar, HMS Juno and HMS Kandahar departed Alexandria to join the fleet and relieve the Australian destroyers Stuart, Vampire, Vendetta, Voyager and Waterhen which then proceeded ahead of the fleet to Alexandria arriving in the evening of 2 May.
The Fleet arrived at Alexandria on the 3rd. (65)
5 May 1941
Around 1115C/5, HMAS Voyager (Cdr. J.C. Morrow, DSO, RAN) and HMAS Waterhen (Lt.Cdr. J.H. Swain, RN) departed Alexandria for Tobruk loaded with troops and ammunition.
They arrived at Tobruk around 0230C/6 and departed again around 0430C/6 after disembarking the fresh troop and the ammunition. They now had on board troops and wounded to take back to Alexandria. Visibility was however bad and they had to anchor until 0545C/6 when they finally left for Alexandria arriving there around 1930C/6. (81)
5 May 1941
Convoy AN 30.
This convoy sailed in two sections, one from Haida and one from Port Said.
The Haifa section sailed on 5 May 1941. It was made up of only one ship, the transport Cape Horn (British, 5643 GRT, built 1929). She was escorted by the sloop HMS Grimsby (Cdr. K.J. D'Arcy, RN).
The Port Said section sailed on 6 May 1941. It was made up of the transports City of Canterbury (British, 8331 GRT, built 1922), Lossiebank (British, 5627 GRT, built 1930) and Rawnsley (British, 4998 GRT, built 1940). On departure from Port Said they were escorted by the sloop HMS Flamingo (Cdr. R.J.O. Otway-Ruthven, RN).
HMAS Vampire (Cdr. J.A. Walsh, RAN) departed Alexandria around 2150C/6 to go to the aid of the transport City of Canterbury which had broken down while in convoy AN 30 from Port Said to Suda Bay.
The City of Canterbury was sighted at 0155C/7 in approximate position 32°00'N, 30°00'E. She was making repairs which were completed by 0215C/7. Course was then set to rejoin convoy AN 30.
During the forenoon of the 7th, HMAS Vampire encountered HMS Flamingo with the remainder of the Port Said section. They had been delayed due to defects in the Rawnsley.
HMAS Vampire then proceeded with the other two ships to make rendezvous with the Haifa section which on the 7th had been joined by the destroyers HMAS Stuart (Capt. H.M.L. Waller, DSO, RAN) and HMAS Waterhen (Lt.Cdr. J.H. Swain, RN) coming from Alexandria. The sloop HMS Auckland (Cdr. E.G. Hewitt, RN) also joined on the 7th. HMAS Stuart however developed defects and parted company later on the 7th.
The convoy was in formation around 1300C/7 and by 2000C/7 the Flamingo and the Rawnsley had caught up.
On the 8th the convoy was joined by the destroyer HMAS Voyager (Cdr. J.C. Morrow, DSO, RAN) which had departed Alexandria earlier that day to replace HMAS Stuart.
Around 1935C/8, the convoy was attacked from the air in position 33°52'N, 26°34'E. The first attack run failed due to effective AA fire from HMS Flamingo. The enemy then commenced a second attack run during which the Rawnsley was hit. HMS Grimsby and HMAS Waterhen remained behind to assist her. HMS Grimsby took her in tow with HMAS Waterhen screening. The remainder of the convoy meanwhile continued on to Suda Bay where it arrived around 0830C/9.
Meanwhile the Rawnsley was towed to an anchorage off the south of Crete. HMAS Waterhen then parted company and proceeded to Suda Bay where she arrived on 10 May. (82)
9 May 1941
Convoy AS 30.
This convoy departed Suda Bay on 9 May 1941.
It was made up of the following merchant vessels; Belray (British, 2888 GRT, built 1926), Crista (British, 2590 GRT, built 1938), Kephallinia (Greek, 1055 GRT, built 1893), Kirkland (British, 1361 GRT, built 1934), Lesbos (Greek, 1106 GRT, built 1893), Pass of Balmaha (British (tanker), 758 GRT, built 1933), Popi (Greek, 1594 GRT, built 1896), Rodi (British, 3220 GRT, built 1928, former Italian), Rokos (Greek, 6426 GRT, built 1918), Runa (British, 1575 GRT, built 1930), Samos (Greek, 921 GRT, built 1889), Scottish Prince (British, 4917 GRT, built 1938) and Zealand (British, 2726 GRT, built 1930).
On departure from Suda Bay the convoy was escorted by the destroyers HMAS Vampire (Cdr. J.A. Walsh, RAN), HMAS Voyager (Cdr. J.C. Morrow, DSO, RAN), sloops HMS Auckland (Cdr. E.G. Hewitt, RN), HMS Flamingo (Cdr. R.J.O. Otway-Ruthven, RN), minesweeper HMS Derby (Lt.Cdr. F.C.V. Brightman, RN), ASW trawler HMS Moonstone (Lt.Cdr. P.G. Britten, RNR). The Greek torpedo boat RHS Sfendoni was also with the convoy.
The passage was undisturbed. The convoy split into two sections (Port Said and Alexandria) around 2100C/11.
Both sections arrived at their destination on the 12th. The Port Said section was escorted by HMS Flamingo while the other escorts remained with the Alexandria section.
18 May 1941
Around 0130C/18, the infantery landing ship HMS Glengyle (A/Capt.(Retd.) C.H. Petrie, RN) departed Alexandria with troops for Crete which were to be landed near Tympaki on the south coast. She was escorted by the AA cruiser HMS Coventry (Capt. D. Gilmour, RN) and the destroyers HMAS Voyager (Cdr. J.C. Morrow, DSO, RAN) and HMAS Waterhen (Lt.Cdr. J.H. Swain, RN).
Around 2330C/18, they arrived off the disembarkation beach.
Around 0400C/19, disembarkation had been completion and course was set to return to Alexandria where they arrived around 0800C/20 but not before being attacked, unsuccesfully from the air, around 1020C/19. (83)
20 May 1941
Battle for Crete.
Timespan: 20 May to 1 June 1941.
Opening of the German airborn attack on Crete, 20 May 1941.
At 0915 hours, 20 May 1941, just three weeks after the British withdrawal from Greece, the German attack on Crete commenced. This took the form of intense bombing of Maleme airfield and Suda Bay areas, closely followed by the landing of troops by parachute, gliders and troop carrying aircraft. The enemy’s main objective appeared to be Maleme airfield but in the afternoon similar attacks developed at Heraklion and Retimo.
Fierce hand to hand fighting took place throughout the day on the Maleme airfield. At nightfall the situation appeared to be in hand, though about 1200 of the 3000 enemy who had landed by air appeared to be unaccounted for.
The naval situation at dawn, 20 May 1941.
The position of British (Allied) naval forces at sea at daylight on the 20th of May was as follows;
Force A 1 was about 100 nautical miles to the west of Crete. It was made up of the following warships; battleships HMS Warspite (Capt. D.B. Fisher, CBE, RN, flying the flag of Rear-Admiral H.B. Rawlings, OBE, RN), HMS Valiant (Capt. C.E. Morgan, DSO, RN), light cruiser HMS Ajax (Capt. E.D.B. McCarthy, RN), destroyers HMAS Napier (Capt. S.H.T. Arliss, RN), HMS Kimberley (Lt.Cdr. J.S.M. Richardson, DSO, RN), HMS Janus (Cdr. J.A.W. Tothill, RN), HMS Imperial (Lt.Cdr. C.A.de W. Kitcat, RN), HMS Isis (Cdr. C.S.B. Swinley, DSC, RN), HMS Hereward (Lt. W.J. Munn, RN), HMS Hero (Cdr. H.W. Biggs, DSO, RN), HMS Hotspur (Lt.Cdr. C.P.F. Brown, DSC, RN), HMS Griffin (Lt.Cdr. J. Lee-Barber, DSO, RN) and HMS Decoy (Cdr. E.G. McGregor, DSO, RN).
Force B was enroute from Alexandria to join force A 1 and consisted of the light cruisers HMS Gloucester (Capt. H.A. Rowley, RN also in command of this force as senior Captain) and HMS Fiji (Capt. P.B.R.W. William-Powlett, RN).
Force C was to the south of the Kaso Strait and was made up of the light cruisers HMS Naiad (Capt. M.H.A. Kelsey, DSC, RN, flying the flag of Rear-Admiral E.L.S. King, CB, MVO, RN), HMAS Perth (Capt. P.W. Bowyer-Smith, RN), destroyers HMS Kandahar (Cdr. W.G.A. Robson, DSO, RN), HMS Kingston (Lt.Cdr. P. Somerville, DSO, DSC, RN), HMS Juno (St.J.R.J. Tyrwhitt, RN) and HMS Nubian (Cdr. R.W. Ravenhill, RN).
Force D had reached the Antikithera Channel during the night and was now steering to join Force A 1. Force D was made up of the light cruisers HMS Orion (Capt. G.R.B. Back, RN, flying the flag of the Rear-Admiral (D) [D = Destroyers] I.G. Glennie, RN) and HMS Dido (Capt. H.W.U. McCall, RN).
The Commander-in-Chief’s intentions, 20-21 May 1941.
On learning that the attack on Crete had started, the Commander-in-Chief, Mediterranean at once ordered the forces at sea to move up towards the island but to keep out of sight of land. In the course of the forenoon he signalled his intentions for the night.
Force B was ordered to pass close to Cape Matapan at 0400/21 and then rendezvous with Force A 1 about 50 miles west of Crete at 0700/21.
Force D, augmented by HMS Ajax and the destroyers HMS Isis HMS Imperial, HMS ar and HMS Kimberley was to pass through the Antikithera Channel to sweep the area Cape Malea (36°26’N, 23°12’E), Hydra (37°21’N, 23°35’E), Phalconera (36°50’N, 23°54’E) and to be off Canea at 0700/21.
Force C was to pass through the Kaso Strait and sweep round Stampalia (75 miles north of Kaso) arriving off Heraklion at 0700/21.
Later in the day air reconnaissance reported caiques in the Aegean, and these two sweeps were cancelled as it was feared that they might miss south-bound convoys in the darkness. Instead forces C and D were ordered to establish patrols to the east and west of Longitude 25°E respectively. A new force of destroyers (Force E) made up of HMS Jervis (Capt. P.J. Mack, DSO, RN), HMS Ilex (Capt. H.St.L. Nicolson, DSO and Bar, RN) and HMAS Nizam (Lt.Cdr. M.J. Clark, RAN) was to bombard the Italian airfield at Scarpanto (50 miles to the east of Crete), withdrawing to the southward before daylight.
Night operations, 20-21 May 1941.
Scarpanto airfield was bombarded at 0245/21. The result could not be observed, but intelligence reports later indicated that two Do.17 aircraft were damaged. After examining Pegadia Bay (six miles to the northward of the airfield on the east coast of Scarpanto), and finding it empty, Force E retired to the southward.
The other operations ordered by the Commander-in-Chief were duly carried out but no convoys were sighted. Force C was attacked by torpedo-carrying aircraft with approaching the Kaso Strait at 2040/20. All torpedoes could be avoided. An hour later six MAS boats were encountered. Juno, Kandahar and Naiad engaged them and they retired after four of them had been damaged.
Naval situation at dawn, 21 May 1941.
At daylight, 21 May, Force A 1 (Warspite, Valiant, HMAS Napier, HMS Hereward, HMS Hero, HMS Hotspur, HMS Griffin and HMS Decoy) was 60 miles west of the Antikithera Channel, steering to the south-east to meet Force D (HMS Orion, HMS Ajax, HMS Dido, HMS Isis, HMS Imperial, HMS Janus and HMS Kimberley), which sighted nothing during the night and was now to the northward of Canea Bay and withdrawing towards the Antikithera Channel.
Force B (HMS Gloucester and HMS Fiji) was closing Force A 1 after an uneventful sweep between Cape Matapan and Cape Elophonesi (the south-west point of Crete).
The minelayer HMS Abdiel (Capt. E. Peydell-Bouverie, MVO, RN) was returning to Alexandria after laying mines off Cephalonia.
At the eastern end of Crete Force C (HMS Naiad, HMAS Perth, HMS Kandahar, HMS Kingston, HMS Juno and HMS Nubian) was joined at 0600 hours by the AA cruiser HMS Calcutta (Capt. D.M. Lees, DSO, RN). This force was now retiring from the Aegean through the Kaso Strait.
Force E (HMS Jervis, HMS Ilex and HMAS Nizam) was to the southward of Scarpanto and operating under the orders of Rear-Admiral King (Force C) as was the AA cruiser HMS Carlisle (Capt. T.C. Hampton, RN) which was on passage from Alexandria.
Operations during 21 May 1941. Loss of HMS Juno.
During 21 May, Force A 1, B and D remained to the south-west of Kithera. Every opportunity, between air attacks, being taken to refuel destroyers from the battleships. Force C cruiser to the southward of the Kaso Strait where HMS Carlisle joined him in the afternoon. Force E was recalled to Alexandria.
Throughout the day various forces were subjected to heavy air attacks. Force C in particular suffered attacks from daylight onwards, and after withdrawing through the Kaso Strait, was bombed continuously from 0950 to 1350 hours.
At 1249 hours, HMS Juno was hit and sank in two minutes. Six officers and ninety-one ratings were rescued by Kandahar, Kingston and Nubian. During the attacks one enemy aircraft was shot down and two, maybe more, were damaged.
To the west of Crete Force D was located at daylight and heavily bombed while withdrawing towards Force A 1. HMS Orion and HMS Ajax both suffered damage from near misses.
Force A 1 was attacked once during the forenoon and for two and a half hours during the afternoon. This later bombing was shared by Forces B and D which were then in company. Two enemy aircraft were probably shot down.
No seaborne landing has as yet taken place but during the afternoon air reconnaissance reported groups of small craft, escorted by destroyers, moving towards Crete from Milos (80 miles north of Retimo). Forces B, C and D were therefore ordered into the Aegean to prevent landings during the night. If there were no developments Forces C and D, in the eastern and western areas respectively, were to commence working northwards on a wide zigzag at 0530/22, to locate convoys.
Force A followed Force D well into the Antikithera Channel as AA support, turning to the westward at sunset to patrol for the night in the supporting area. As the two forces parted company a sharp attack by four Ju.88’s was made on Force D which shot down three of them.
Force D breaks up a troop convoy, night of 21/22 May 1941.
At 2330/21 when some 18 miles north of Canea, Rear-Admiral Glennie with Force D which now consisted of HMS Dido, HMS Orion, HMS Ajax, HMS Janus, HMS Kimberley, HMS Hasty (Lt.Cdr. L.R.K. Tyrwhitt, DSC, RN) and HMS Hereward, encountered an enemy convoy composed mainly of caiques escorted by a torpedo boat. The caiques which were crowded with German troops were engaged for two and a half hours. In all, at least a dozen caiques, two or three steamers and a steam yacht were sunk or left burning. It was estimated that about 4000 German troops were accounted for [an over-estimate, the real number was about 800 of which some were rescued later]. In addition the Italian torpedo-boat Lupo, after firing torpedoes at the cruisers, was damaged by a broadside from HMS Ajax.
After taking a further sweep to the east and north, Rear-Admiral Glennie decided that, in view of serious shortage of AA ammunition (AA ammunition remaining; Orion 38%, Ajax 42%, Dido 30%) and the scale of air attack to be anticipated the next day, he was not justified in keeping his force in the Aegean to carry out the intended sweep to the northward at daylight. He accordingly turned to the westward at 0330/22. His ships which had become considerably scattered during the action were given a rendezvous some 30 miles west of Crete. This decision, together with the result of his attack on the convoy, he reported to the Commander-in-Chief who ordered Force D to return to Alexandria with all dispatch.
Meanwhile Force B (Gloucester, Fiji, HMS Greyhound (Cdr. W.A. Marshall-A’Deane, DSO, DSC, RN) and Griffin) had been ordered by the Commander-in-Chief to leave their patrol off Cape Matapan and to proceed with dispatch to Heraklion where part of the town and harbour were reported to be in enemy hands. These orders reached Capt. Rowley in the Gloucester too late to be carried out, but the force entered the Aegean and at daylight was about 25 miles north of Canea. Nothing was sighted, and they retired to the westward towards Force A 1. Force B was attacked almost continuously by dive bombers for an hour and a half from 0630/22 onwards but escaped with slight damage only to each cruiser. They joined Force A 1 at 0830/22.
Naval situation at dawn, 22 May 1941.
At daylight on 22 May 1941, the position of the naval forces at sea was as follows. Rear-Admiral Rawlings with Force A 1 (HMS Warspite, HMS Valiant. HMAS Napier, HMS Imperial, HMS Isis, HMS Hero, HMS Hotspur and HMS Decoy) was about 45 miles south-west of Kithera, steering to the north-westward and shortly to be joined by the forces D and B from the Aegean.
The 5th Destroyer Flottilla had meanwhile (21 May) sailed from Malta the previous evening and was on passage to join Rear-Admiral Rawlings around 1000/22. This Flotilla was made up of five destroyers; HMS Kelly (Capt. L.F.A.V.N. Mountbatten, DSO, RN), HMS Kashmir (Cdr. H.A. King, RN), HMS Kelvin (Cdr. J.H. Alliston, RN), HMS Kipling (Cdr. A. St.Clair-Ford, RN) and HMS Jackal (Lt.Cdr. R.McC.P. Jonas, DSC, RN).
HMAS Stuart (Capt. H.M.L. Waller, DSO, RAN), HMAS Vendetta (Lt.Cdr. R. Rhoades, RAN) and HMAS Voyager (Cdr. J.C. Morrow, DSO, RAN) from the 10th Destroyer Flotilla as well as HMS Jervis, HMS Ilex and HMAS Nizam from the 14th Destroyer Flotilla were on passage from Alexandria to join Rear-Admiral Rawlings (Force A 1) and Rear-Admiral King (Force C) respectively.
Force C (HMS Naiad, HMAS Perth, HMS Calcutta, HMS Carlisle, HMS Kandahar, HMS Kingston and HMS Nubian) was off Heraklion about to sweep to the north-westward in search of enemy troop convoys.
The 22nd of May was to prove an expensive day for the British naval forces costing them two cruisers and a destroyer sunk, and leading directly to the situation which occasioned the loss of a further two destroyers the next morning. Also two battleships and two cruisers were damaged.
On the other hand the enemy was prevented from making a seaborne landing, and that so effectively as to deter him from any further attempts to do so, until the fall of Crete had been decided by his airborne troops.
Force C’s encounter with an enemy troop convoy, AM 22nd May.
Rear-Admiral King’s Force C had spent the night of 21/22 May patrolling of Heraklion. Nothing was sighted and at dawn the force formed up to carry out the sweep to the northward as ordered by the Commander-in-Chief. Air attacks on Force C commenced at 0700/22 and were continued without intermission. At 0830 hours a single caique carrying German troops was sighted. This caique was sunk by HMAS Perth, and as she was being heavily attacks by enemy aircraft, HMS Naiad turned back to support her. A small merchant vessel, reported by HMS Calcutta at 0909 hours was dealt with by the destroyers.
At 1000/22 Force C was 25 miles south of Milo (90 miles north of Retimo), HMAS Perth had rejoined the rest of the force but HMS Naiad was being heavily attacked and was still some way astern. Ten minutes later an enemy torpedo-boat (the Italian Saggitario) with four or five small sailing vessels was sighted to the northward. The destroyers gave chase, while the Perth and Naiad engaged the torpedo boat, causing her to retire behind smoke. HMS Kingston then engaged another destroyer, who was laying a smoke screen, at 7000 yards range, claiming two hits. She also reported a large number of caiques behind the smoke.
Force C was running short of AA ammunition. Air attacks were incessant and the force had to be kept together for mutual support. Its speed was limited as HMS Carlisle was unable to do more than 21 knots due to a bomb hit by enemy aircraft. During the same attack HMAS Perth had been near-missed but her speed was not effected.
For these reasons, Rear-Admiral King considered that he would jeopadise his whole force if he proceeded any further to the northward. He therefore decided to withdraw to the westward and ordered his destroyers to abandon the chase. A signal from the Commander-in-Chief (timed 0941 hour), which showed that this convoy was of considerable size, was not seen by him until 1100 hours. The brief action did, however, cause the enemy to turn back, and the troops, if they ever reached Crete at all, were not in time to influence the battle.
During its withdrawal to the westward, Force C, was continuously bombed for three and a half hours. HMS Naiad due to avoiding action had been unable to overtake the remainder of the force had two 5.25” turrets out of action. Several compartments were flooded by near misses, and at 1125 hours, her speed being reduced to 16-19 knots, the remainder of the force was ordered back to her support. Over a period of two hours, 181 bombs had been counted as being aimed at HMS Naiad.
HMS Carlisle was hit, and although not seriously damaged her Commanding Officer was killed. Torpedo bombers attacked the force at 1258 and 1315 hours but all torpedoes were avoided. At 1321 hours Force C sighted Force A 1 coming up the Kithera Channel from the westward.
The junction of Force A 1 with Force C, 22 May 1941.
On learning that Rear-Admiral King would be withdrawing through the Kithera Channel, Rear-Admiral Rawlings had decided that he would meet him in that neighbourhood. Accordingly, after being joined by Forces B and D he spent the forenoon patrolling between 20 and 30 miles west of the channel. The ammunition situation was causing anxiety, and rigid economy was ordered.
At 1225 hours, Rear-Admiral Rawlings heard from Rear-Admiral King that HMS Naiad was badly damaged and in need of support. He immediately decided to enter the Aegean and steered for the Kithera Channel at 23 knots. AA shell bursts from Force C were sighted at 1312 hours and a few minutes afterwards a large caique was seen between Pori and Antikithera Islands, to the south of the channel. HMS Greyhound was ordered to sink it.
At 1332 hours, just as forces A 1/B/D and C were meeting HMS Warspite was attacked by three Me 109’s equipped with bombs. A bomb hit and wrecked the starboard 4” and 6” batteries and damaged number three boiler room fan intakes, thereby reducing the ship’s speed. Both forces then withdrew to the south-westward, air attacks continuing intermittently for most of the afternoon.
The loss of HMS Greyhound, HMS Gloucester, HMS Fiji, 22 May 1941.
HMS Greyhound meanwhile, after sinking the caique, was returning to her place in Force A 1’s screen when at 1351 hours she was struck by two bombs and sank stern first 15 minutes later. HMS Kandahar and HMS Kingston were detached from Force C to pick up survivors and shortly after 1400 hours, Rear-Admiral King (who was the senior officer of all the forces present) ordered HMS Gloucester and HMS Fiji to give them AA support and to stand by the sinking Greyhound. These rescuing ships, and the men swimming in the water were subjected to almost continuous bombing and machine gun attacks. HMS Kingston was damaged by three near misses.
At 1413 hours, Rear-Admiral King asked Rear-Admiral Rawlings for close support as Force C by that time had practically no AA ammunition left. Force A 1 closed at the Warspite’s best speed (18 knots), and Rear-Admiral Rawlings, who was feeling uneasy about the orders given to Gloucester and Fiji informed Rear-Admiral King about the depleted state of their AA ammunition stocks of which the latter was not aware. At 1457 hours, Rear-Admiral King therefore ordered the rescuing ships to withdraw at their discretion, leaving boats and rafts if air attack prevented the rescue of survivors from Greyhound.
At 1530 hours, HMS Gloucester and HMS Fiji were coming up astern of HMS Warspite at high speed, engaging enemy aircraft. At 1550 hours, HMS Gloucester was hit by several bombs and came to a full stop. She was badly on fire and her upper deck was a shambles. In view of the intensity of the air attacks the Captain of HMS Fiji reluctantly decided that he could offer no assistance to her. All available boats and floats were dropped and the Fiji proceeded to the southward with Kandahar and Kingston still being hotly attacked by enemy aircraft.
At 1710 hours, HMS Fiji reported that she was in position 24 miles, 305°, Cape Elophonesi (the south-west point of Crete), steering 175° at 27 knots, a position 30 miles due east of Forces A 1 and C which were steering 215°.
At 1845 hours, after having survived about 20 bombing attacks by aircraft formations during the last four hours she fell victim to a single Me. 109. The machine flew out of the clouds in a shallow dive and dropped its bomb very close to the port side amidships. The ship took up a heavy list, but was able to steam at 17 knots until half an hour later when another single machine dropped three bombs which hit above ‘A’ boiler room. The list increased and at 2015 hours she rolled right over and sank in position 34°45’N, 23°12’E. She had expended all her 4” ammunition except for six star shell.
HMS Kandahar and HMS Kingston dropped boats and floats and then withdrew to the southward to avoid almost certain damage from air attacks if they had stayed in the area. They returned after dark and were able to rescue 523 officers and men. It was during this rescue work that Cdr. W.R. Marshall-A’Deane the Commanding Officer of HMS Greyhound, who had been picked up by HMS Kandahar earlier in the day when his own ship was sunk, jumped overboard to help a men in distress. He was lost out of sight in the darkness and was never seen again.
HMS Kandahar and HMS Kingston had been subjected to 22 air attacks between 1445 and 1920 hours and were now running short of fuel. At 2245 hours they left the scene of the loss of HMS Fiji and shaped course to rendezvous with Rear-Admiral King’s forces to the southward of Crete.
Night operations, 22-23 May 1941
Meanwhile, Rear-Admiral King, with Forces C and A 1 had been steering to the south-westward. Spasmodic air attacks continued till dusk. At 1645 hours HMS Valiant was hit by two medium bombs but no serious damage was done to her. Course was altered to the southward at 1800 hours and to the eastward at 2100 hours
Captain Lord Louis Mountbatten with his five destroyers; HMS Kelly, HMS Kashmir, HMS Kelvin, HMS Kipling and HMS Jackal had been delayed on his passage from Malta by a promising A/S hunt and only effected his junction with Force A 1 at 1600/22. At 2030 hours Kelly, Kashmir and Kipling were detached to search for survivors from Fiji and half an hour later Kelvin and Jackal were also detached to try to search for survivors from Gloucester. Subsequently these searches for survivors were cancelled and the destroyers were ordered to patrol inside Kisamo and Canea Bays.
On arrival at the Antikithera Channel HMS Kipling developed a steering defect and was detached to join Force A 1. Later on as the defect was remedied, her Commanding Officer decided to remain to the south-west of Crete where he anticipated he was able to make rendezvous with the other destroyer on their return. To this fortunate decision Capt. D.5 and over 250 of his officers and men in all probability were to owe their lives.
Continuing into Canea Bay Kelly and Kashmir fell in with a troop carrying caique, which they damaged badly with gunfire. They then carried out a short bombardment at Maleme and, whilst withdrawing, they engaged and set on fire another caique.
The Naval Officer in Command Suda had meanwhile reported some lights in Canea Bay. These lights the Kelvin and Jackal, who were operating in Kissamo Bay, were ordered to investigate, and finding them to be shore lights, proceeded independently for Alexandria informing the Commander-in-Chief of this intention at 0300/23.
Towards the eastern end of Crete, Force E, consisting of HMS Jervis, HMAS Nizam, HMS Ilex and HMS Havock (Lt. G.R.G. Watkins, RN) maintained a patrol off Heraklion without incident. They set course to return to Alexandria in the morning. On the way there were bombed for five hours, Ilex and Havock being damaged by near misses.
During the night HMS Decoy and HMS Hero embarked the Greek King, members of the government and other prominent Greeks at Agriarumeli on the south coast of Crete after which the two destroyers sailed to join Rear-Admiral King forces to the southward.
In the meantime Forces C and A 1 were some 75 miles to the southward of Crete steering 110°. At 0100/23 ‘Force C’ parted company and proceeded for Alexandria. Some hours previously Rear-Admiral Rawlings had signalled to the Commander-in-Chief that a rallying point further to the east would be better than one to the southwest of Kithera. If this was approved it was suggested that the 5th Destroyer Flotilla should make it’s withdrawal from Canea Bay to the eastward and that the Commander-in-Chief should issue orders accordingly, to all forces. Force A 1 therefore continued steering 110° until 0400/23, when, no reply having been received from the Commander-in-Chief, course was altered to the south-westward. Rear-Admiral Rawlings was about to signal a rendezvous to the southwest of Cape Elophonesi when a message was received ordering the withdrawal of all force to Alexandria. He accordingly set course for Alexandria at 15 knots, informing scattered units of his position, course and speed at 0530/23.
The Commander-in-Chief orders withdrawal to Alexandria, 23 May 1941.
At 2230/22, the Commander-in-Chief had received a ‘Most Immediate’ message from Rear-Admiral Rawlings reporting the loss of HMS Gloucester and HMS Fiji, and giving details of the ammunition situation. Owning to an error at Alexandria this signal made it appear that the battleships of Force A 1 had no pompon ammunition left. Therefore at 0408/23 orders were given to all forces to retire to the eastward.
In actual fact, the battleships had plenty of ammunition. Had the Commander-in-Chief been aware of this, they would not have been ordered to Alexandria, and would have been available as a support and rallying point for the 5th Destroyer Flotilla in the morning of the 23rd.
Naval situation at dawn, 23 May 1941.
Dawn on 23 May 1941 found the naval forces in the waters around Crete considerably scattered. To the eastward Capt. Mack with Force E was north of Crete, returning to Alexandria through the Kaso Strait.
Rear-Admiral Glennie in HMS Dido was just arriving at Alexandria with HMS Orion and HMS Ajax some distance astern of him.
The transport HMS Glenroy (Capt.(Retd.) J.F. Paget, RN), with reinforcements on board and escorted by HMS Coventry (A/Capt. W.P. Carne, RN), HMS Auckland (A/Capt. E.G. Hewitt, RN) and HMS Flamingo (Cdr. R.J.O. Otway-Ruthven, RN) had left Alexandria the previous afternoon and was 130 miles out making for Tymbaki.on the south coast of Crete.
Forces A 1 and C were about 25 miles apart to the south of Crete and were returning to Alexandria. The destroyers HMS Kandahar and HMS Kingston, with survivors from HMS Fiji on board were about to join Force C. The destroyers HMS Decoy and HMS Hero, with the King of Greece on board, were to the northward of Force A 1 which they joined at 0745/23.
Further to the west, a bit to the south of Gavdos Island, was Capt. Waller in HMAS Stuart, HMAS Vendetta and HMAS Voyager, who had been ordered around 2330C/22, by Rear-Admiral Rawlings to search for survivors from HMS Fiji. The Australian destroyers searched until around 0600C/23 and joined Force A 1 around 1000C/23. Also in that area were the destroyers HMS Jaguar (Lt.Cdr. J.F.W. Hine, RN) and HMS Defender (Lt.Cdr. G.L. Farnfield, RN) which had left Alexandria the day before with munitions for the army.
HMS Kelvin and HMS Jackal were to the south-west of Crete and returning to Alexandria where they arrived on May, 24th. HMS Kipling was also in that vicinity and was hoping to join HMS Kelly and HMS Kashmir, who had cleared Canea Bay and were retiring close to the west coast of Crete.
Loss off HMS Kelly and HMS Kashmir, 23 May 1941.
Captain Lord Louis Mountbatten had been withdrawing at full speed since dawn. At 0755 hours, after surviving two air attacks without suffering damage, he was about 13 nautical miles to the southward of Gavdos Island when his ships were attacked by a force of 24 Ju.87 dive bombers. The Kashmir was hit and sunk in 2 minutes. A large bomb struck the Kelly while she was doing 30 knots under full starboard rudder. She turned turtle to port with considerable way on, and after floating upside down for about half an hour, finally sank. In accordance with earlier practice the dive bombers then machine-gunned the survivors in the water, killing and wounding several.
The attack was witnessed by HMS Kipling, who was some 7 to 8 miles to the southward. She immediately closed and succeeded in picking up 281 officers and men from the water including the Commanding Officers of both destroyers. She left the scene of the sinking for Alexandria at 1100/23. She was considerably hampered in this rescue work by six high level bombing attacks and it was subsequently estimated that between 0820 and 1300 hours no less then 40 aircraft attacked her, dropping 83 bombs, though she emerged from the ordeal unscathed.
Return of the British naval forces to Alexandria, 23 May 1941.
In the meantime Force C had been joined by HMS Kandahar and HMS Kingston with survivors from HMS Fiji on board at 0630/23. Both destroyers were very low on fuel. Force A 1 was only 25 miles to the north-west. Force C then closed Force A 1 and both destroyers were able to fuel from the battleships. Shortly after 0800 hours, a signal was received from HMS Kipling reporting the loss of HMS Kelly and HMS Kashmir. Rear-Admiral King reluctantly decided that he could sent no help from Forces A 1 and C.
HMS Decoy and HMS Hero, with the Greek Royal party on board, had joined Force A 1 about the same time, and in course of the forenoon all the scattered destroyer joined up except for HMS Kipling. Later in the day HMS Jaguar and HMS Defender were detached to land ammunition at Suda Bay. The remained of the force proceeded to Alexandria where they arrived in the early hours of the 24th.
The fighting in Crete, 21 -24 May 1941.
On shore, meanwhile, the situation deteriorated. During the 21st although Maleme airfield remained no-man’s land under fire from Italian guns manned by New Zealand gunners, enemy troop carriers landed there regardless of losses. Parachute reinforcements also arrived, and the Germans concentrated between Aliakanou and Canea, and immediately west of Meleme. The savage air bombardment of the British positions continued.
Early on the 22nd, a British counter attack reached Maleme airfield, but heavy dive bombing, and machine gun fire from air and ground rendered further progress impossible. Fighting continued throughout the day, but enemy troop carriers with reinforcements were arriving at a rate of more than 20 each hour, and the withdrawal of British troops to a new line further east was commenced.
The steady flow of German reinforcements, and very heavy air attacks on the British troops continued throughout the 23rd. On this day, the five Motor Torpedo Boats of the 10th M.T.B. Flotilla in Suda Bay (MTB 67, MTB 213, MTB 214, MTB 216 and MTB 217) were all sunk by air attacks. During their operations off the Cretan coast and in harbour they accounted for two aircraft shot down for sure and another two probably shot down.
By the 24th the AA defences of Suda had been seriously reduced and losses to small craft in port were heavy. Severe bombing of Canea compelled the withdrawal of the Army Headquarters to the Naval Headquarters at Suda.
At Heraklion, in the meantime, the Germans had been unable to make much headway. Successful counter attacks were carried out by British troops, in conjunction with Greek and Cretan forces on the 21st, and the situation remained will in hand the next day. 20 to 30 German troop carrying aircraft were destroyed by AA fire. On the 23rd an ultimatum from the Germans calling for the surrender of Heraklion was rejected by the British and Greek commanders, though by this time the Greeks were running short of ammunition.
Reinforcements and supplies to the Army in Crete.
Throughout the Battle of Crete, frequent attempts were made to throw reinforcements and supplies into the island, with varying success.
All disembarkation had to planned to take place at night, owning to the German command of the air. Attempts were made to use HMS Glenroy and merchant vessels for this purpose, but it was found in practice that only warships were able to get through.
On the night of the 23rd – 24th of May, HMS Jaguar and HMS Defender landed stores and ammunition at Suda between midnight and 0200 hours. They returned to Alexandria with officers and men not required in Crete as well as some wounded.
HMS Glenroy embarked 900 men from the Queens Royal Regiment, H.Q. staff of the 16th Infantry Brigade and 18 vehicles at Alexandria. She then sailed for Tymbaki on the afternoon of the 22nd escorted by HMS Coventry, HMS Auckland and HMS Flamingo. These ships were recalled at 1127/23 due to the heavy air attacks sustained by the Fleet.
The following day, HMS Isis, HMS Hero and HMAS Nizam sailed from Alexandria with the Headquarters and two battalions of special service troops, known as ‘Layforce’. These were to be landed on the south-west coast of Crete at Selinos Kastelli. The weather conditions however did not permitted a landing and it had to be cancelled.
During the night of 24 – 25 May, the fast minelayer HMS Abdiel landed about 200 personnel of ‘Layforce’ and about 80 tons of stores at Suda. She returned with about 50 wounded and 4 Greek Cabinet Ministers. A dive bombing attack by 4 Ju.88’s at 1300/25 was successfully avoided.
On arrival at Alexandria in the evening of the 25th, HMS Abdiel embarked Brigadier Laycock with 400 men and 100 tons of stores. She left again early on the 26th accompanied by HMS Hero and HMAS Nizam. These ships landed about 750 troops and stores at Suda during the night of 26 – 27 May. These were the last reinforcements landed in Crete.
About 930 men no longer required there were then embarked and taken back to Alexandria in HMS Abdiel. Air attacks commenced at daylight, just north-west of the Kaso Strait, and continued intermittently till 1130/27. No damage was sustained except by HMS Hero whose speed was reduced to 28 knots by a near miss at 0700 hours.
Meanwhile the Glenroy with a battalion of the Queen’s Regiment on board, had sailed from Alexandria for Tymbaki during the evening of the 25th. She was being escorted by HMS Coventry, HMAS Stuart and HMS Jaguar. The force was subjected to bombing attacks by enemy reconnaissance aircraft during the forenoon. At 1820/26 there were heavy dive bombing attacks. Glenroy was slightly damaged sustained some casualties owing to near misses and machine gun attacks. Three of her landing craft were holed and a large dump of cased petrol on the upper deck caught fire, which necessitated steering down wind until the fire was put out. With 800 troops on board and with a large cargo of petrol it was a nasty situation. By 1950 hours the fire was under control and course was resumed to the northward. A final attack by torpedo bombers at 2050 hours caused no further damage. The torpedoes were being successfully evaded. The Glenroy was now about three hours behind schedule and wither landing craft capacity down by about a third and the weather forecast in mind it was decided to cancel the operation and the force was ordered to return to Alexandria.
One other attempt was made to transport some supplies to Crete. Convoy AN 31 of three Greek merchant ships escorted by HMS Auckland left Alexandria at 0500/26. One of the merchant vessels soon had to turn back due to engine trouble. The convoy escort was later reinforced by HMS Calcutta and HMS Defender. Early the next forenoon it was realised that under the existing conditions they would not have a chance of reaching the island and they too were recalled. Shortly after turning back the convoy was attacked by about 9 Ju.88’s but no damage was sustained. One of the attacking aircraft was seen to be hit by AA fire.
Naval situation at dawn, 24 May 1941.
At daylight on the 24th, the only naval forces at sea were HMS Jaguar and HMS Defender, which were about to pass through the Kaso Strait on passage from Suda Bay to Alexandria and HMS Abdiel which had left Alexandria during the night and was on passage to Suda Bay with more stores for the Army.
HMS Kipling with the survivors from HMS Kelly and HMS Kashmir on board was about 70 miles from Alexandria, practically out of fuel. HMS Protector (Cdr. R.J. Gardner, RN) had been sent out to meet her.
It was on this day that the Commander-in-Chief, well aware under which strain his ships were working, signalled to his Fleet. ‘The Army is just holding its own against constant reinforcement of airborne enemy troops. We must NOT let them down. At whatever cost to ourselves, we must land reinforcements for them and keep the enemy from using the sea. There are indications that the enemy resources are stretched to the limit. We can and must outlast them. STICK IT OUT.’
The Commander-in-Chief’s appreciation, 24 May 1941.
Four days had now elapsed since the opening of the attack on Crete and in reply to a request from the Chiefs-of-Staff for an appreciation, the Commander-in-Chief, Mediterranean, informed them that the scale of air attack now made it no longer possible for the Navy to operate in the Aegean or vicinity of Crete by day. The Navy could not guarantee to prevent seaborne landings without suffering losses which, added to those already sustained, would very seriously prejudice our command of the Eastern Mediterranean.
The Chiefs-of-Staff replied that the Fleet and Royal Air Force were to accept whatever risk was entailed in preventing any considerable enemy reinforcement from reaching Crete. If enemy convoys were reported north of Crete, the Fleet would have to operate in that area by day, although considerable losses might be expected. Experience would show for how long this situation could be maintained.
To this the Commander-in-Chief replied on the 26th that the determining factor in operating in the Aegean was not the fear of sustaining losses but the need to avoid crippling the Fleet. He added that the enemy, so far, had apparently not succeeded in landing any appreciable reinforcements by sea.
As how long the situation could be maintained, he pointed out that in three days two cruisers and four destroyers had been sunk, one battleship had been put out of action for several months, and two cruisers and four destroyers had been considerably damaged. He also referred to the strain both to personnel and machinery in the light craft, who had been operating to the limits of their endurance since February.
Captain McCarthy’s Force , 24-26 May 1941.
There had been indications that a landing might take place in the east of Crete at Sitia on the night of 24-25 May. To deal with this threat a Force consisting of the cruisers HMS Ajax (Senior Officer), HMS Dido, destroyers HMS Hotspur, HMS Imperial and HMS Kimberley left Alexandria at 0800/24 and passing through the Kaso Strait swept the north coast of Crete during the night. Nothing was sighted and the Force withdrew to the southward of Kaso before daylight. Here they remained during the 25th, repeating the sweep north of Crete the next night. Again nothing was sighted.
F.A.A. attack on Scarpanto airfield, 26 May 1941 (Operation MAQ 3).
It was known that Scarpanto airfield was being extensively used by the enemy in his operations against Crete, and it was therefore decided to attack it with Fleet Air Arm aircraft from HMS Formidable (Capt. A.W.la T. Bisset, RN, flying the flag of A/Rear-Admiral D.W. Boyd, CBE, DSC, RN), who had now built up her fighter strength to 12 Fulmars.
Vice-Admiral Pridham-Whippel left Alexandria on the 25th with Force A which was made up of the battleships HMS Queen Elizabeth (Capt. C.B. Barry, DSO, RN, flying the flag of Vice-Admiral H.D. Pridham-Whippell, CB, CVO, RN), HMS Barham (Capt. G.C. Cooke, RN), aircraft carrier HMS Formidable and the destroyers HMS Jervis, HMS Janus, HMS Kandahar, HMS Nubian, HMS Hasty, HMS Hereward, HMAS Voyager and HMAS Vendetta.
At 0330/26 this Force was about 100 miles to the south-south-west of Scarpanto. Four Albacores and later five Fulmars were flown off from HMS Formidable to attack the airfield. The Albacores achieved complete surprise. They destroyed two enemy aircraft and damaged several others while the Fulmars damaged a number of Cr.42’s and Ju.87’s. All aircraft had returned to Formidable by 0700 hours. By now the Force headed by HMS Ajax had also joined coming from the Kaso Strait. ‘Force A’ now set course to the southward.
Operations of ‘Force A’, HMS Formidable and HMS Nubian damaged, 26 May 1941.
During the forenoon of the 26th May, enemy aircraft were continually being detected. The eight remaining serviceable aircraft, four of which were fighters, made 24 flights, during which there were 20 combats. Two enemy aircraft were shot down and two more were probably destroyed. One Fulmar was lost.
At 1320 hours, when about 150 miles south of the Kaso Strait ‘Force A’ was attacked by about 20 dive bombers which approached from the African coast. HMS Formidable was hit twice, her starboard side was blown out between numbers 17 and 24 bulkheads and ‘X’ turret and cable and accelerator gear were put out of action.
During the same attack, HMS Nubian, was hit right aft and had her stern blown off. She was still able to steam 20 knots. She was then detached to Alexandria with HMS Jackal where she arrived under her own steam that night.
Force A than shaped course to the eastward and after dark HMS Formidable escorted by HMS Hereward, HMAS Vendetta and HMAS Voyager parted company and set course for Alexandria where they arrived around 0715C/27. The remainder of the Force operated to the north-eastward of Alexandria during the night.
Naval situation at dawn, 27 May 1941.
At daylight, 27 May 1941, ‘Force A’, now consisted of the battleships HMS Queen Elizabeth, HMS Barham and escorted by the destroyers HMS Jervis, HMS Janus, HMS Kandahar, HMS Kelvin, HMAS Napier and HMS Hasty were about 250 nautical miles south-east of Kaso, steering to the north-westward. In the Kaso Strait HMS Abdiel, HMS Hero and HMAS Nizam were returning from Suda Bay.
Some 90 nautical miles to the north-west of Force A, HMS Glenroy and her escorting destroyers; HMAS Stuart and HMS Jaguar were steering for Alexandria after their abortive attempt to land troops and supplies at Tymbaki. About half way between these two forces was convoy AN 31 heading for Crete. This convoy was recalled soon afterwards.
Operations of ‘Force A’, HMS Barham damaged, 27 May 1941.
Vice-Admiral Pridham-Whippel with Force A had been steering since daylight for the Kaso Strait to cover the withdrawal of HMS Abdiel, HMS Hero and HMAS Nizam. At 0859 hours, 15 Ju.88’s and He.111’s attacked from the direction of the sun. HMS Barham was hit on ‘Y’ turret and two of her bulges were flooded by near misses. A fire was started, which necessitated steering down wind to the south until it was extinguished two hours later. Two enemy aircraft were shot down and one was seen to be damaged.
At 1230 hours, on receipt of instructions from the Commander-in-Chief, Force A shaped course for Alexandria, arriving there at 1900 hours that evening.
The collapse in the Suda-Maleme area, 26 May 1941.
While these operation had been in progress at sea, the battle on shore had continued with unabated bitterness. Sunday, May 25th, the sixth day of the enemy attack was critical for the Australian and New Zealand troops in the Maleme area. After continuous bombing of their positions all day, a strong enemy attack took Galatos. British light tanks and New Zealand troops retook it at the point of the bayonet. This was described by General Fryberg as ‘one of the great efforts in the defence of Crete’. The position could not be held, however, and with Maleme no longer under fire, enemy troop carriers poured in reinforcements. Late that night the new line formed in the Maleme-Canea sector was broken by the Germans, after several attacks had been repulsed.
The next day (May 26th) further attacks compelled the tired New Zealand and Australian troops to withdraw still further towards Suda. They had fought for six days without respite; more then 20 fiece bayonet counter attacks had been carried out, and throughout the whole period they had been subjected to air attacks on unprecedented scale. That night the line collapsed and the retreat commenced.
So suddenly did the collapse come at the last, that there had been no time to organise the retirement and though the infantry which withdrew from the front line did so in good order, the movements of the rest of the force were uncontrolled, and much congestion on the route resulted.
The withdrawal, which was directed towards Sphakia continued during the 27th. By this time a rearguard had been organised which was able to cover the retirement of the bulk of the remainder to Sphakia.
Meanwhile in the Heraklion sector the British troops were holding out. On the 26th, the Argyll and Sutherland Highlanders, and two of the ‘I’ tanks landed at Tymbaki on the 19th, succeeded in breaking through from the south and joining them. With the Suda-Maleme area in the hands of the enemy, however, the position of the troops at Heraklion was clearly untenable and it appeared to be only a matter of time before the enemy would launch a major attack on them.
The work of the Royal Air Force.
Throughout the battle, the Royal Air Force, working from Egypt, did all that was possible to afford relief to our troop in Crete; but the distance was too great to maintain a scale of attack on the Germans that could affect the issue.
Enemy positions and aircraft were attacked at Maleme by Blenheims and Marylands (of the S.A.A.F.) at intervals on the 23rd, 25th, 26th and 27th of May. In these raids at least 40 enemy aircraft of various types were destroyed and many others damaged. Nine Ju.52’s carrying troops were destroyed by Hurricanes on the 23rd and 26th. Wellingtons bombed Maleme on the nights of the 23rd, 25th, 26th, 27th and 29th. They also attacked Scarpanto on the nights of the 25th, 27th, 28th and 29th and Heraklion on the 30th at 31st of May and 1st of June.
All these attacks caused fires and explosions but the extent of the damage is not known. During the battle the R.A.F. lost 38 aircraft, 33 of them in the air.
The decision to evacuate Crete, 27 May 1941.
Messages received from the G.O.C. Troops in Crete and the N.O.I.C. Suda Bay made it clear that our line defending Suda had collapsed with great suddenness.
In a message times 0824/27, General Wavell informed the Prime Minister that he feared we must recognise that Crete was no longer tenable, and that, so far as possible, the troops must be withdrawn. In reply to this message, the Chiefs-of-Staff ordered Crete to be evacuated forthwith.
Evacuation from Sphakia, 1st night, 28-29 May 1941.
At 0600/28, less then 24 hours after the decision to evacuate Crete had been taken, Force B, consisting of the light cruisers HMS Orion, HMS Ajax, HMS Dido and the destroyers HMS Decoy, HMS Hereward, HMS Hotspur, HMS Imperial, HMS Jackal and HMS Kimberley departed Alexandria to evacuate the Heraklion garrison. Rear-Admiral Rawlings, flying his flag in Orion was given charge of this operation.
Two hours later, Force C, under Capt. Arliss, left Alexandria for Sphakia. It was made up of HMAS Napier, HMAS Nizam, HMS Kandahar and HMS Kelvin. Force C had an uneventful passage and commenced embarkation at 0030/29. The operation was completed by 0300/29 by which time the four destroyers had taken on board nearly 700 troops and had landed badly needed rations for 15000.
On the return passage, the force was attacked by four Ju.88’s at about 0900 hours, HMAS Nizam suffered minor damage from a near miss. Fighter protection had been arranged from 0545 hours and at 0940 hours a crashed enemy aircraft was sighted, probably shot down by our fighters. Force C arrived at Alexandria at 1700/29 without much enemy interference.
Evacuation of the Heraklion garrison, 1st night, 28-29 May 1941.
Rear-Admiral Rawlings, meanwhile, had been having a much more different experience. At 1700/28 Force B was about 90 miles from Scarpanto and from then until dark was subjected to a series of air attacks. High level, dive bombing and torpedo.
At 1920 hours, HMS Imperial was near missed but appeared to be undamaged and 50 minutes later a near miss caused slight damage and some casualties in HMS Ajax which was then detached to Alexandria.
On arrival of the force at Heraklion at 2330/28 the destroyers immediately entered harbour, embarked troops from the jetties and ferried them to the cruisers outside. By 0245/29 the ferrying was complete and a quarter of an hour later HMS Kimberley and HMS Imperial had embarked the rearguard.
At 032 hours the force proceeded to sea at 29 knots with the whole of the Heraklion garrison on board, some 4000 troops. All went well until 0345 hours when HMS Imperial’s steering gear failed and she nearly collided with HMS Orion and HMS Dido. Her rudder was jammed and repairs could not be made. Delaying the force would mean more air attacks and it was vital to be as far away as possible from the enemy airfields before daylight. It was therefore decided to take off the troops from HMS Imperial and then sink her. At 0445 hours this was successfully done by HMS Hotspur which had now 900 troops on board. By now Force B was about 1,5 hours late and it was only at sunrise that they arrived off the Kaso Strait. The German air force was already waiting.
Air attacks commenced at 0600 hours and continued at intervals to 1500 hours when the force was within 100 miles from Alexandria.
At 0625 hours, HMS Hereward was hit by a bomb which forced her to reduce speed and fall away from her position in the screen. The force was then in the middle of the Kaso Strait and once more Rear-Admiral Rawlings had to decide whether to endanger his whole force and the troops on board for the sake of a single ship, or to leave her for a certain destruction. HMS Hereward was last seen making slowly towards Crete which was only five miles distant with her guns engaging enemy aircraft.
Twenty minutes later HMS Decoy suffered damage to her machinery as the result of a near miss and the speed of the force had to be reduced to 25 knots. A further reduction to 21 knots was needed after HMS Orion had been near-missed at 0730 hours.
With 4000 troops on board, the speed reduced to 21 knots, and no fighter support, things were beginning to look ugly. The Commander-in-Chief realised from Rear-Admiral Rawlings signals that our fighters had not appeared and every endeavour was made to rectify this but the fighters only appeared at noon.
By this time Force B had suffered badly. Shortly after 0730 hours Capt. Back, the Flag captain of HMS Orion was wounded and died two hours later. His place was taken by Cdr. Wynne.
At 0815 hours, HMS Dido was hit on ‘B’ turret and the Orion on ‘A’ turret at 0900 hours, both by bombs from Ju.87 dive bombers. In each case the turrets were put out of action.
At 1045 hours, HMS Orion was again attacked by Ju.87’s and a bomb passed through her bridge, putting the lower conning tower out of action. Force B was then 100 miles south of Kaso and this was the last attack made by dive bombers.
The Orion had nearly 1100 troops on board and the casualties on the crowded mess decks were very heavy. It is believed that a total of 260 were killed and 280 were wounded. In addition three of the engineer officers were killed. All normal communication between the bridge and the engine room was destroyed, the steering gear was put out of action, and three boiler rooms were damaged. Also there were fires in the foremost 6” and 4” magazines.
Fortunately there was a lull in the air attacks until 1300/29 when a high level bombing attack developed, followed by another one at 1330 hours and a final one at 1500 hours.
Force B arrived at Alexandria at 2000/29. HMS Orion only having 10 tons of fuel and two rounds of 6” HE remaining.
Feasibility of further evacuation considered, 29-30 May 1941.
This disastrous commencement of the evacuation placed the Commander-in-Chief in a most unpleasant predicament. Of the 4000 troops embarked in Force B, no less then 800 had been killed or captured (those on the Hereward) after leaving Crete. If this was to be the scale of the casualties, it appeared that quite apart from prospective naval losses of ships and men, who could be ill spared, our efforts to rescue the army from capture might only lead to destruction of a large portion of the troops.
Particular anxiety was feld for the transport HMS Glengyle (A/Capt.(Retd.) C.H. Petrie, RN) which was already at sea and was due to embark 3000 troops the next night (29-30 May).
It was only after long and anxious consideration, and consultation with the Admiralty, as well as with the military authorities, that the decision to continue the evacuation could be taken.
Once taken this decision was amply justified. The remainder of the evacuation proceeded almost without casualties to personnel. Fighter protection became steadily more effective, and the enemy less enterprising. His failure to interfere with the nightly embarkations at Sphakia was most surprising.
The original intention to send ships to Plaka Bay to take off the Retimo garrison was abandoned, as it was not known whether the troops had received the message ordering them to retire there. Moreover it was doubtful that they would be able to reach the coast, since they had no supplies. 1200 rations were dropped by air at Plaka, in case any should get there, but it was decided to send ships to Sphakia only.
From messages received from Crete during the night of 28-29 May, it was thought that the next night was going to be the last night of the evacuation but in the course of the day it became clear that the situation was not so desperate as it had appeared and the Commander-in-Chief decided to send four destroyers to embark men on the night of 30-31 May.
Evacuation from Sphakia, 2nd night, 29-30 May 1941.
Meanwhile Rear-Admiral King, wearing his flag in HMS Phoebe (Capt. G. Grantham, RN, flying the flag of Rear-Admiral E.L.S. King, CB, MVO, RN) had left Alexandria in the evening of the 28th with the light cruiser HMAS Perth, AA cruisers HMS Calcutta, HMS Coventry, transport HMS Glengyle, destroyers HMS Jervis, HMS Janus and HMS Hasty (Force D). Detination was Sphakia and their passage was uneventful except for one attack by one Ju.88 which dropped a stick of bombs near HMAS Perth but no damage was caused.
The cruisers and the Glengyle anchored off Sphakia at 2330/29 and the destroyers closed in one at a time to embark their quota. The troops were ferried from the beach in the landing craft from Glengyle assisted by two assault craft carried in HMAS Perth. The beach was too small for ships boats to be used in addition.
By 0320/30 a total of 6000 men had been embarked and Force D sailed for Alexandria, leaving three motor landing craft behind for use on subsequent nights. During the passage there were three air attacks on the force which had been joined by the destroyers HMAS Stuart, HMS Defender and HMS Jaguar at 0645 hours.
In the fist of these attacks, at 0930 hours, HMAS Perth was hit and her foremost boiler room was put out of action. The second and third attacks achieved no result although bombs fell close to HMAS Perth and HMS Jaguar. Fighter cover was able to drive off quite a number of enemy aircraft. The force returned to Alexandria during the night of 30 / 31 May.
Evacuation from Sphakia, 3rd night, 30-31 May 1941.
At 0915/30, Force C, consisting of the destroyers HMAS Napier, HMAS Nizam, HMS Kandahar and HMS Kelvin again left Alexandria for Sphakia. After a few hours Kandahar developed a mechanical defect and had to return to Alexandria.
At 1530 hours, three Ju.88’s carried out an unseen dive from astern. Bombs were dropped and HMS Kelvin was near missed. The result was that her speed had to be reduced to 20 knots and she too was detached to Alexandria.
Captain Arliss now continued on with only the two Australian destroyers and arrived at Sphakia at 0030/31. By 0300 hours, each destroyer had embarked over 700 troops, using the three motor landing craft that had been left behind the previous night, supplemented by the ships boats.
On the return passage to Alexandria the two Australian destroyers were attacked by 12 Ju.88’s between 0815 and 0915 hours. Both destroyers were damaged by near misses and HMAS Napier had her speed reduced to 23 knots. One Ju.88 was shot down while three others were seen to be hit.
Fighter cover was able to shoot down three Ju.88’s and one Cant 1007 during the day. The remainder of the passage was without incident and HMAS Napier and HMAS Nizam arrived at Alexandria in the evening with a total of 1510 troop on board.
The final evacuation, Sphakia, 31 May – 1 June 1941.
A final evacuation of about 3000 men was required, which was more then previously was estimated. It was therefore decided to sent over one more Force to evacuate these men during the night of 31 May – 1 June.
So at 0600/31, Vice Admiral King departed Alexandria with the light cruiser HMS Phoebe (Flag), fast minelayer HMS Abdiel, destroyers HMS Hotspur, HMS Jackal and HMS Kimberley to carry out this final evacuation (Force D).
That forenoon the Commander-in-Chief received a signal from Capt. Arliss, who was then on his way back from Sphakia, which indicated that there was then some 6500 men to come off Crete. Vice-Admiral King was then authorized to increase the total number he was allowed to embark to 3500 men. This was later changed to ‘fill up to maximum capacity’.
In the evening of the 31st the force was attacked three times by enemy aircraft. None of the bombs fell very close and one Ju.88 was believed to be damaged by AA fire. Many bombs were seen to be jettisoned on the horizon indicating several successful combats by our fighters.
Force D arrived at 2320/31. Three fully loaded landing craft, the ones left behind, immediately went alongside. The embarkation went so quickly that for a time the beach was empty of troops. This was unfortunate as it led to a last minute rush, which could not be dealt with in the time available and some troops had to be left behind. Some medical stores were landed and finally the three motor landing craft were destroyed or sunk.
The force departed at 0300/1 having embarked nearly 4000 troops and arrived at Alexandria at 1700 hours that day. The return passage was uneventful.
The loss off HMS Calcutta.
Yet one more loss was suffered by the Fleet. In order to provide additional protection for Force D the AA cruisers HMS Calcutta and HMS Coventry were sailed from Alexandria early on the 1st of June. When only about 100 nautical miles out, they were attacked by two Ju.88’s, who dived from the direction of the sun. HMS Coventry was narrowly missed by the first but two bombs from the second hit HMS Calcutta and she sank within a few minutes at 0920/1. HMS Coventry then picked up 23 officers and 232 ratings. She then immediately returned to Alexandria. (84)
21 May 1941
Around 2230C/21, HMAS Stuart (Capt. H.M.L. Waller, DSO, RAN), HMAS Vendetta (Lt.Cdr. R. Rhoades, RAN) and HMAS Voyager (Cdr. J.C. Morrow, DSO, RAN) departed Alexandria to join the battlefleet at sea.
[For more info and subsequent movements see the event ' Battle for Crete ' for 20 May 1941.] (85)
27 May 1941
Between 27 May and 4 June 1941, HMAS Voyager (Cdr. J.C. Morrow, DSO, RAN) cleaned boilers at Alexandria. (25)
5 Jun 1941
Around 0700C/5, HMAS Voyager (Cdr. J.C. Morrow, DSO, RAN) and HMAS Vendetta (Lt.Cdr. R. Rhoades, RAN) departed Alexandria for Tobruk loaded with troops and ammunition.
They arrived at Tobruk around 2330C/5 and commenced disembarking the troops and ammunition. Wounded men and troops that were being relieved were then embarked and around 0115C/6, the destroyers departed Tobruk for Mersa Matruh where they arrived around 0930C/6. (86)
6 Jun 1941
Around 1815C/6, HMAS Voyager (Cdr. J.C. Morrow, DSO, RAN) and HMAS Vendetta (Lt.Cdr. R. Rhoades, RAN) departed Mersa Matruh to search for the crew of an RAF bomber that had been shot down over the sea.
The destroyers returned around 0745C/7 not having found the missing aircrew. (86)
8 Jun 1941
Around 1300C/8, HMAS Voyager (Cdr. J.C. Morrow, DSO, RAN) and HMAS Vendetta (Lt.Cdr. R. Rhoades, RAN) departed Mersa Matruh for Tobruk loaded with some troops and stores.
They arrived at Tobruk around 2315C/8 and commenced disembarking. On completion of which wounded men and troops that were to be relieved were embarked.
The destroyers departed Tobruk around 0030C/9 for Alexandria.
En-route HMAS Vendetta had to reduce speed due to a failure in the oil supply to the starboard engine.
HMAS Voyager arrived at Alexandria around 1545C/9 followed by HMAS Vendetta around 1800C/9. (86)
10 Jun 1941
Around 2100C/10, HMAS Voyager (Cdr. J.C. Morrow, DSO, RAN) and HMAS Waterhen (Lt.Cdr. J.H. Swain, RN) departed Alexandria for Mersa Matruh where they arrived around 0630C/11.
After embarking stores they departed for Tobruk around 1300C/11.
They arrived at Tobruk around 2300C/11 and commenced to disembark their stores.
They departed again around 0015C/12 with evacuees which included members of the Senussi tribe [this tribe was pro allies].
The destroyers arrived at Mersa Matruh around 0930C/12. (87)
13 Jun 1941
Around 1300C/13, HMAS Voyager (Cdr. J.C. Morrow, DSO, RAN) and HMAS Waterhen (Lt.Cdr. J.H. Swain, RN) departed Mersa Matruh for Tobruk loaded with stores.
They arrived at Tobruk around 2345C/13 and disembarkation commenced which took a little over an hour.
Around 0050C/14, the destroyers departed for Alexandria / Mersa Matruh.
HMAS Voyager arrived at Alexandria around 1450C/14. HMS Watherhen had been detached of Mersa Matruh earlier. (87)
16 Jun 1941
Around 0600C/16, HMAS Stuart (Capt. H.M.L. Waller, DSO, RAN) and HMAS Voyager (Cdr. J.C. Morrow, DSO, RAN) departed Alexandria for Tobruk loaded with troops and stores.
At 1937C/16, HMAS Stuart was attacked by a lone Italian S.79 aircraft. The attack was made from low level but AA fire was effective and the aircraft dropped its bombs early and no damage was done.
They arrived at Tobruk around 0005C/17. After disembarking the troops and stores about 200 Senussi troops were embarked by each destroyer.
Around 0115C/17, the destroyers departed Tobruk for Mersa Matruh where they arrived around 1015C/17. (88)
18 Jun 1941
Shortly after 1300C/18, HMAS Stuart (Capt. H.M.L. Waller, DSO, RAN) and HMAS Voyager (Cdr. J.C. Morrow, DSO, RAN) departed Mersa Matruh for Tobruk loaded with stores.
They arrived at Tobruk around 2320C/18. After unloading the stores they departed again around 0100C/19 with wounded and personnel. Course was set for Alexandria where they arrived around 1600C/19. (88)
20 Jun 1941
Around 2000C/20, HMAS Stuart (Capt. H.M.L. Waller, DSO, RAN) and HMAS Voyager (Cdr. J.C. Morrow, DSO, RAN) departed Alexandria for Mersa Matruh where they arrived around 0600C/21. (88)
21 Jun 1941
Around 1300C/21, HMAS Stuart (Capt. H.M.L. Waller, DSO, RAN) and HMAS Voyager (Cdr. J.C. Morrow, DSO, RAN) departed Mersa Matruh loaded with troops and stores for Tobruk.
They arrived around 2330C/21 and commenced unloading. They departed again around 0115C/22 with wounded and other personnel.
They arrived at Mersa Matruh around 1000C/22 to disembark the wounded and other personnel. (88)
23 Jun 1941
Around 1245C/23, HMAS Stuart (Capt. H.M.L. Waller, DSO, RAN) and HMAS Voyager (Cdr. J.C. Morrow, DSO, RAN) departed Mersa Matruh loaded with troops and stores for Tobruk.
They arrived at Tobruk around 2330C/23 and disembarking the troops and stores was commenced. They departed again around 0045C/23 with wounded and other personnel.
En-route to Alexandria they were ordered to go to the assistance of the minesweeper HMS Derby (Lt.Cdr. F.C.V. Brightman, RN) which had been attacked but missed by an enemy submarine. The submarine in question was the Italian Axum which had fired a torpedo at a darkened vessel at 2325C/23 in position 32°18'N, 25°10'E. The torpedo however missed.
HMAS Stuart and HMAS Voyager arrived at Alexandria around 1600C/24. (88)
26 Jun 1941
Around 0600C/26, HMAS Stuart (Capt. H.M.L. Waller, DSO, RAN) and HMAS Voyager (Cdr. J.C. Morrow, DSO, RAN) departed Alexandria loaded with troops and stores for Tobruk.
They arrived at Tobruk around 2330C/26 and unloading commenced.
Around 0145C/27, they departed for Mersa Matruh with wounded and other personnel.
During the passage HMAS Parramatta (Lt.Cdr. J.H. Walker, MVO, RAN) reported that she was attacking a submarine contact north-east of Mersa Matruh. HMAS Stuart and HMAS Voyager were ordered to go to her assistance but as HMAS Voyager had one air pump out of action she was ordered to proceed to Mersa Matruh for repairs so only HMAS Stuart at first proceeded to join HMAS Parramatta in the submarine hunt.
HMAS Parramatta had been missed by a torpedo at 0652C/27 in position 31°27'N, 27°44'E. In fact the torpedo ran underneath. HMAS Parramatta turned at once and dropped a depth charge to keep the submarine submerged. Contact on the submarine was obtained immediately and three depth charge attacks were delivered. Contact was lost after the third depth charge pattern and a long search commenced. Prior to the third depth charge attack the enemy was moving very slowly and much oil had come to the surface so she was most likely damaged by the first two depth charge attacks. HMAS Stuart then arrived and took over the hunt while HMAS Parramatta set course for Mersa Matruh.
Around 1025C/27, HMAS Voyager arrived at Mersa Matruh where she landed the wounded and other passengers and made repairs. She departed again around 1405C/27 to rejoin HMAS Stuart. HMAS Parramatta meanwhile had arrived at Mersa Matruh around 1135C/27 and had transferred twelve depth charges to HMAS Voyager which apparently had only a limited supply herself.
Meanwhile, HMAS Stuart had obtained an A/S contact at 1345C/27 and had carried out four depth charge attacks. After the fourth attack HMAS Voyager rejoined but neither one of the destroyers were able to obtain contact again. HMAS Voyager then searched the area all night but no contact was obtained and it is considered that the submarine was destroyed. The submarine in question was the Italian Jantina which managed to escape damaged. She had to abandon her patrol and arrived at Leros on 30 June.
HMAS Stuart arrived at Mersa Matruh around 1700C/27 and then unloaded her wounded and other passengers.
HMAS Voyager returned to Mersa Matruh after the A/S hunt around 0540C/28.
(89)
28 Jun 1941
Around 1300C/28, HMAS Stuart (Capt. H.M.L. Waller, DSO, RAN) and HMAS Voyager (Cdr. J.C. Morrow, DSO, RAN) departed Mersa Matruh loaded with troops and stores for Tobruk.
They arrived at Tobruk around 2330C/28 and disembarking the troops and stores was commenced. They departed again around 0100C/29 with wounded and other personnel.
They arrived at Alexandria around 1545C/29.
On arrival HMAS Voyager commenced boiler cleaning and urgent engine room repairs. (88)
9 Jul 1941
HMAS Voyager (Cdr. J.C. Morrow, DSO, RAN) is docked in the Gabbari Dry Dock at Alexandria. (90)
10 Jul 1941
HMAS Voyager (Cdr. J.C. Morrow, DSO, RAN) is undocked. (90)
11 Jul 1941
Around 0700C/11, HMS Hero (Cdr. H.W. Biggs, DSO and Bar, RN) and HMAS Voyager (Cdr. J.C. Morrow, DSO, RAN) departed Alexandria with troops and stores for Tobruk.
HMAS Voyager however soon developed engine problems and had to return to Alexandria for repairs. She arrived back around 0830C/11.
Meanwhile it had become known that HMS Defender (Lt.Cdr. G.L. Farnfield, RN) had been sunk and the HMAS Vendetta (Lt.Cdr. R. Rhoades, RAN) was returning to Alexandria with survivors. HMS Hero was then ordered to go to the assitance of HMAS Vendetta. HMS Jaguar (Lt.Cdr. J.F.W. Hine, RN) was also sailed from Alexandria for the same purpose.
HMAS Vendetta, HMS Hero and HMS Jaguar arrived at Alexandria around 2020C/11.
HMAS Voyager, with her repairs completed, had departed Alexandria around 1930C/11 for post-repair trials. She returned one hour later with the trials successfully completed. (91)
12 Jul 1941
Around 0715C/12, HMS Hero (Cdr. H.W. Biggs, DSO and Bar, RN) and HMAS Voyager (Cdr. J.C. Morrow, DSO, RAN) departed Alexandria with troops and stores for Tobruk.
They arrived at Tobruk around 2345C/12 and commenced unloading. They departed again around 0100C/13 after having embarked wounded.
At 0558C/13, an enemy submarine was sighted on the surface by HMAS Voyager north of Sidi Barrani in position 32°02'N, 25°51'E. The submarine submerged two minutes later and HMS Hero started an attack. HMAS Voyager's starboard engine stopped working and her speed was reduced and she did not join the hunt. HMS Hero rejoined HMAS Voyager at 0615C/13.
The submarine in question was the Italian Luigi Settembrini which had actually fired a torpedo at one of the destroyers at 0536C/13 but it had missed.
HMS Hero and HMAS Voyager arrived at Alexandria around 1900C/13.
HMAS Voyager was again suffering from defects and it was decided that she was to leave the Mediterranean Station to refit. (90)
24 Jul 1941
HMAS Voyager (Cdr. J.C. Morrow, DSO, RAN) departed Alexandria for Port Said. (90)
25 Jul 1941
HMAS Voyager (Cdr. J.C. Morrow, DSO, RAN) arrived at Port Said. She then entered the Suez Canal and proceeded southwards to the Great Bitter Lakes. (90)
26 Jul 1941
HMAS Voyager (Cdr. J.C. Morrow, DSO, RAN) proceed from the Great Bitter Lakes to Port Tewfik. (90)
28 Jul 1941
HMAS Voyager (Cdr. J.C. Morrow, DSO, RAN) departed Port Tewfik roads for Aden. (90)
2 Aug 1941
HMAS Voyager (Cdr. J.C. Morrow, DSO, RAN) arrived at Aden.
She remained at Aden for days while waiting for orders where to proceed to for refit. (90)
11 Aug 1941
HMS Barham (Capt. G.C. Cooke, RN) departed Aden for Suez. Before proceeding night encounter exercises were carried out in the evening with HMAS Voyager (Cdr. J.C. Morrow, DSO, RAN). (92)
16 Aug 1941
HMAS Voyager (Cdr. J.C. Morrow, DSO, RAN) and RHS Spetsai departed Aden for Bombay. (93)
22 Aug 1941
HMAS Voyager (Cdr. J.C. Morrow, DSO, RAN) and RHS Spetsai arrived at Bombay from Aden. (93)
23 Aug 1941
HMAS Voyager (Cdr. J.C. Morrow, DSO, RAN) departed Bombay for Colombo. (93)
26 Aug 1941
HMAS Voyager (Cdr. J.C. Morrow, DSO, RAN) arrived at Colombo from Bombay. (93)
27 Aug 1941
HMAS Voyager (Cdr. J.C. Morrow, DSO, RAN) departed Colombo for Singapore. (93)
1 Sep 1941
HMAS Voyager (Cdr. J.C. Morrow, DSO, RAN) arrived at Singapore from Colombo. (94)
2 Sep 1941
HMAS Voyager (Cdr. J.C. Morrow, DSO, RAN) departed Singapore for Darwin. (94)
11 Sep 1941
HMAS Voyager (Cdr. J.C. Morrow, DSO, RAN) arrived at Darwin from Singapore. (94)
12 Sep 1941
HMAS Voyager (Cdr. J.C. Morrow, DSO, RAN) departed Darwin for Townsville. (94)
18 Sep 1941
HMAS Voyager (Cdr. J.C. Morrow, DSO, RAN) arrived at Townsville from Darwin. (94)
19 Sep 1941
HMAS Voyager (Cdr. J.C. Morrow, DSO, RAN) departed Townsville for Brisbane. (94)
21 Sep 1941
HMAS Voyager (Cdr. J.C. Morrow, DSO, RAN) arrived at Brisbane from Townsville. (94)
24 Sep 1941
HMAS Voyager (Cdr. J.C. Morrow, DSO, RAN) departed Brisbane for Sydney. (94)
25 Sep 1941
HMAS Voyager (Cdr. J.C. Morrow, DSO, RAN) arrived at Sydney from Brisbane. (94)
26 Sep 1941
HMAS Voyager (Cdr. J.C. Morrow, DSO, RAN) is taken in hand for refit at Sydney at the Cockatoo Island Dockyard. (94)
3 Mar 1942
HMAS Voyager (Lt.Cdr. R.C. Robison DSC, RAN) completed her refit at the Cockatoo Island Dockyard at Sydney although there was still some unfinished work. (95)
13 Mar 1942
HMAS Voyager (Lt.Cdr. R.C. Robison DSC, RAN) conducted basin trials at the Cockatoo Island Dockyard. (95)
18 Mar 1942
HMAS Voyager (Lt.Cdr. R.C. Robison DSC, RAN) conducted D/G trials at Sydney. (95)
21 Mar 1942
HMAS Voyager (Lt.Cdr. R.C. Robison DSC, RAN) conducted D/G trials at Sydney. (95)
30 Mar 1942
HMAS Voyager (Lt.Cdr. R.C. Robison DSC, RAN) proceeded from Sydney to Jervis Bay to commence a work-up period there. (95)
31 Mar 1942
HMAS Voyager (Lt.Cdr. R.C. Robison DSC, RAN) conducted gunnery and torpedo firing exercises at Jervis Bay. (95)
1 Apr 1942
HMAS Voyager (Lt.Cdr. R.C. Robison DSC, RAN) conducted exercises with aircraft and gunnery exercises at Jervis Bay. (96)
2 Apr 1942
HMAS Voyager (Lt.Cdr. R.C. Robison DSC, RAN) conducted exercises with aircraft, high speed manoeuvering exercises and gunnery exercises at Jervis Bay. (96)
4 Apr 1942
HMAS Voyager (Lt.Cdr. R.C. Robison DSC, RAN) departed Jervis Bay for Sydney. En-route gunnery and torpedo firing exercises were carried out. She also carried out a night A/S patrol. (96)
4 Apr 1942
Convoy SU 4.
This convoy departed Bombay on 4 April 1942.
It was made up of the troop transports; Duntroon (British, 10346 GRT, built 1935), Katoomba (Australian, 9424 GRT, built 1913) and Willard A. Holbrook (American (Army transport), 14812 GRT, built 1921).
On departure from Bombay the convoy was escorted by the armed merchant cruiser HMS Chitral (A/Capt.(Retd.) G.W. Hoare-Smith, RN) and the sloop HMS Falmouth (Cdr. U.H.R. James, RN).
The convoy arrived at Colombo on 8 April 1942.
------------------------------------------------------------------------------------------------------
The convoy departed Colombo on 12 April 1942. The transports Kenmar (American, 6844 GRT, built 1919) and Pardo (British, 5400 GRT, built 1940) had joined the convoy as had the corvette HMS Aster (Cdr. E. Hewitt, RD, RNR).
Around 1900E/14, in approximate position 07°12'N, 70°40'E, the Katoomba, Kenmar and Pardo parted company to proceed to their respective destination independently. HMS Falmouth and HMS Aster also parted company to return to Colombo.
The remainder of the convoy arrived at Kilindini / Mombasa on 20 April 1942.
------------------------------------------------------------------------------------------------------
The convoy, now made up of the troop transports Duntroon and Willard A. Holbrook departed Kilindini / Mombasa on 21 April 1942. It had been joined by the troop transports Felix Roussel (British, 17083 GRT, built 1930) and Mendoza (British (former French), 8233 GRT, built 1919). Escort was still the armed merchant cruiser HMS Chitral.
Around 1730C/22, the light cruiser HMS Colombo (Capt. W.P. Carne, RN) joined the convoy as additional escort.
The convoy arrived at Durban on 27 April 1942.
------------------------------------------------------------------------------------------------------
On 1 May 1942, the convoy, now made up of the Duntroon, Felix Roussel and Willard A. Holbrook departed Durban for Fremantle. The convoy was escorted by HMS Chitral.
Around 0845GH/12, the light cruiser USS Phoenix (Capt. H.E. Fischer, USN) joined the convoy.
The convoy arrived at Fremantle on 13 May 1942.
------------------------------------------------------------------------------------------------------
The convoy departed Fremantle on 17 May 1942.
It was still made up of the now made up of the Duntroon, Felix Roussel and Willard A. Holbrook.
On departure from Fremantle the convoy was escorted by USS Phoenix and the destroyer HMAS Voyager (Lt.Cdr. R.C. Robison DSC, RAN).
The Duntroon was delayed by engine trouble and sailed around two hours later to overtake and join the convoy at sea which she did around 0135H/18.
Around 1600H/19, HMAS Voyager parted company with the convoy in position 35°20'S, 120°00'E. She was to return to Fremantle.
Around 0500HI/20, the convoy was dispersed. USS Phoenix then set course to return to Fremantle. (97)
5 Apr 1942
HMAS Voyager (Lt.Cdr. R.C. Robison DSC, RAN) arrived at Garden Island, Sydney from Jervis Bay. (96)
6 Apr 1942
The troopship Queen Mary (British, 81235 GRT, built 1936) departed Sydney for Fremantle. She was escorted out by the destroyers HMAS Voyager (Lt.Cdr. R.C. Robison DSC, RAN) and USS John D. Edwards (Lt. W.J. Giles, Jr., USN).
HMAS Voyager had however to return to Sydney soon after sailing due to her steering engine malfunctioning. The ship had to be steering by using the main engines. (96)
13 Apr 1942
HMAS Voyager (Lt.Cdr. R.C. Robison DSC, RAN) conducted gunnery exercises at Sydney. (96)
15 Apr 1942
HMAS Voyager (Lt.Cdr. R.C. Robison DSC, RAN) proceeded to the Morts Dock Shipyard where she was docked for repairs to her Asdic installation. (96)
16 Apr 1942
HMAS Voyager (Lt.Cdr. R.C. Robison DSC, RAN) is undocked. (96)
19 Apr 1942
HMAS Voyager (Lt.Cdr. R.C. Robison DSC, RAN) departed Sydney escorting the troopship Queen Elizabeth (British, 83673 GRT, built 1939).
She parted company with the troopship the following day. (96)
21 Apr 1942
HMAS Voyager (Lt.Cdr. R.C. Robison DSC, RAN) arrived at Williamstown, Melbourne.
She departed again later the same day escorting the troopship President Coolidge (American, 21936 GRT, built 1931).
Rendezvous was made on 23 April 1942 with HMAS Adelaide (Capt. H.A. Showers, RAN) which took over the escort of the troopship. (96)
23 Apr 1942
HMAS Voyager (Lt.Cdr. R.C. Robison DSC, RAN) arrived at Sydney from escort duty. (96)
24 Apr 1942
HMAS Voyager (Lt.Cdr. R.C. Robison DSC, RAN) had a quick docking at the Morts Dock Shipyard for repairs to the rope guards on one of the propeller shafts. (96)
27 Apr 1942
HMAS Voyager (Lt.Cdr. R.C. Robison DSC, RAN) departed Sydney for Melbourne. (96)
28 Apr 1942
HMAS Voyager (Lt.Cdr. R.C. Robison DSC, RAN) arrived at Melbourne from Sydney. (96)
30 Apr 1942
HMAS Voyager (Lt.Cdr. R.C. Robison DSC, RAN) departed Melbourne for Fremantle.
At Melbourne Oerlikon AA guns had been fitted. (96)
5 May 1942
HMAS Voyager (Lt.Cdr. R.C. Robison DSC, RAN) arrived at Albany as she had not enough fuel to make it to Fremantle. (98)
10 May 1942
HMAS Voyager (Lt.Cdr. R.C. Robison DSC, RAN) conducted A/S exercises off Albany with USS Seal (Lt.Cdr. K.C. Hurd, USN). (98)
11 May 1942
HMAS Voyager (Lt.Cdr. R.C. Robison DSC, RAN) departed Albany for Fremantle. She was escorting the transport USS Gold Star. (98)
13 May 1942
HMAS Voyager (Lt.Cdr. R.C. Robison DSC, RAN) and USS Gold Star arrived at Fremantle from Albany. (98)
17 May 1942
Convoy SU 4D.
This convoy departed Fremantle on 17 May 1942.
It was made up of the following (troop) transports; Duntroon (British, 10346 GRT, built 1935), Felix Roussel (British, 17083 GRT, built 1930) and Willard A. Holbrook (American, 14812 GRT, built 1921).
On departure from Fremantle the convoy was escorted by the light cruiser USS Phoenix (Capt. H.E. Fischer, USN) and the destroyer HMAS Voyager (Lt.Cdr. R.C. Robison DSC, RAN).
The Duntroon was delayed by engine trouble and sailed around two hours later to overtake and join the convoy at sea which she did around 0135H/18.
Around 1600H/19, HMAS Voyager parted company with the convoy in position 35°20'S, 120°00'E. She was to return to Fremantle.
Around 0500HI/20, the convoy was dispersed. USS Phoenix then set course to return to Fremantle. (99)
20 May 1942
Around 1530H/20, HMAS Voyager (Lt.Cdr. R.C. Robison DSC, RAN) returned to Fremantle from convoy escort duty. She then commenced boiler cleaning which was completed on the 28th. (98)
29 May 1942
The destroyers HMAS Stuart (Cdr. S.H.K. Spurgeon, DSO, RAN) and HMAS Voyager (Lt.Cdr. R.C. Robison DSC, RAN) conducted A/S exercises off Fremantle with the submarine USS Sculpin (Lt.Cdr. L.H. Chappell).
On completion of the exercises the destroyers set course for Geraldton. (98)
30 May 1942
HMAS Stuart (Cdr. S.H.K. Spurgeon, DSO, RAN) and HMAS Voyager (Lt.Cdr. R.C. Robison DSC, RAN) arrived at Gerlandton from Fremantle. (98)
1 Jun 1942
HMAS Stuart (Cdr. S.H.K. Spurgeon, DSO, RAN) and HMAS Voyager (Lt.Cdr. R.C. Robison DSC, RAN) departed Geraldton for exercises but shortly after departure they were informed that a strange ship escorted by two destroyers had been spotted by aircraft. The destroyers worked up to full speed to intercept and investigate but later a signal was received that there was one destroyer and that she had been identified as USS Childs (Lt.Cdr. F. O'Beirne, USN) en-route from Exmouth Bay to Fremantle. The movements of this ship had been unknown to the local naval command.
The destroyers then return to Geraldton. HMAS Voyager had one engine out of action due to her starboard condenser outlet being blocked by thick seaweed. which was subsequently removed. (100)
2 Jun 1942
HMAS Stuart (Cdr. S.H.K. Spurgeon, DSO, RAN) and HMAS Voyager (Lt.Cdr. R.C. Robison DSC, RAN) conducted exercises off Geraldton. (100)
4 Jun 1942
HMAS Stuart (Cdr. S.H.K. Spurgeon, DSO, RAN), HMAS Voyager (Lt.Cdr. R.C. Robison DSC, RAN) and HMAS Geraldton (Cdr.(Retd.) H.M. Harris, RNR) conducted exercises off Geraldton.
On completion of the exercises HMAS Stuart proceeded to Fremantle. (100)
5 Jun 1942
HMAS Voyager (Lt.Cdr. R.C. Robison DSC, RAN) departed Geraldton for Fremantle. (100)
6 Jun 1942
HMAS Voyager (Lt.Cdr. R.C. Robison DSC, RAN) arrived at Fremantle from Geraldton. (100)
9 Jun 1942
HMAS Voyager (Lt.Cdr. R.C. Robison DSC, RAN) conducted compass swing trials off Fremantle. (100)
10 Jun 1942
HMAS Voyager (Lt.Cdr. R.C. Robison DSC, RAN) conducted exercises off Fremantle. (100)
11 Jun 1942
HMAS Voyager (Lt.Cdr. R.C. Robison DSC, RAN) conducted A/S exercises off Fremantle with USS Seadragon (Lt.Cdr. W.E. Ferrall, USN). (100)
12 Jun 1942
HMAS Voyager (Lt.Cdr. R.C. Robison DSC, RAN) conducted gunnery exrcises off Fremantle. These were interrupted mid-afternoon by a report that an unidentified submarine had been sighted but a search of the area produced no results.
HMAS Voyager returned to Fremantle the following morning. (100)
18 Jun 1942
HMAS Voyager (Lt.Cdr. R.C. Robison DSC, RAN) conducted exercises off Fremantle. (100)
24 Jun 1942
HMAS Voyager (Lt.Cdr. R.C. Robison DSC, RAN) conducted exercises off Fremantle. (100)
25 Jun 1942
HMAS Voyager (Lt.Cdr. R.C. Robison DSC, RAN) conducted exercises off Fremantle with local shore batteries. (100)
26 Jun 1942
HMAS Voyager (Lt.Cdr. R.C. Robison DSC, RAN) conducted A/S exercises off Fremantle with USS Searaven (T/Lt.Cdr. H. Cassedy, USN). (100)
27 Jun 1942
HMAS Voyager (Lt.Cdr. R.C. Robison DSC, RAN) conducted A/S exercises off Fremantle with USS Searaven (T/Lt.Cdr. H. Cassedy, USN). (100)
2 Jul 1942
HMAS Voyager (Lt.Cdr. R.C. Robison DSC, RAN) and HMAS Burnie (T/Lt. T. Christy, RANR(S)) conducted exercises off Fremantle.
In the evening HMAS Voyager conducted exercises with the local defences. (101)
4 Jul 1942
HMAS Voyager (Lt.Cdr. R.C. Robison DSC, RAN) departed Fremantle to make rendezvous with the tanker USS Trinity (T/Capt. W. Hibbs, USN) well to the westward of Cape Leeuwin.
Rendezvous was effected around 1530H/6, in very heavy weather, in position 34°25'S, 108°12'E. Commenced escorting the tanker to Albany.
Around 1030H/9, they arrived at Albany. HMAS Voyager had sustained engine room and weather damage in the rough seas. Repairs were taken in hand by the ships staff with assistance from USS Holland (T/Capt. P.E. Pendelton, USN).
13 Jul 1942
'Schooner' convoy.
This convoy departed Colombo on 13 July 1942.
It was made up of the following (troop) transports; Aronda (British, 9031 GRT, built 1941), Athlone Castle (British, 25565 GRT, built 1936), City of Canterbury (British, 8331 GRT, built 1922), City of Lille (British, 6588 GRT, built 1928), Clan MacDonald (British, 9653 GRT, built 1939), Devonshire (British, 11275 GRT, built 1939), Dunedin Star (British, 11168 GRT, built 1936), Ekma (British, 5108 GRT, built 1911), Martand (British, 7967 GRT, built 1939), Rajula (British, 8478 GRT, built 1926) and Westernland (Dutch, 16479 GRT, built 1918).
On departure from Colombo the convoy was escorted by the light cruiser HMS Gambia (Capt. M.J. Mansergh, CBE, RN), armed merchant cruiser HMS Worcestershire (A/Capt.(Retd.) E.H. Hopkinson, RN), sloops HMIS Jumna (Cdr. J.E.N. Coope, RIN), HMIS Sutlej (Capt. P.A. Mare, RIN) and the corvettes HMS Aster (Lt. W.L. Smith, RNR) and HMS Tulip (Lt.Cdr. A. Wilkinson, RNR).
Around 1845F/14, HMIS Jumna, HMIS Sutlej, HMS Aster and HMS Tulip parted company in position 02°23'N, 80°23'E.
Around 1750F/16, the City of Lille was ordered to proceed independently as she was unable to keep up with the convoy. Position was 06°03'S, 81°34'E.
Around 1330F/19, the light cruiser USS Phoenix (Capt. H.E. Fischer, USN) took over from HMS Gambia in position 17°02'S, 82°24'E. HMS Gambia then parted company with the convoy to proceed to Mauritius.
Around 0715F/20, the armed merchant cruiser HMS Kanimbla (A/Capt. W.L.G. Adams, RN) took over from HMS Worcestershire in position 20°11'S, 83°17'E. HMS Worcestershire then parted company with the convoy to proceed to Mauritius.
Around 0855H/27, the destroyer HMAS Voyager (Lt.Cdr. R.C. Robison DSC, RAN) joined the convoy in position 31°04'S, 112°00'E.
Around 1350H/27, the minesweeper HMIS Madras (Lt. S.G. Karmarkar, RINR) joined the convoy and five minutes later the convoy was split up, in position 31°11'S, 112°16'E, into two sections ' Schooner A ' for Melbourne and ' Schooner B ' for Fremantle.
' Schooner A ' was made up of the transports Athlone Castle, City of Canterbury, Dunedin Star and Martand. They were escorted by USS Phoenix and HMAS Voyager.
' Schooner B ' was made up of the transports Aronda, Clan MacDonald, Devonshire, Ekma, Rajula and Westernland. They were escorted by HMS Kanimbla and HMIS Madras.
' Schooner B ' arrived at Fremantle in the morning of the 28th.
At 1015H/28, in position 33°28'S, 113°48'E, ' Schooner A ' merged with convoy ZK 12 which was coming from Fremantle escorted by the light cruiser HrMs Tromp (Cdr. J.B. de Meester, RNN). Convoy ZK 12 was made up of the transport Duntroon (10346 GRT, built 1935) and the armed merchant cruisers HMAS Manoora (A/Capt. J.M. Armstrong, RAN) and HMAS Westralia (A/Capt.(Emgy.) H.V. Hudson, OBE, RAN).
Around 1900H/29, in position 36°45'S, 119°48'E, HrMs Tromp and HMAS Voyager parted company with convoy ' Schooner B '. They were to return to Fremantle.
Around 0530K/3, the Athlone Castle, City of Canterbury, Dunedin Star and Martand parted company with the convoy and proceeded to Melbourne.
Around 0715K/5, the destroyer HMAS Arunta (Cdr. J.C. Morrow, DSO, RAN) joined the convoy.
The convoy arrived at Sydney around 1630K/5.
19 Jul 1942
HMAS Voyager (Lt.Cdr. R.C. Robison DSC, RAN) commenced boiler cleaning at Fremantle. This was completed on the 25th. (101)
27 Jul 1942
Around 1400H/26, HMAS Voyager (Lt.Cdr. R.C. Robison DSC, RAN) departed Fremantle to make rendezvous with the ' Schooner ' Convoy.
[For more info on this convoy see the event ' 'Schooner' convoy ' for 13 July 1942.] (101)
29 Jul 1942
Around 1900H/29, HrMs Tromp (Cdr. J.B. de Meester, RNN) and HMAS Voyager (Lt.Cdr. R.C. Robison DSC, RAN), parted from the combined convoy ' Schooner A / ZK 12 '. (102)
31 Jul 1942
Around 0700H/31, HMAS Voyager (Lt.Cdr. R.C. Robison DSC, RAN) arrived at Fremantle from convoy escort duty. (101)
31 Jul 1942
Convoy Schooner B '.
This convoy departed Fremantle on 31 July 1942.
It was made up of the following (troop) transports; Aronda (British, 9031 GRT, built 1941), Clan MacDonald (British, 9653 GRT, built 1939), Devonshire (British, 11275 GRT, built 1939), Ekma (British, 5108 GRT, built 1911), Elisabeth Bakke (Norwegian, 5450 GRT, built 1937), Kaituna (British, 4914 GRT, built 1938), Rajula (British, 8478 GRT, built 1926) and Westernland (Dutch, 16479 GRT, built 1918).
On departure from Fremantle the convoy was escorted by the light cruiser HMAS Adelaide (A/Capt. J.C.D. Esdaile, OBE, RAN), armed merchant cruiser HMS Kanimbla (A/Capt. W.L.G. Adams, RN), destroyer HMAS Voyager (Lt.Cdr. R.C. Robison DSC, RAN) and the minesweeper HMAS Wollongong (T/Lt. G.A. Keith, RANR(S)). HMAS Wollongong most likely was with the convoy only for a short time.
Around 1900H/2, HMAS Adelaide and HMAS Voyager parted company with the convoy to return to Fremantle.
The Elisabeth Bakke arrived at Adelaide on 5 August 1942 after having been detached from the convoy.
The convoy arrived at Melbourne on 7 August 1942. It appears that the Westernland proceeded to Sydney independently.
4 Aug 1942
Around 0800H/4, HMAS Adelaide (A/Capt. J.C.D. Esdaile, OBE, RAN) and HMAS Voyager (Lt.Cdr. R.C. Robison DSC, RAN) arrived at Fremantle from convoy escort duty. (103)
10 Aug 1942
HMAS Voyager (Lt.Cdr. R.C. Robison DSC, RAN) conducted A/S exercises off Fremantle with USS Seal (T/Cdr. K.C. Hurd, USN).
On completion of the exercises HMAS Voyager anchored in Gage Roads. During the night, in a gale, she dragged her anchor and then got underway. She returned to Fremantle early the following morning. (104)
14 Aug 1942
At 1750H/14, HMAS Voyager (Lt.Cdr. R.C. Robison DSC, RAN) departed Fremantle for Darwin. (104)
15 Aug 1942
At 0953H/15, HMAS Voyager (Lt.Cdr. R.C. Robison DSC, RAN) arrived at Geraldton due to a breakdown of her steering engine.
After repairs had been completed, and the ship had fuelled to capacity, taken on board fresh water and fresh stores she departed around 1330H/15 to continue her passage to Darwin. (104)
20 Aug 1942
around 0800H/20, HMAS Voyager (Lt.Cdr. R.C. Robison DSC, RAN) arrived at Darwin. She had only 25 tons of fuel remaining and also some defects in the engine room had developed for which repairs were undertaken. (104)
23 Aug 1942
In the morning, HMAS Voyager (Lt.Cdr. R.C. Robison DSC, RAN) got underway during a Japanese air raid in the Darwin area. (104)
23 Aug 1942
Convoys US 16 and US 17.
Convoy US 16.
Convoy US 16 departed Sydney on 23 August 1942.
It was made up of the following (troop) transports; Aronda (British, 9031 GRT, built 1941) and Devonshire (British, 11275 GRT, built 1939).
The convoy was escorted by the armed merchant cruiser HMS Kanimbla (A/Capt. W.L.G. Adams, RN).
The transport Rajula (British, 8478 GRT, built 1926) joined the convoy PM on the 27th in position 18°40'S, 140°40'E.
The convoy was joined by the light cruiser HrMs Tromp (Capt. J.B. de Meester, RNethN) at 0845H/2.
The convoy arrived at Fremantle on 3 September 1942.
------------------------------------------------------------------------------------------------------------------------------------------
Convoy US 17.
Convoy US 17 departed Sydney on 24 August 1942.
It was made up of the following (troop) transports; Ekma (British, 5108 GRT, built 1911), Felix Roussel (British, 17083 GRT, built 1930), Lilian Luckenbach (American, 6339 GRT, built 1919), Westernland (Dutch, 16479 GRT, built 1918).
The convoy was escorted by the armed merchant cruiser HMAS Manoora (A/Capt. J.M. Armstrong, RAN).
At 1415K/28, the convoy was joined by the light cruiser HMAS Adelaide (A/Capt. J.C.D. Esdaile, OBE, RAN) coming from Melbourne.
The convoy arrived at Fremantle on 4 September 1942.
------------------------------------------------------------------------------------------------------------------------------------------
The now combined convoy US 16 / US 17 departed Fremantle on 7 September. It was now escorted by the light cruisers HMAS Adelaide, HrMs Tromp, armed merchant cruisers HMS Kanimbla, HMAS Manoora and the destroyer HMAS Voyager (Lt.Cdr. R.C. Robison DSC, RAN).
Around 0700H/8, HMAS Voyager was detached to return to Fremantle.
Around 1000FG/11, the heavy cruiser HMS Devonshire (Capt. R.D. Oliver, CBE, DSC, RN) joined the convoy coming from Colombo. HMAS Adelaide and HrMs Tromp then parted company to return to Fremantle.
Around 0930FG/14, the light cruiser HMS Mauritius (Capt. W.D. Stephens, RN) joined the convoy which was then split up. HMS Mauritius and HMS Kanimbla proceeded to Colombo with convoy US 16. HMS Devonshire proceeded to Durban with convoy US 17. HMAS Manoora returned to Fremantle.
Convoy US 16 was joined by the destroyer HMS Scout (Lt.Cdr.(Retd.) H. Lambton, RN) around 0900FG/19. Later the same day HMS Scout developed rudder problems and had to be steered by her engines. She and HMS Kanimbla were then detached to proceed to Colombo in company while HMS Mauritius remained with the convoy. Both the convoy escorted by HMS Mauritius and HMS Scout in company with HMS Kanimbla arrived at Colombo on 21 September 1942.
Convoy US 16 departed Colombo for Aden on 24 September 1942 now escorted by the light cruiser HMS Mauritius, sloop HMS Shoreham (Cdr. E. Hewitt, RD, RNR) and the minelayer HrMs Willem van der Zaan (Lt.Cdr. G.P. Küller, RNethN).
Around 2000F/26, HrMs Willem van der Zaan parted company with convoy US 16 to return to Colombo where she arrived on 29 September 1942.
Around 0800F/28, HMS Shoreham parted company with convoy US 16 to proceed to Bombay where she arrived on 1 October 1942.
Around 0730E/30, the minesweeper HMS Poole (Lt. W.L.G. Dutton, RNR) joined the convoy.
Around 1500E/30, the destroyer HMS Hero (Lt. W. Scott, DSC, RN) joined the convoy.
Convoy US 16 arrived at Aden on 2 October 1942.
Convoy US 17 meanwhile had arrived at Durban on 23 September 1942.
24 Aug 1942
HMAS Voyager (Lt.Cdr. R.C. Robison DSC, RAN) conducted an A/S patrol in the approaches to Darwin. (104)
25 Aug 1942
HMAS Voyager (Lt.Cdr. R.C. Robison DSC, RAN) conducted an A/S patrol in the approaches to Darwin. (104)
26 Aug 1942
HMAS Voyager (Lt.Cdr. R.C. Robison DSC, RAN) conducted an A/S patrol in the approaches to Darwin. (104)
27 Aug 1942
HMAS Voyager (Lt.Cdr. R.C. Robison DSC, RAN) conducted an A/S patrol in the approaches to Darwin. (104)
28 Aug 1942
HMAS Voyager (Lt.Cdr. R.C. Robison DSC, RAN) conducted an A/S patrol in the approaches to Darwin. (104)
30 Aug 1942
HMAS Voyager (Lt.Cdr. R.C. Robison DSC, RAN) departed Darwin for Geraldton and then onwards to Fremantle.
[No report of proceedings is available for September 1942, so some details for this month might be missing.] (104)
4 Sep 1942
HMAS Voyager (Lt.Cdr. R.C. Robison DSC, RAN) arrived at Fremantle from Darwin. Apparently she had proceeded directly to Fremantle. (105)
7 Sep 1942
The light cruisers HMAS Adelaide (A/Capt. J.C.D. Esdaile, OBE, RAN), HrMs Tromp (Capt. J.B. de Meester, RNethN), armed merchant cruisers HMS Kanimbla (A/Capt. W.L.G. Adams, RN), HMAS Manoora (A/Capt. J.M. Armstrong, RAN) and the destroyer HMAS Voyager (Lt.Cdr. R.C. Robison DSC, RAN) departed Fremantle escorting the combined convoys US 16 and US 17.
[For more info on these convoys see the event ' Convoys US 16 and US 17 ' for 23 August 1942.] (106)
8 Sep 1942
HMAS Voyager (Lt.Cdr. R.C. Robison DSC, RAN) returned to Fremantle from convoy escort duty. (107)
14 Sep 1942
HMAS Voyager (Lt.Cdr. R.C. Robison DSC, RAN) departed Fremantle for Darwin via Geraldton. (107)
15 Sep 1942
HMAS Voyager (Lt.Cdr. R.C. Robison DSC, RAN) arrived at Geraldton from Fremantle. She arrived with a burnt out thrust bearing for which repairs were undertaken which were estimated to take two days. (107)
16 Sep 1942
With the repairs completed, HMAS Voyager (Lt.Cdr. R.C. Robison DSC, RAN), departed Geraldton for Darwin. (107)
20 Sep 1942
HMAS Voyager (Lt.Cdr. R.C. Robison DSC, RAN) arrived at Darwin from Geraldton. (94)
22 Sep 1942
HMAS Voyager (Lt.Cdr. R.C. Robison DSC, RAN) departed Darwin with troops and supplies for Timor.
23 Sep 1942
Around 1830H/23, HMAS Voyager (Lt.Cdr. R.C. Robison DSC, RAN) arrived at Betano Bay. She dropped anchor and started to disembark the troops and the supplies. She had anchored not in an ideal position and it was decided to hoist anchor and re-position the ship. While doing so the ship was taken by the current and pushed closer inland. The port propeller could not be started without endangering the boats in which the troops and supplies were being disembarked. Lt.Cdr. Robinson decided to try to swing the ship round by using the starboard shaft and while doing so the ship grounded by the stern. Attemps to get off were futile and by next morning the propellers and shafts were embedded in the sand.
In the afternoon of the 24th, the ship was attacked and damaged by Japanese aircraft.
She was scuttled by her crew early on the 25th after it had been decided that further salvage attempts would be futile.
Media links
|
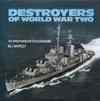
Sources
- Report of proceedings of HMAS Hobart for September 1939 + Report of proceedings of HMAS Voyager for September 1939
- Report of proceedings of HMAS Voyager from September 1939 to March 1940
- Report of proceedings of HMAS Vampire for September 1939 + Report of proceedings of HMAS Voyager from September 1939 to March 1940
- Report of proceedings of HMAS Sydney for September 1939 + Report of proceedings of HMAS Voyager from September 1939 to March 1940
- Report of proceedings of HMAS Sydney for October 1939 + Report of proceedings of HMAS Vampire for September 1939 + Report of proceedings of HMAS Voyager from September 1939 to March 1940
- Report of proceedings of HMAS Vampire for October 1939 + Report of proceedings of HMAS Voyager from September 1939 to March 1940
- ADM 173/15904 + Report of proceedings of HMAS Voyager from September 1939 to March 1940
- ADM 173/15904 + ADM 173/16011 + Report of proceedings of the Australian Destroyer Flotilla
- Report of proceedings of the Australian Destroyer Flotilla + Report of proceedings of HMAS Vendetta for November 1939
- Report of proceedings of the Australian Destroyer Flotilla
- Report of proceedings of HMAS Vampire for November 1939 + Report of proceedings of HMAS Voyager from September 1939 to March 1940
- ADM 53/109461 + Report of proceedings of HMAS Vampire for November 1939 + Report of proceedings of HMAS Voyager from September 1939 to March 1940
- ADM 53/109462 + Report of proceedings of HMAS Vampire for December 1939 + Report of proceedings of HMAS Voyager from September 1939 to March 1940
- ADM 53/108314 + Report of proceedings of HMAS Vampire for December 1939 + Report of proceedings of HMAS Voyager from September 1939 to March 1940
- Report of proceedings of HMAS Vampire for December 1939 + Report of proceedings of HMAS Voyager from September 1939 to March 1940
- Report of proceedings of HMAS Vampire for January 1940 + Report of proceedings of HMAS Voyager from September 1939 to March 1940 + Report of proceedings of the Australian Destroyer Flotilla
- Report of proceedings of HMAS Vendetta for February 1940 + Report of proceedings of HMAS Voyager from September 1939 to March 1940 + Report of proceedings of the Australian Destroyer Flotilla
- Report of proceedings of HMAS Voyager from September 1939 to March 1940 + Report of proceedings of the Australian Destroyer Flotilla
- Report of proceedings of HMAS Vendetta for March 1940 + Report of proceedings of HMAS Voyager from September 1939 to March 1940 + Report of proceedings of the Australian Destroyer Flotilla
- ADM 53/111431 + ADM 199/654
- ADM 53/111431 + ADM 53/111432 + ADM 53/122339
- Report of proceedings of HMAS Voyager for April and May 1940 + Report of proceedings of the 10th Destroyer Flotilla
- Report of proceedings of HMAS Voyager for April and May 1940
- ADM 53/113107 + Report of proceedings of the 10th Destroyer Flotilla
- Report of proceedings of the 10th Destroyer Flotilla
- ADM 199/654 + Report of proceedings of the 10th Destroyer Flotilla
- ADM 53/112920
- ADM 173/16399
- Report of proceedings of HMAS Vampire for May 1940 + Report of proceedings of the 10th Destroyer Flotilla
- Report of proceedings of HMAS Voyager for May 1940 and Report of proceedings of HMAS Waterhen for May 1940
- Report of proceedings of HMAS Vampire for May 1940
- ADM 173/16374 + ADM 173/16429
- ADM 53/112344 + ADM 53/112872 + ADM 53/112920 + ADM 53/113294
- ADM 53/113295
- Report of proceedings of HMAS Vampire for June 1940 + Report of proceedings of HMAS Voyager for June 1940
- ADM 199/386 + ADM 199/445
- Report of proceedings of HMAS Vampire for June 1940 + Report of proceedings of HMAS Voyager for June 1940 + Report of proceedings of HMAS Waterhen for June 1940 + Report of proceedings of the 10th Destroyer Flotilla
- Report of proceedings of HMAS Voyager for June 1940
- ADM 199/386
- Report of proceedings of HMAS Voyager for July 1940
- ADM 199/386 + ADM 234/317
- Report of proceedings of HMAS Voyager for July 1940 + Report of proceedings of the 10th Destroyer Flotilla
- Report of proceedings of HMAS Vampire for August 1940 + Report of proceedings of HMAS Voyager for August 1940
- Report of proceedings of HMAS Voyager for August 1940
- ADM 53/113422 + Report of proceedings of HMAS Voyager for August 1940 + Report of proceedings of the 10th Destroyer Flotilla
- Report of proceedings of HMAS Voyager for August 1940 + Report of proceedings of HMAS Waterhen for August 1940 + Report of proceedings of the 10th Destroyer Flotilla
- ADM 199/386 + Report of proceedings of HMAS Voyager for August 1940 + Report of proceedings of HMAS Waterhen for August 1940
- Report of proceedings of HMAS Vampire for August 1940
- ADM 53/112117 + Report of proceedings of the 10th Destroyer Flotilla
- ADM 199/386 + ADM 199/387 + ADM 199/391
- Report of proceedings of HMAS Voyager for September 1940
- ADM 199/387 + Report of proceedings of HMAS Voyager for September 1940
- ADM 199/387
- Report of proceedings of HMAS Voyager for October 1940
- ADM 53/113364 + Report of proceedings of HMAS Voyager for October 1940
- ADM 199/387 + ADM 199/392
- Report of proceedings of HMAS Voyager for November 1940
- ADM 53/112467 + Report of proceedings of the 10th Destroyer Flotilla
- Report of proceedings of HMAS Vendetta for December 1940 + Report of proceedings of HMAS Voyager for December 1940
- ADM 53/113323 + ADM 199/387 + Report of proceedings of HMAS Vampire for December 1940 + Report of proceedings of the 10th Destroyer Flotilla
- ADM 53/113323 + Report of proceedings of HMAS Voyager for December 1940 + Report of proceedings of HMAS Waterhen for December 1940
- Report of proceedings of HMAS Voyager for December 1940
- Report of proceedings of HMAS Waterhen for December 1940
- Report of proceedings of HMAS Voyager from December 1940
- ADM 199/414
- ADM 199/414 + ADM 199/656 + ADM 223/679 + ADM 234/335
- ADM 53/ + 115208 + Report of proceedings of the 10th Destroyer Flotilla + Report of proceedings of some of the Individual Australian destroyers
- Report of proceedings of HMAS Stuart for February 1941 + Report of proceedings of HMAS Voyager for February 1941 + Report of proceedings of the 10th Destroyer Flotilla
- Report of proceedings of HMAS Voyager for February 1941
- ADM 53/113721 + ADM 53/115234 + Report of proceedings of the 10th Destroyer Flotilla
- Report of proceedings of HMAS Vampire for February 1941 + Report of proceedings of the 10th Destroyer Flotilla
- Report of proceedings of the 10th Destroyer Flotilla for February 1941 + Report of proceedings of HMAS Stuart for February 1941
- Report of proceedings of HMAS Voyager for February 1941 + Report of proceedings of the 10th Destroyer Flotilla
- Report of proceedings of HMAS Voyager for March 1941
- ADM 53/115210 + Report of proceedings of HMAS Voyager for March 1941
- Report of proceedings of HMAS Vampire for March 1941 + Report of proceedings of the 10th Destroyer Flotilla
- ADM 199/414 + Report of proceedings of HMAS Vampire for March 1941 + Report of proceedings of HMAS Voyager for March 1941
- Report of proceedings of HMAS Voyager for April 1941
- ADM 53/`114326 + Report of proceedings of the 10th Destroyer Flotilla
- ADM 199/414 + Report of proceedings of HMAS Voyager for April 1941 + Report of proceedings of the 10th Destroyer Flotilla
- Report of proceedings of HMAS Voyager for May 1941 + Report of proceedings of HMAS Waterhen for May 1941
- Report of proceedings of HMAS Vampire for May 1941 + Report of proceedings of HMAS Waterhen for May 1941 + Report of proceedings of the 10th Destroyer Flotilla
- ADM 53/114327 + Report of proceedings of HMAS Voyager for May 1941 + Report of proceedings of HMAS Waterhen for May 1941
- ADM 199/414 + 234/320
- Report of proceedings of HMAS vendetta for May 1941 + Report of proceedings of HMAS Voyager for May 1941 + Report of proceedings of the 10th Destroyer Flotilla
- Report of proceedings of HMAS Vendetta for June 1941 + Report of proceedings of HMAS Voyager for June 1941
- Report of proceedings of HMAS Voyager for June 1941
- Report of proceedings of HMAS Voyager for June 1941 + Report of proceedings of the 10th Destroyer Flotilla
- Report of proceedings of HMAS Parramatta for June 1941 + Report of proceedings of HMAS Voyager for June 1941 + Report of proceedings of the 10th Destroyer Flotilla
- Report of proceedings of HMAS Voyager for July 1941
- ADM 53/115212 + ADM 199/415 + Report of proceedings of HMAS Voyager for July 1941
- ADM 199/2547 + Report of proceedings of HMAS Voyager for August 1941
- Report of proceedings of HMAS Voyager for August 1941
- ADM 199/2574
- Report of proceedings of HMAS Voyager for March 1942
- Report of proceedings of HMAS Voyager for April 1942
- ADM 199/426
- Report of proceedings of HMAS Voyager for May 1942
- Log of USS Phoenix for May 1942 + Report of proceedings of HMAS Voyager for May 1942
- Report of proceedings of HMAS Voyager for June 1942
- Report of proceedings of HMAS Voyager for July 1942
- Report of proceedings of HMAS Voyager for July 1942 + File 2.12.03.6850 (Dutch Archives, The Hague, Netherlands)
- Report of proceedings of HMAS Adelaide for August 1942 + Report of proceedings of HMAS Voyager for August 1942
- Report of proceedings of HMAS Voyager for August 1942
- ADM 199/2574 + War diary Commander Allied Naval Force Western Australia for September 1942
- Commander Allied Naval Force Western Australia for September 1942
- War diary Commander Allied Naval Force Western Australia for September 1942
ADM numbers indicate documents at the British National Archives at Kew, London.
As an Amazon Associate uboat.net earns a commission from qualifying purchases.